As you go down the Platform Engineering journey, your goal is to make the lives of all engineers and developers as efficient as possible, but how about your life? The goal is to also remove as much cognitive load from yourself as well.
One way to do that is by ensuring a repeatable process when deploying applications. Furthermore, ensuring that the current state of an application is the desired state.
In this blog post, you’ll learn how to implement ArgoCD and CICD using Devtron.
Prerequisites
To follow along with this blog post, you should have the following:
- A Kubernetes cluster running in a location where PersistentVolumes are available.
- Knowledge of deploying Devtron. If you have not deployed Devtron before, you can follow the guide here.
Why App Deployments With Devtron
One of the biggest goals when an engineer is implementing a new tool in today’s world is to ensure that it makes their life easier in some way, shape, or form. There are far too many implementations, new ways of doing things, and processes when it comes to new vendors and tooling implementations. It leaves engineers wondering why it made their life easier in one aspect, but brought on a whole new load of problems at the same time.
With a tool like Devtron, you don’t have to worry about a new way of doing GitOps, deploying applications, or managing Kubernetes. You can do it the same way you’ve been doing it, the only difference being that it’s in one central platform.
The entire goal is to use the tools, practices, and implementations you’ve been using. Devtron just gives you a location to do it all from.
Creating A Project
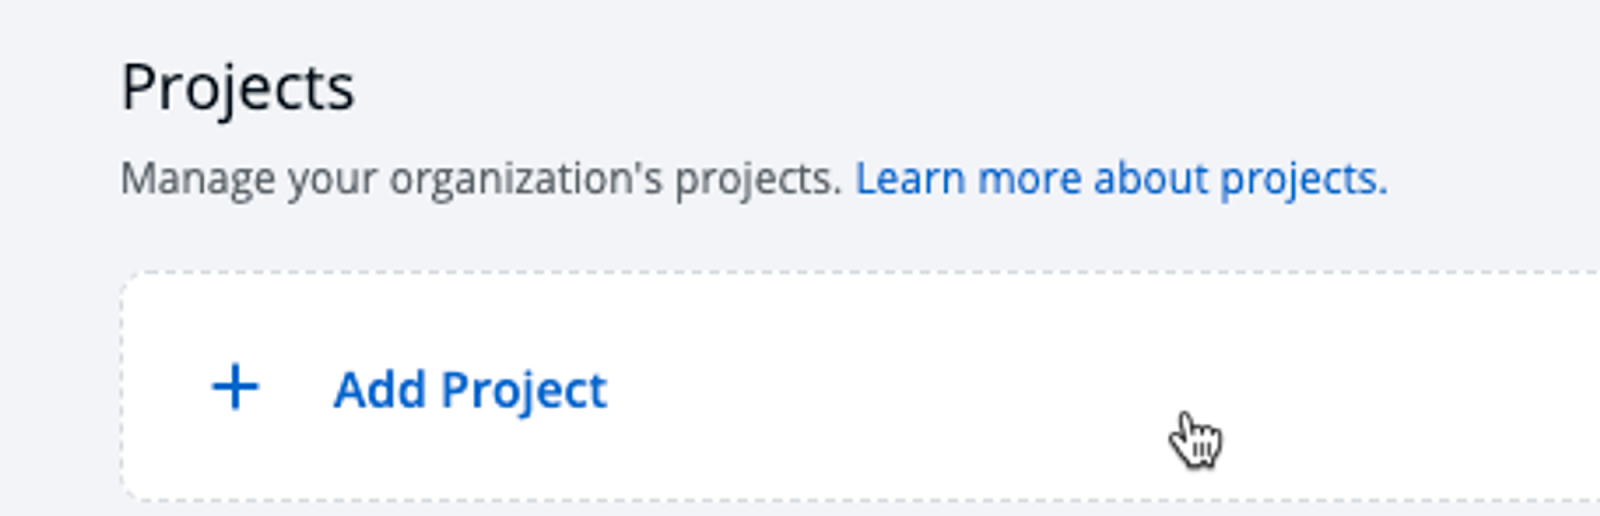
The first step in ensuring a successful application deployment via Devtron is to create a Project. a Project is where your application stacks and configurations will be stored.
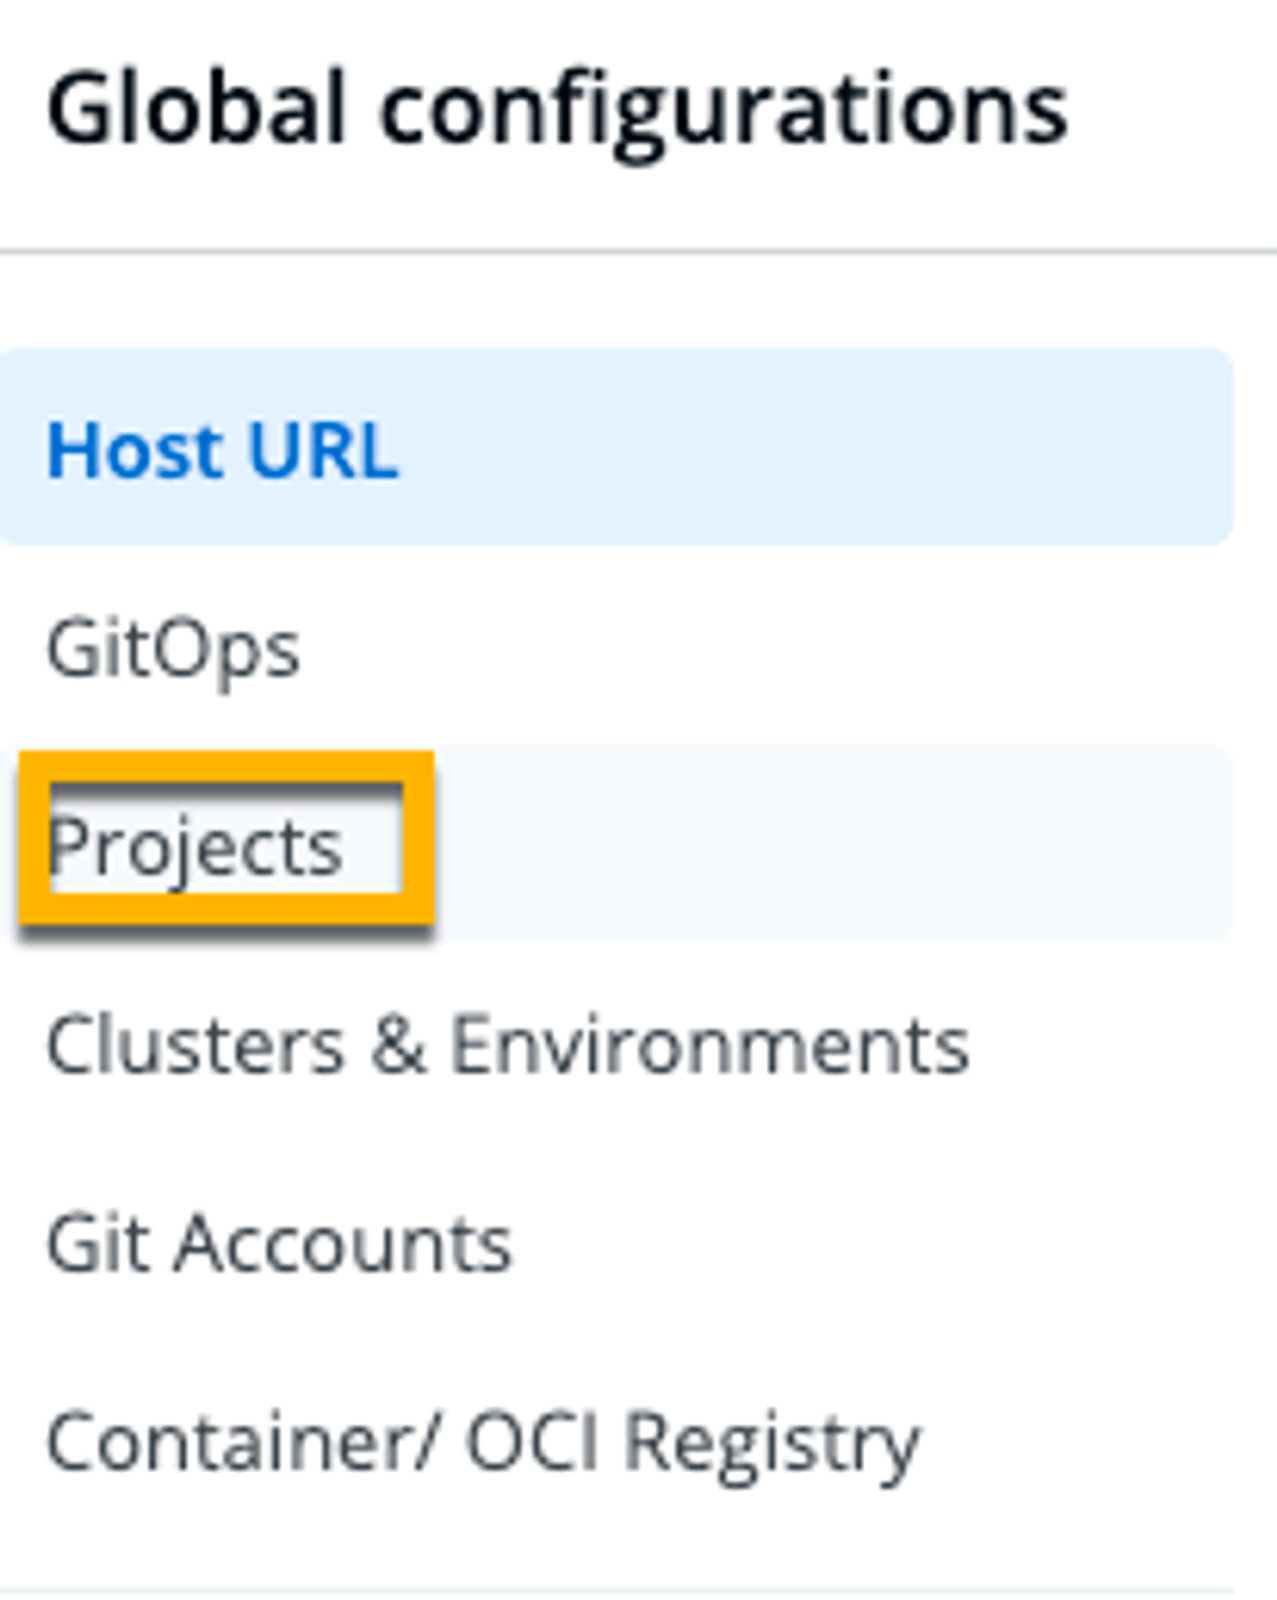
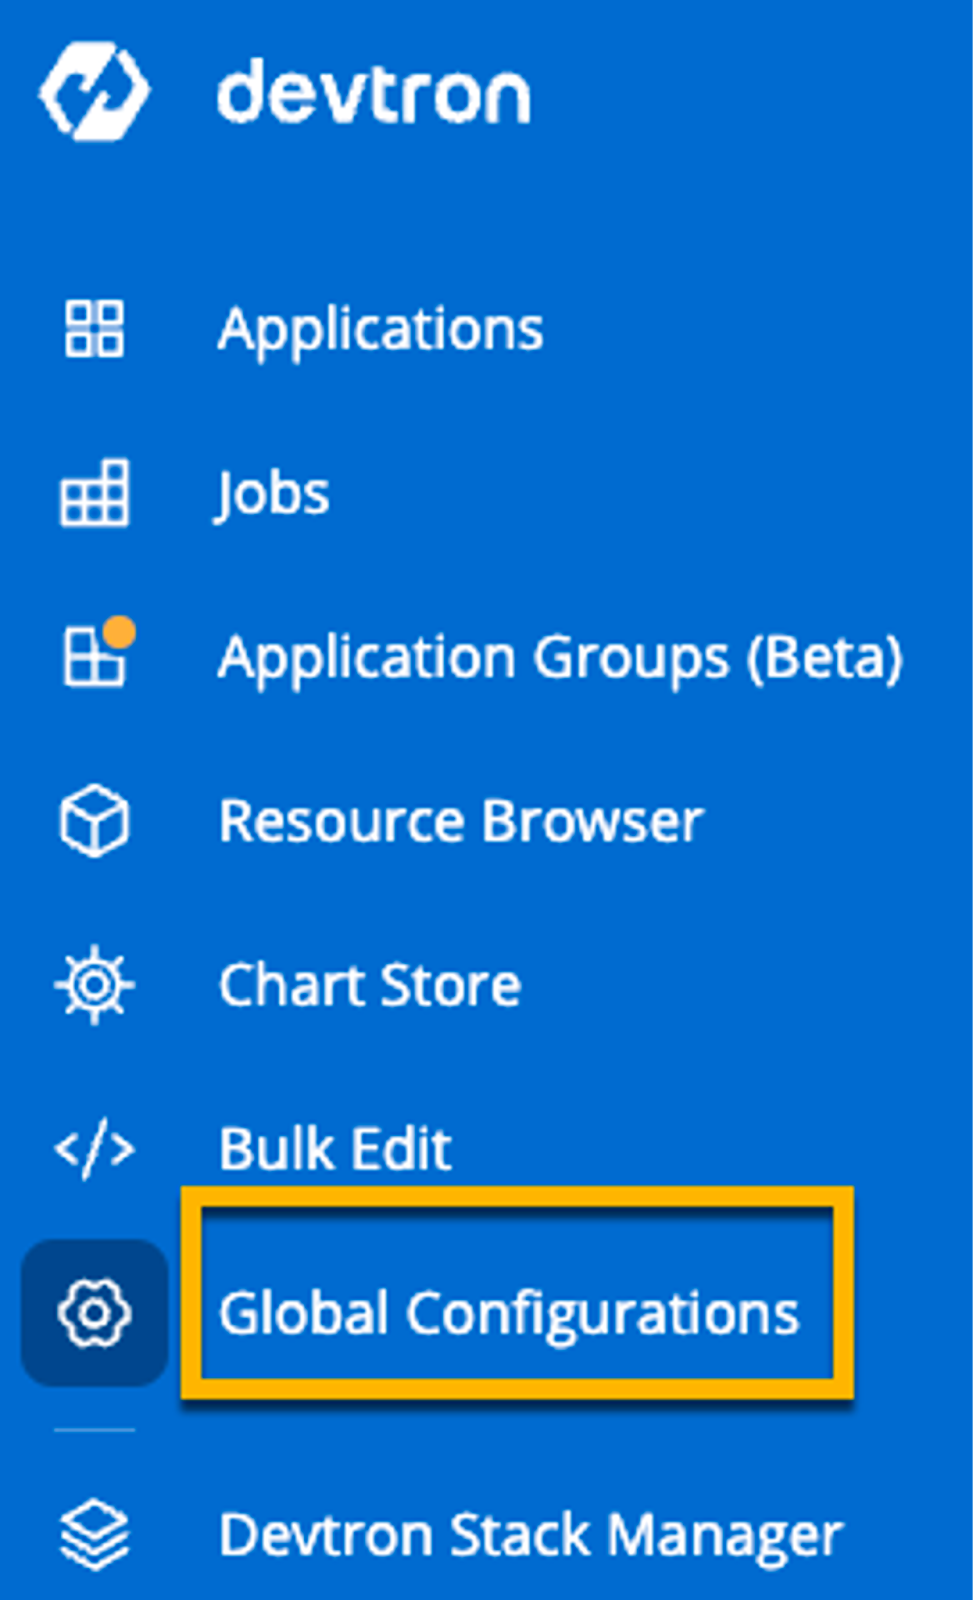
First, in the Devtron pane, click the Global Configurations button.
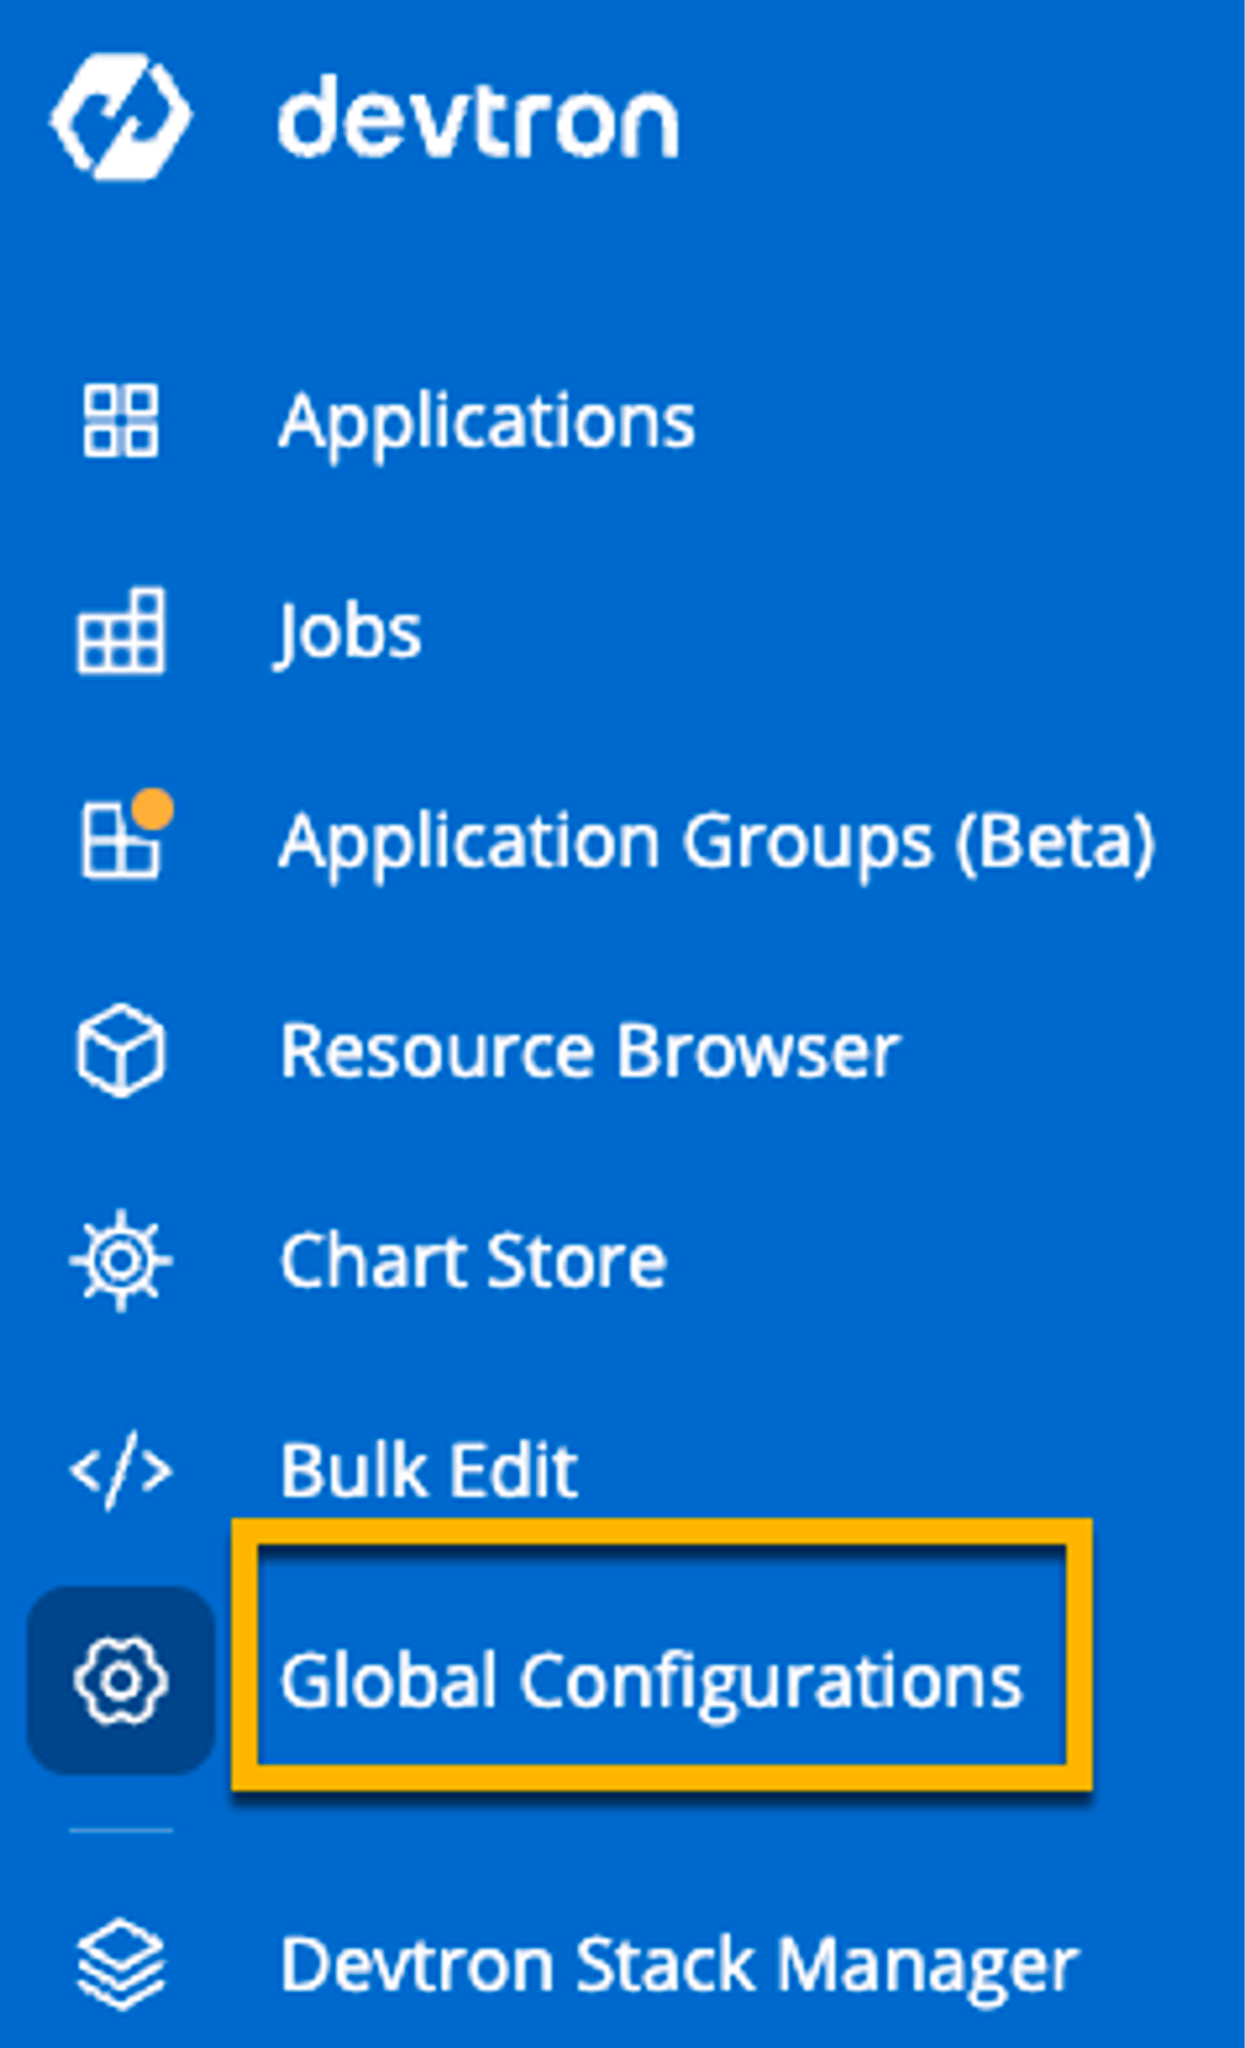
Within the Global Configurations, click the Projects button.
Click the blue + Add Project button.
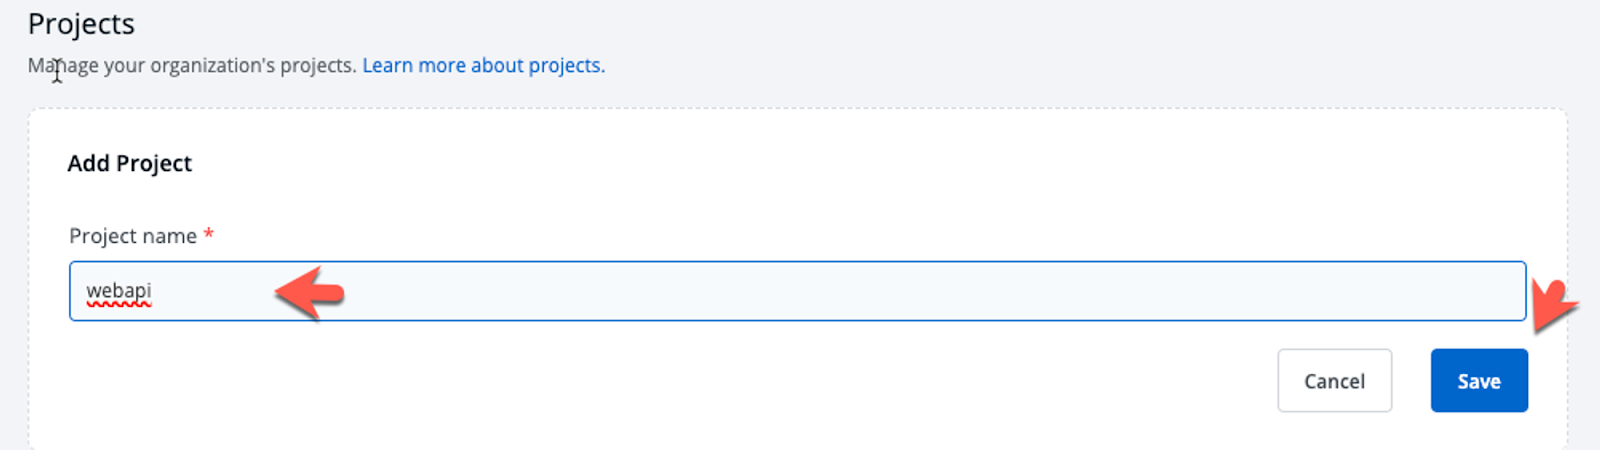
Give your project a name. In the case of this deployment, the demo app used is a Go Web API. If you don’t have an application to use, you’ll find a link to the Go Web API in the Creating An App section.
Now that the project is created, you can connect to source control.
Connecting To Source Control
When connecting to source control, there are two options:
- Connect to a personal GitHub account
- Connect to a company organization.
In this section, you’ll learn about connecting to a personal GitHub account.
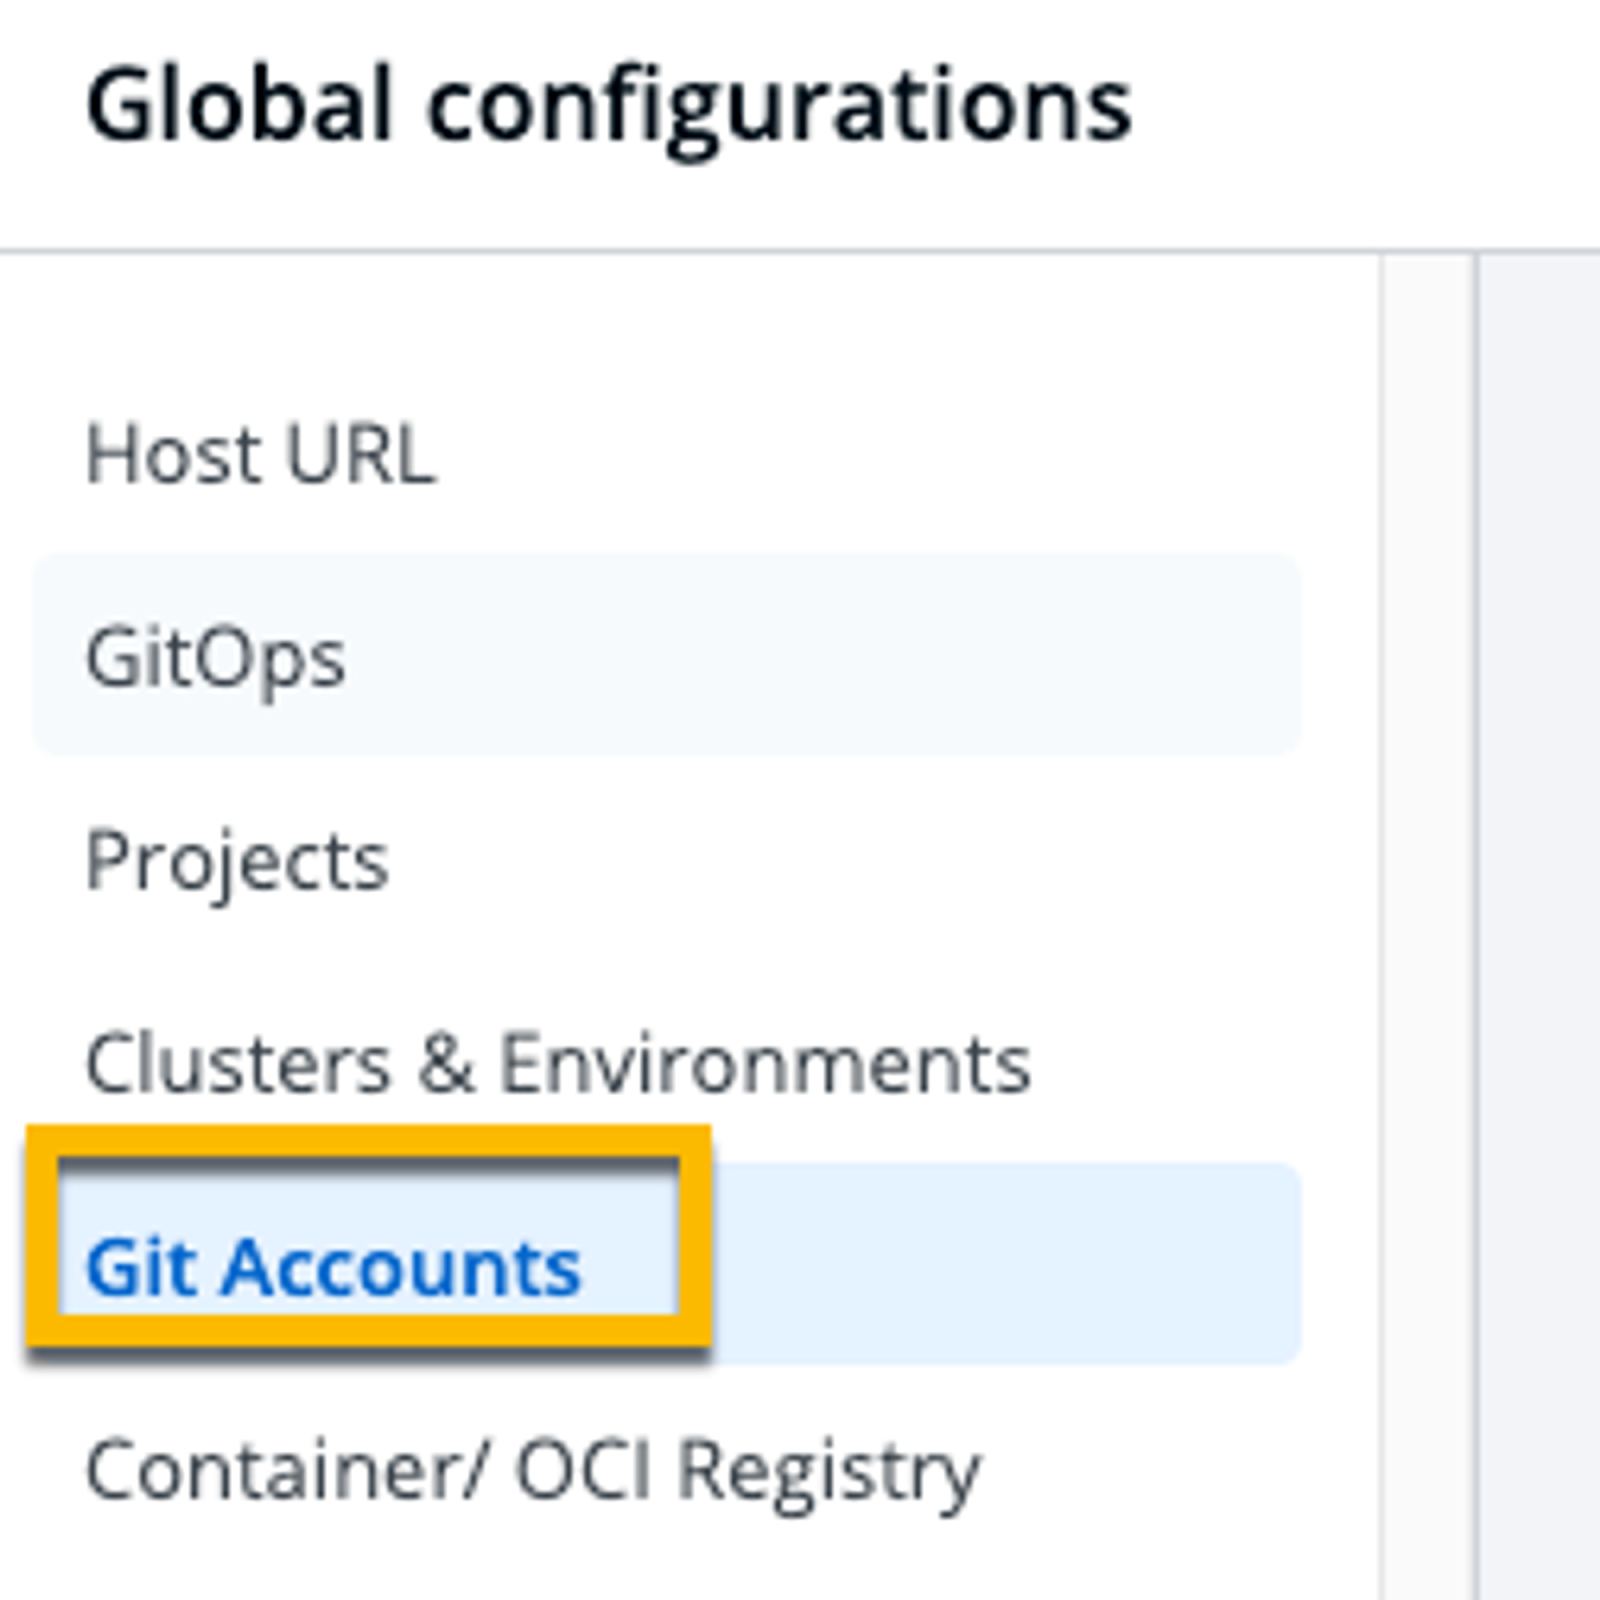
Under Global Configurations, click Git Accounts.
Add in the source control information for your Git account including the host, URL, and authentication information.
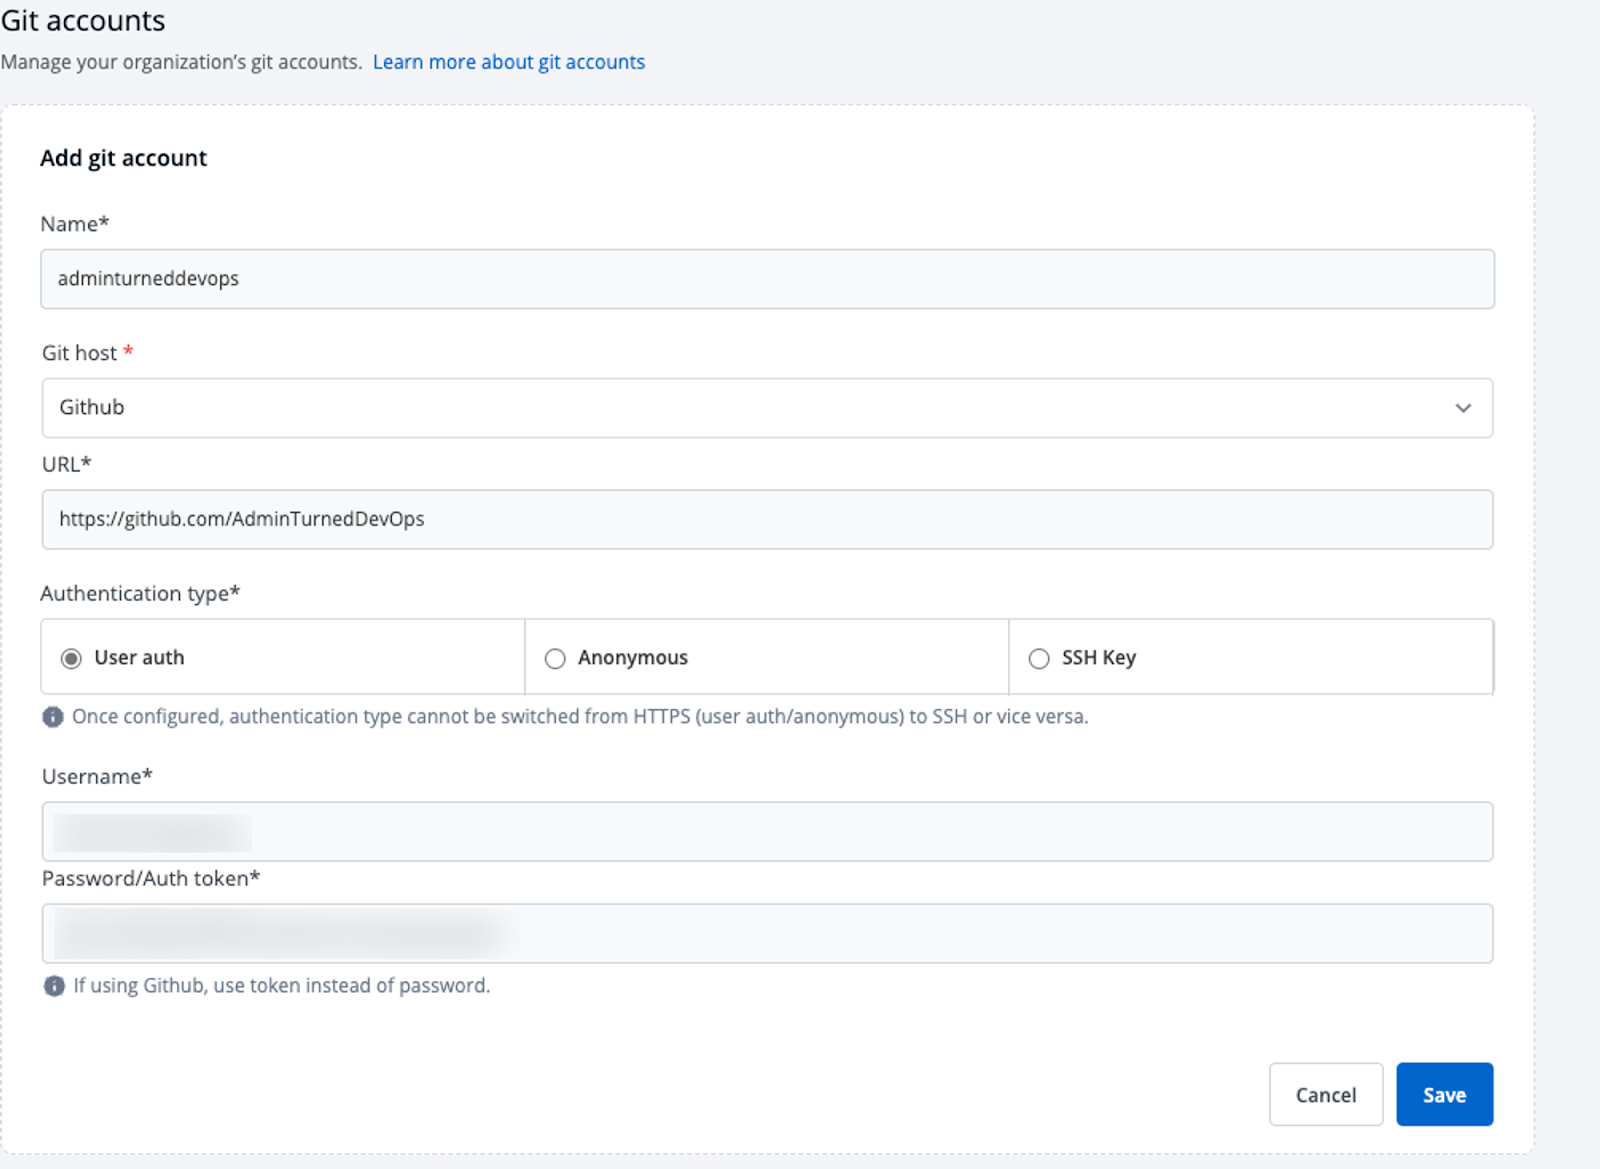
If you don’t have a GitHub account, you don’t have to add one for public repositories.
Connecting To A Git Org
In the previous section, you learned about the first way to connect to Git - with a personal GitHub action. In this section, you’ll learn about connecting to a Git Organization.
Under Global Configurations, click the GitOps button.
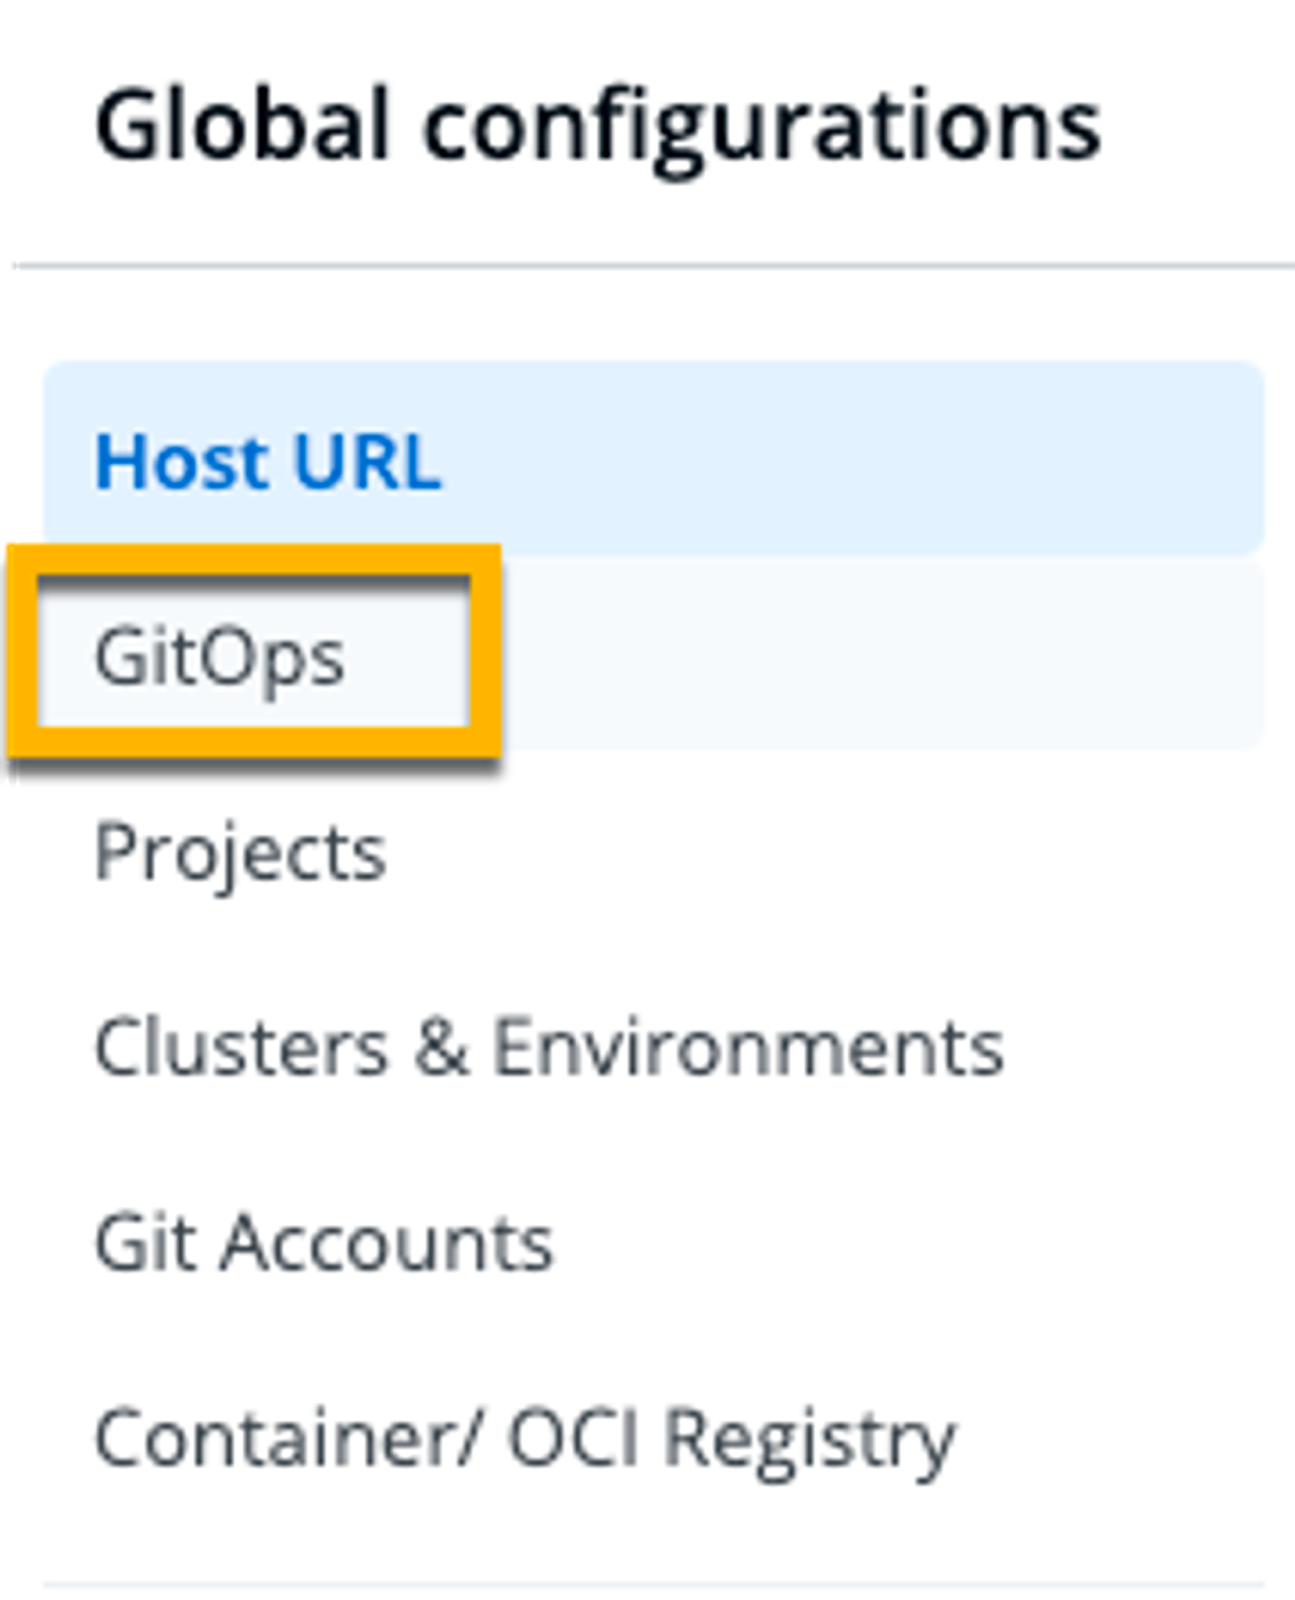
In the GitOps pane, you’ll see four options:
- GitHub
- GitLab
- Azure
- Bitbucket Cloud
These options are to connect your existing source control system. Depending on which source control system you have, there are a few different options for connecting. For example, with GitHub, you can connect using the organization name, GitHub username, and Personal Access Token.
💡 If you’re unsure how to generate a Personal Access Token for GitHub, follow these instructions: https://docs.github.com/en/authentication/keeping-your-account-and-data-secure/managing-your-personal-access-tokens
Once all information is added, click the blue Save button.
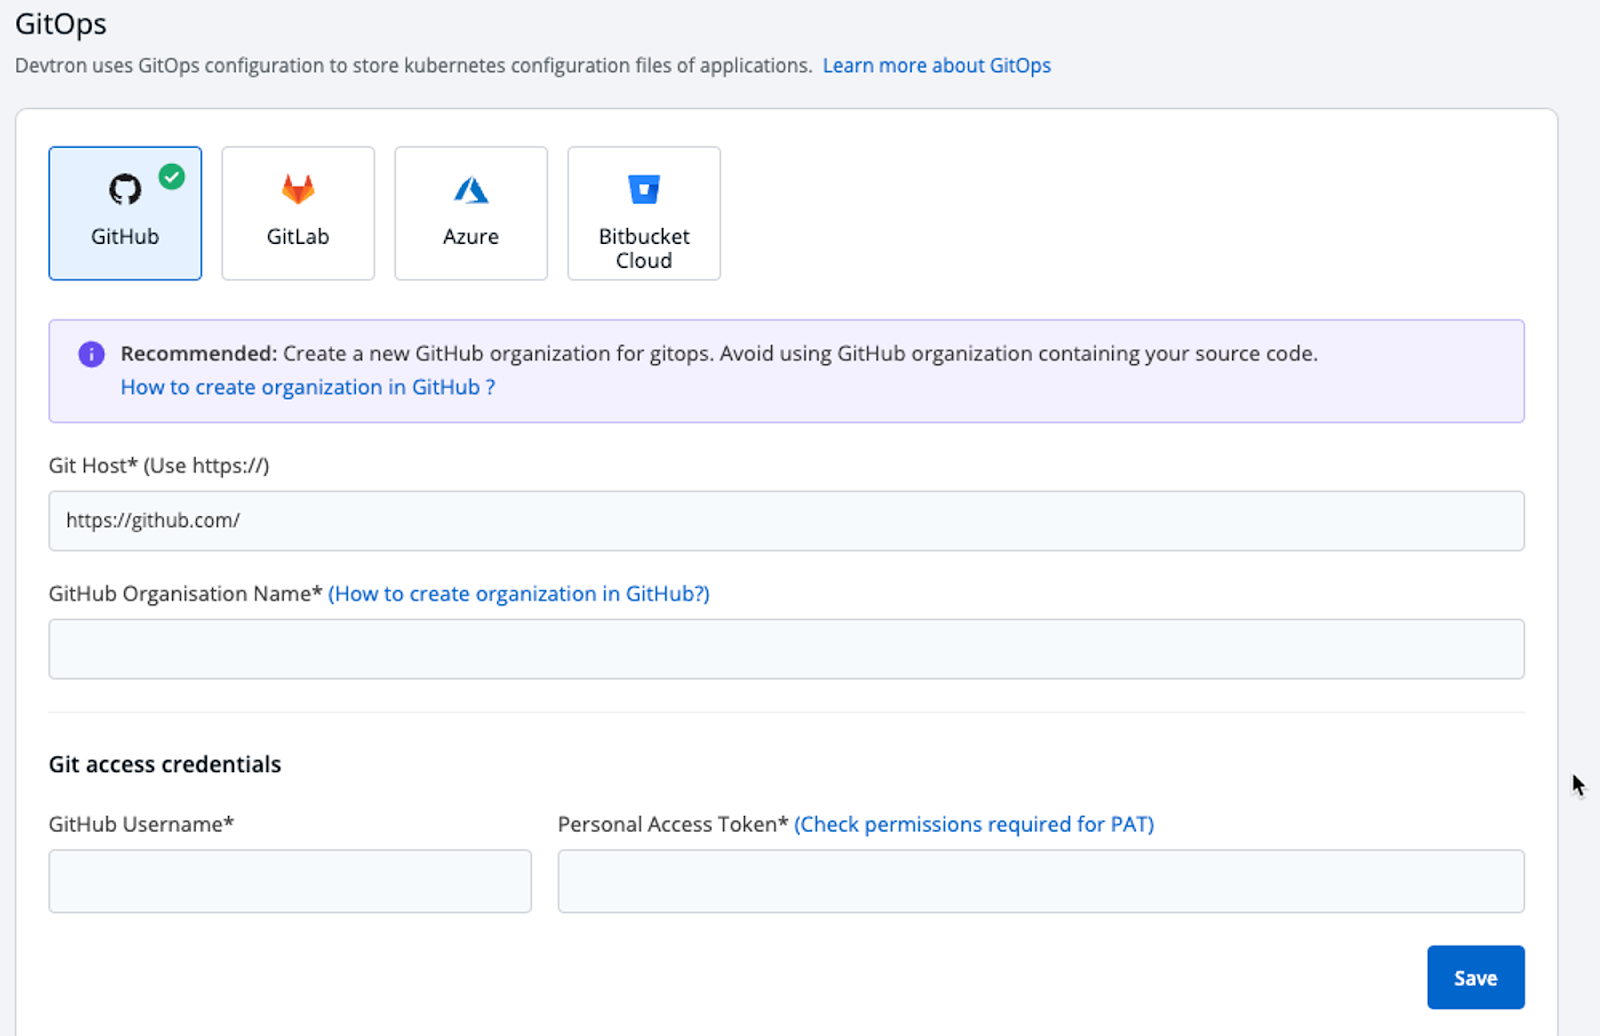
💡 Connecting organizations via GitOps in this fashion is for business-related organizations. This will not work for personal orgs. To work with personal orgs, you can set up Git access via the previous section.
Creating A Registry
Once the project is created and source control credentials are added if necessary, you’ll need to connect an Open Container Initiative (OCI) compliant container registry.
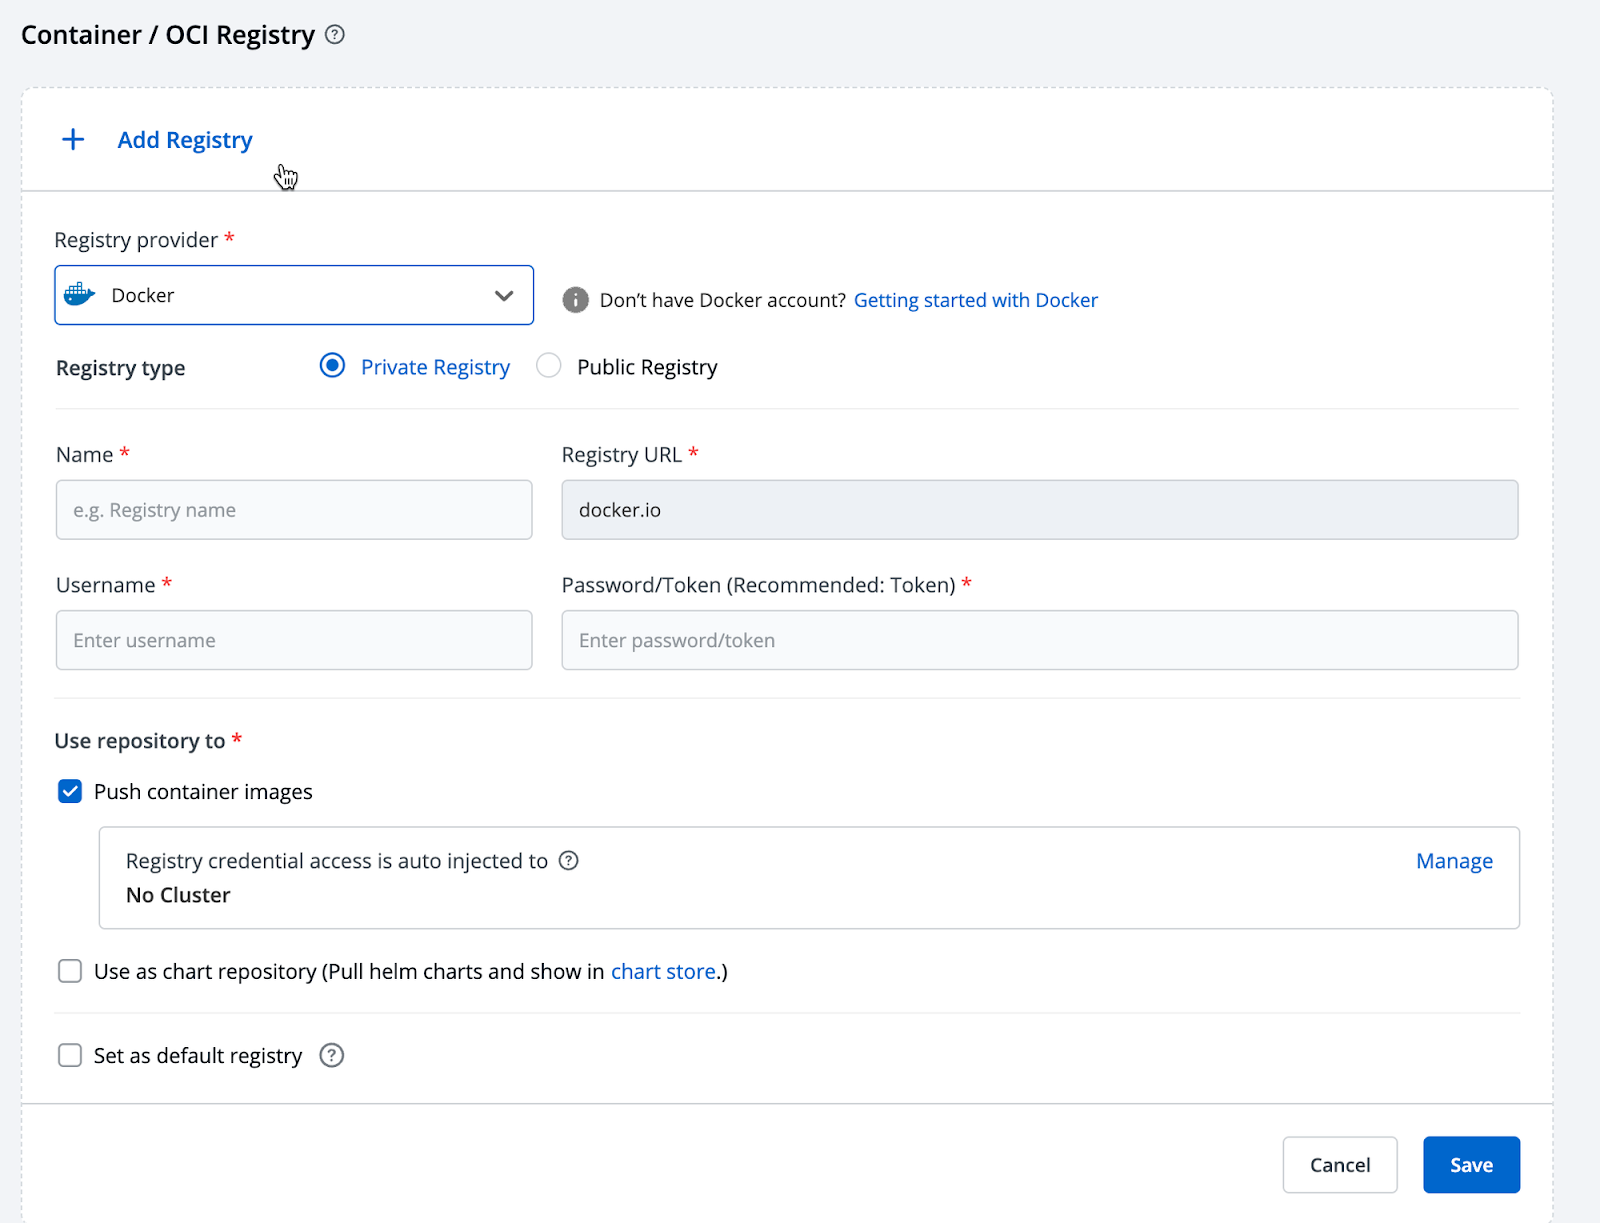
💡 If you don’t already have a container registry, you can create one for free on DockerHub. https://www.docker.com/blog/how-to-use-your-own-registry-2/
Under Global Configurations, choose the Container/OCI Registry option.
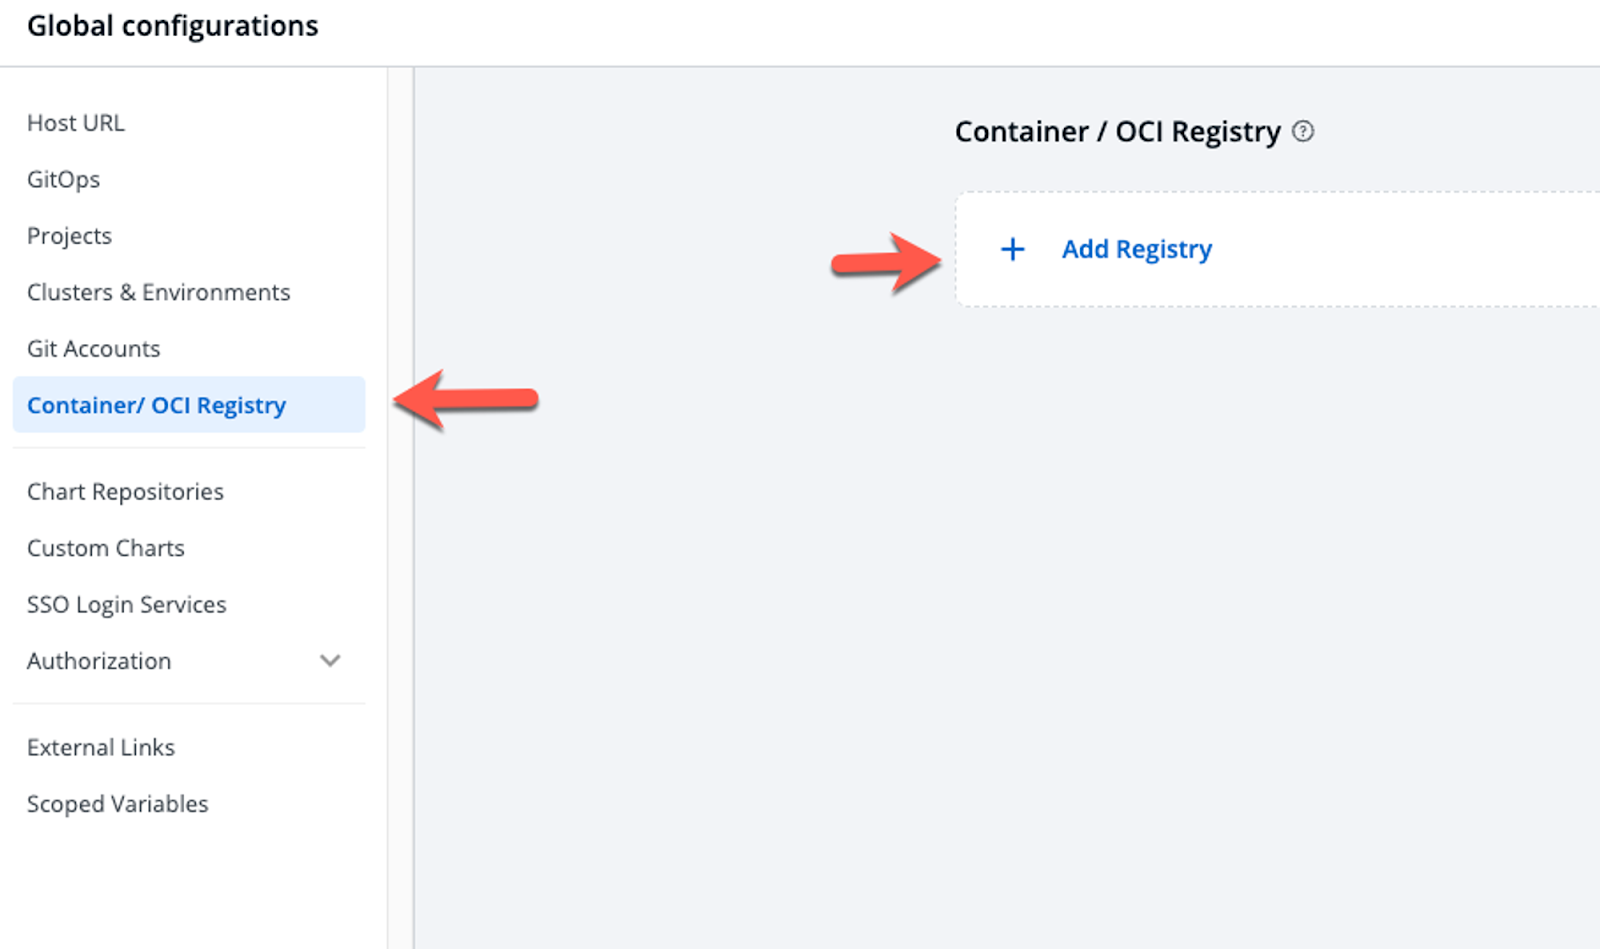
Add the registry information including the registry name, username, and password.
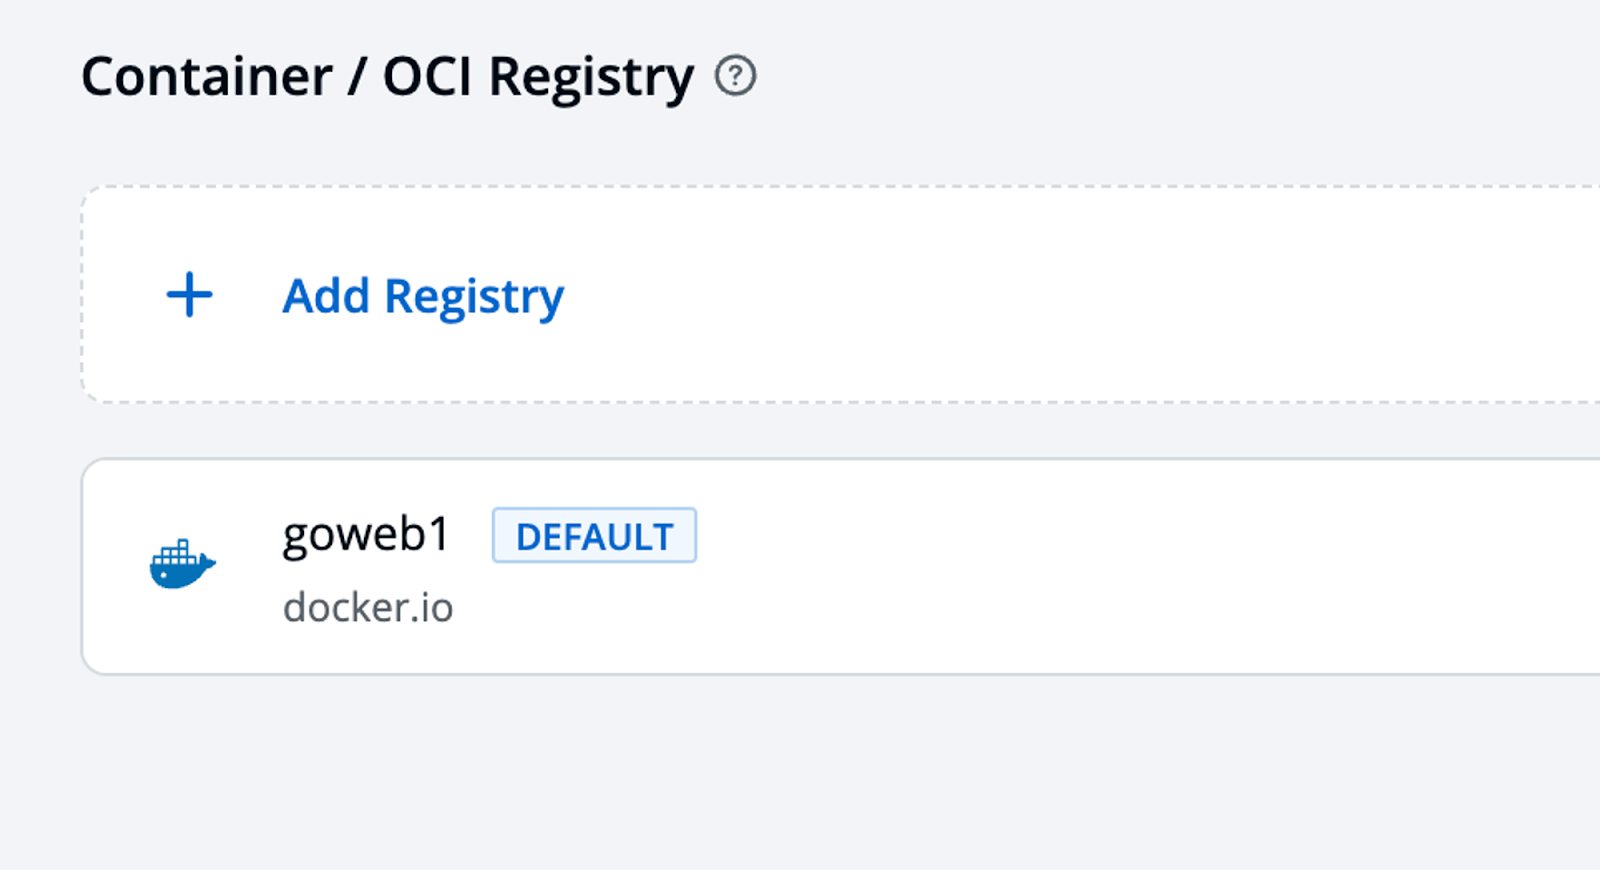
You’ll now see that the container registry is connected.
💡 Even if you’re using a public repository in DockerHub under your account, you’ll still need to sign into your DockerHub account.
Creating An App
The project, registry, and source control is connected. These are the prerequisites necessary to deploy an application within Devtron. The reason why is because Devtron isn’t creating what already doesn’t exist. It’s giving you a method of connecting what exists in a cohesive fashion.
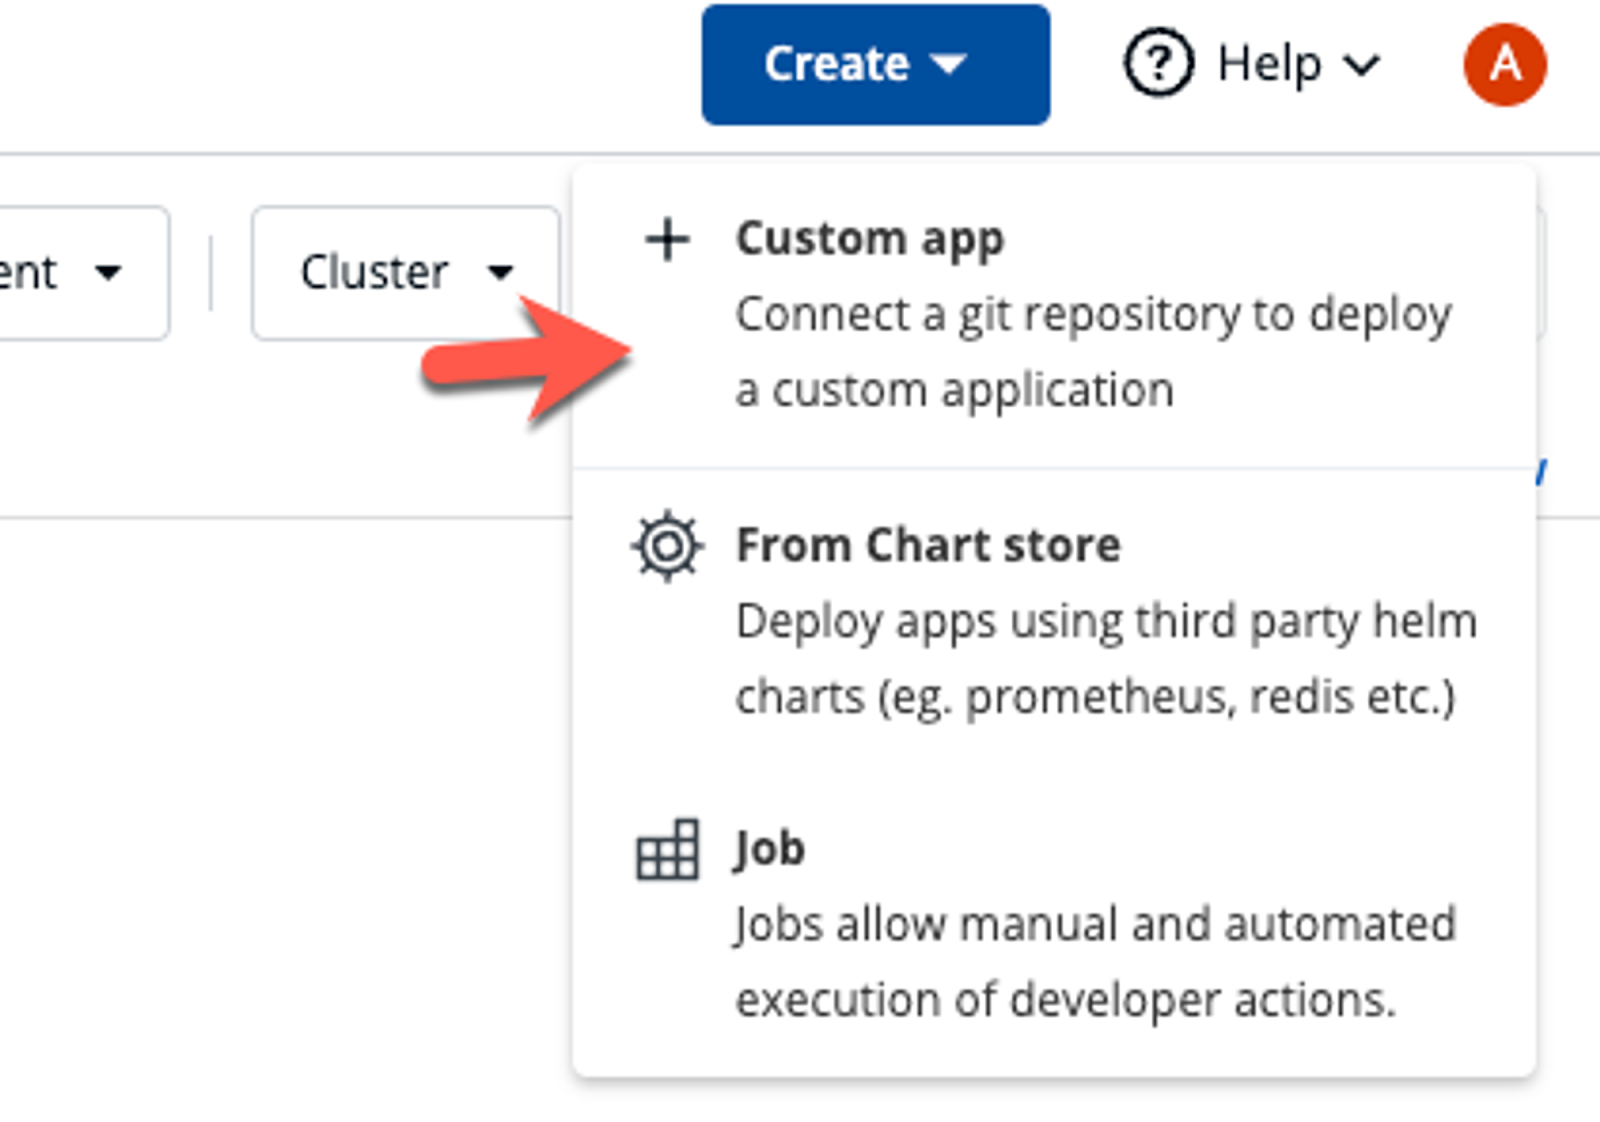
To deploy an application with Devtron, click on the Applications button.

Within Applications, click the blue Create button and click the + Custom app button.
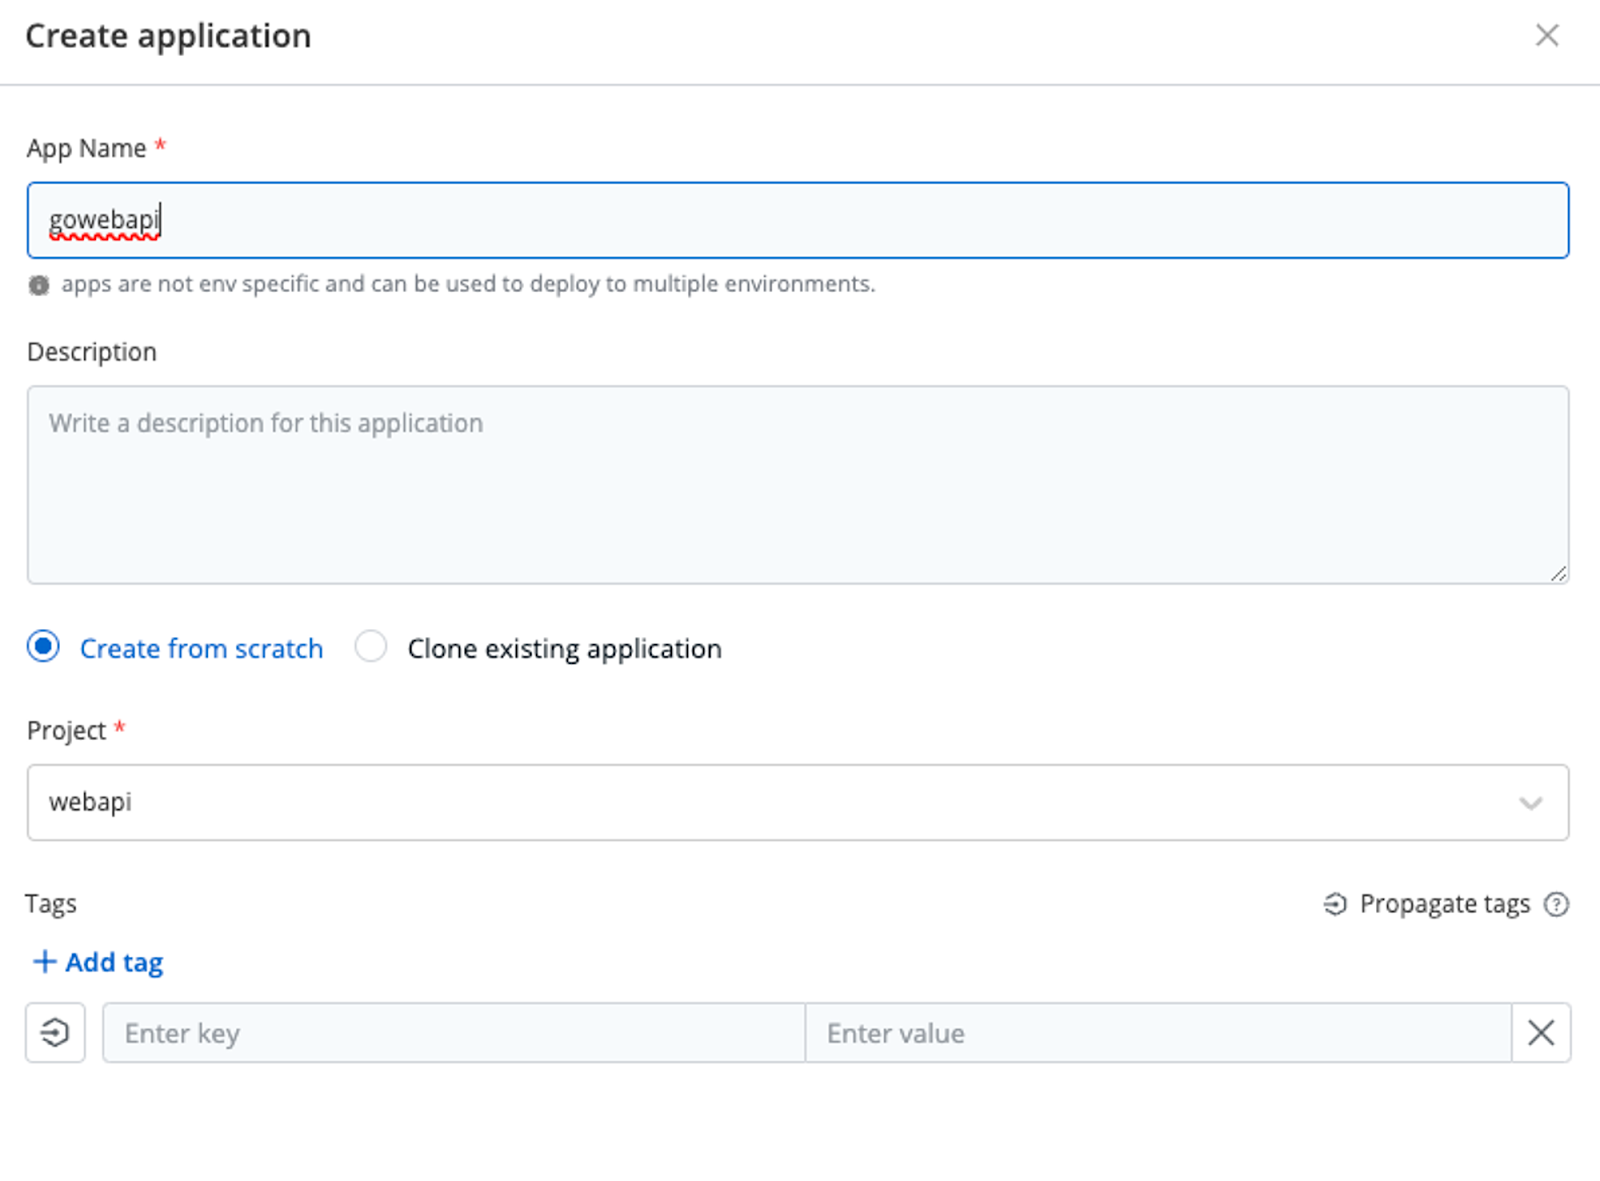
Give your application a name and choose the project that you created in the Creating A Project section.
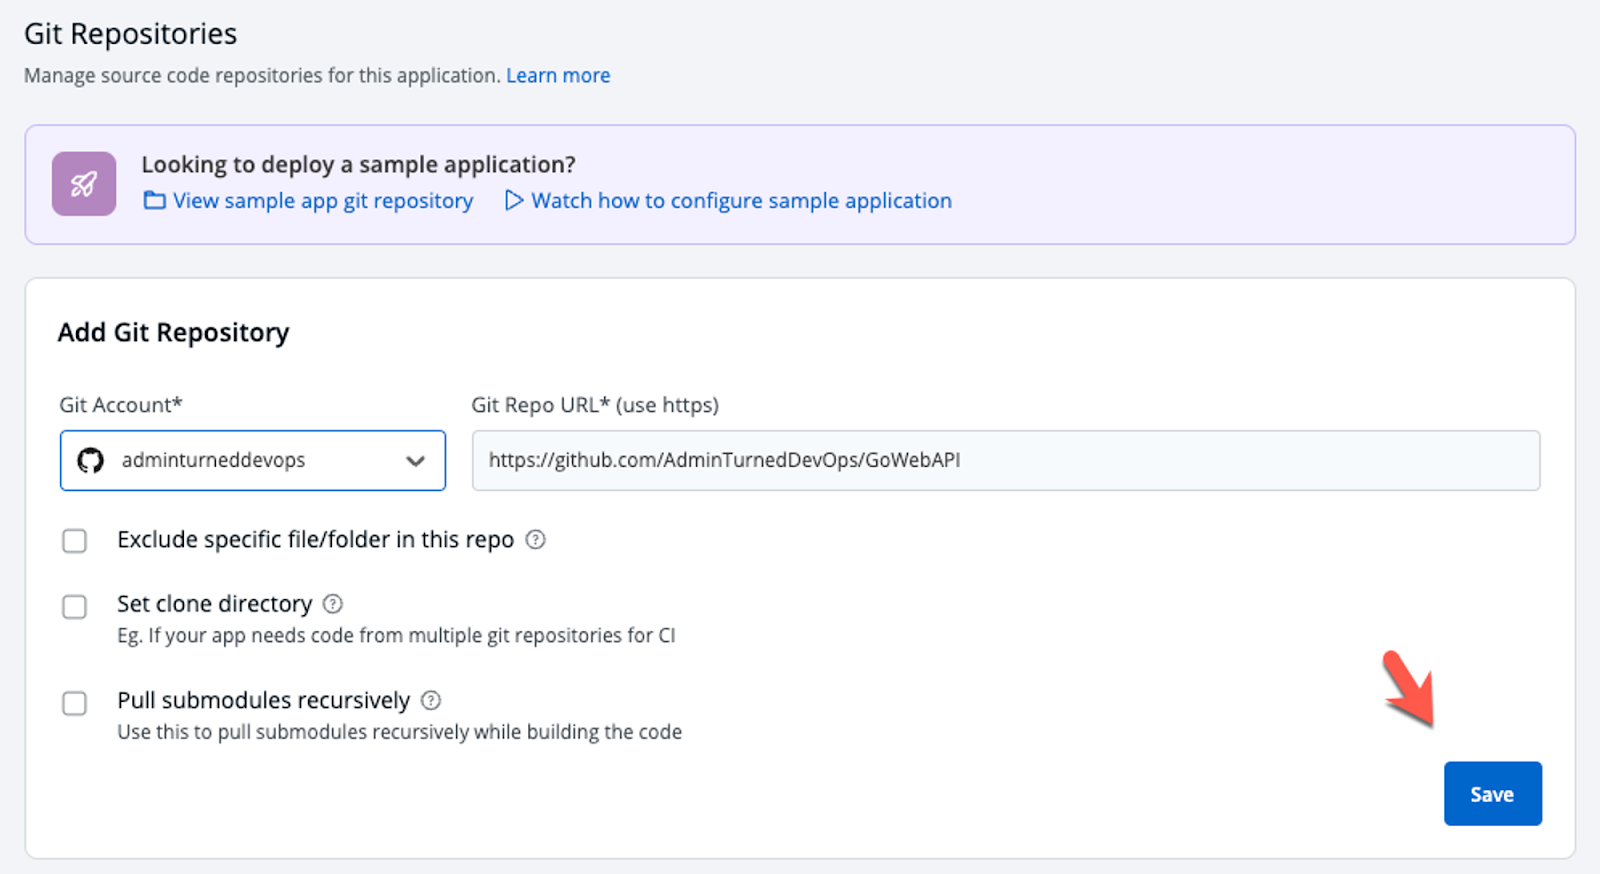
Point to the repo with your application to deploy. If you don’t have an application to use, you can use the GoWebAPI here: https://github.com/AdminTurnedDevOps/GoWebAPI
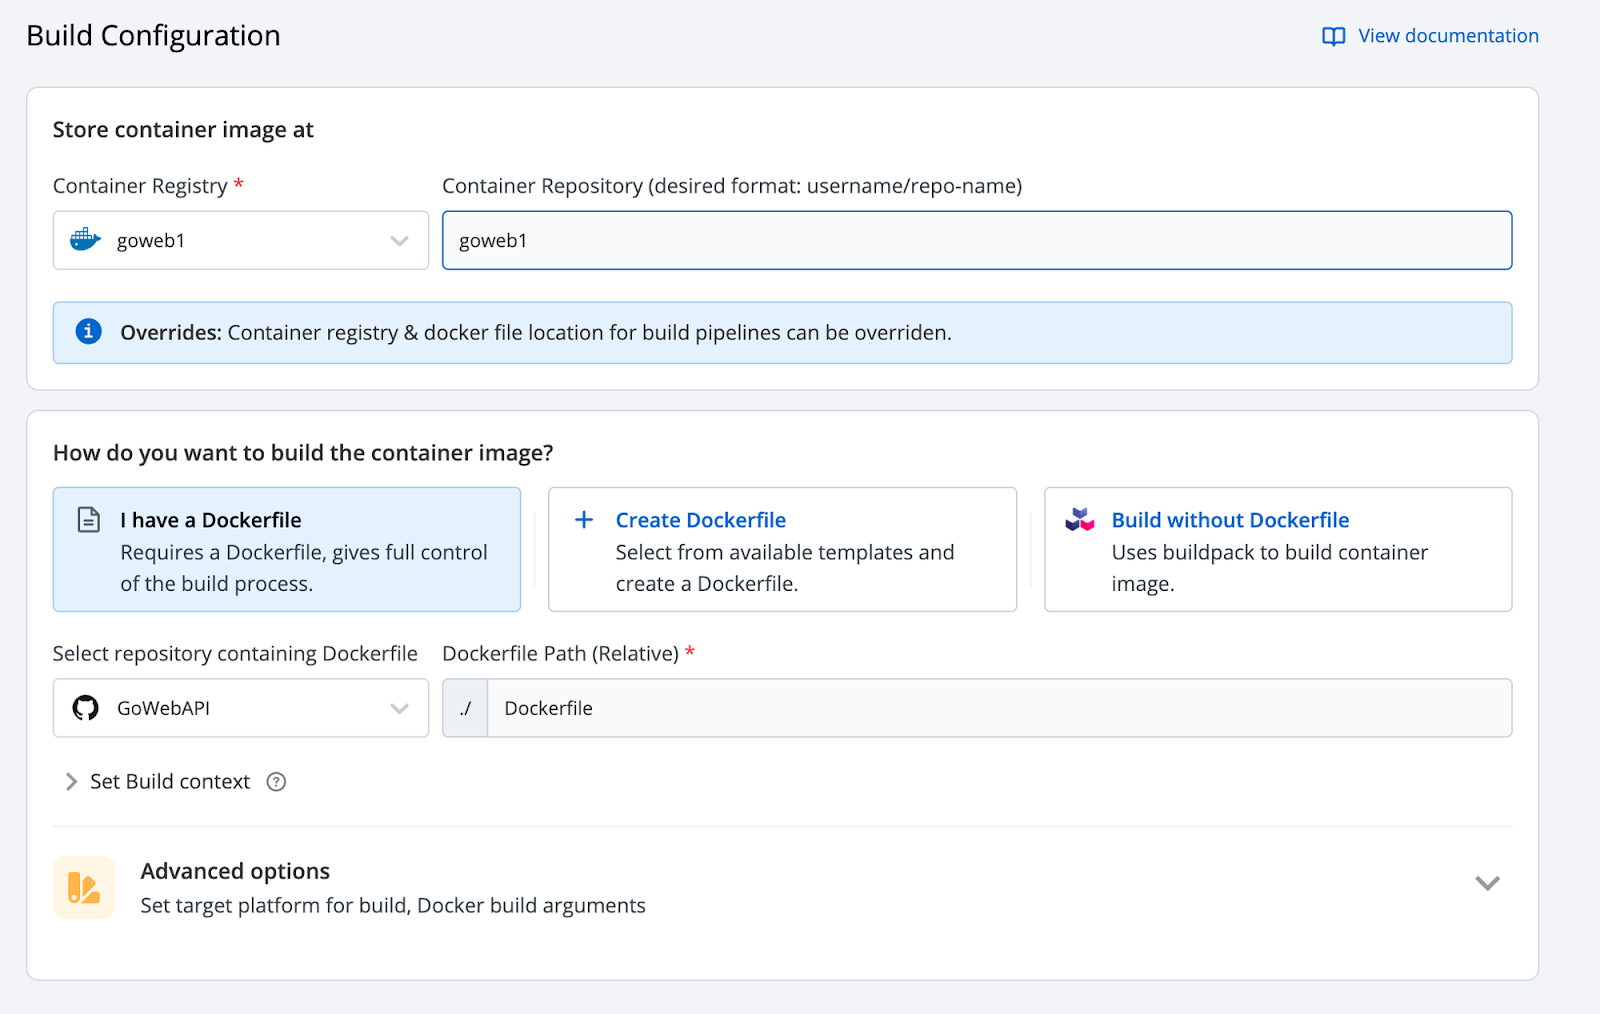
Once the app is created, you’ll be brought to the Build Configuration stage. The build configuration page has three options:
- Use a Dockerfile that already exists.
- Create a Dockerfile based on the configurations in the existing directory.
- Use a Buildpack. Buildpacks are a way to build and deploy containerized applications with a Dockerfile.
If you used the GoWebAPI, there’s a Dockerfile that already exists. If you didn’t, choose the option that’s most appropriate for you.
Within the Deployment Template, you can configure certain portions of the containerized application like the ports and resources it needs to run properly.
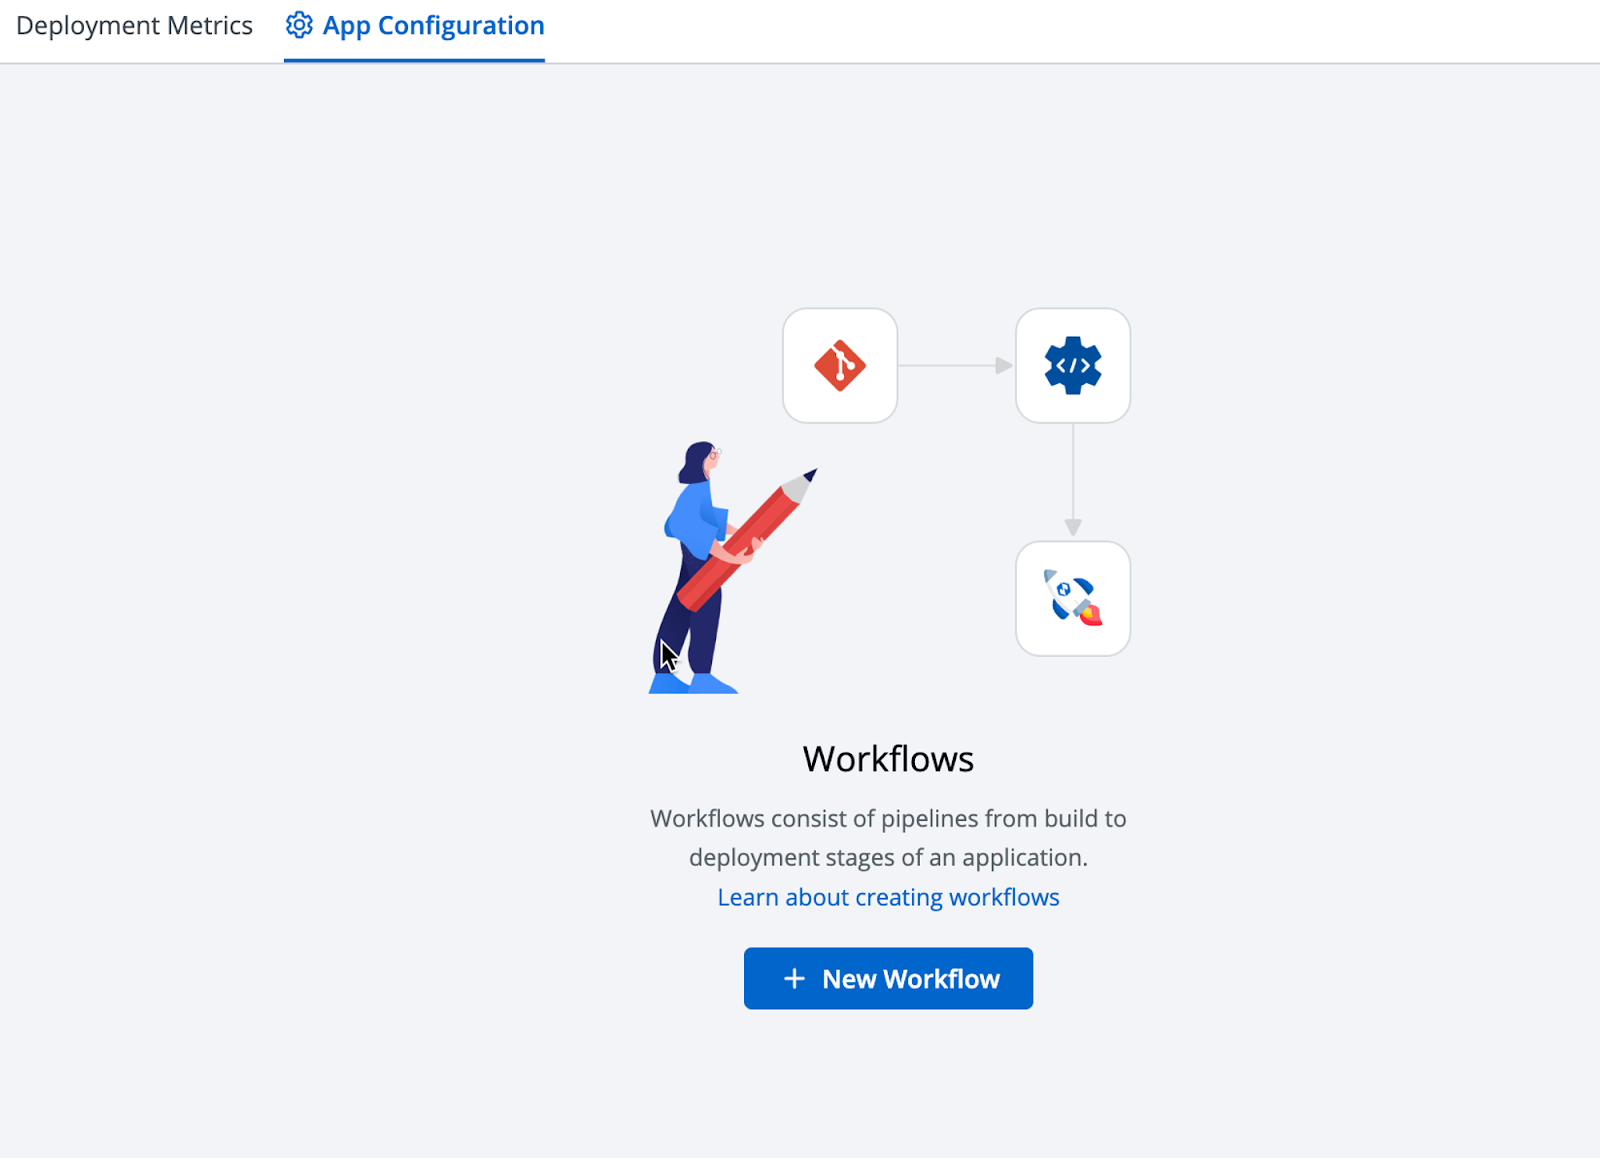
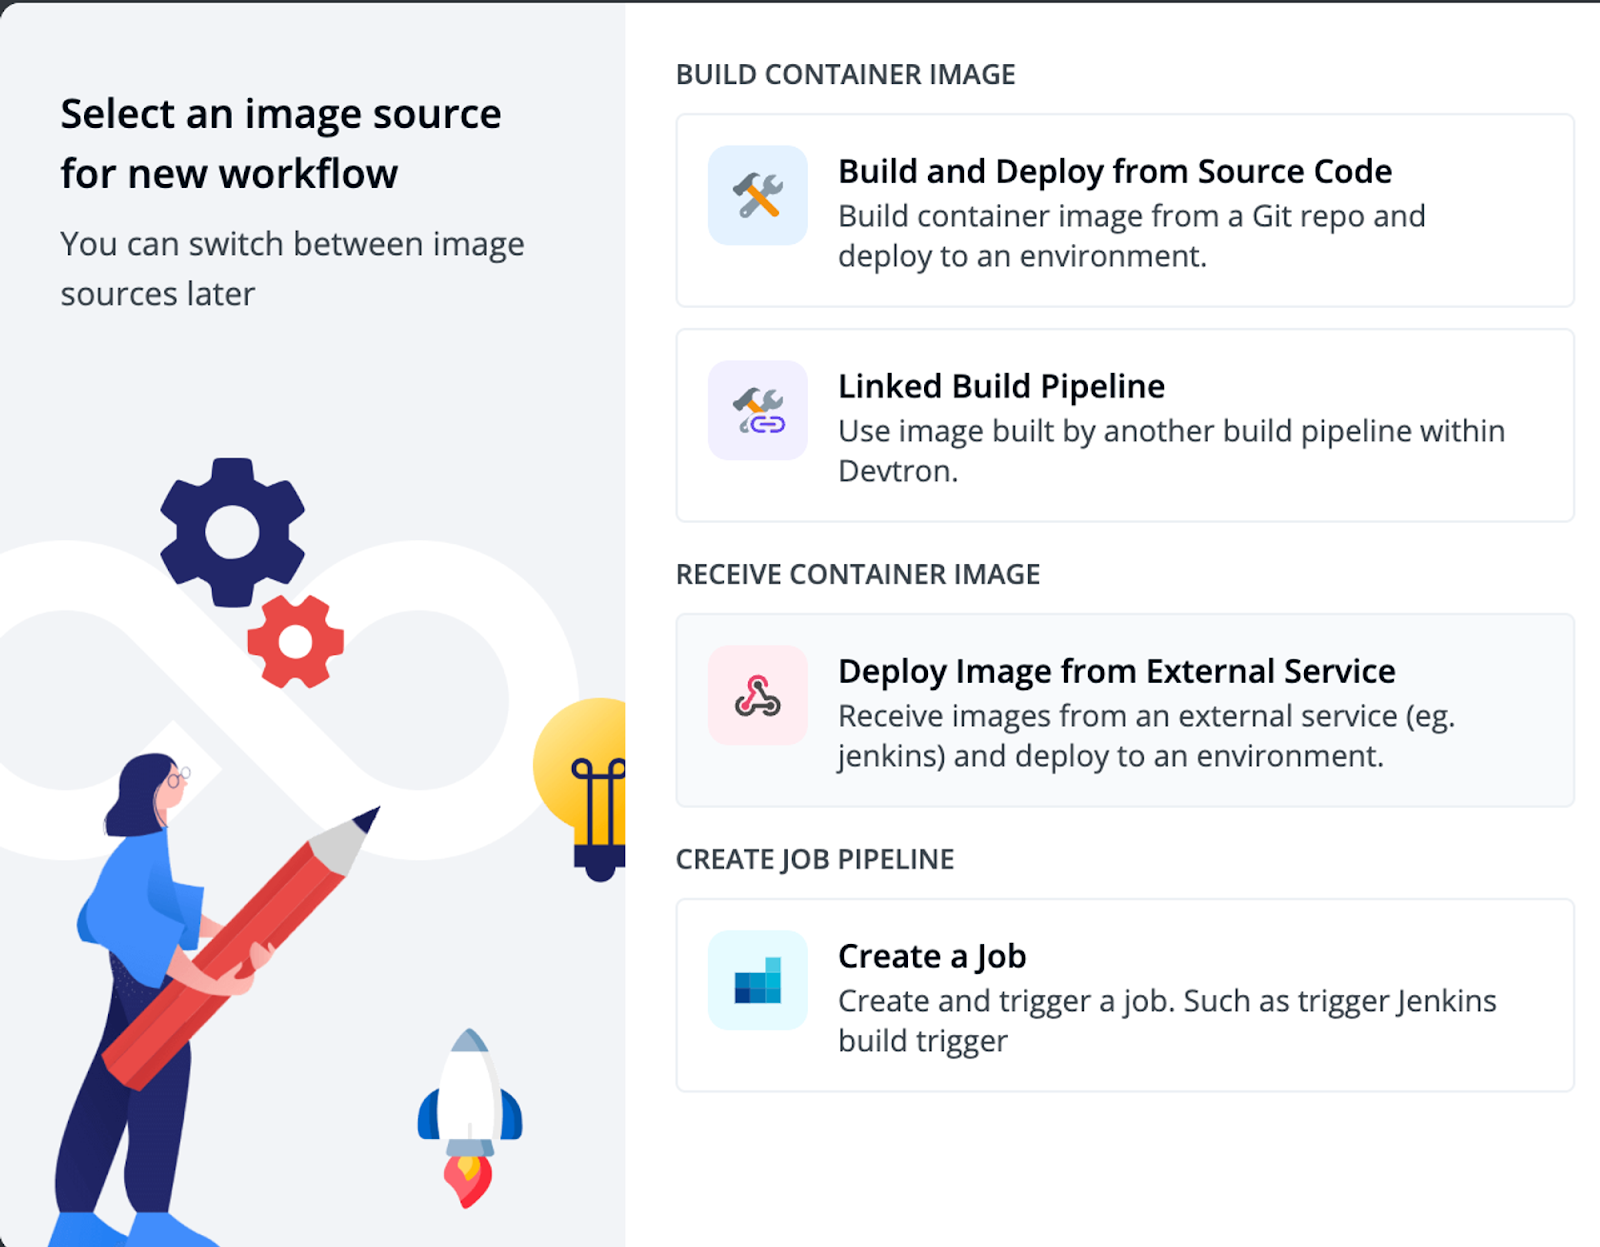
After the app configuration, you’ll need to create a Workflow. a Workflow is the pipeline that’ll be used to build and deploy the application within the configuration.
Click the blue + New Workflow button.
Choose the Build and Deploy from Source Code option. This is because you’ve connected a Git repository pointing to your application and no other pipelines currently exist.
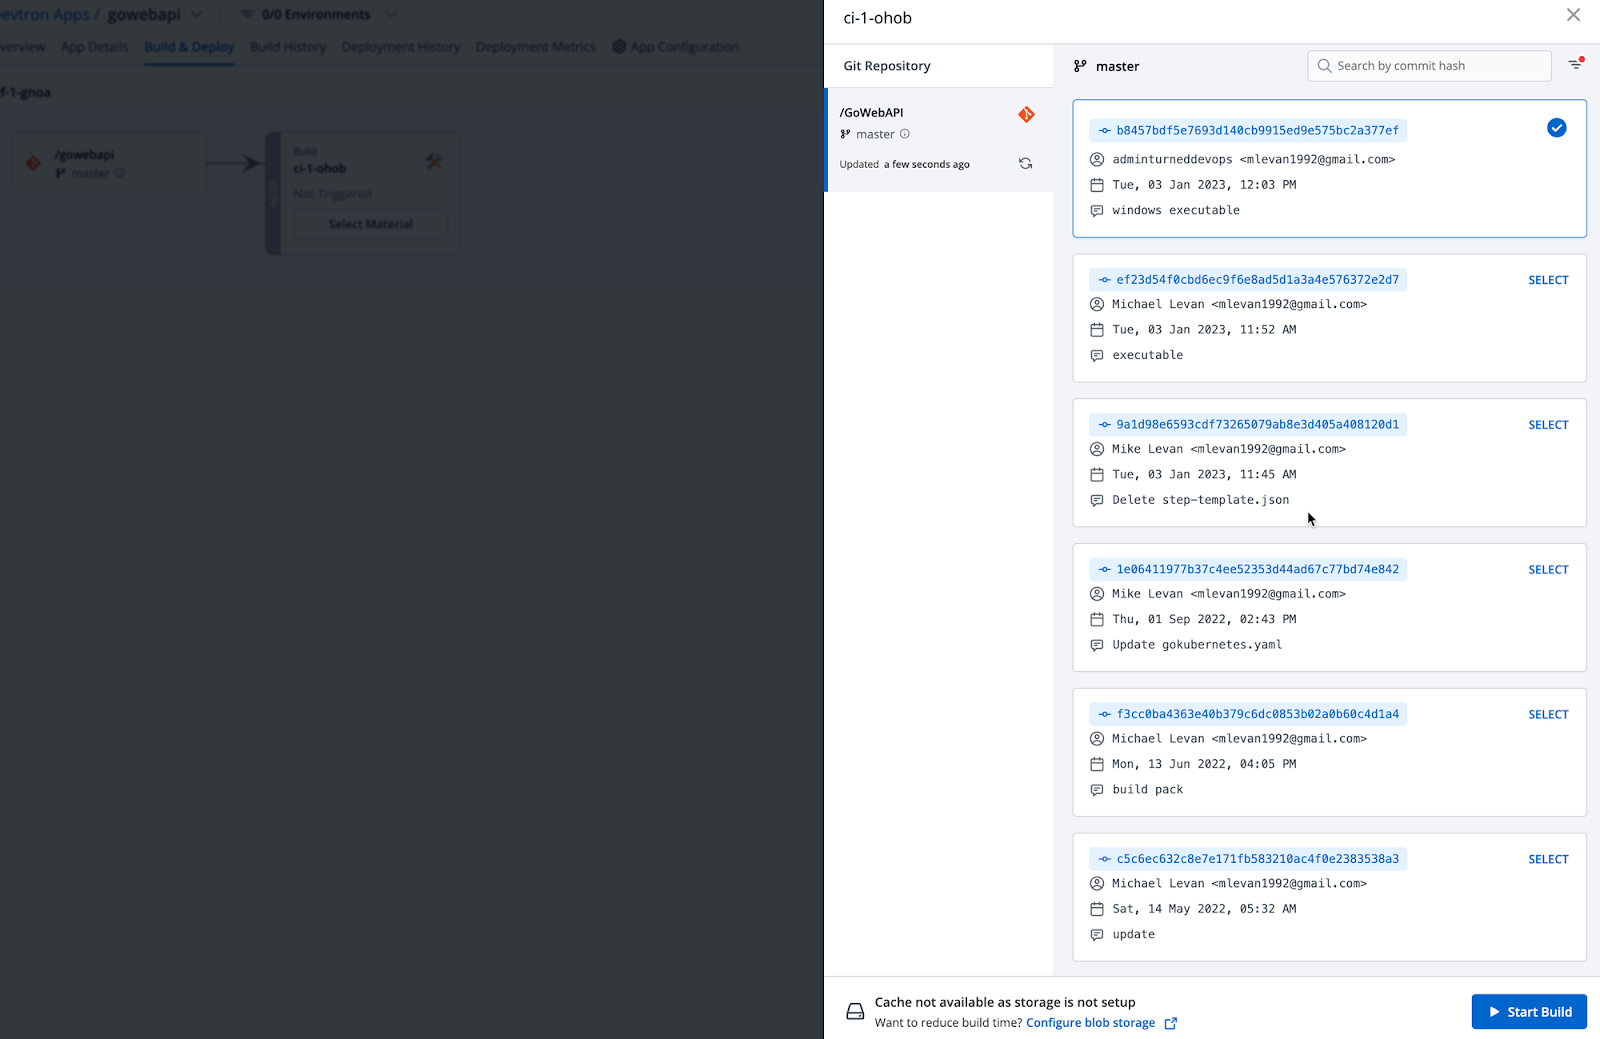
Input the branch name that you wish to deploy and then click the blue Create Pipeline button.

You’ll now see that the Git repo is connected and you can press the blue Start Build button.
The length of which the pipeline will run depends on the type of application that’s being built and deployed. If it’s larger with more steps, it’ll take longer. If it’s a smaller app with fewer configuration options, it’ll have a shorter build time.
After the workflow is complete, you’ll see a green checkmark.
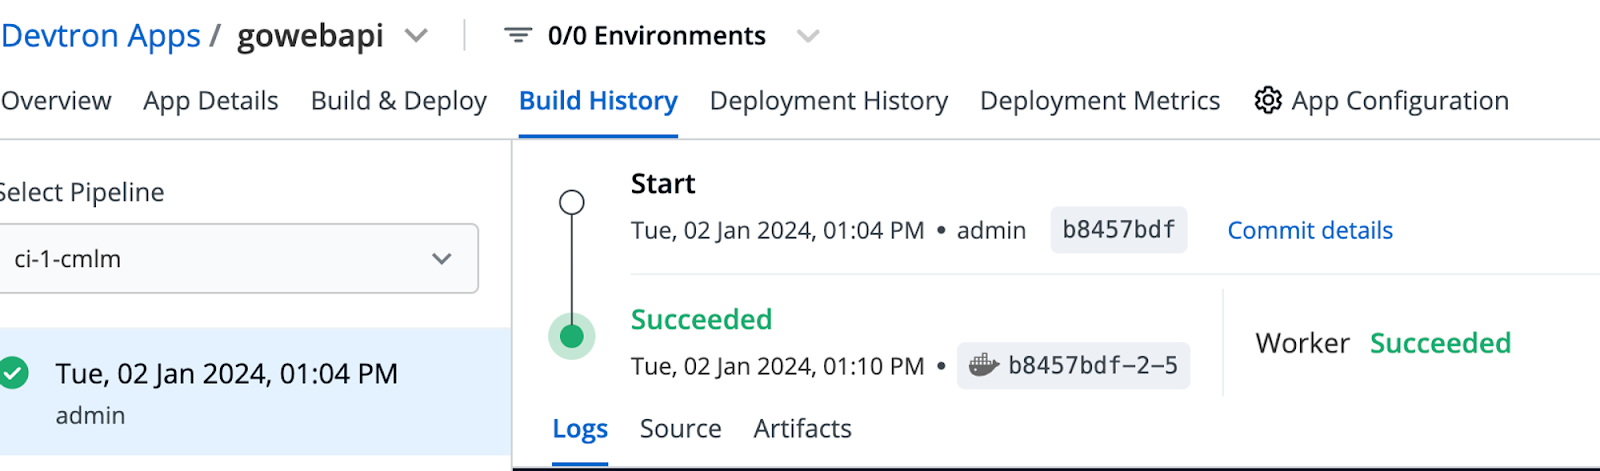
You’ve now successfully deployed an app with Devtron!
If you have any queries, don't hesitate to connect with us. Join the lively discussions and shared knowledge in our actively growing Discord Community.