If you’ve been following along with the Devtron series, you’ve seen many different methods of using Devtron for Kubernetes and overall application deployment. Now it’s time to dive deeper into the Kubernetes components.
In this blog post, you’ll see everything you can do within your Kubernetes environment to not only make it easier to manage whether you have one cluster or 50, but you’ll see how you can deploy Helm Charts, standalone Kubernetes Manifests, and manage it all under one roof.
Deploying Devtron
If you haven’t already deployed Devtron, you can do so with a Helm Chart.
First, ensure that the Helm Chart is added.
helm repo add devtron <https://helm.devtron.ai>
Next, update the Helm Chart if necessary.
helm repo update devtron
Lastly, deploy the Helm Chart. The Helm Chart below also contains the CICD and ArgoCD implementations for application deployments.
helm install devtron devtron/devtron-operator \
--create-namespace --namespace devtroncd \
--set installer.modules={cicd} \
--set argo-cd.enabled=true
It may take 3-4 minutes for all resources to get up and running.
Once complete, navigate to the Devtron dashboard by using the load balancer IP address associated with the Devtron service. If you do not have a load balancer, you can use the port-forward command.
kubectl get svc -n devtroncd
NAME                             TYPE           CLUSTER-IP     EXTERNAL-IP     PORT(S)             AGE

devtron-service                  LoadBalancer   10.0.246.96    20.185.104.16   80:31430/TCP        33m
Once you’ve navigated to the Devtron dashboard, you’ll need the initial password to log in. The command below retrieves the Kubernetes Secret to log into Devtron.
kubectl -n devtroncd get secret devtron-secret -o jsonpath='{.data.ADMIN_PASSWORD}' | base64 -d
💡 For a more comprehensive setup for deploying Devtron, you can take a look at the blog post here.
Managing Clusters
After accessing the Devtron dashboard, the first thing that you can do is navigate to the existing Kubernetes cluster. Before deploying Devtron, a Kubernetes cluster needs to exist. The cluster is where Devtron is installed and it must exist for Devtron to work properly as it’s a Kubernetes-based deployment.
You can use the existing cluster to deploy applications or you can use it as a Control Plane for managing Devtron. Devtron can live within this cluster and manage other Kubernetes clusters that are running application stacks.
Managing An Existing Cluster
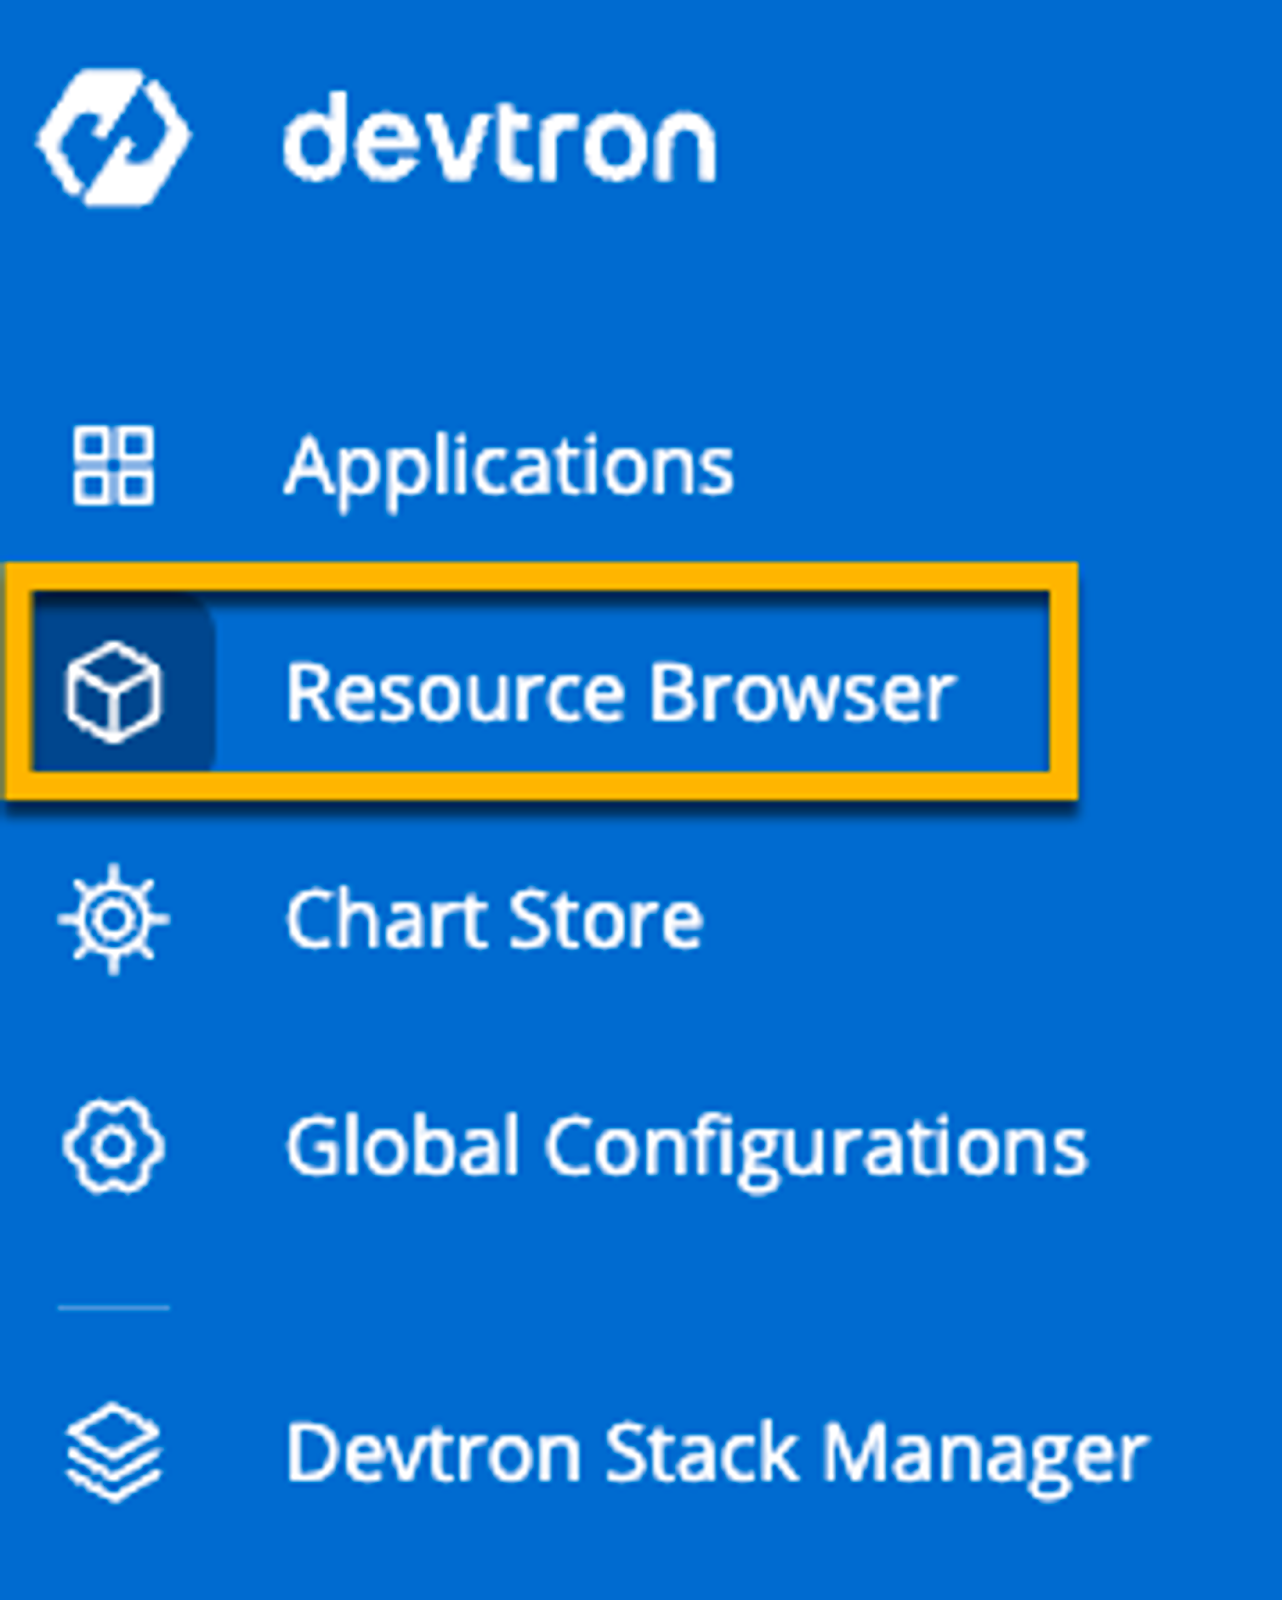
To navigate to the existing cluster, go to the Resource Browser tab.
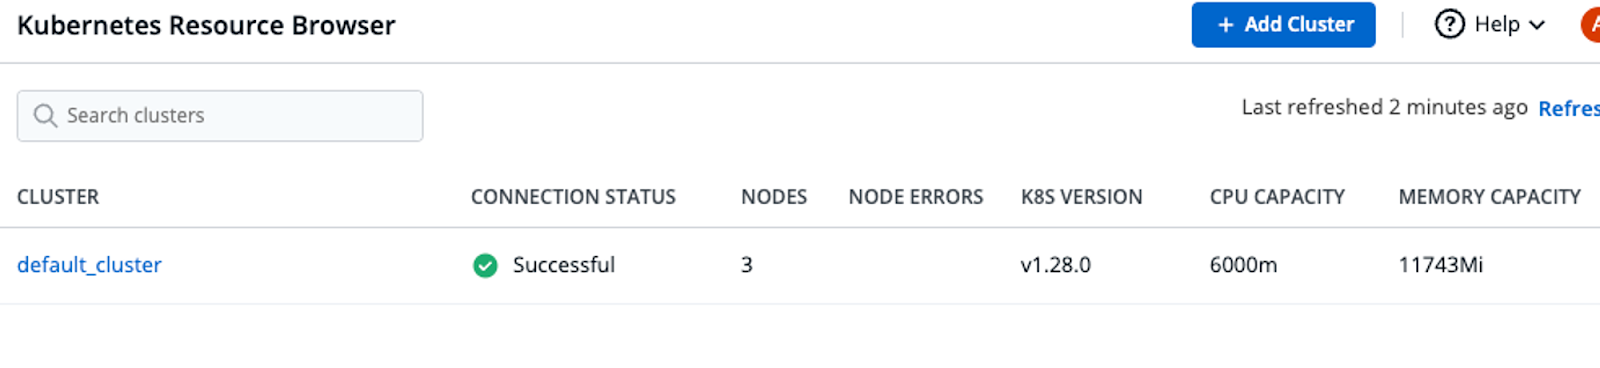
Within the Resource Browser, you’ll see your cluster available. It’ll show information like the node count, any node errors, version, and memory/CPU availability within the Worker Nodes.
In an upcoming section, you’ll learn how to navigate the cluster.
Managing Multiple Clusters
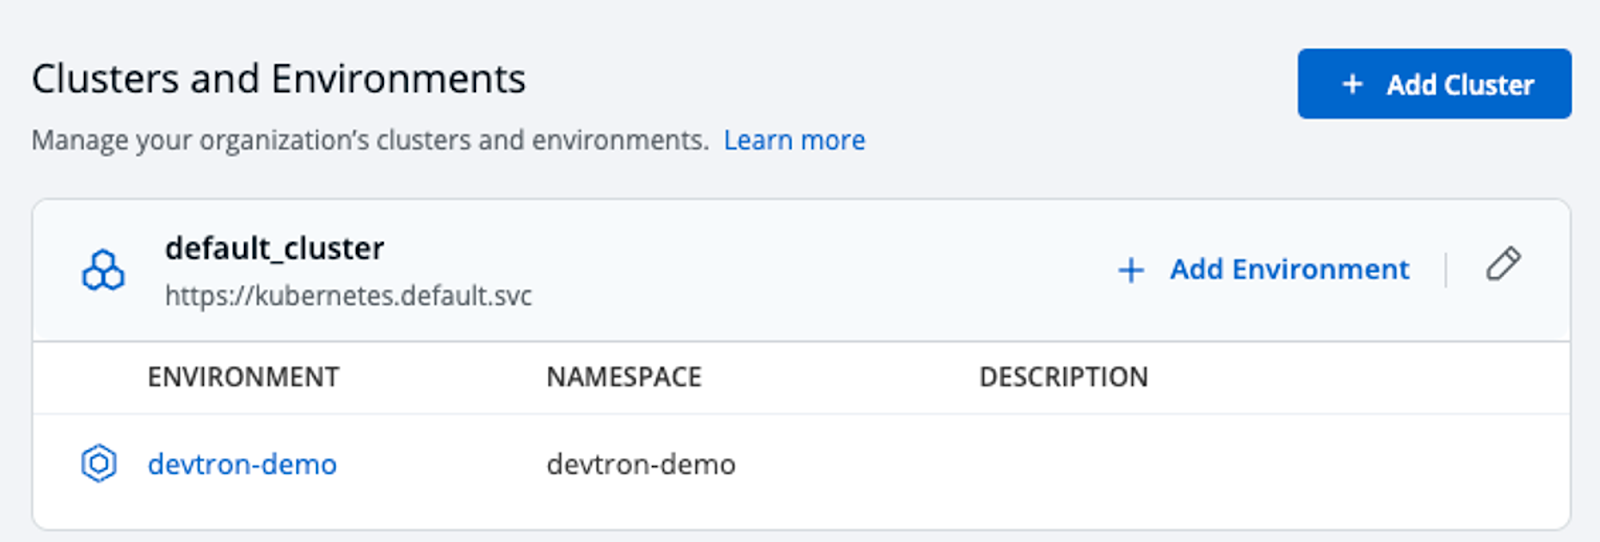
To add a new cluster to manage from within Devtron, within the Resource Browser, click the blue + Add Cluster button.

On the new page, you’ll see the same + Add Cluster button to click.
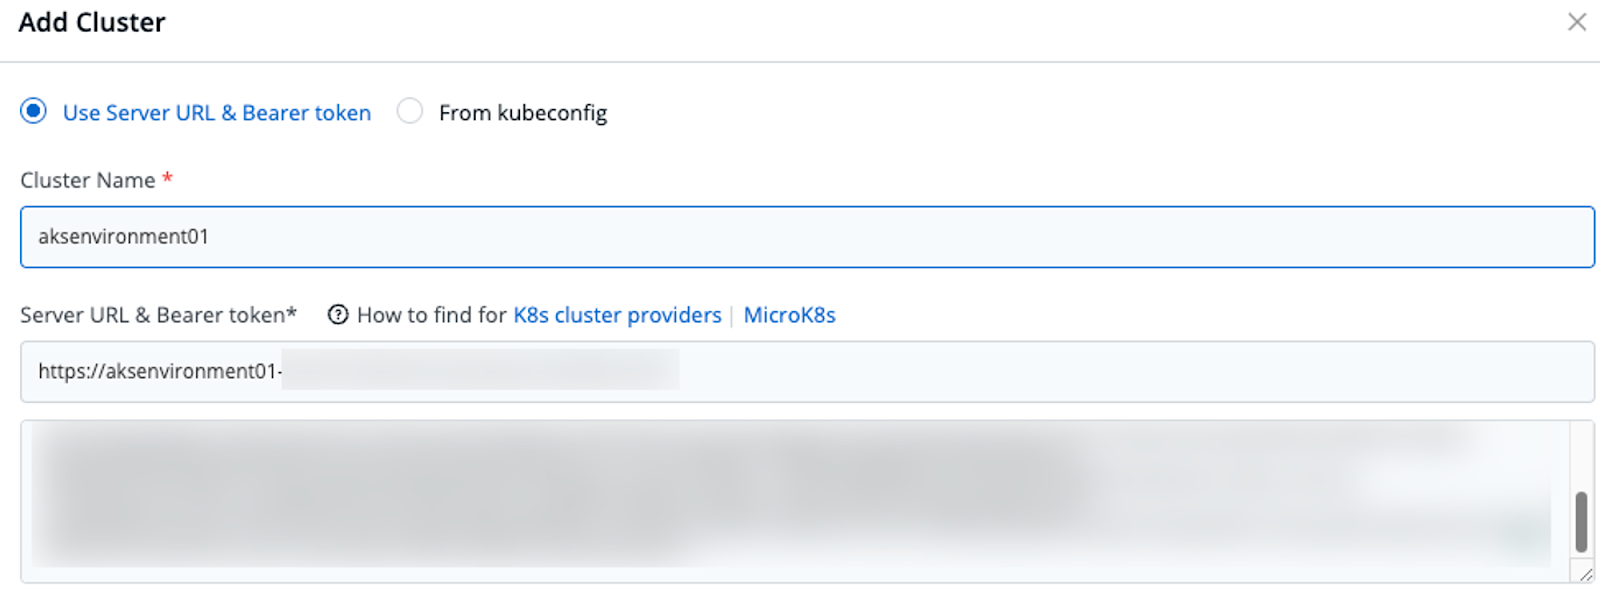
To add a cluster, you can provide a name for it (any name you choose, but ideally it’s the name of the cluster itself), the Bearer token for authenticating, and the Server URL, which is the Control Plane entry point (the API Server).
To find the cluster information to connect it to Devtron, run the following script.
curl -O <https://raw.githubusercontent.com/devtron-labs/utilities/main/kubeconfig-exporter/kubernetes_export_sa.sh> && bash kubernetes_export_sa.sh cd-user devtroncd
You can also connect to the cluster via an existing Kubernetes Configuration (kubeconfig) as long as the Kubeconfig you have has the necessary permissions available to do so.
Accessing and Managing Kubernetes Resources
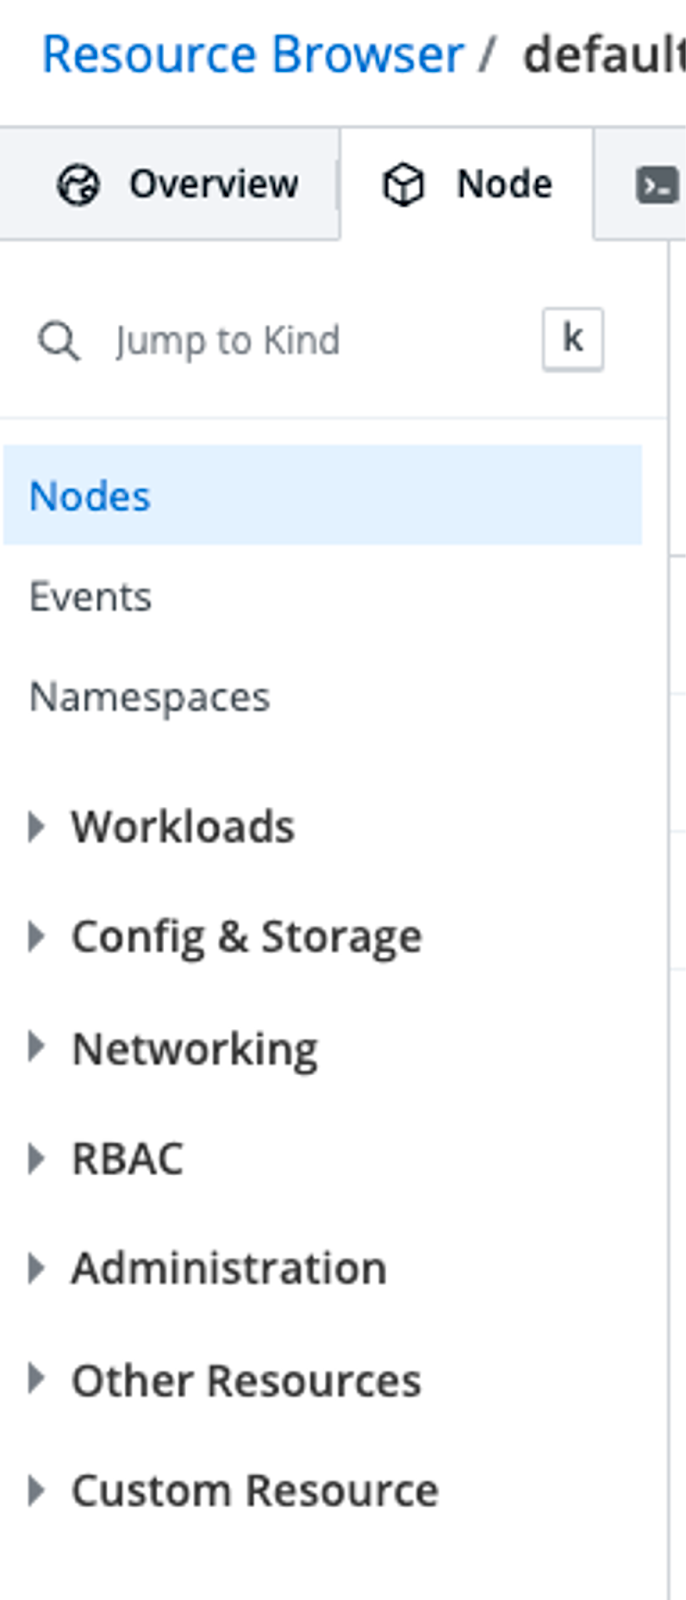
As you’re navigating through the default Kubernetes cluster or a cluster you added, you’ll notice the Resource Browser within the cluster. The Resource Browser gives you the ability to manage any Kubernetes resource, including CRD’s, from within Devtron. You can view them and add resources.
From within the Resource Browser, you have three options that are cluster-specific:
- Nodes
- Events
- Namespaces
Navigating Cluster Resources
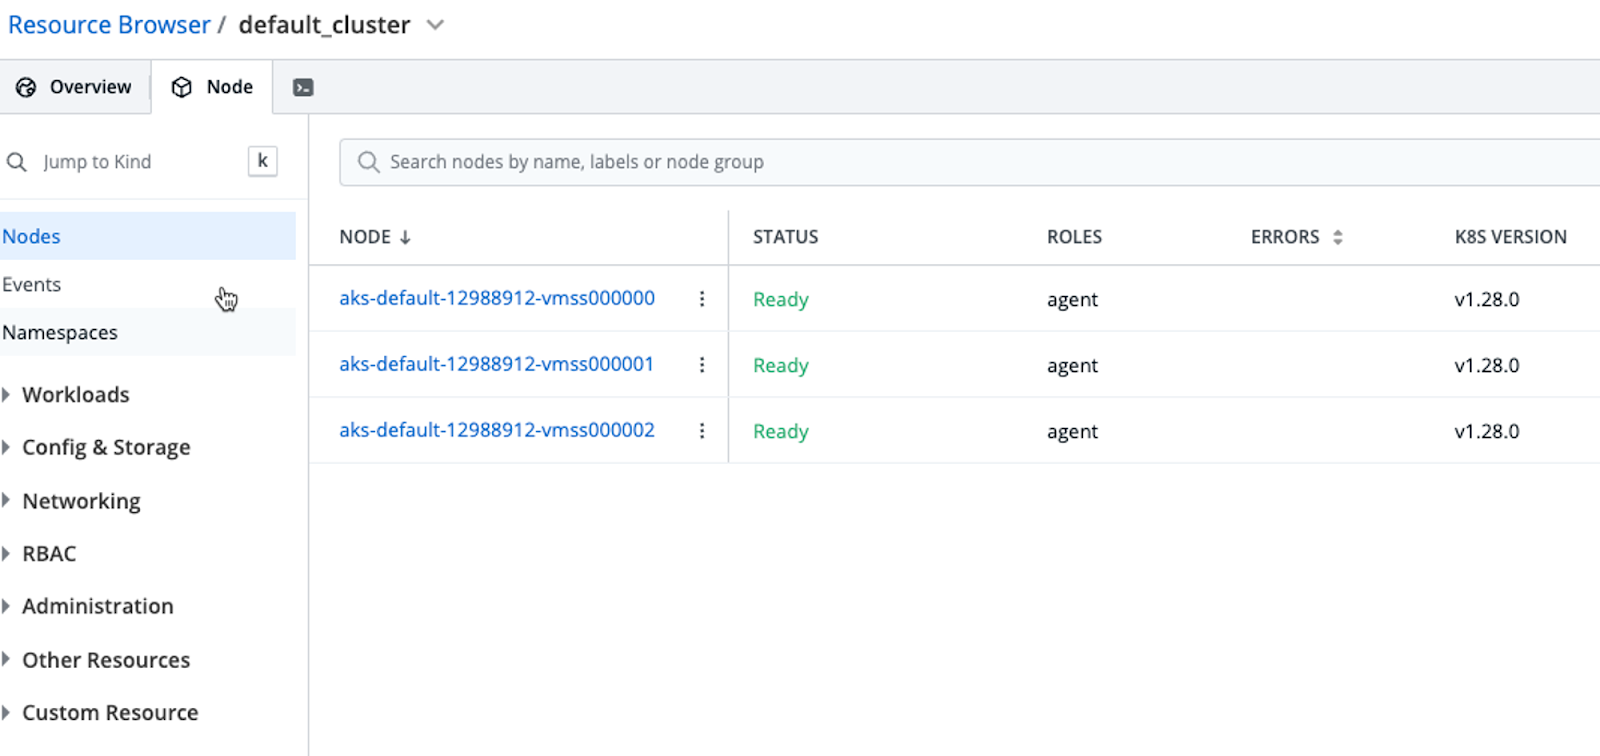
The Nodes tab gives you information about the Worker Nodes running in the Kubernetes cluster. Ready status to ensure all Worker Nodes are running successfully, the Kubernetes version, and the roles associated.
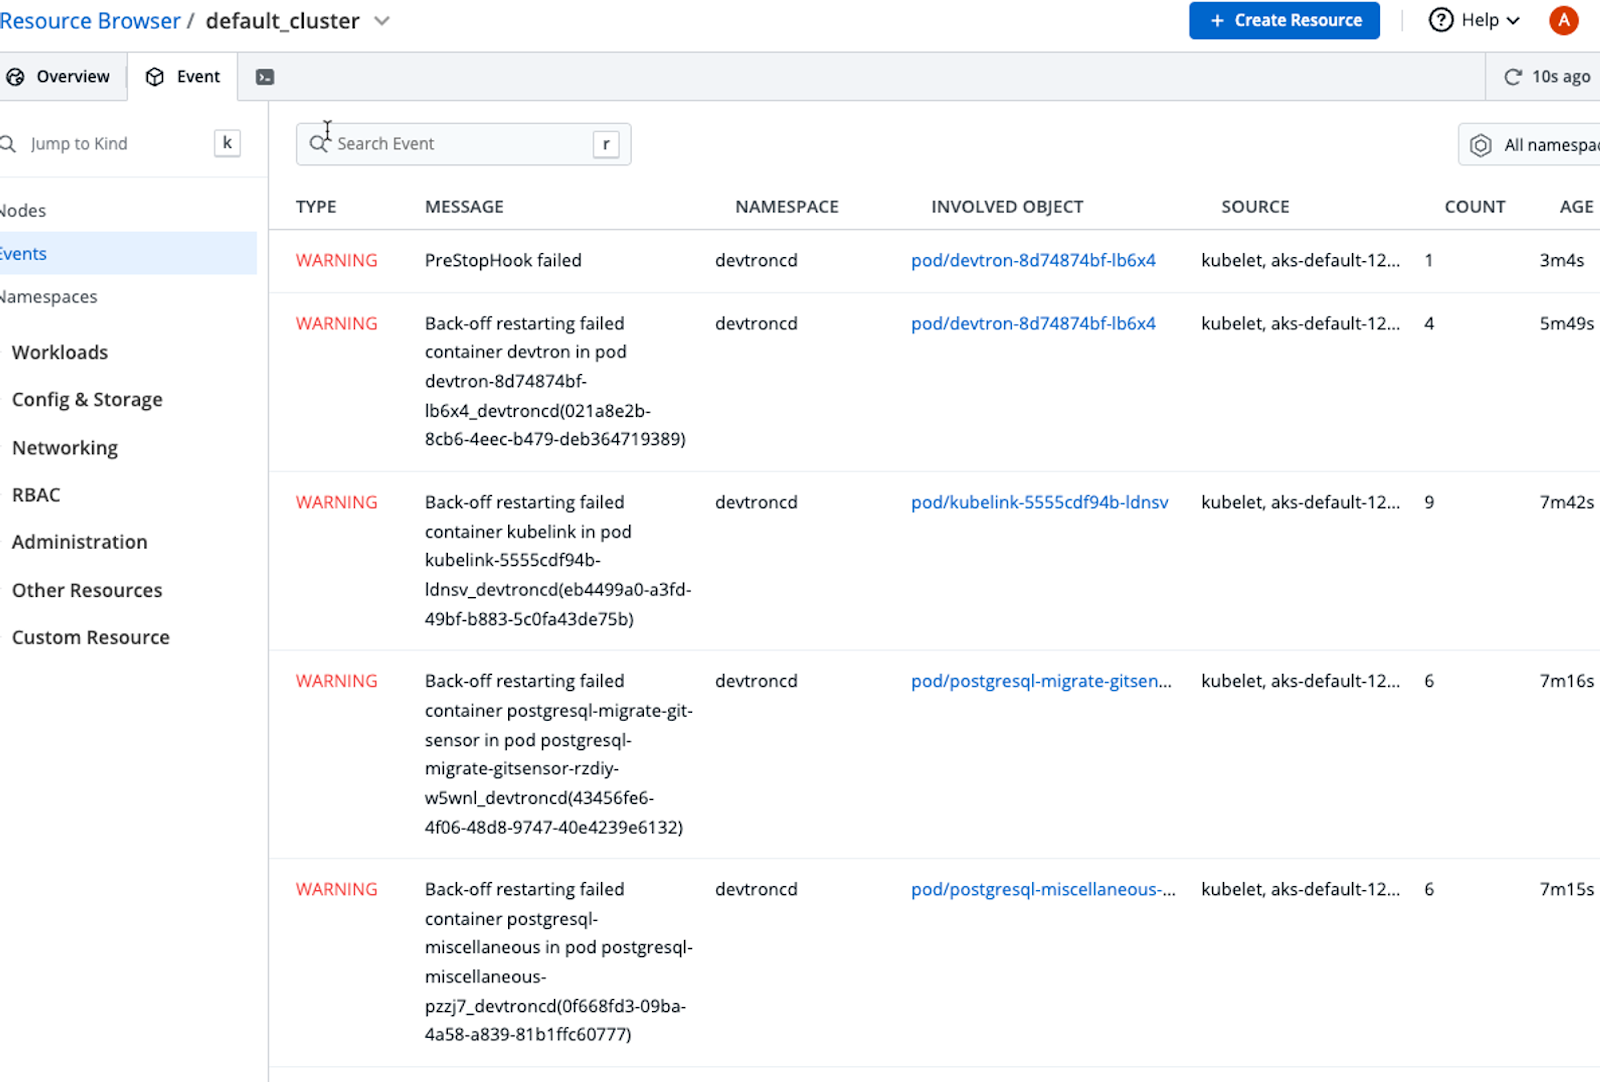
The Events tab tells you about any errors happening on the Worker Nodes based on Namespace and object/resource.
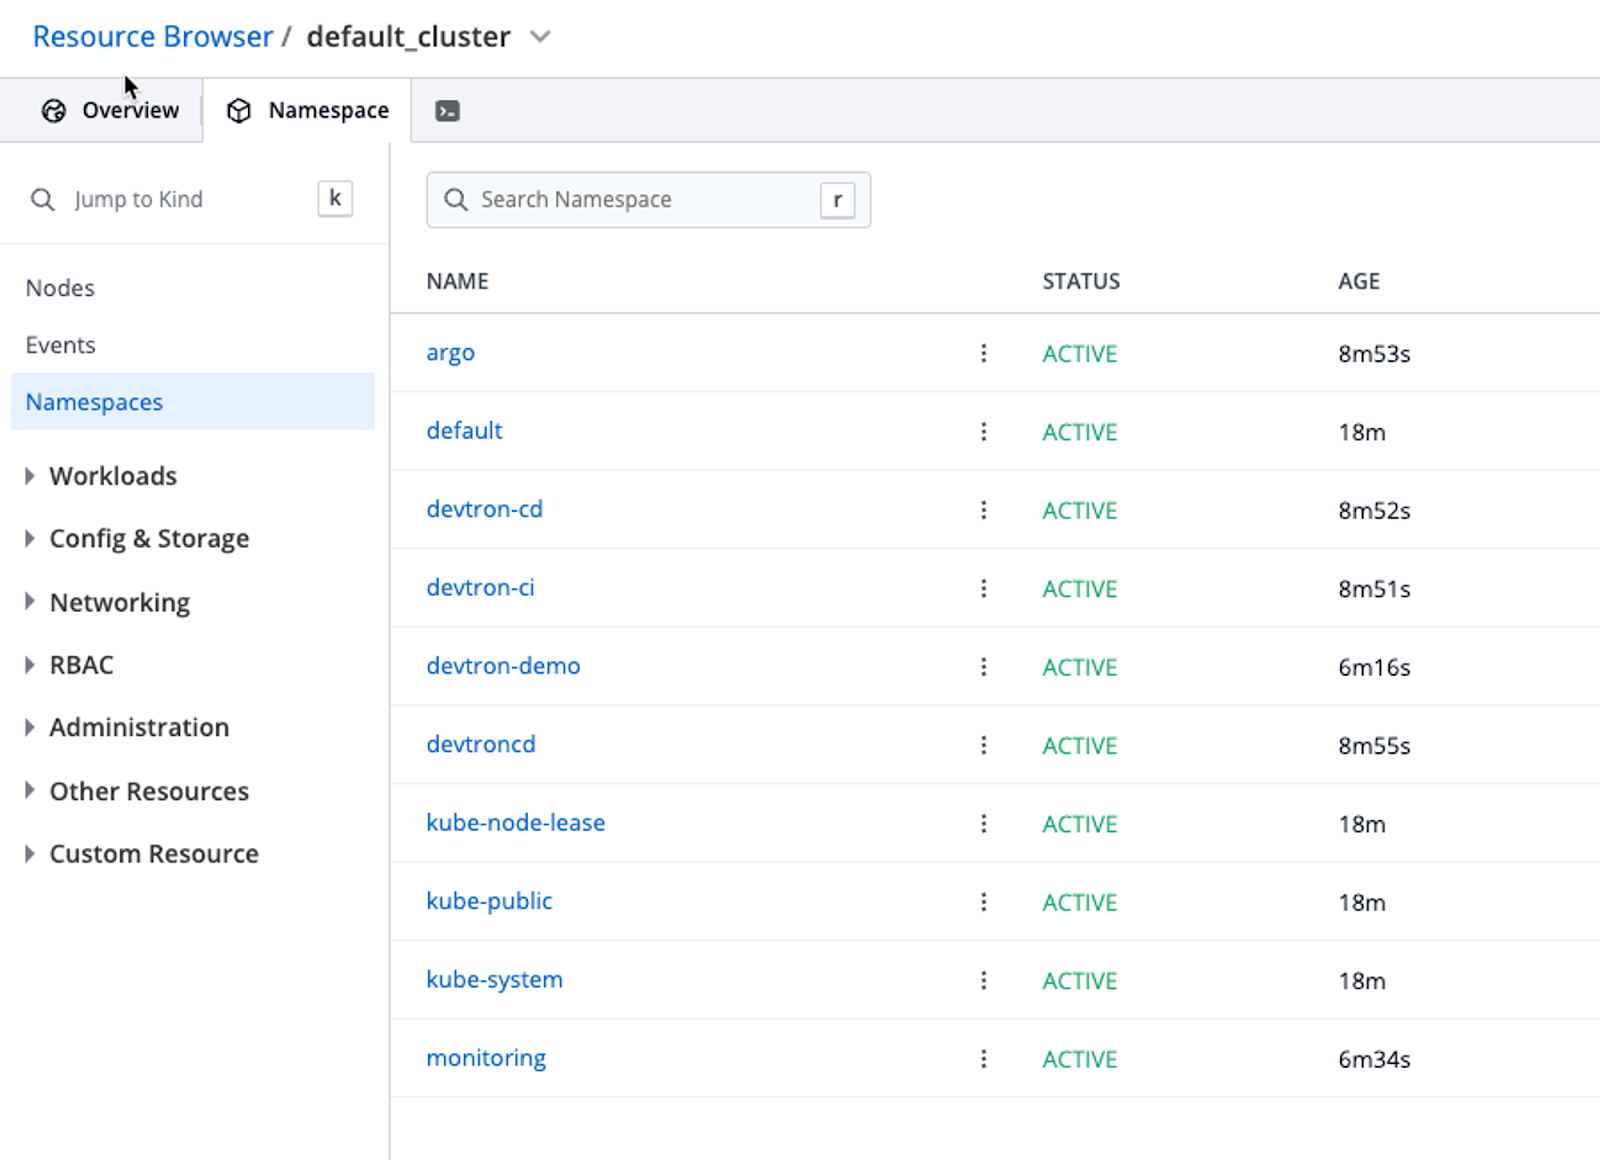
The Namespaces tab shows you the status of all Namespaces running within your cluster and the age of the Namespace.
Navigating Kubernetes Object Resources
Outside of navigating the cluster, you can also navigate Kubernetes objects within the cluster. For example, under Workloads, you can see all Pods running.
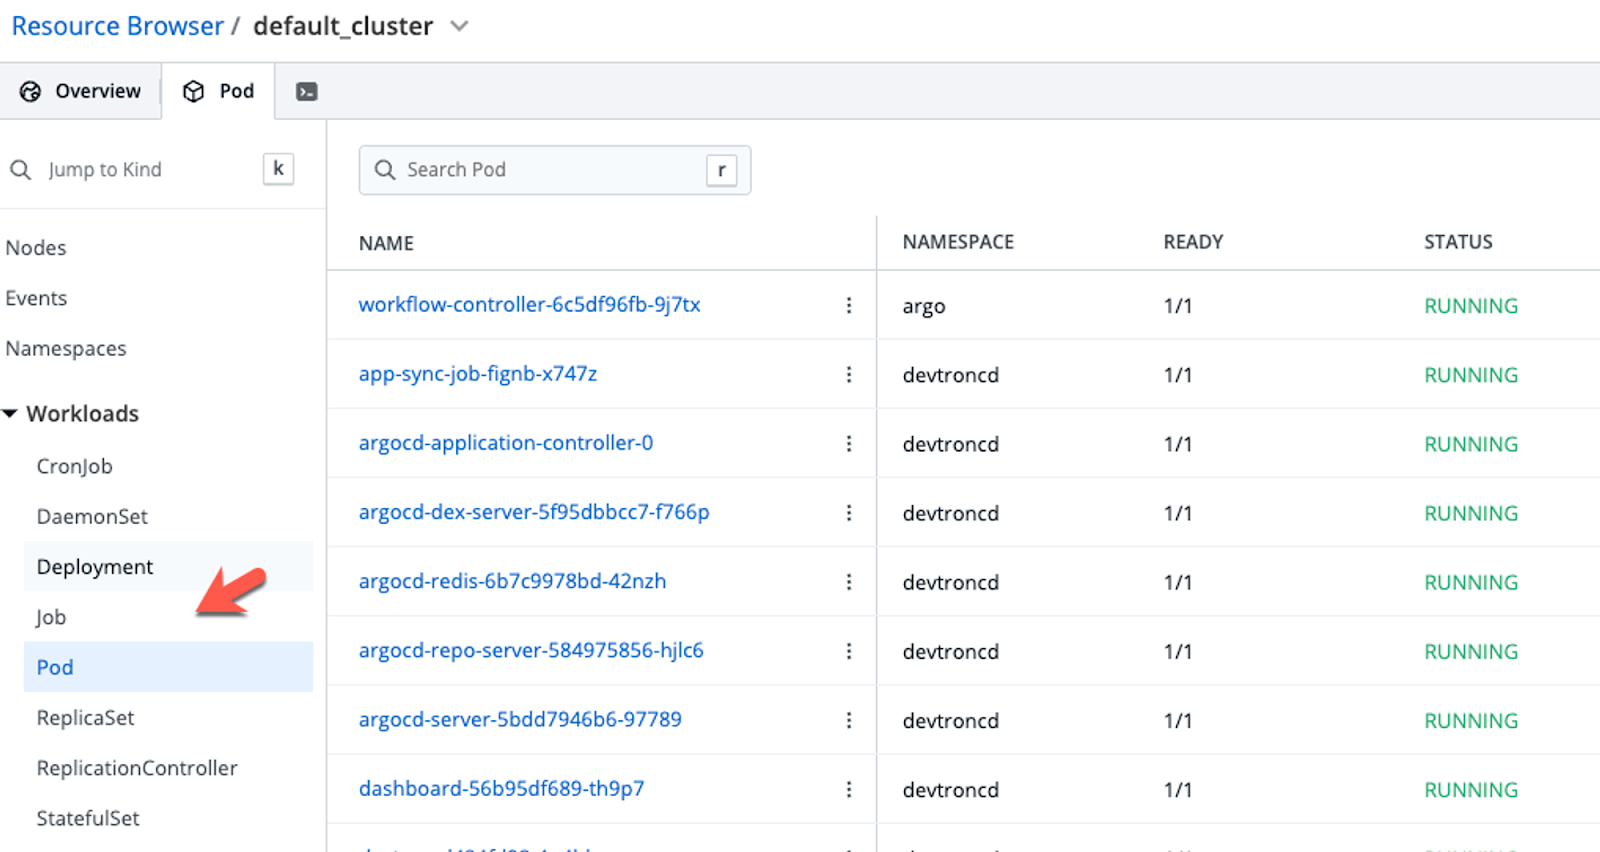
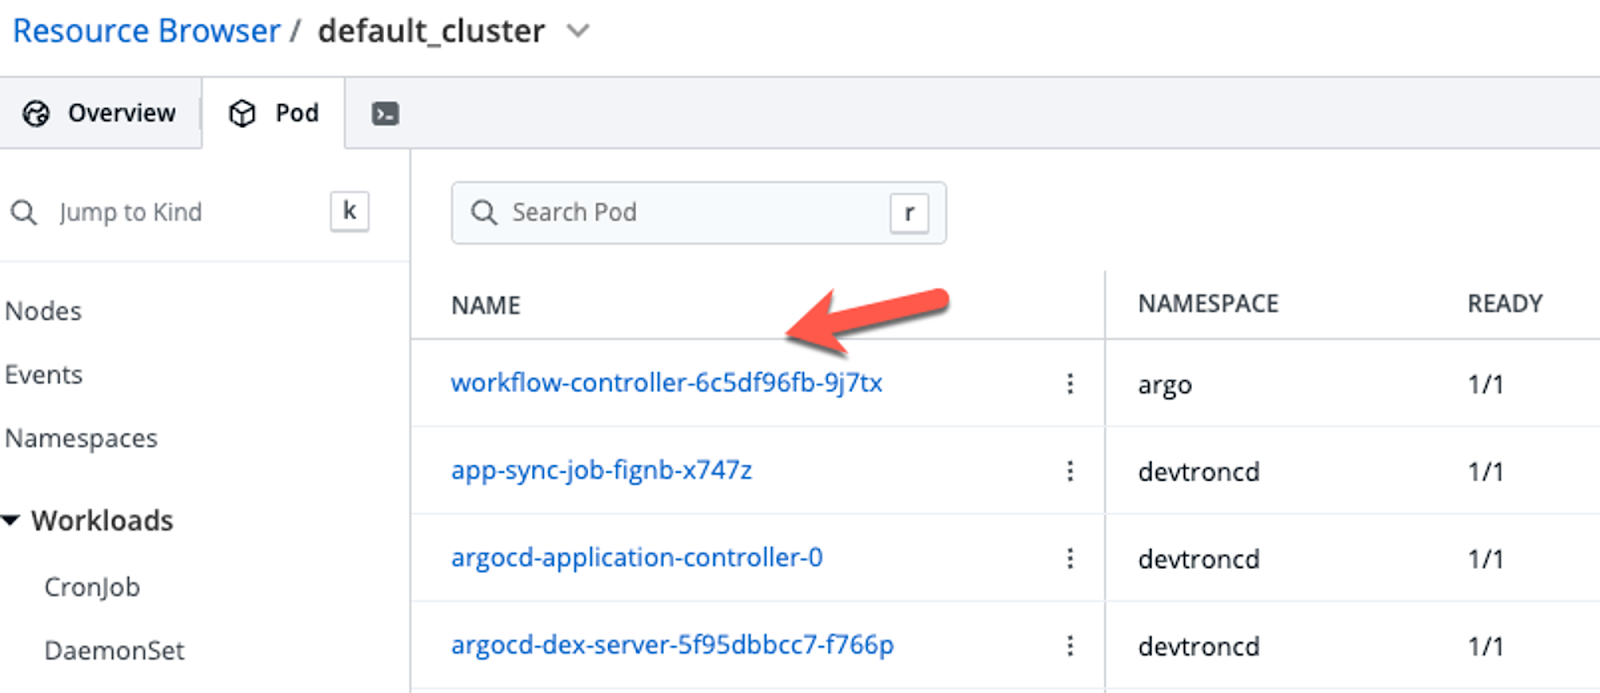
You can click on individual Pods to navigate within the Pod itself.
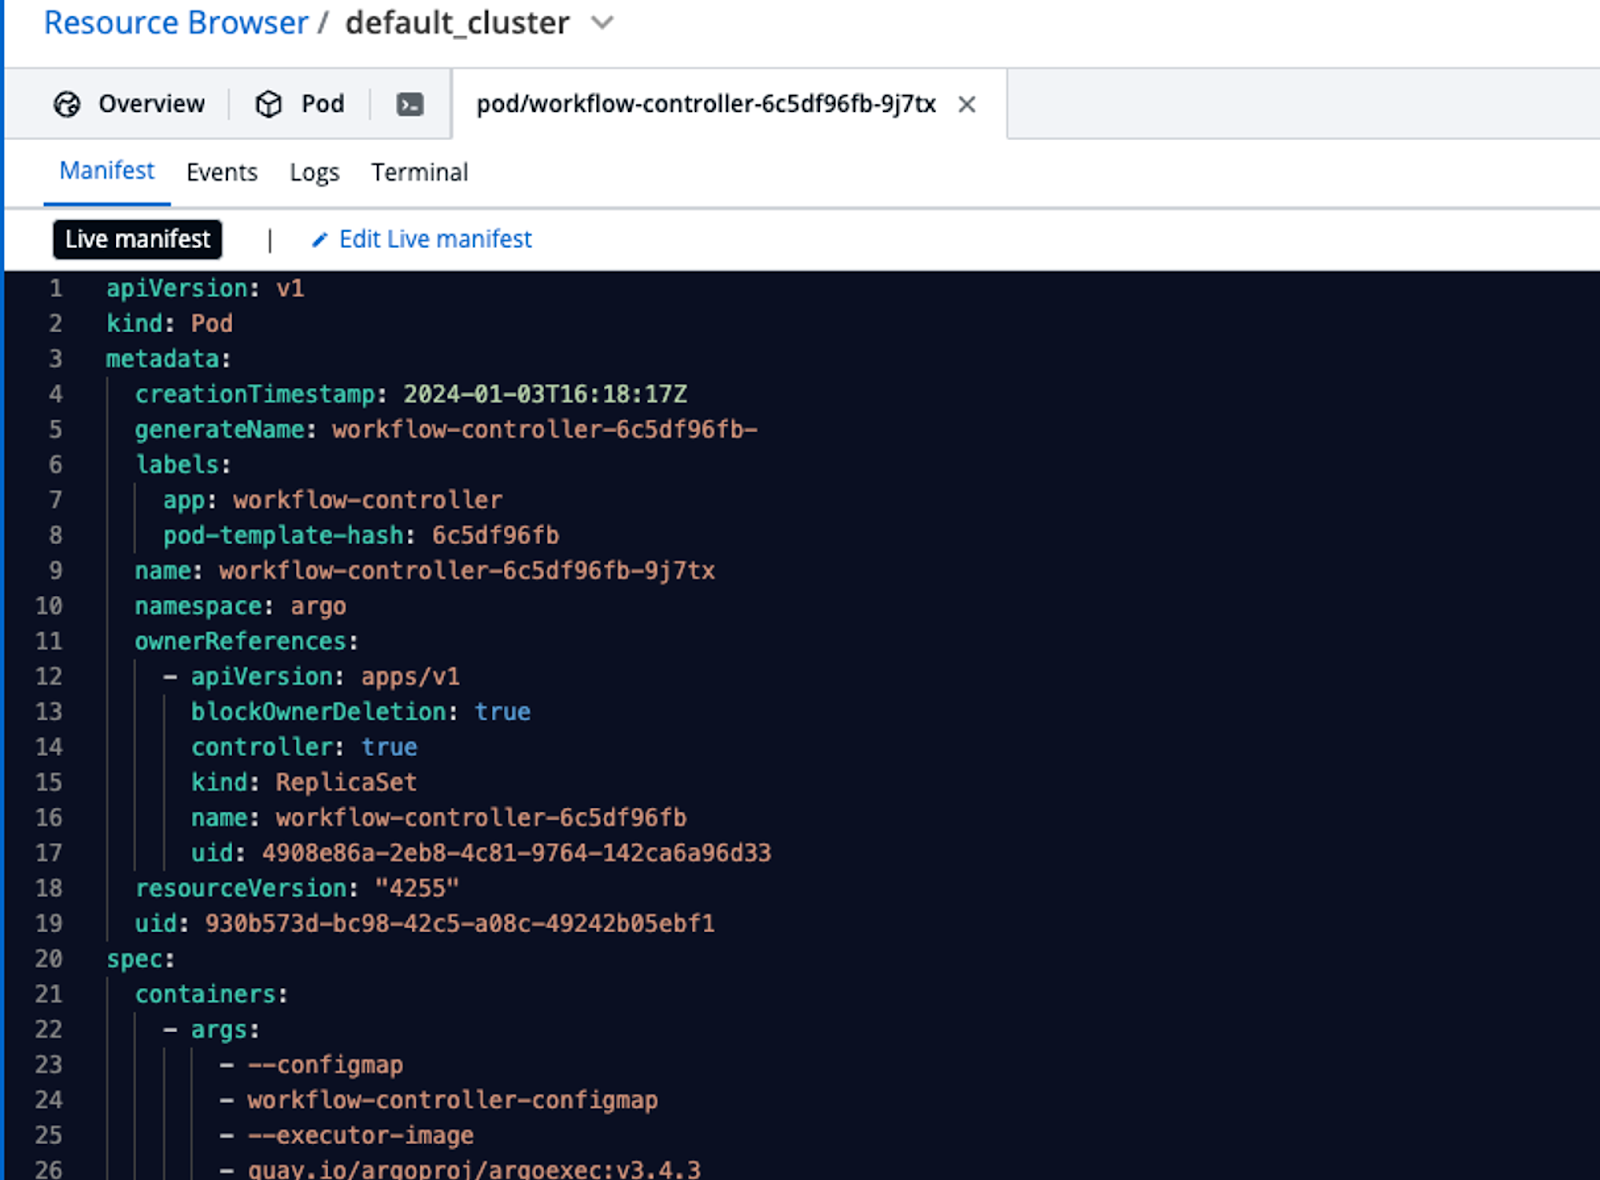
Within the Pod, you can update the Kubernetes Manifest running the Pod. Please note that any updates done here should be stored in source control.
💡 It’s not a best practice to update a Kubernetes Manifest in this fashion. It’s great for a live read-only view, but updating a Manifest this way should only be done in an emergency and any update that occurs should be stored in source control.
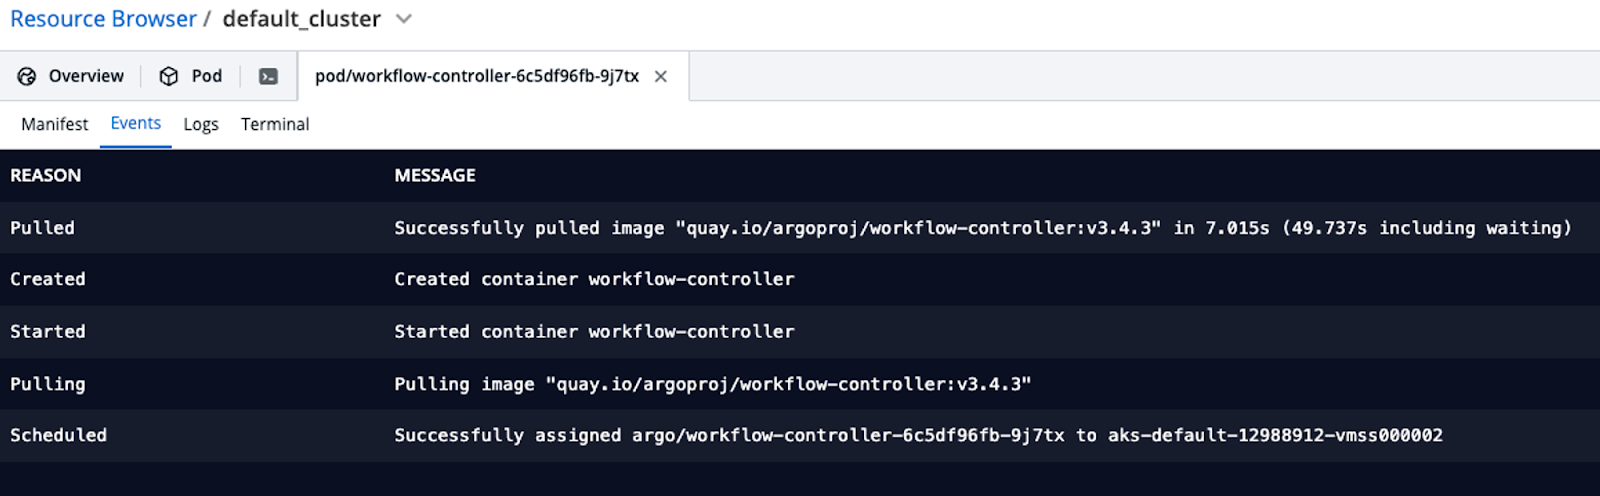
Within the Pod resource, you can see any events that occur and any logs. You can also get a direct connect to the Pod via the Terminal if it’s available.
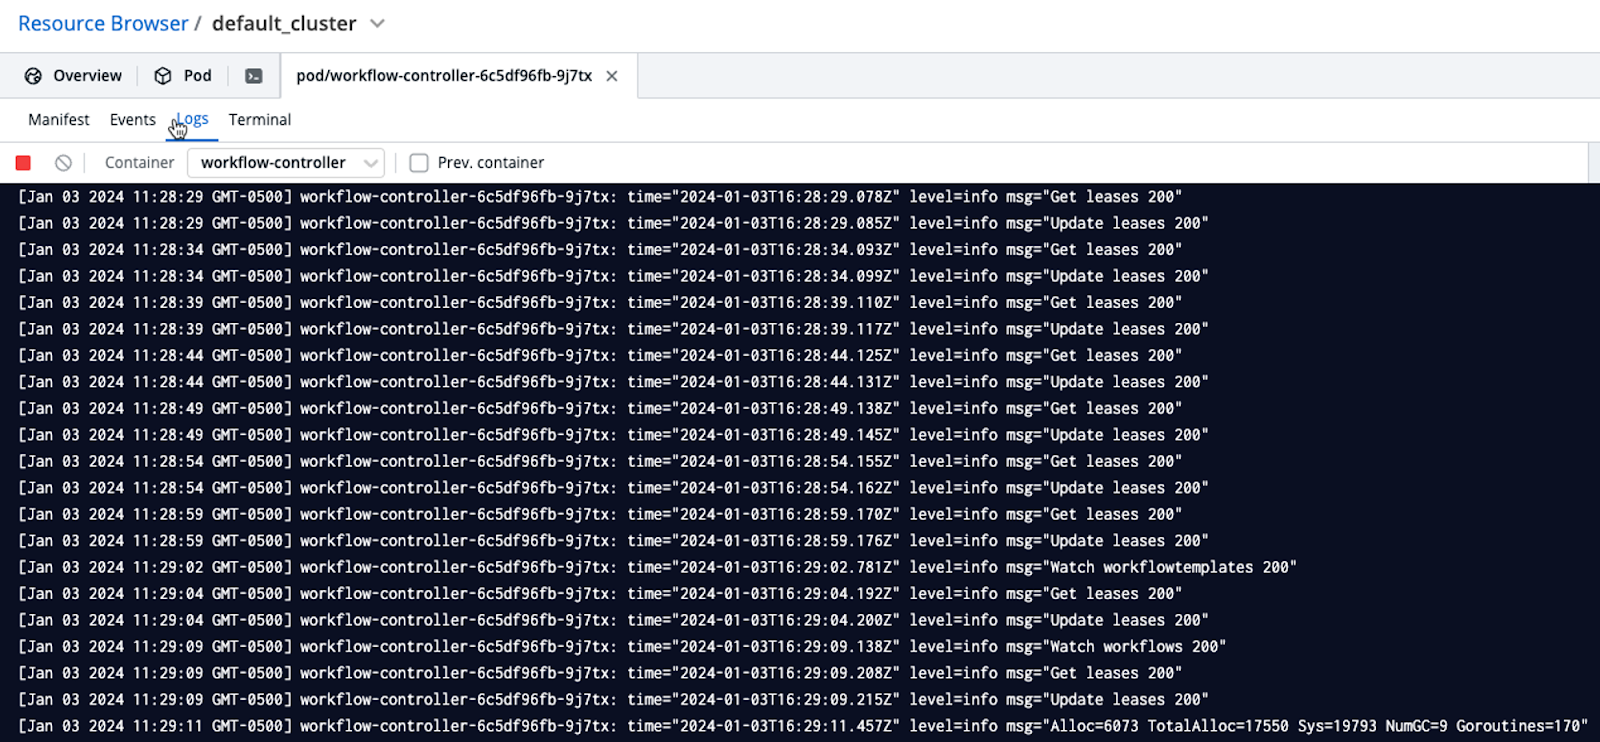
Essentially, anything that you can do from the terminal using kubectl, you can do from the Devtron portal when navigating Kubernetes resources and cluster resources.
Creating Kubernetes Resources
From within the Devtron dashboard, you have the ability to create Kubernetes resources. This is a great approach from a Platform Engineering perspective if you need to give engineers and developers an easier method of deploying resources.
As an example, copy the Nginx Manifest below.
apiVersion: apps/v1
kind: Deployment
metadata:
  name: nginx-deployment
spec:
  selector:
    matchLabels:
      app: nginxdeployment
  replicas: 2
  template:
    metadata:
      labels:
        app: nginxdeployment
    spec:
      containers:
      - name: nginxdeployment
        image: nginx:latest
        ports:
        - containerPort: 80
      - name: nginxtest
        image: nginx:latest
        ports:
        - containerPort: 8080
Within the Resource Browser, click the blue + Create Resource button.

Paste in the Kubernetes Manifest and click the blue Apply button.

You’ll now see the Pods running.
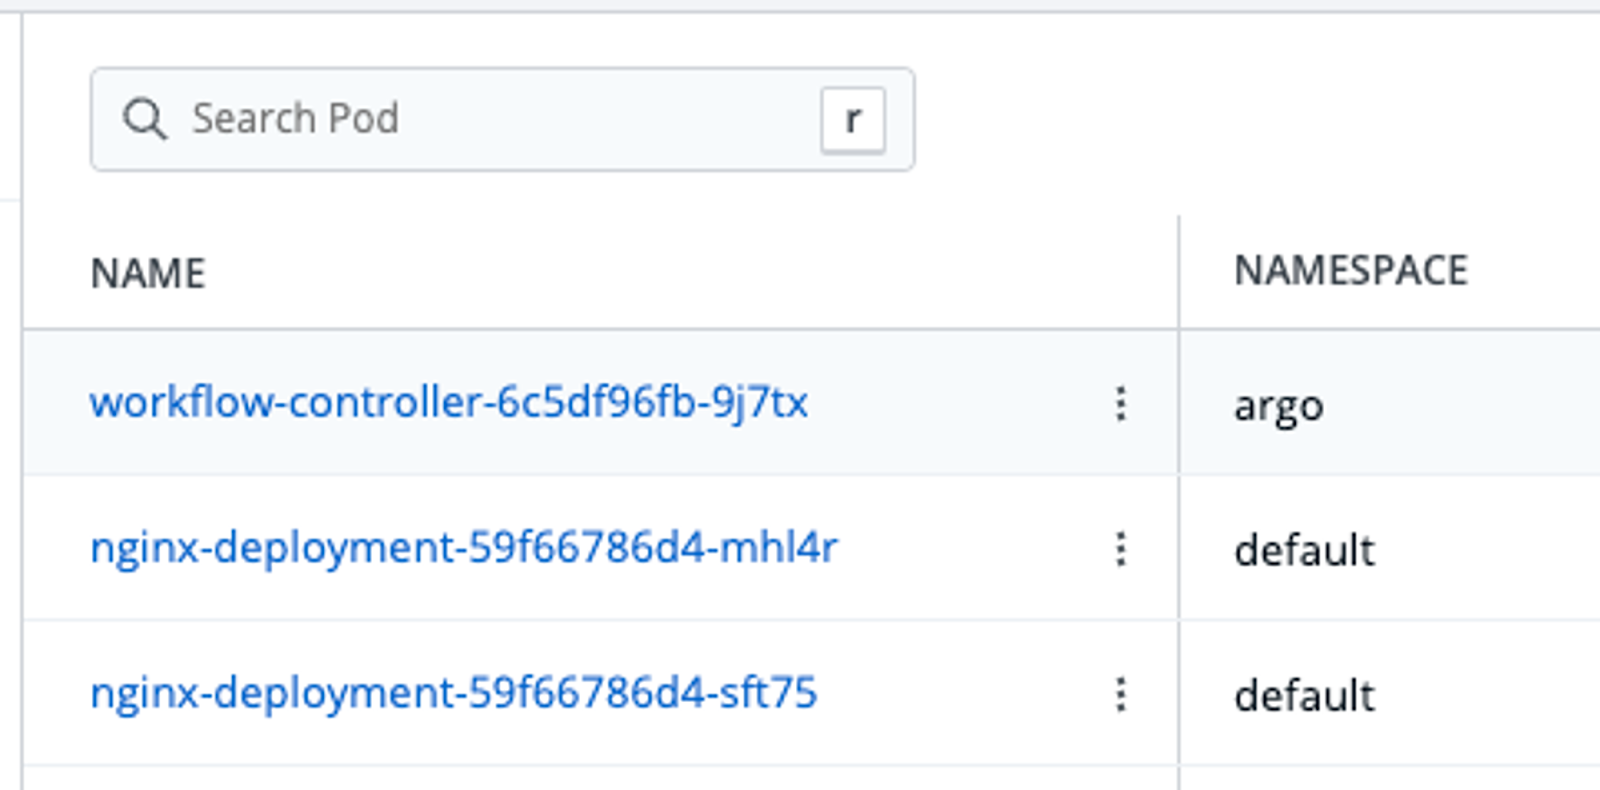
If you don’t see the Pods running, you may need to refresh your browser.
Helm Chart Deployments
The last step in managing and deploying Kubernetes resources is Helm Charts. Helm Charts are the best production-ready way to manage packages within Kubernetes. A Helm Chart consists of one or more Kubernetes Manifests that make up an application stack. Instead of having to deploy multiple Kubernetes Manifests, you can package them up within a Chart and deploy once package.
Within Devtron, you have the ability to deploy Helm Charts within the Chart Store. The Chart Store contains several Helm Charts that are available for the public. It gives you the ability to deploy and manage Helm Charts instead of having to deploy them manually from the CLI.
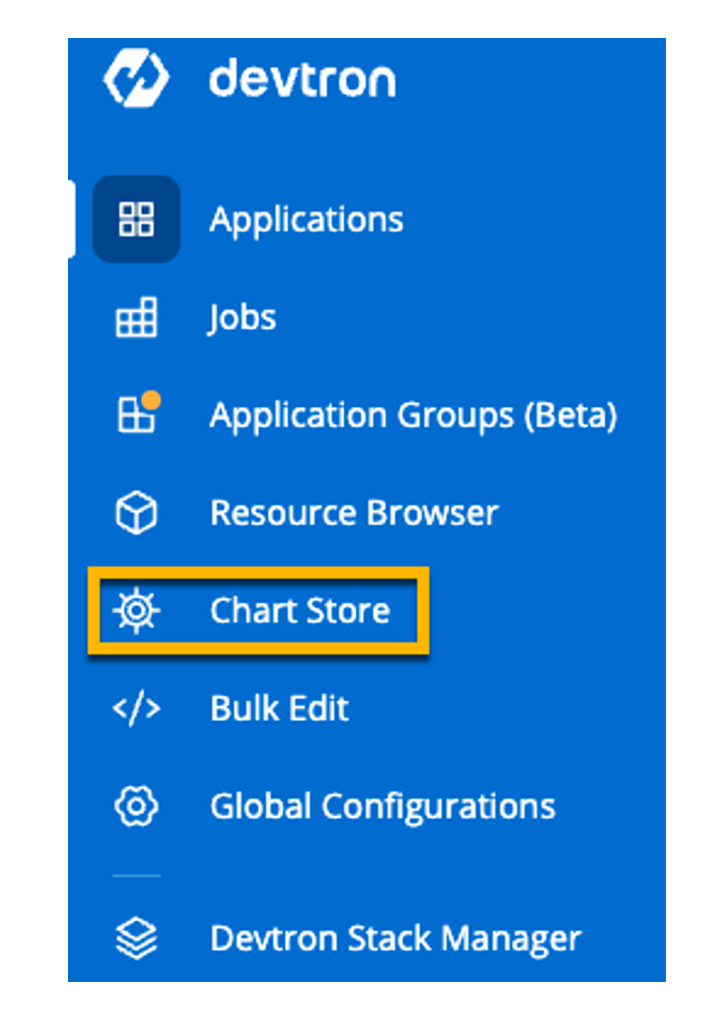
On the Devtron portal, navigate to the Chart Store.
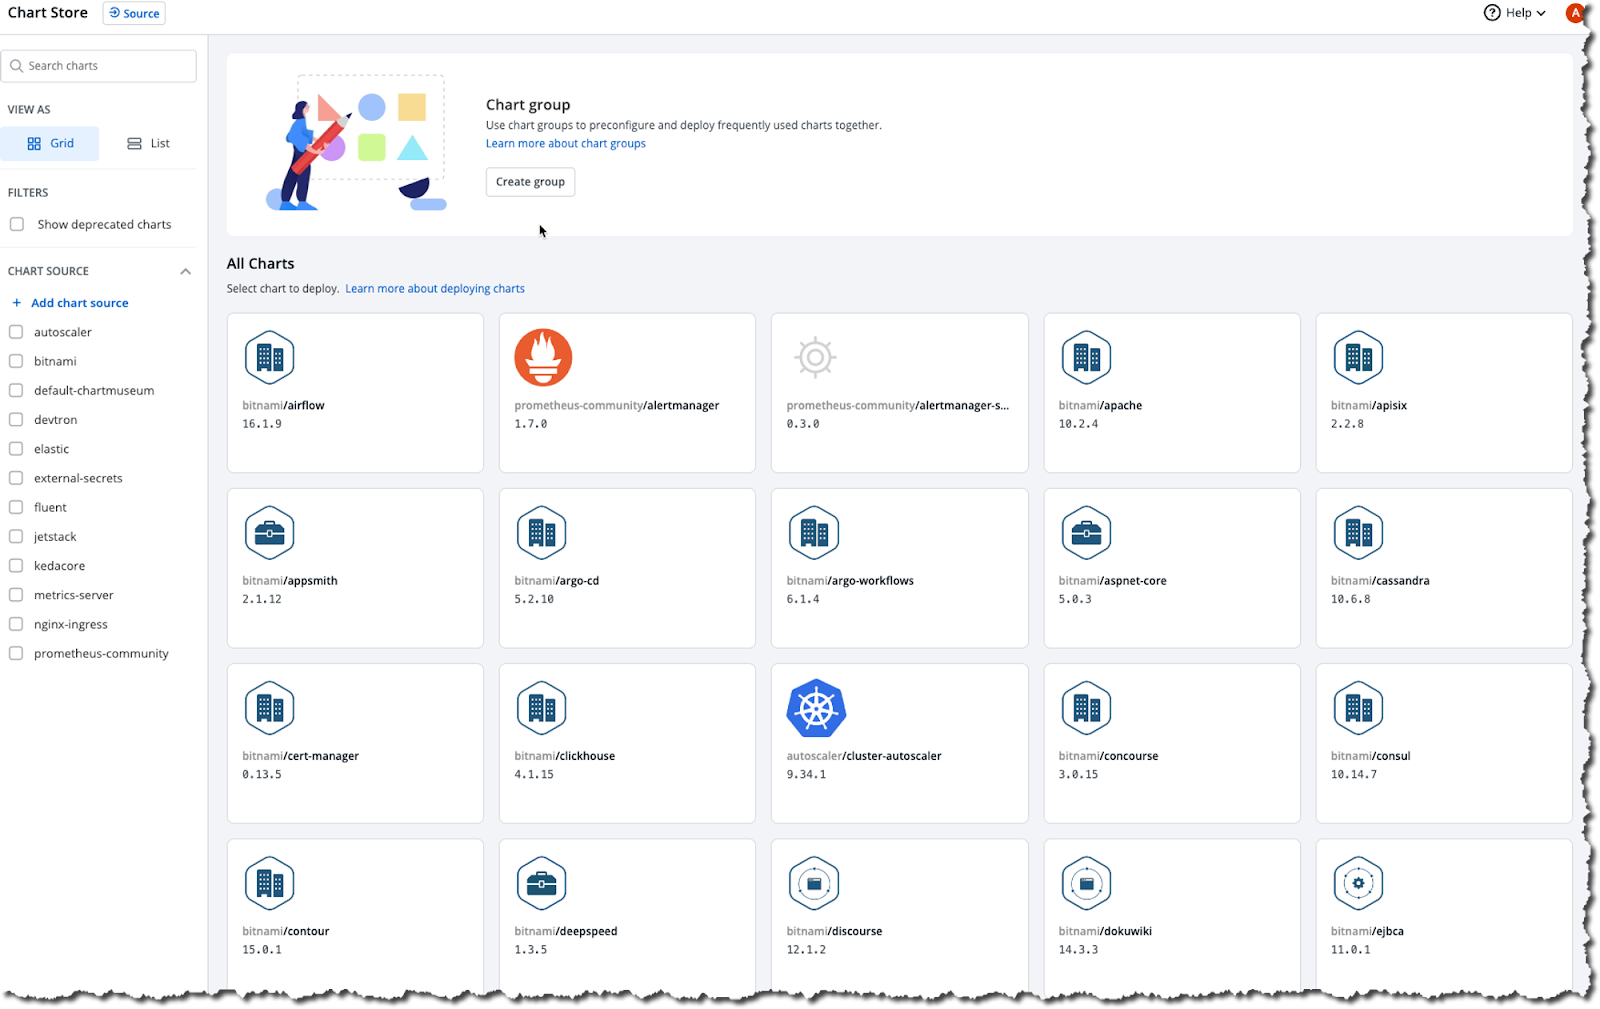
within the Chart Store, you’ll see multiple Charts available in various categories. For testing purposes, click on the Prometheus Helm Chart.
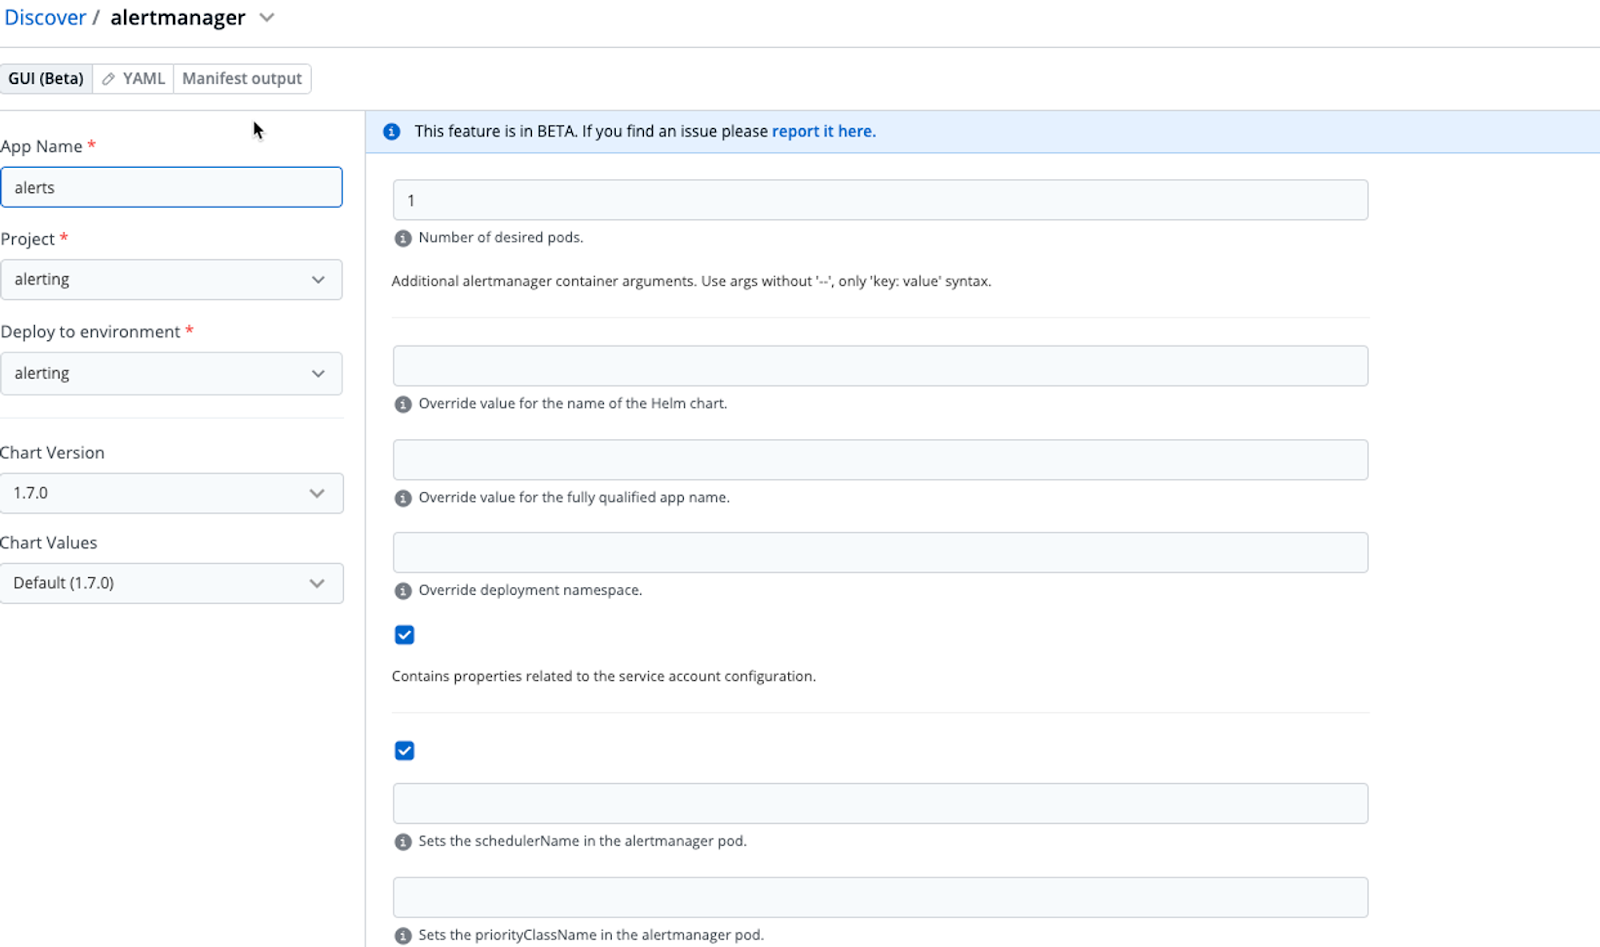
When you click on the Helm Chart, you’ll have a few different options available. These options are to customize the Helm Chart to your liking. You can also go to the values.yaml file within the Helm Chart to override any values that you may need for deploying.
You can add in the app name, Project that you want the Helm Chart to deploy to, Environment for the Helm Chart to run in, and any values that are outside of the default via the pane on the left.
Once complete, click the blue Deploy Chart button.
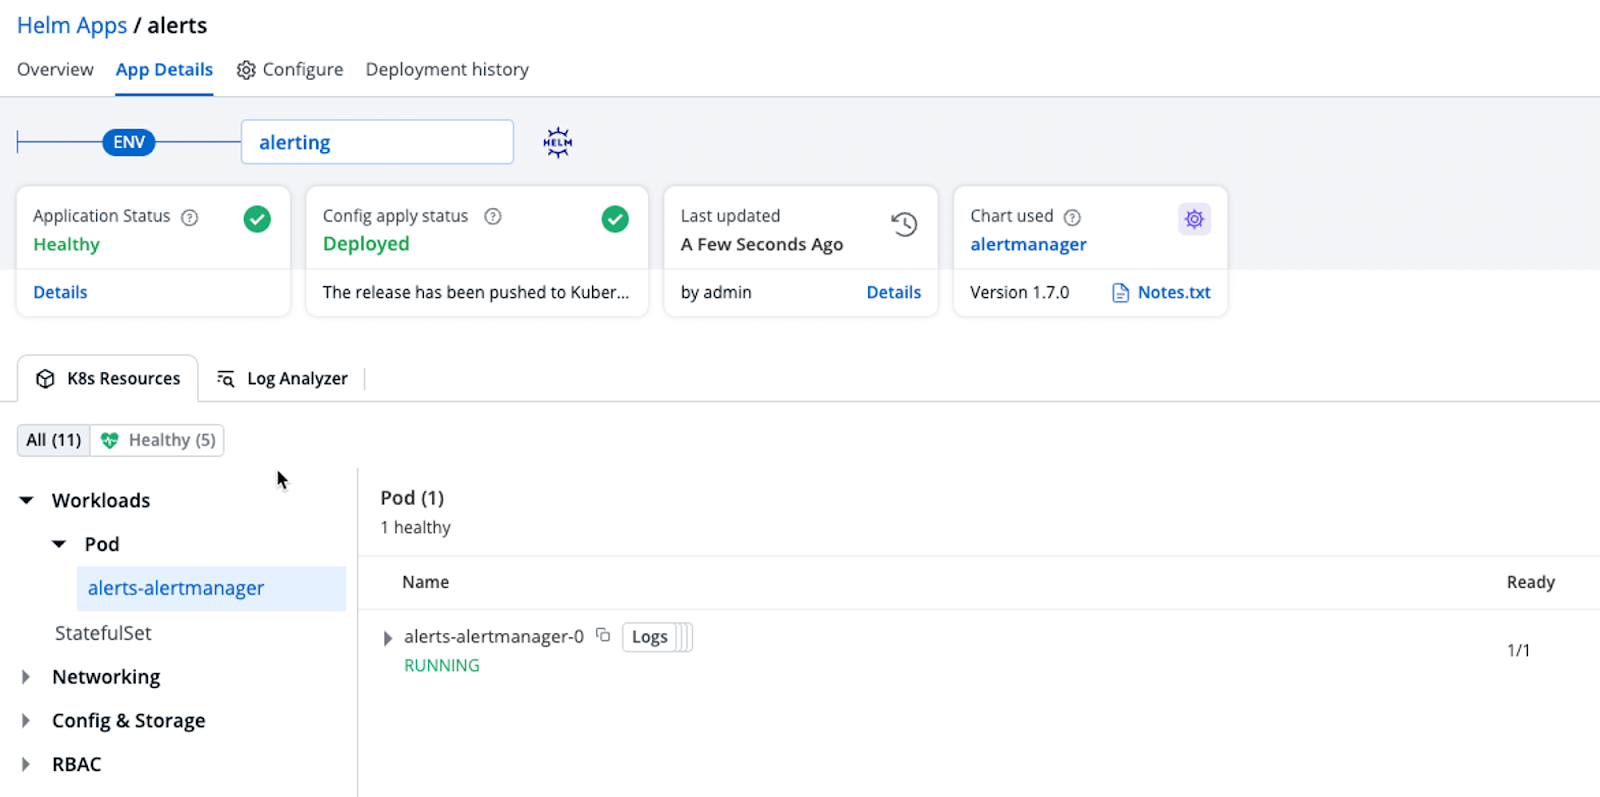
After a few minutes, you’ll see that the Helm Chart is deployed.
Wrapping Up
Devtron gives the ability to manage everything Kubernetes-related with a very intuitive GUI. Outside of just Kubernetes, you can manage any applications that need to be deployed, managed, and alerted on. Devtron doesn’t reinvent the wheel by creating new processes that you have to follow or tools that you have to learn. You continue doing the things you’ve been doing in your environment. The only difference is it’s under one roof.
For the engineers that are more CLI-centric, there’s a programmatic-based approach coming out soon.
If you have any queries, don't hesitate to connect with us. Join the lively discussions and shared knowledge in our vibrant Discord Community.