In the world of cloud-native and containerization, there are not only many levels of abstraction but so many ways to build out your cloud-native environments. Kubernetes is a go-to solution for orchestrating containers and scaling applications. But, before using Kubernetes, you must have a container image, and there are several ways to build a container image.
In this blog, we’ll talk about one of the most commonly used cloud-native tools used for building container images i.e., Buildpacks. It was initially launched by Pivotal and Heroku in January 2018 and later on donated to Cloud Native Computing Foundation (CNCF) on October 2018.
In this blog, we’ll learn about how easily one can migrate from a non-containerized environment to a container ecosystem by leveraging Devtron, a platform for managing lifecycle of your Kubernetes application. Devtron comes with an in built support of Buildpacks which can be used for containerizing applications.
What are Buildpacks?
Buildpacks or Cloud Native Buildpacks are pieces of software that analyze your source code and figure out the best way to build it into a container image. Buildpacks are essentially collections of two binaries. The combination of these two binaries helps to build the container image. These two buildpack binaries are:
- Detect - This binary looks at the application source code and figures out how to proceed with building a container. It looks at the language specs and detects that the application is written in a specific programming language. For e.g., If the buildpacks binary detects a
go.modfile then it will figure out that the underlying codebase is a Golang application. - Build - The Build binary builds the actual container image, and it is the one that makes your image runnable. During this stage, your code gets compiled, and you get a container image ready to be deployed. Buildpacks has standardized build instructions for a number of different programming languages.
Buildpacks embraces modern container standards, such as the OCI image format. They take advantage of the latest capabilities of these standards, such as cross-repository blob mounting and image layer "rebasing" on Docker API v2 registries.
Why do you need Buildpacks?
Across the industry, a Dockerfile is the most common and go-to approach for building container images. With a couple of commands, you can easily build Docker images and push them to the respective container registry.
Writing Dockerfiles is not very complicated, for simple applications thanks to wonderful documentation and a vibrant community. However, depending on application complexity, writing DockerFiles can become cumbersome, with a lot of scripts required at the time of container creation. Additionally, writing and managing Dockerfiles is still a manual job and it can become overwhelming when you have to manage thousands of microservices.

Cloud Native Buildpacks support almost all the popular languages and frameworks. It has become popular in the world of modern application development and deployment for several reasons:
- Portability: Buildpacks provide a consistent and standardized way to package and build application containers, regardless of the underlying infrastructure or platform. This portability ensures that container images built with Buildpacks can be easily deployed across different cloud providers or on-premises environments without major modifications.
- Ease of Use: Buildpacks abstract out the complexity of setting up and managing build environments. Developers don't need to worry about configuring specific build tools, dependencies, or runtime environments. Buildpacks automatically analyze the application's code and determine the necessary components, streamlining the build process.
- Scalability: Buildpacks can help you create lightweight and optimized container images. This leads to faster startup times, smaller image sizes, and efficient resource utilization, all of which are crucial for scalable and responsive applications.
- Language Agnostic: Irrespective of any programming language you are using, Buildpacks can easily analyze the source code and build an OCI-compliant container image for your application.
- Vibrant Community: Cloud Native Buildpacks is an open-source and CNCF incubating project. This ensures ongoing development, improvements, and support from a wide range of contributors.
- Continuous Integration/Continuous Deployment (CI/CD): Cloud Native Buildpacks fit well into modern CI/CD pipelines. They allow for automated and consistent building and packaging of applications as part of the deployment process, promoting efficient development workflows.
Buildpacks Integration with Devtron
Kubernetes itself is a complex piece of software to handle and work around. When using vanilla Kubernetes,for managing your application deployments, it becomes complex to manage the applications as Kubernetes has multiple different objects such as PersistentVolumes, ConfigMaps, Services, RBAC, ServiceAccount, and much more.
Getting into Kubernetes and the container ecosystem is still a dream of many organizations. For migrating into Kubernetes and scaling workloads, Devtron provides a one-stop solution. It is on a mission to democratize Kubernetes adoption by abstracting out all its complexities and providing a user-intuitive interface for creating Kubernetes-native CI/CD pipelines to build and deploy your applications onto Kubernetes. It uses some of the most trusted and community-adopted cloud-native tools such as ArgoCD, Grafana, Trivy, Helm, Casbin, NATS, Dex, Buildpacks and much more to provide the easiest path for migrating into Kubernetes and container ecosystem.
Devtron has integrated Cloud Native Buildpacks into it's workflow which provides a significant stride towards democratizing the adoption of Kubernetes. After combining Devtron’s intuitive dashboard and the streamlined container creation facilitated by Buildpacks, it becomes much easier for organizations considering migrating or scaling with Kubernetes, as buildpacks abstracts out all the complexities with building container images for the applications.
Let’s dive into hands-on and see how easily you can deploy an application on Kubernetes without writing any Dockerfile.
Deploy to Kubernetes with Buildpacks
Follow along to create Kubernetes-native CI/CD pipelines using Devtron and deploy to Kubernetes without Dockerfile, leveraging cloud-native buildpacks.
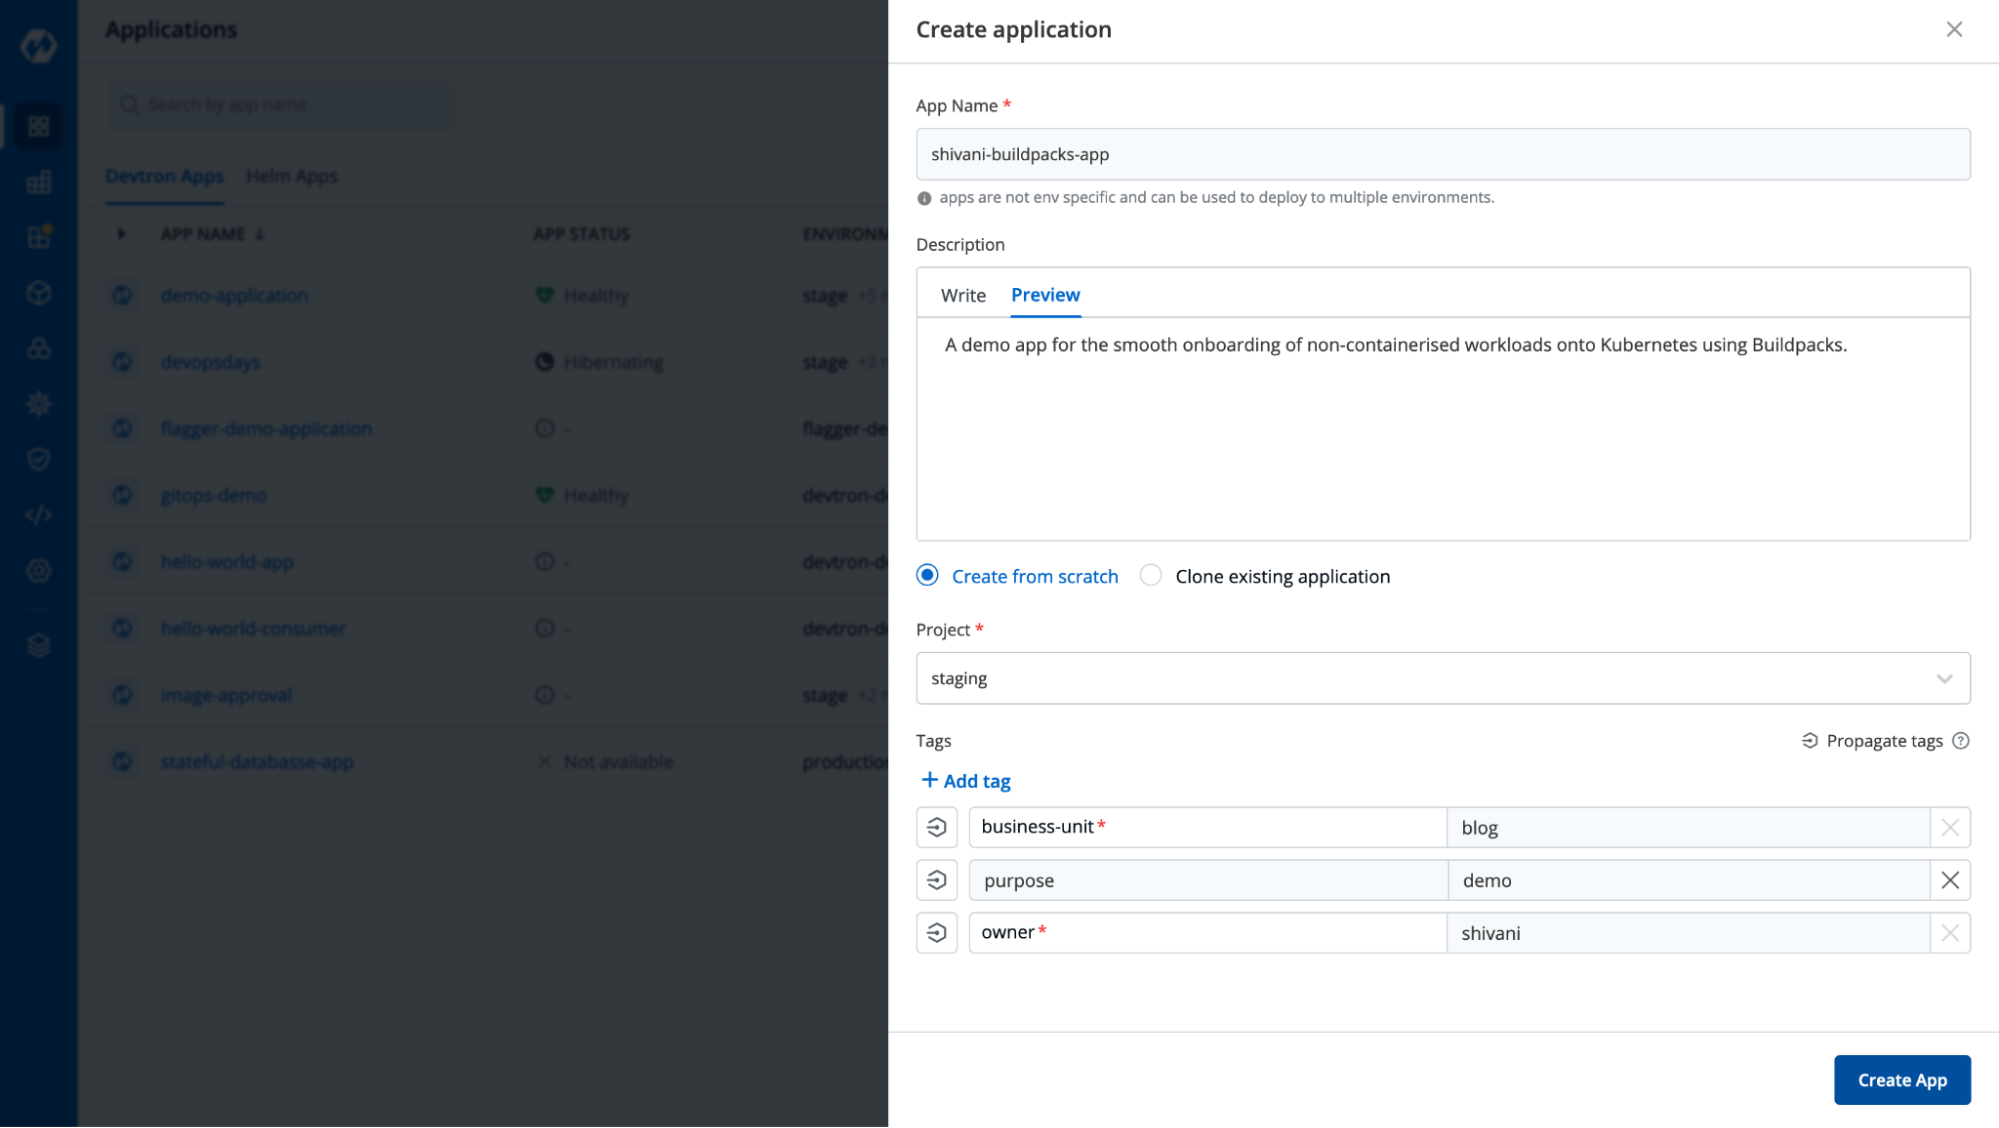
Step-1: Create an Application
On the home page, click on Create in the top right corner and then create a custom application.
Step-2: Adding your Git Repo
Now, you need to give Git Repo URL i.e, repository for the source code. This will be pulled during the build time. I’m using GitHub public here, but you can use any Git-hosted registry including GitLab, Bitbucket, etc.
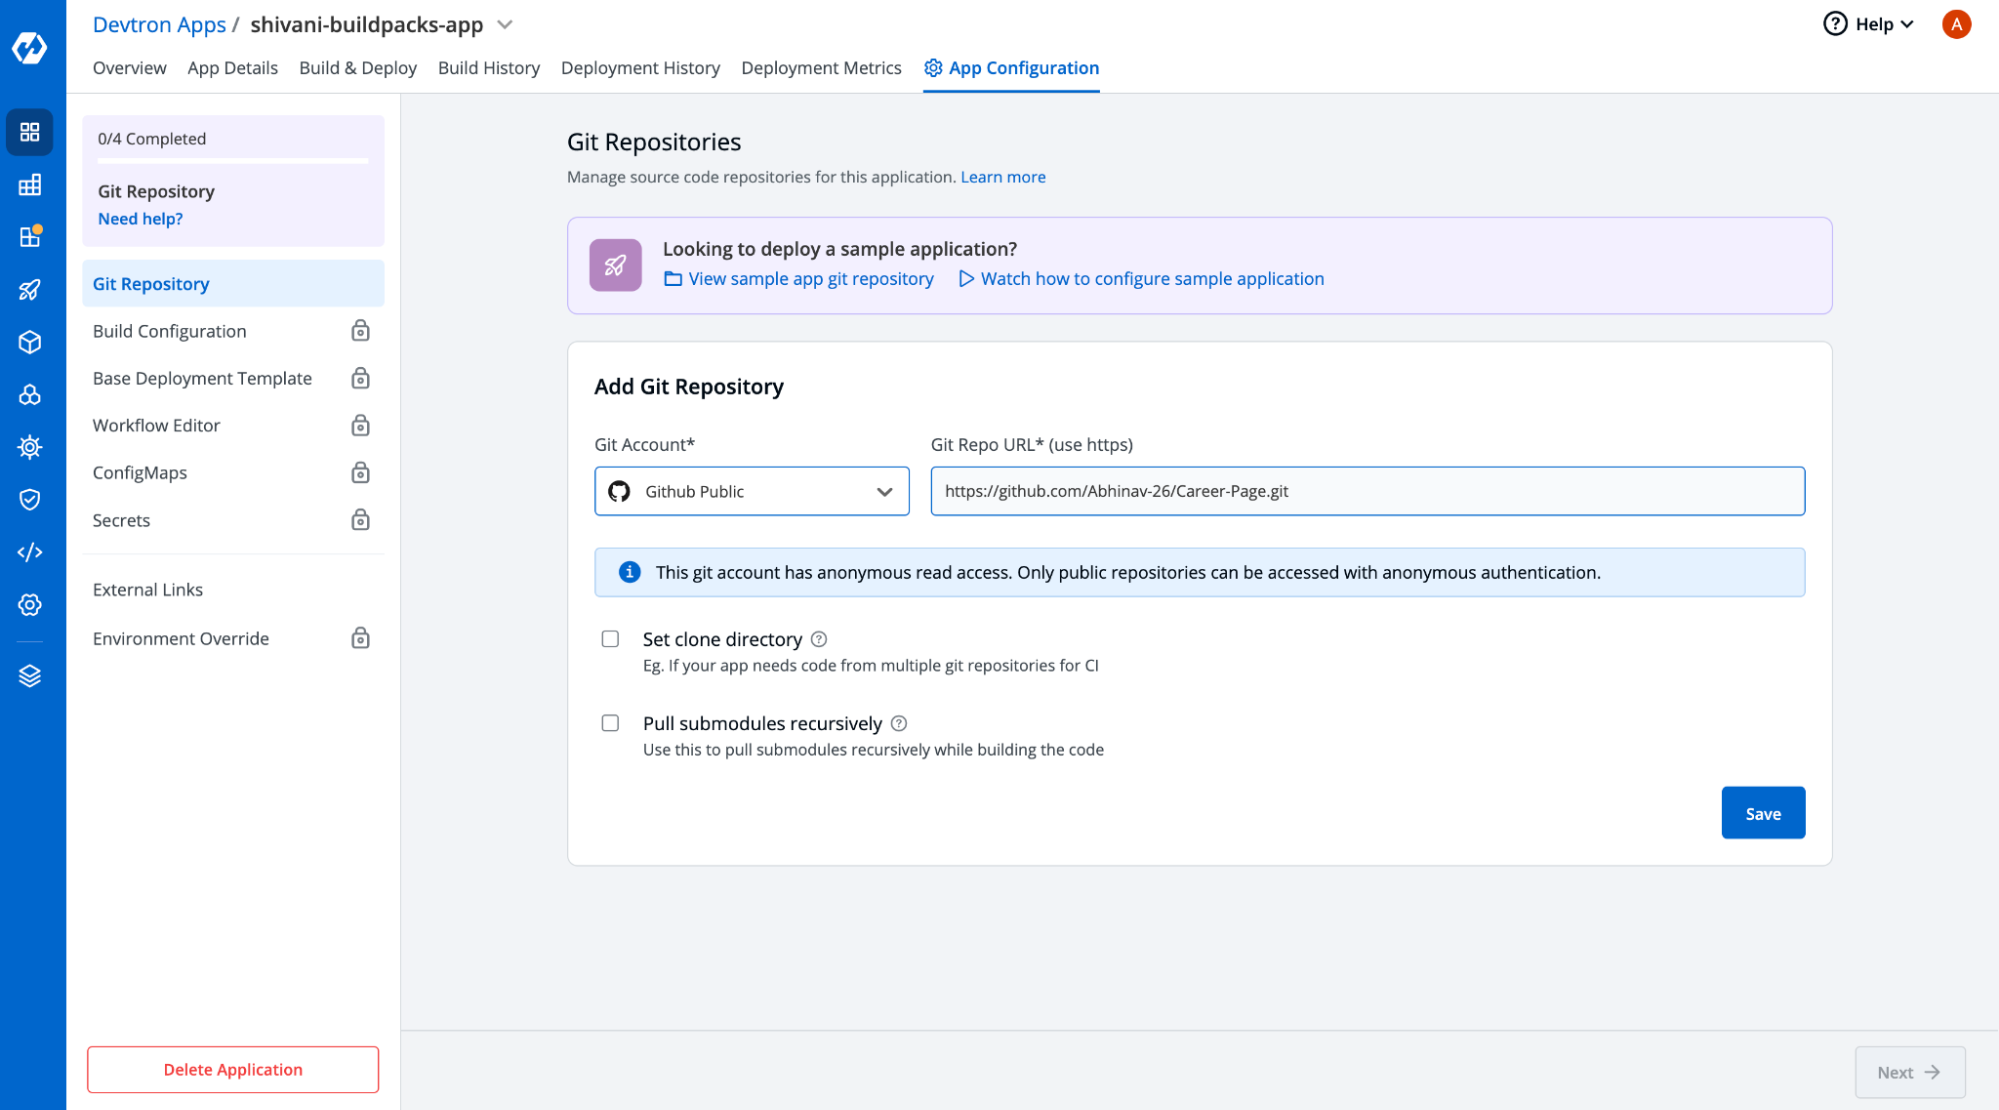
Save this and move to the next page which is Build Configuration.
Step-3: Setting your Build Configuration
Devtron supports three types of build methods, which are listed below:
- Dockerfile - In this method, you have your Dockerfile within the git repo itself and you take that Dockerfile to build the image.
- Create Dockerfile - This is helpful when you don’t have Dockerfile in your git repo. In this case, you can write your Dockerfile right in the browser and use the same. It comes with templates so you only need to change the arguments and values.
- Buildpacks - This is the latest addition and with this feature, you don’t require Dockerfile. You can build your container image hassle-free with Buildpacks.
Now comes the most important step, where you will select your buildpacks related configurations.
As mentioned earlier, cloud-native Buildpacks support a variety of languages and frameworks, you can use any application that’s written in your language of choice and build your image.
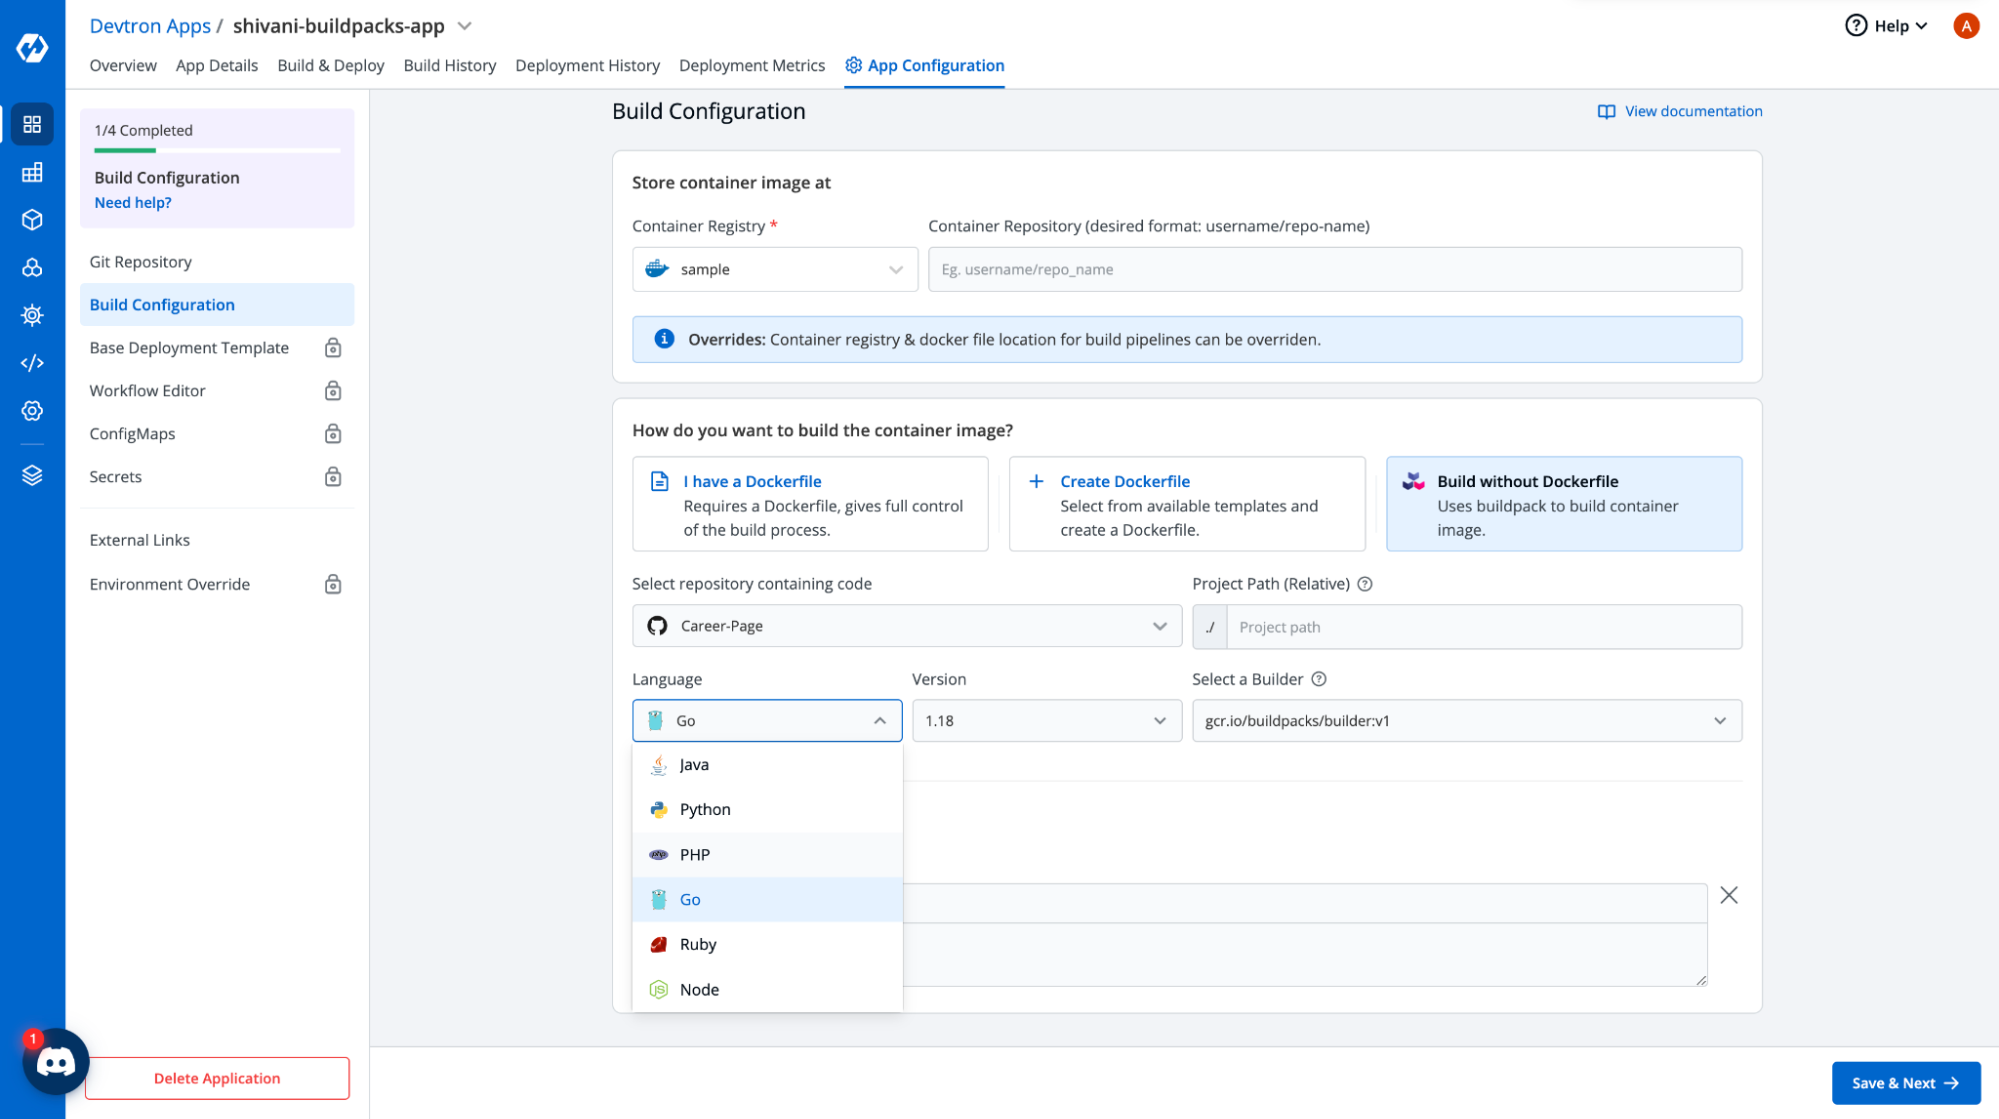
You can choose any of the builders from the options. It's expected not all the builders would be able to build all types of applications, so you can select builders suitable for your source code. For instance, golang application can be built by using gcr.io/buildpacks/builder:v1.

Save this and move to the next page which is the deployment template.
Step-4: Kubernetes Configurations
Choose the base deployment template. If you are not sure about how you can use your base deployment template, then read more about it here.
It will be the default configuration for now, but you can customize it according to your needs.
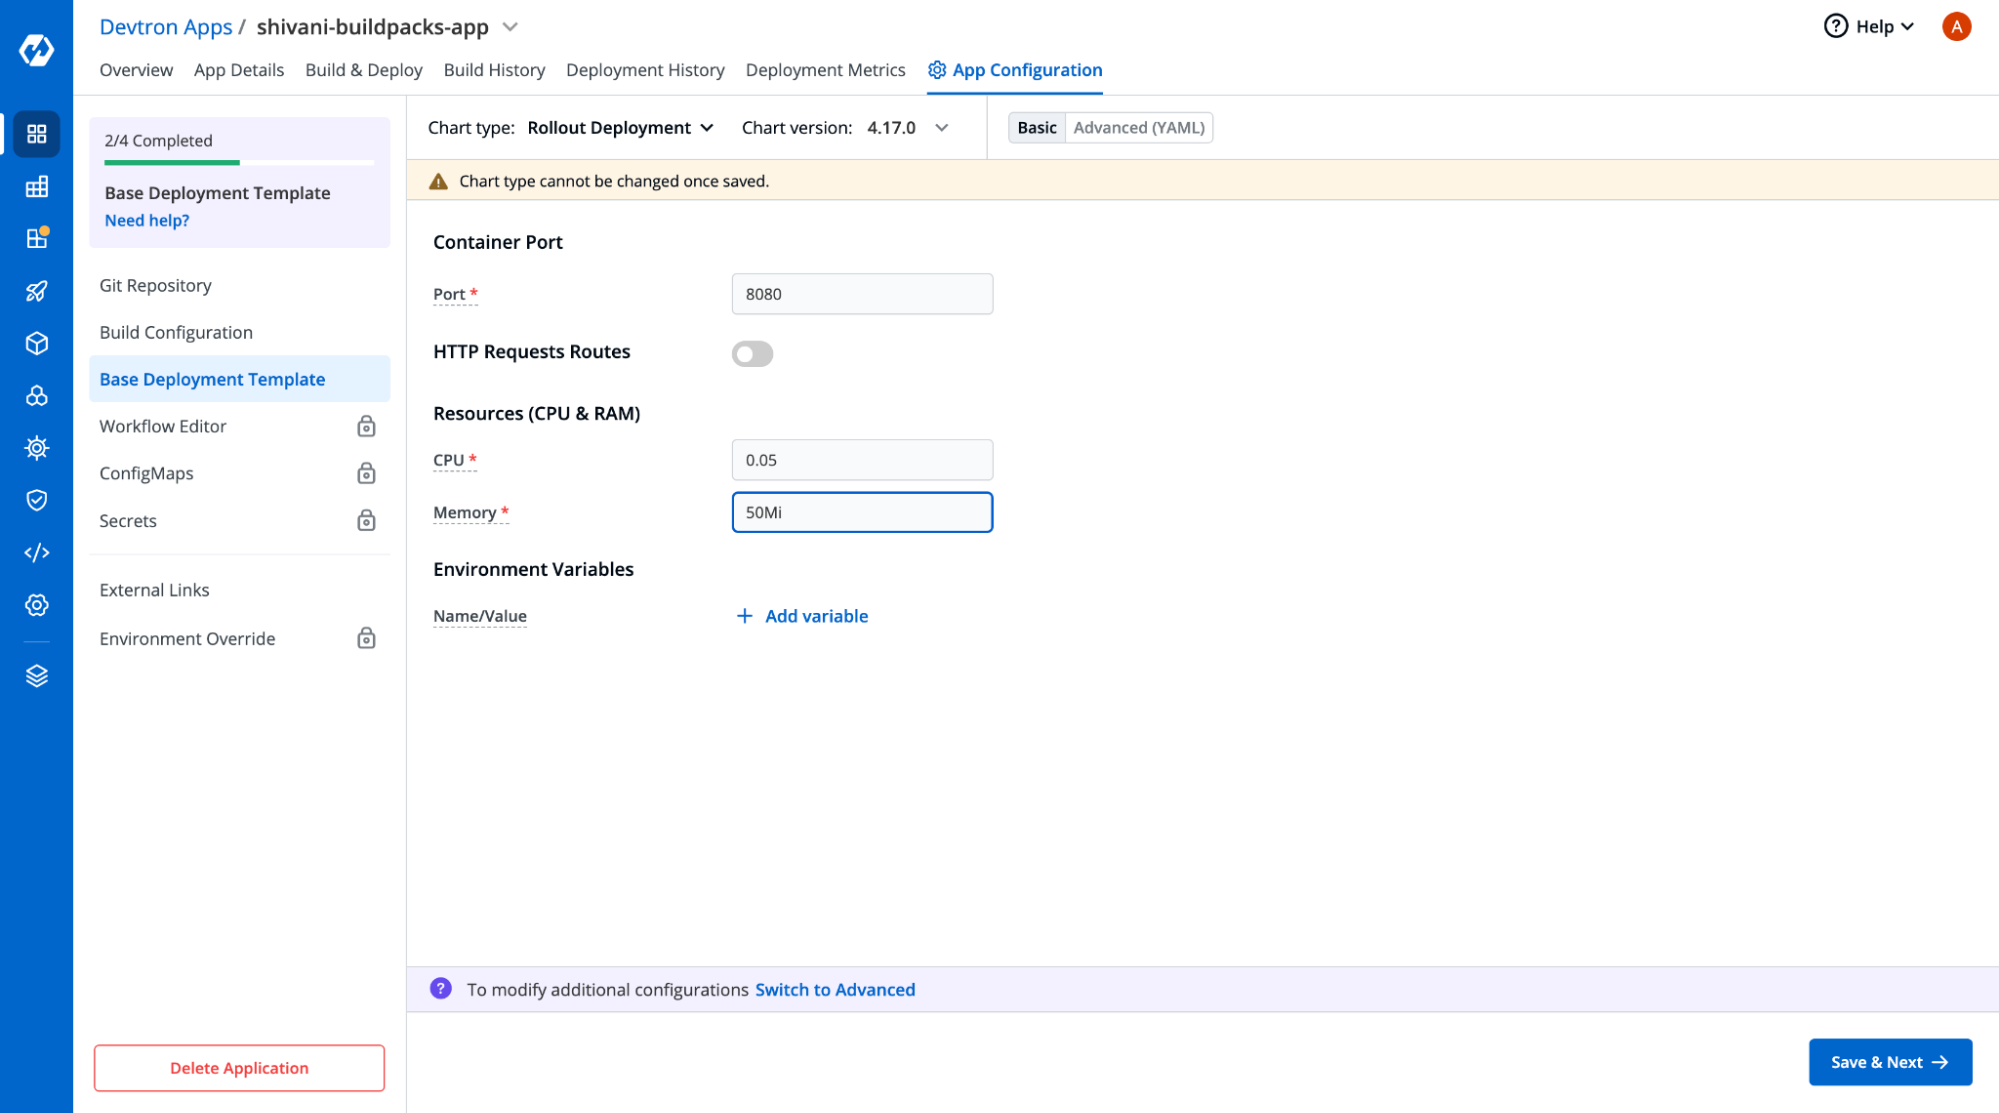
Save this and move next.
Note: If you need even more configuration, you can click on the Advanced YAML and then edit the fields as needed.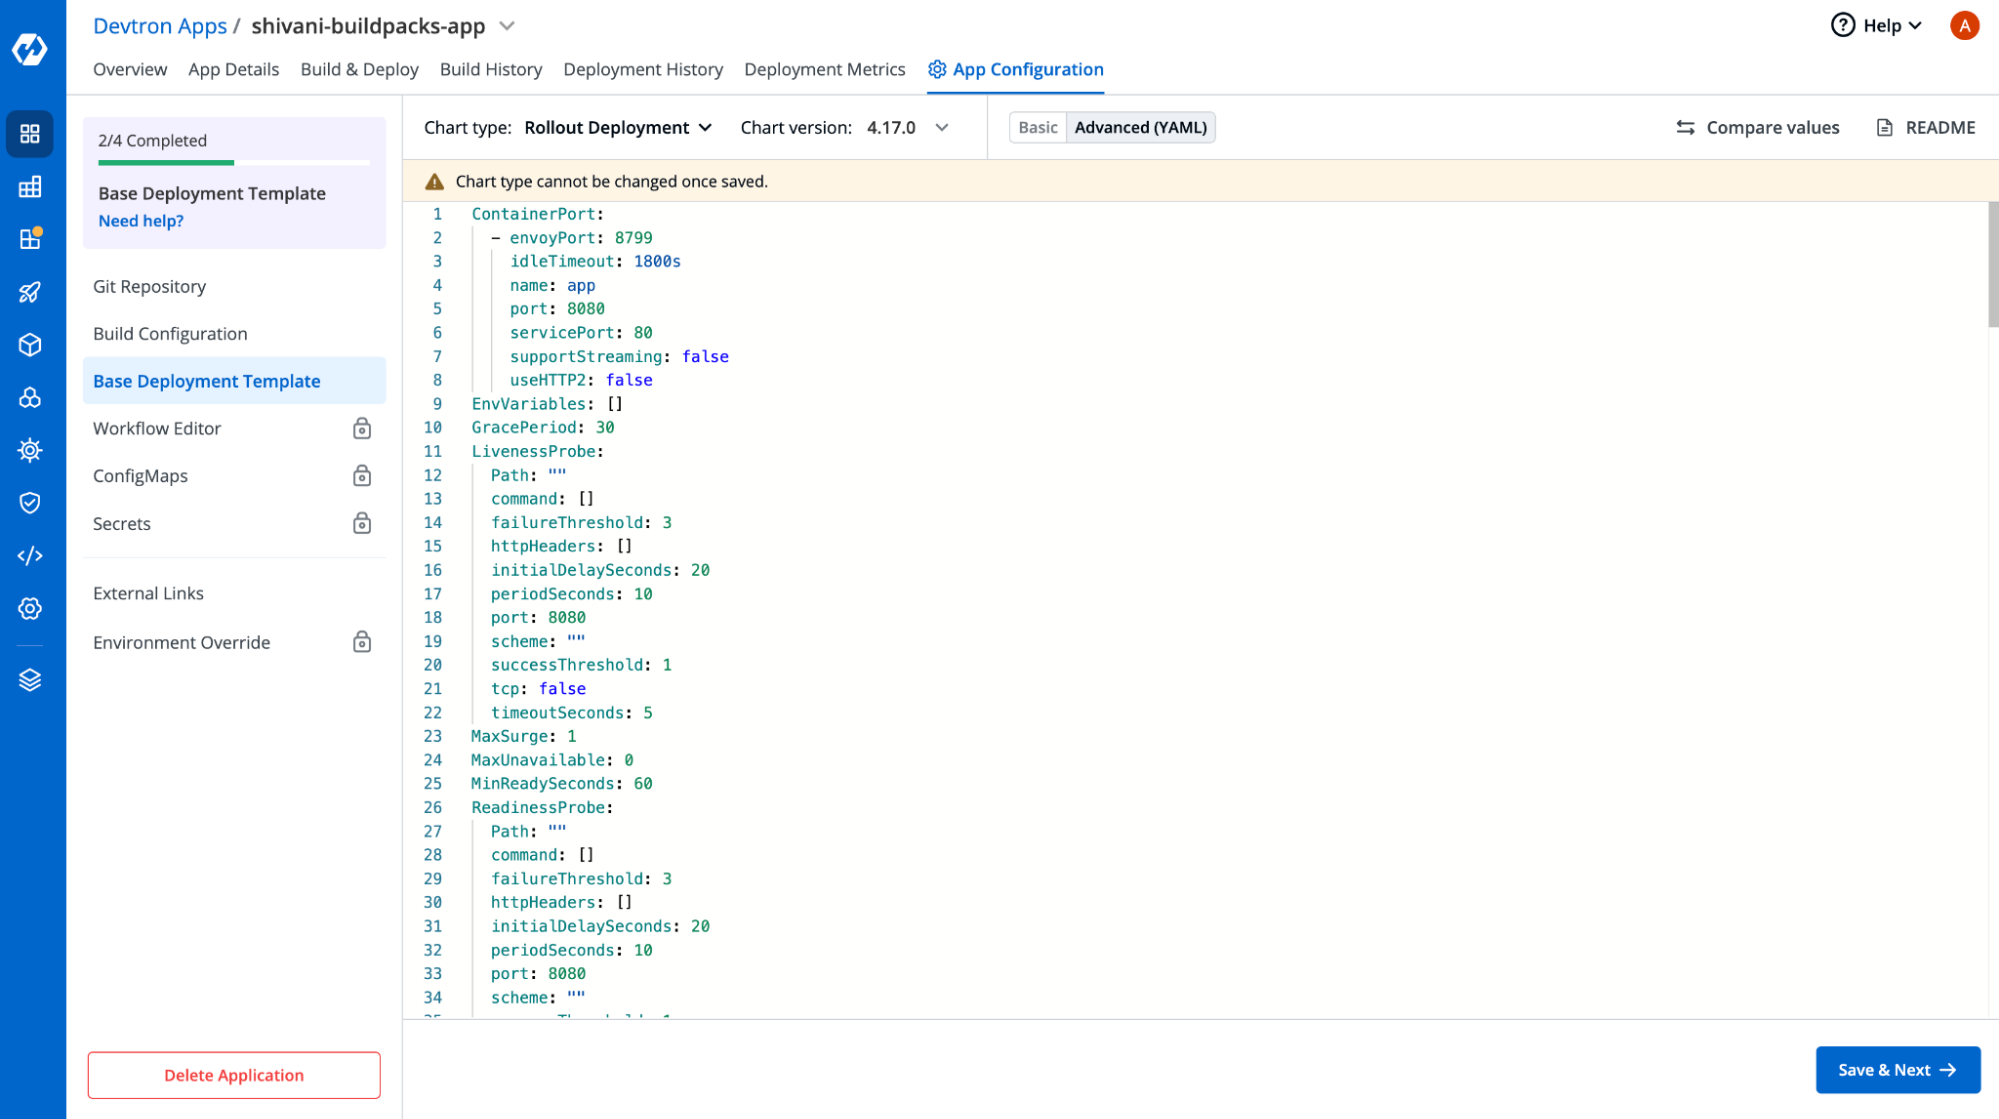
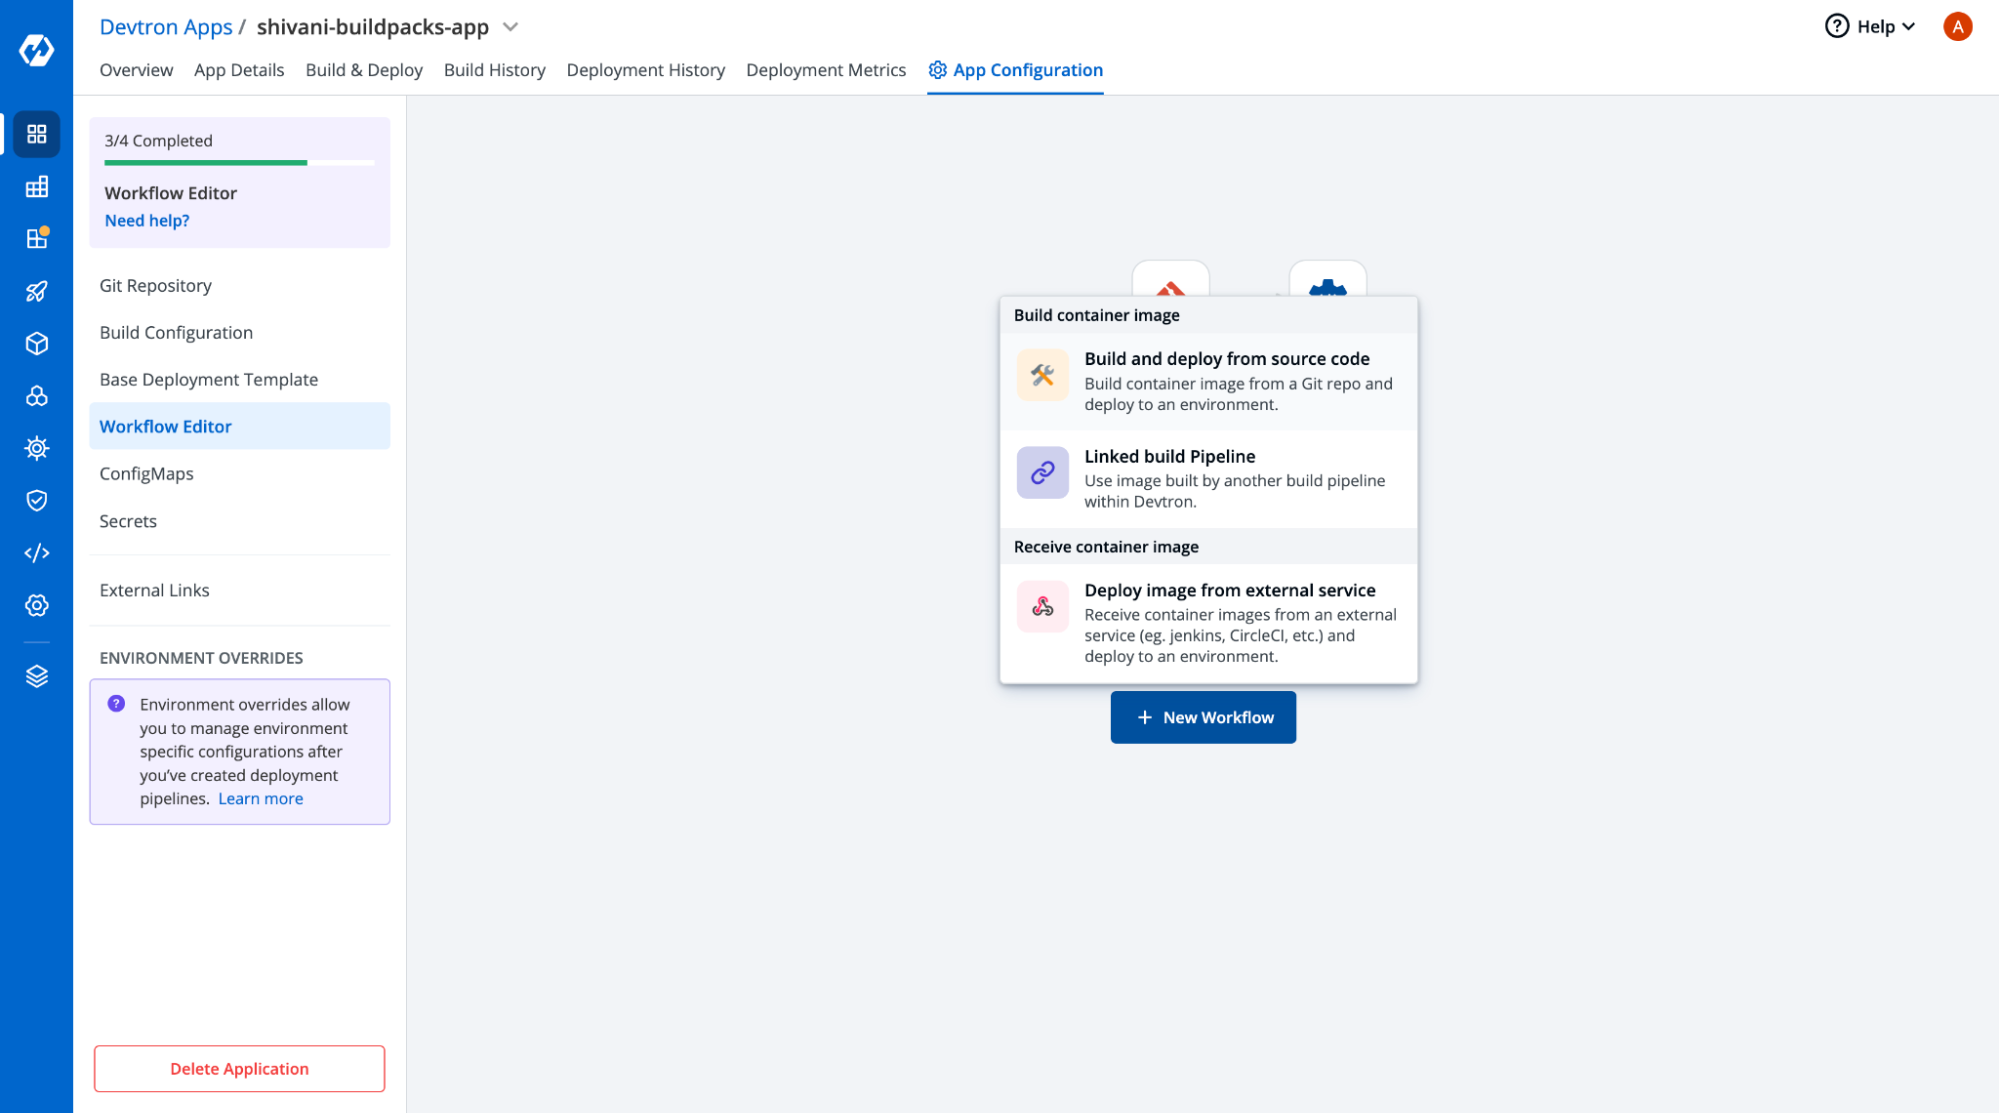
Step-5: Creating CI/CD workflows
Now comes the part of creating the workflows. Let’s create a complete CI/CD workflow and see how easy it is to create one.
Click on the build and deploy from the source code which will help you build your applications and deploy them from Devtron.
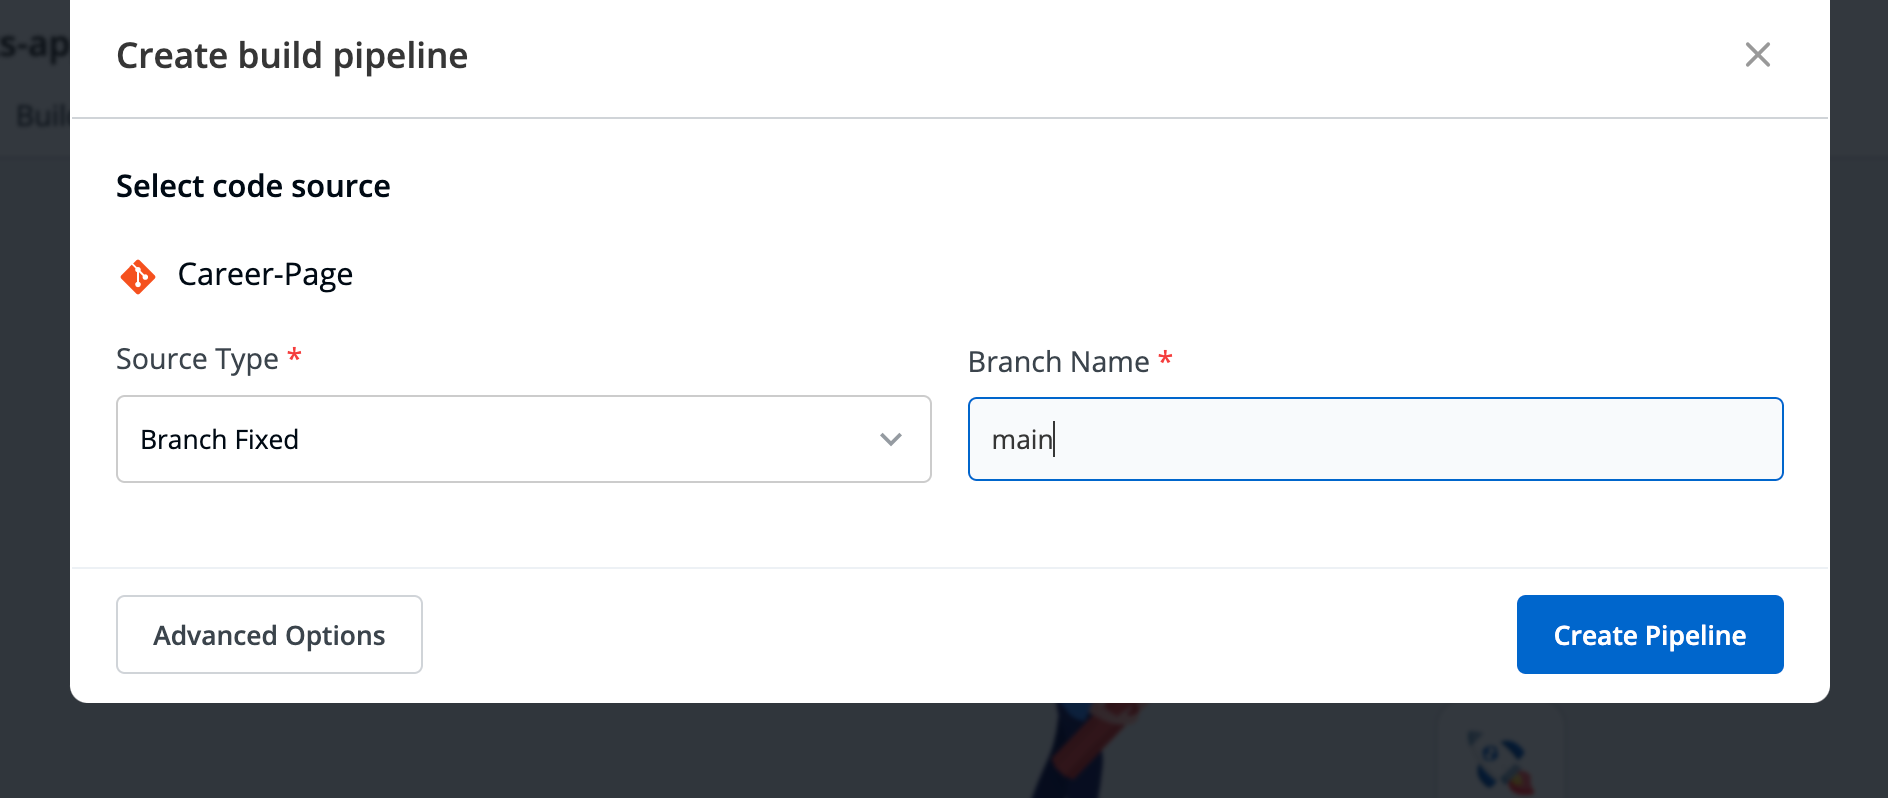
In the build pipeline, select your branch type (for now devtron support branch fixed, Regex, and two webhook named Tag creation & Pull Request) configure the branch name respectively and click on Create Pipeline.
If you want to set up the advanced configuration then can Click on Advanced Option and can override any of the parameters. E.g., You can set up pre-build stages and post-build stages in your build pipeline.
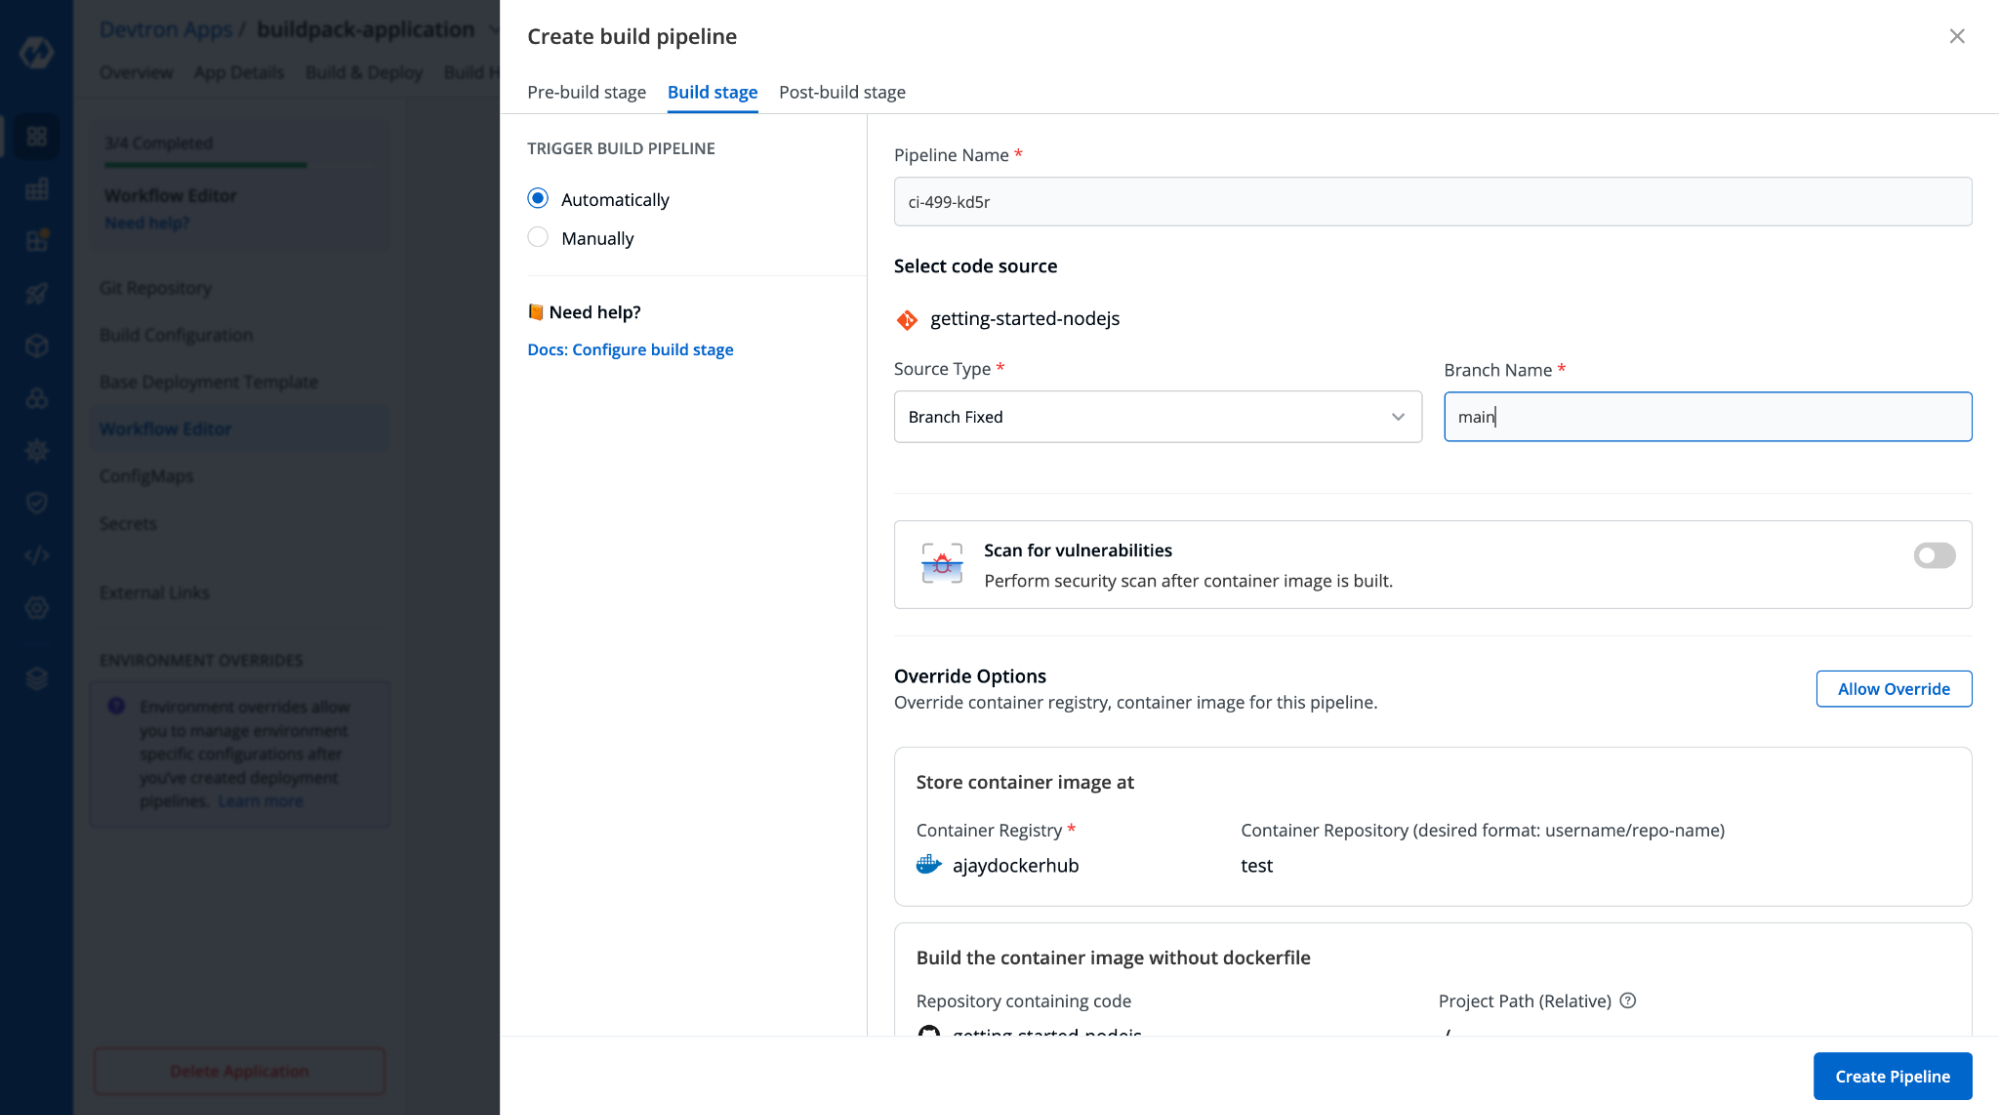
Here’s what the complete build stage looks like. If you want your container image to be scanned, then you can toggle on the Scan for vulnerabilities.
Note: At this stage, one can override the configuration for different workflows by clicking Allow override.
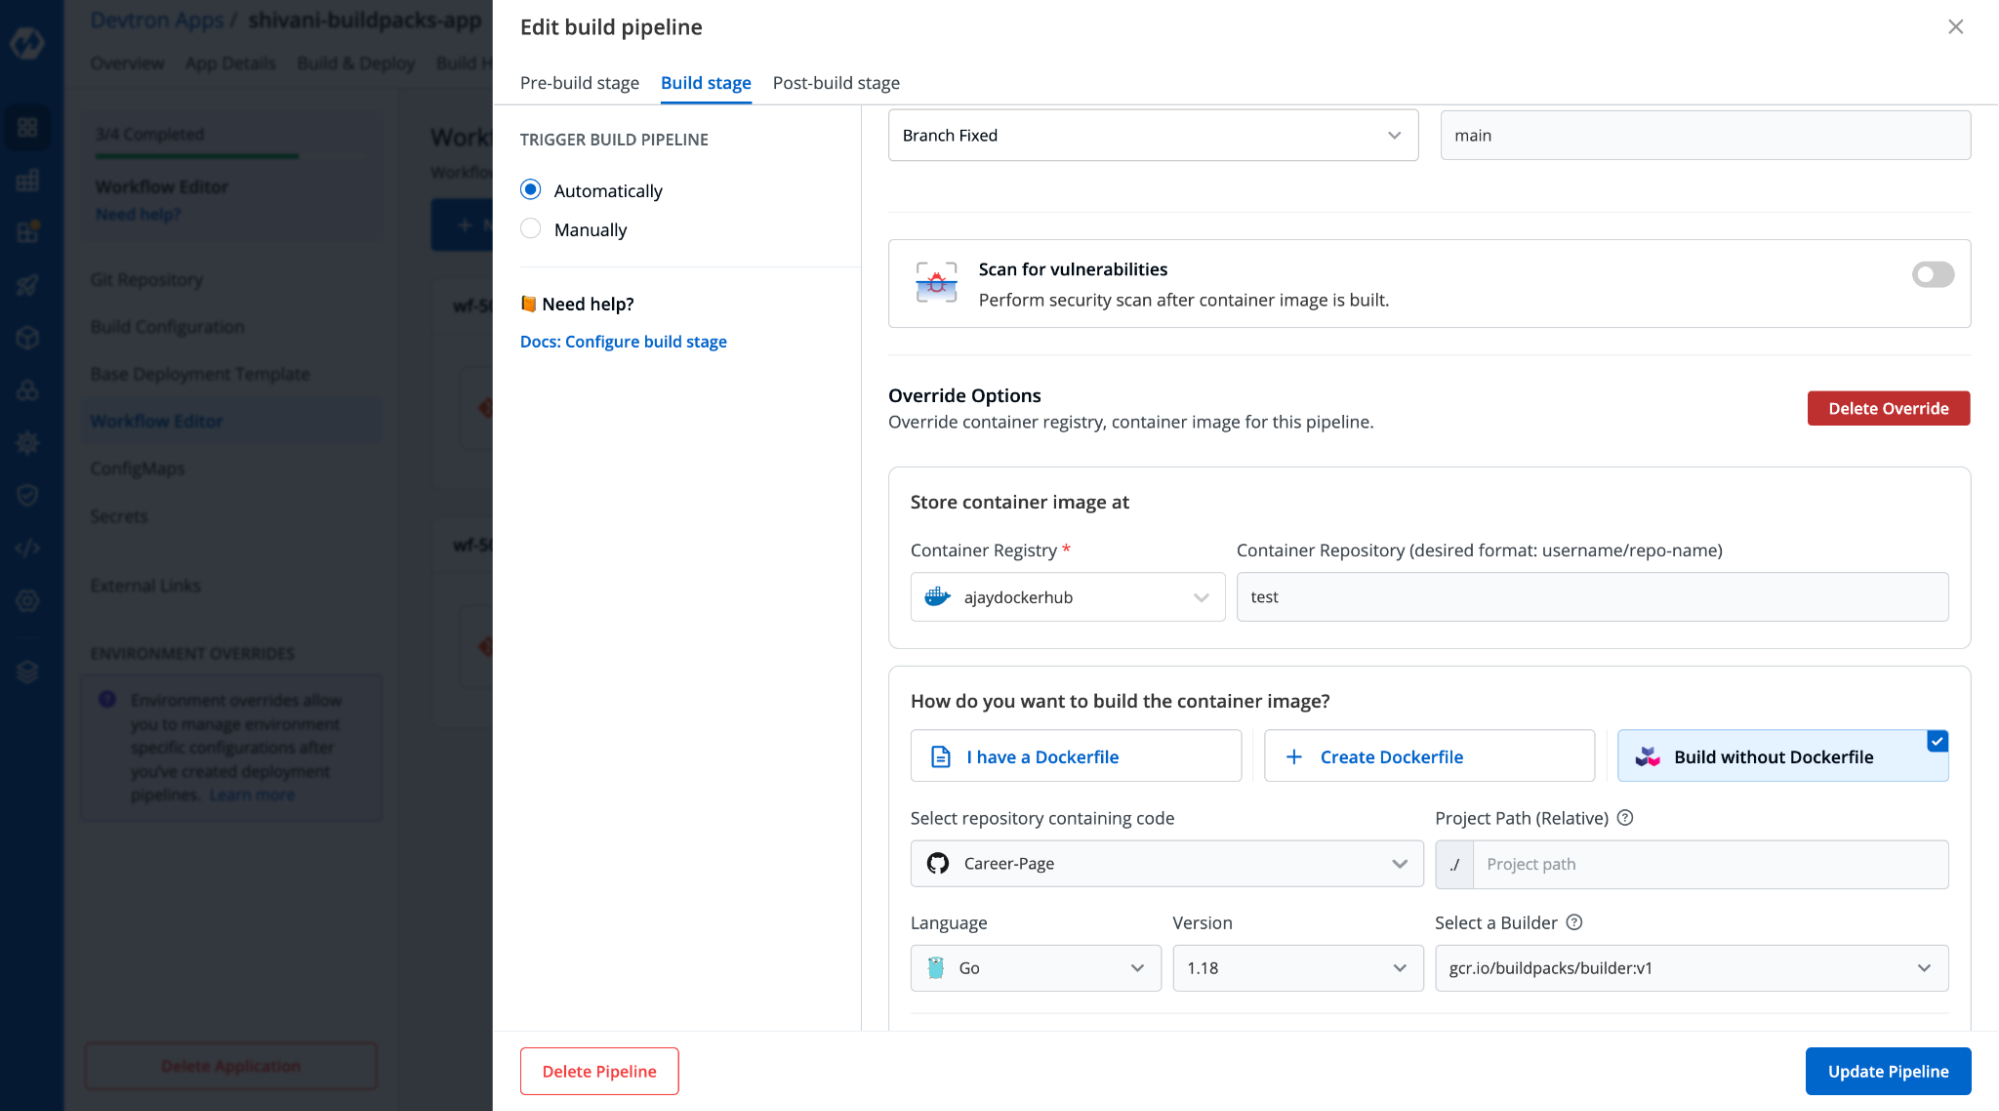
Now click on Create or Update pipeline and your will pipeline will be created. The pipeline will look like the below image.
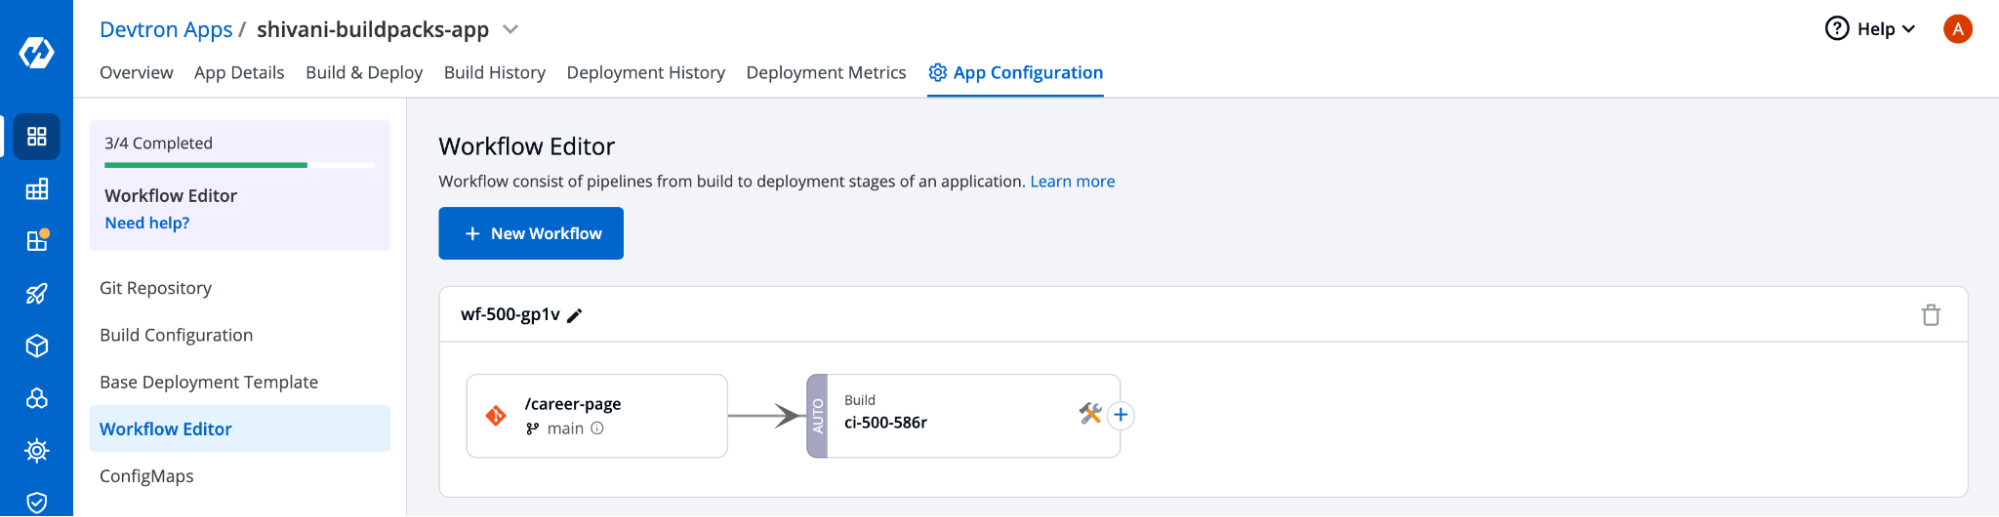
In the next step, let’s create a CD pipeline that will deploy the built image to the cluster. We're choosing a rolling deployment strategy here, but you can select others as well.
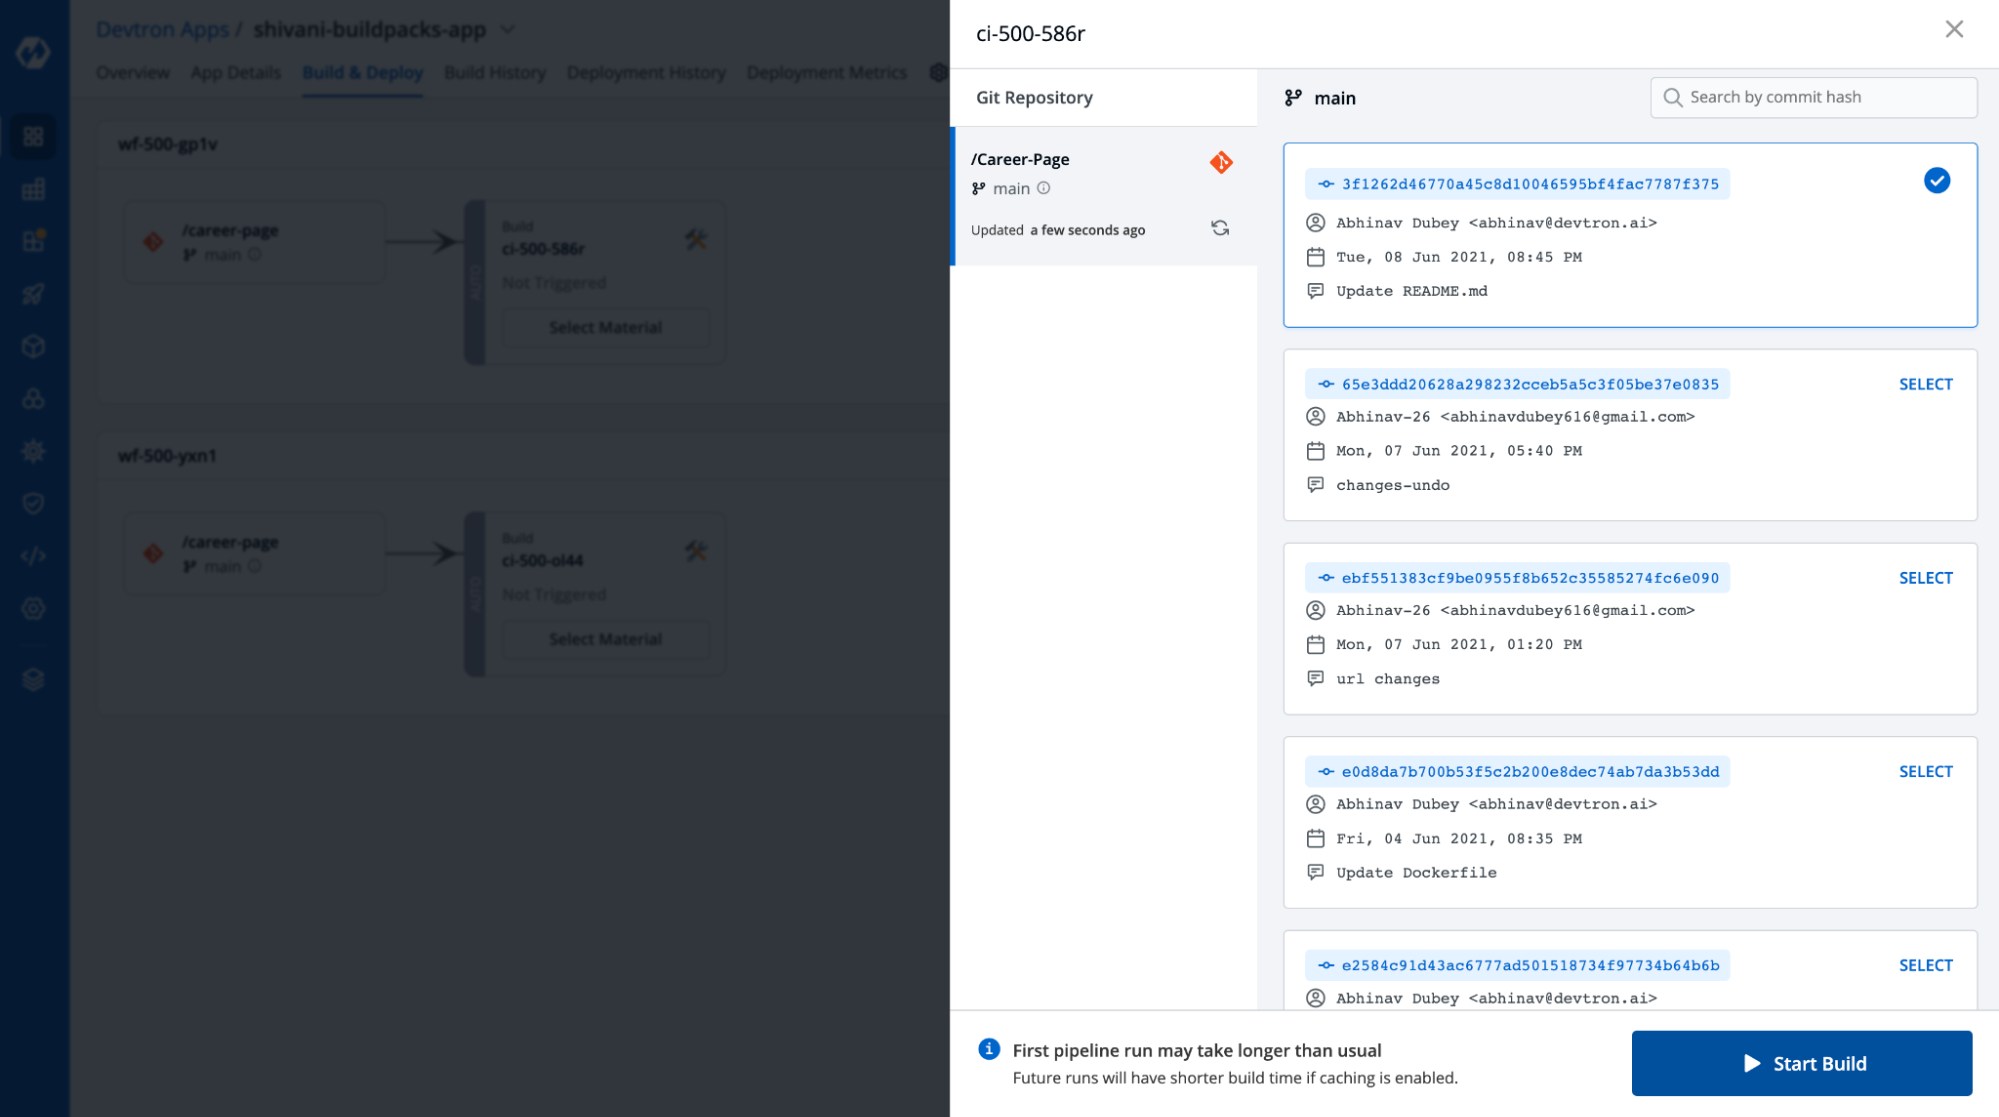
Step-6: Triggering CI & CD workflows
To trigger that pipeline, move to the Build & Deploy section and select the commit.
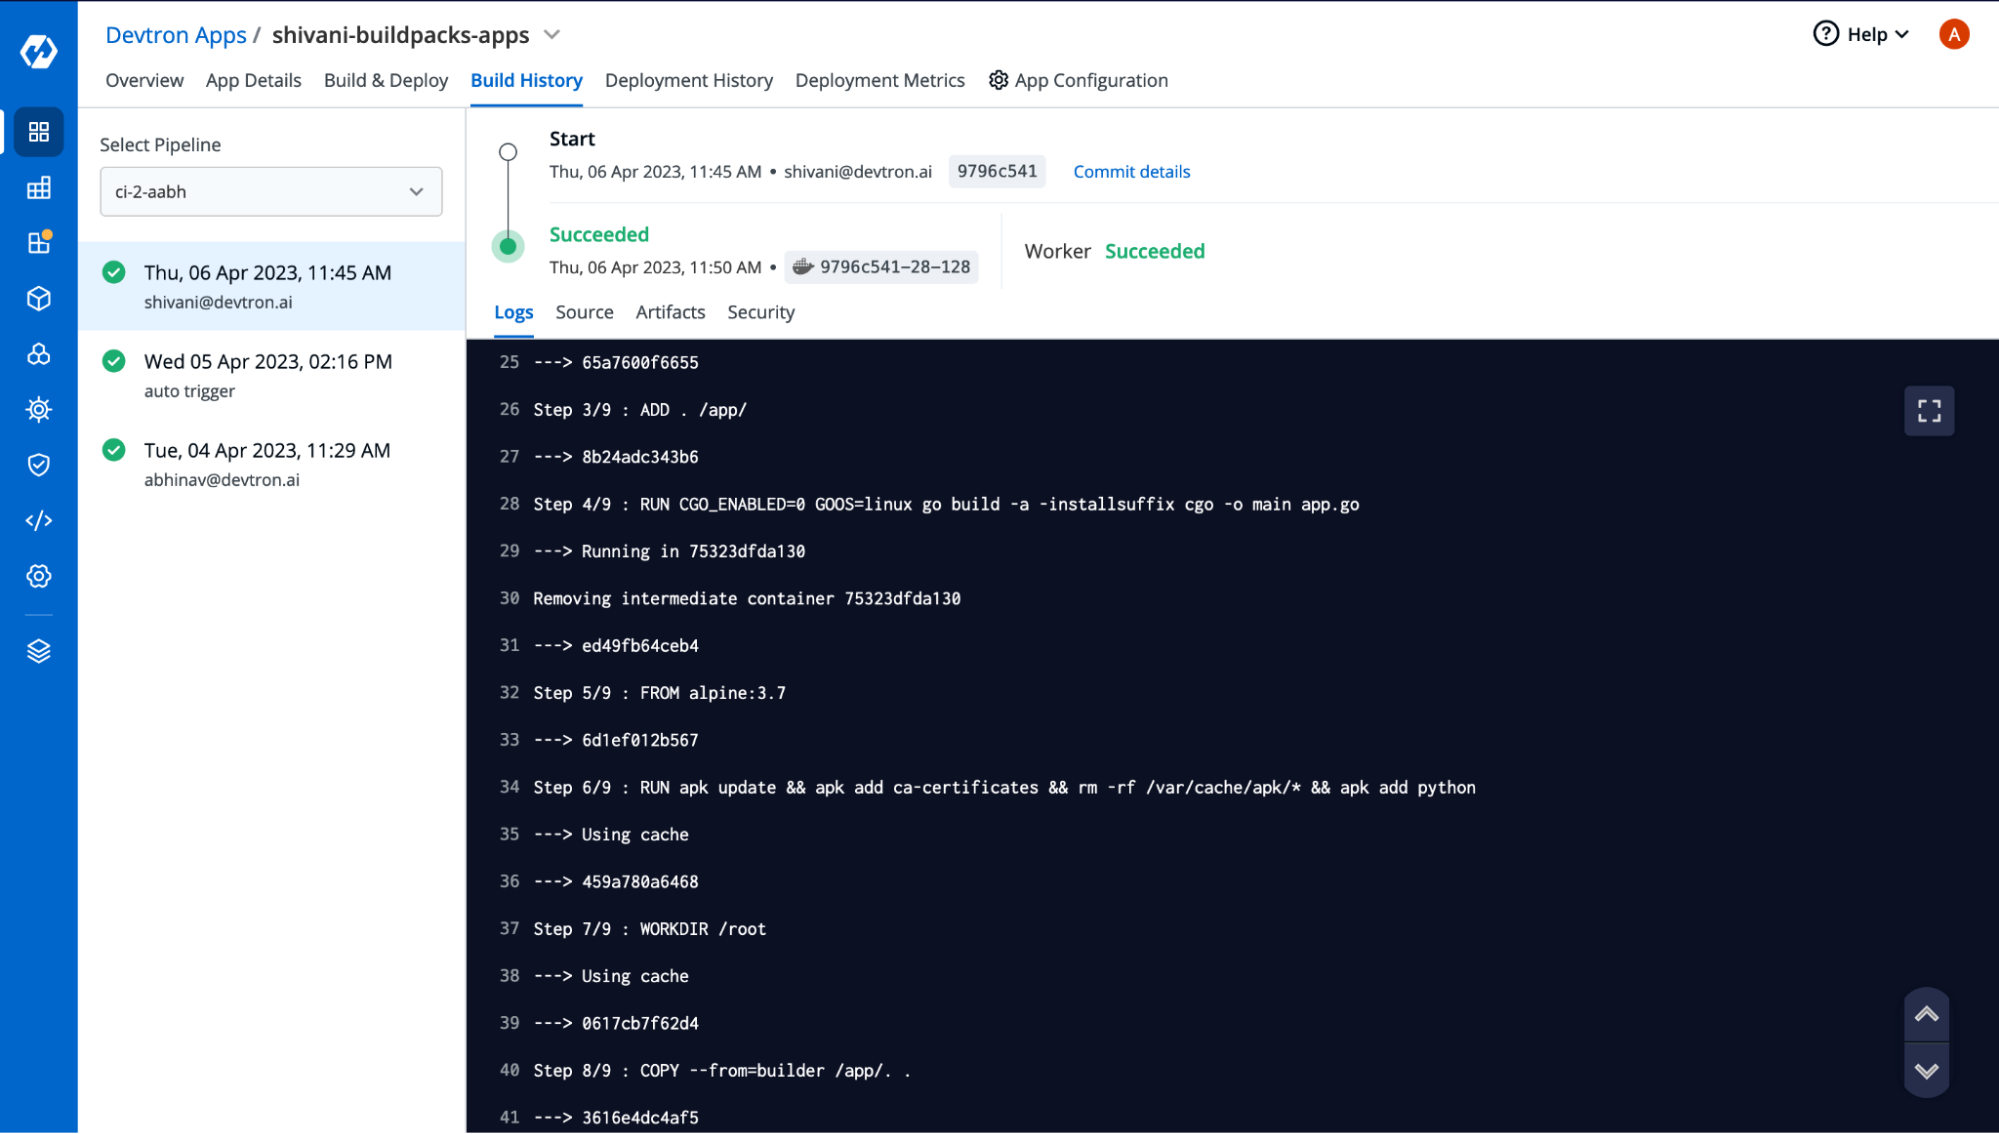
You will see that CI is running in the Build History Tab, and you’ll be able to see the logs. Through the logs, you can see all the steps that the buildpacks are using for creating the container image.
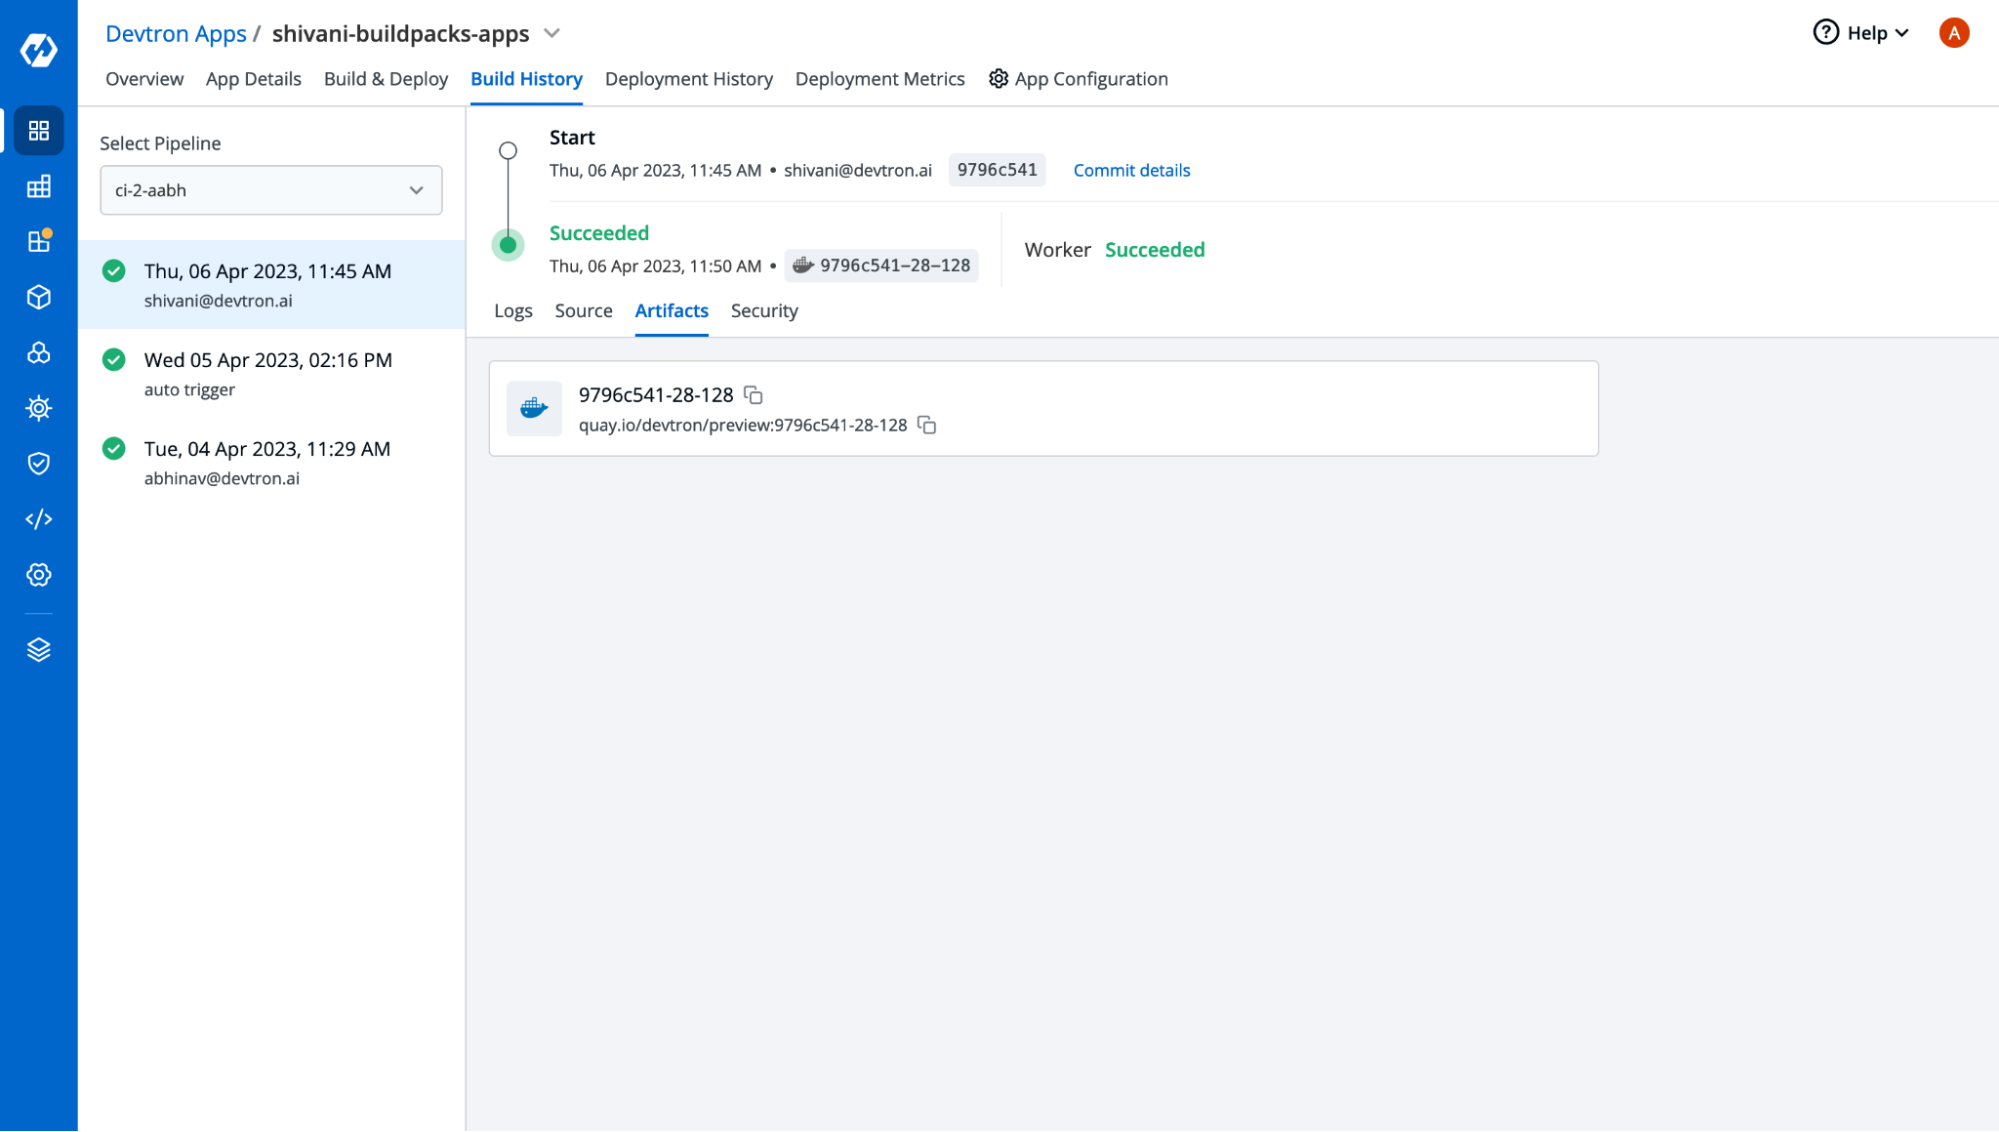
Once the CI is complete, you can check your artifacts, and source code against which image was built as well as scan reports if it was enabled on the same page.
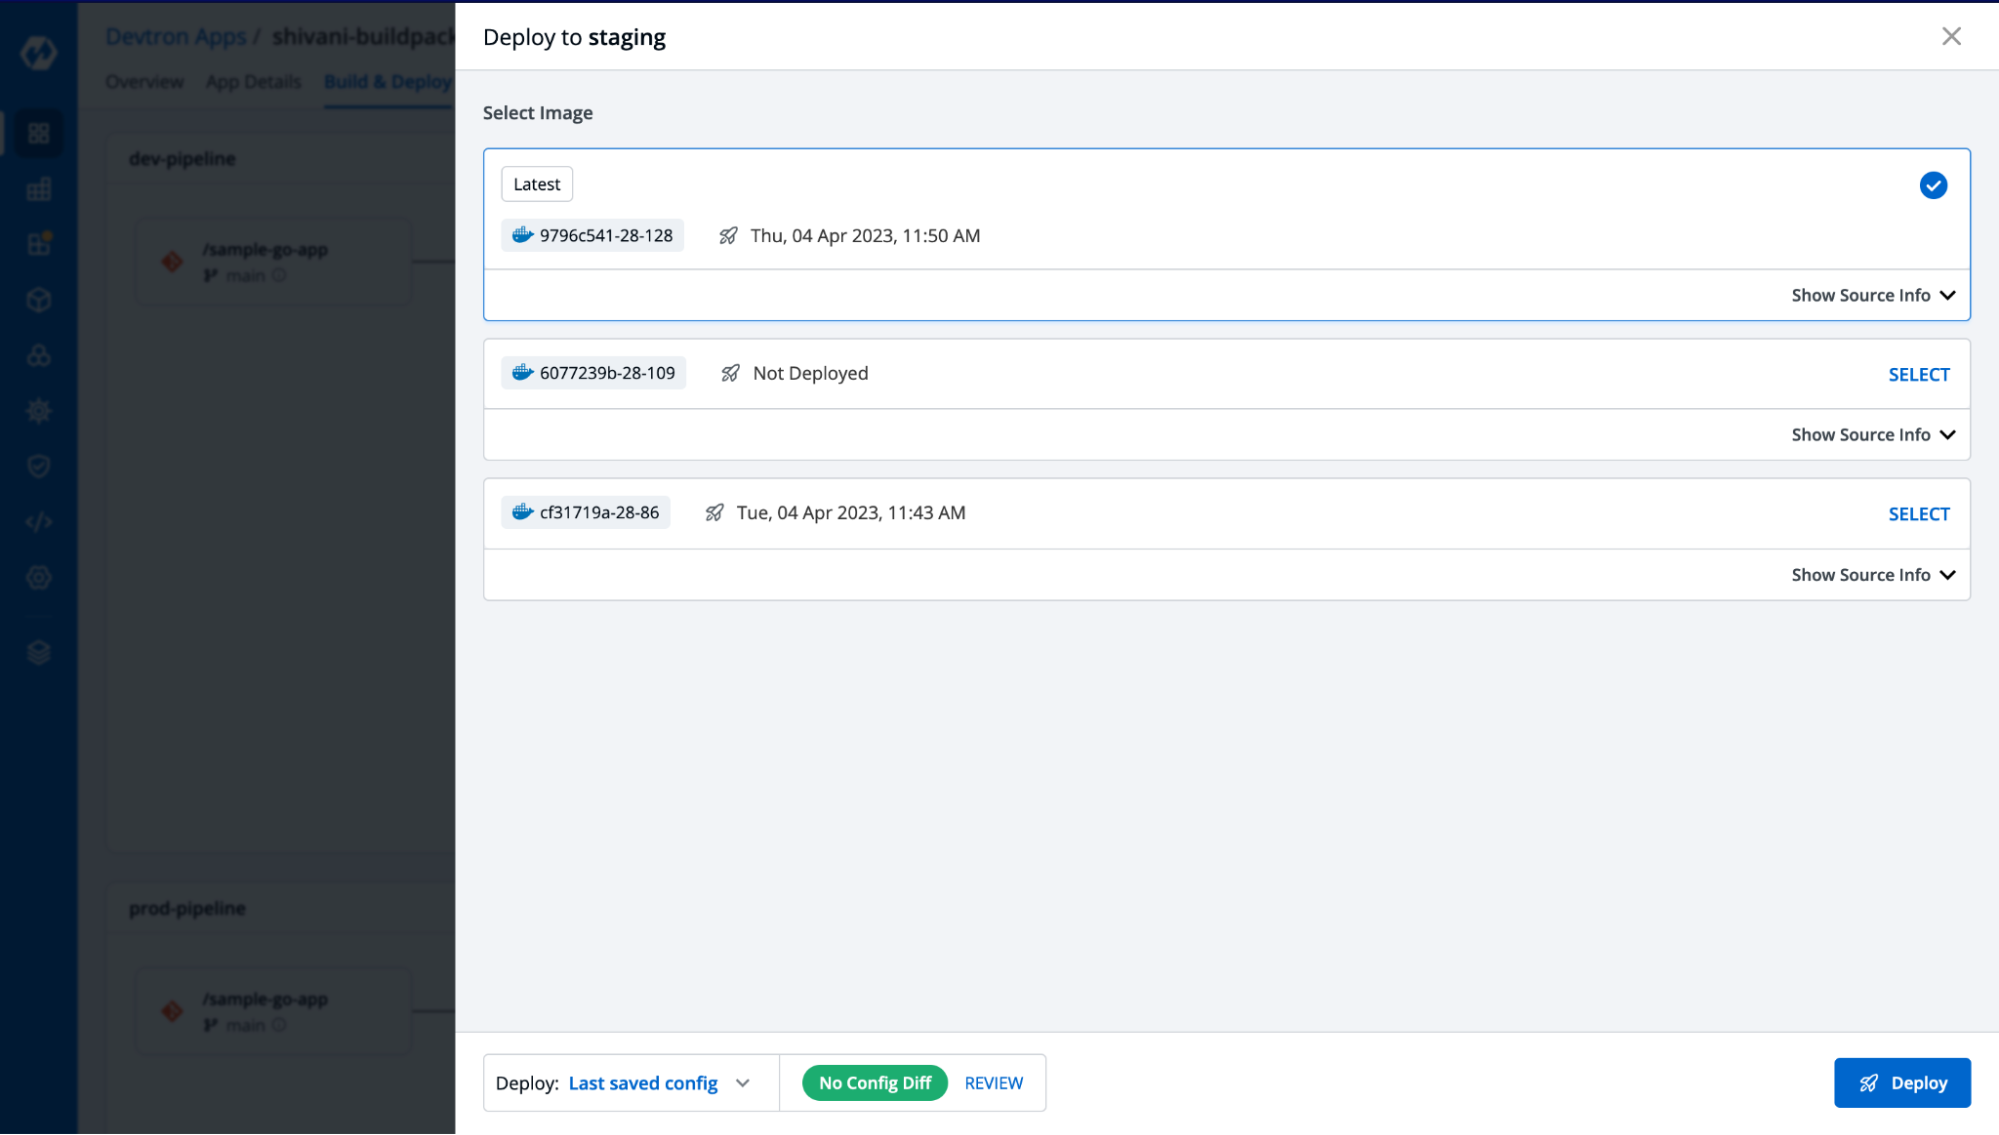
After our image build is completed using Buildpacks, we can use the same image to deploy it in the cluster.
For that, go to the Build & Deploy section and there you’ll be able to select the image that you just built.
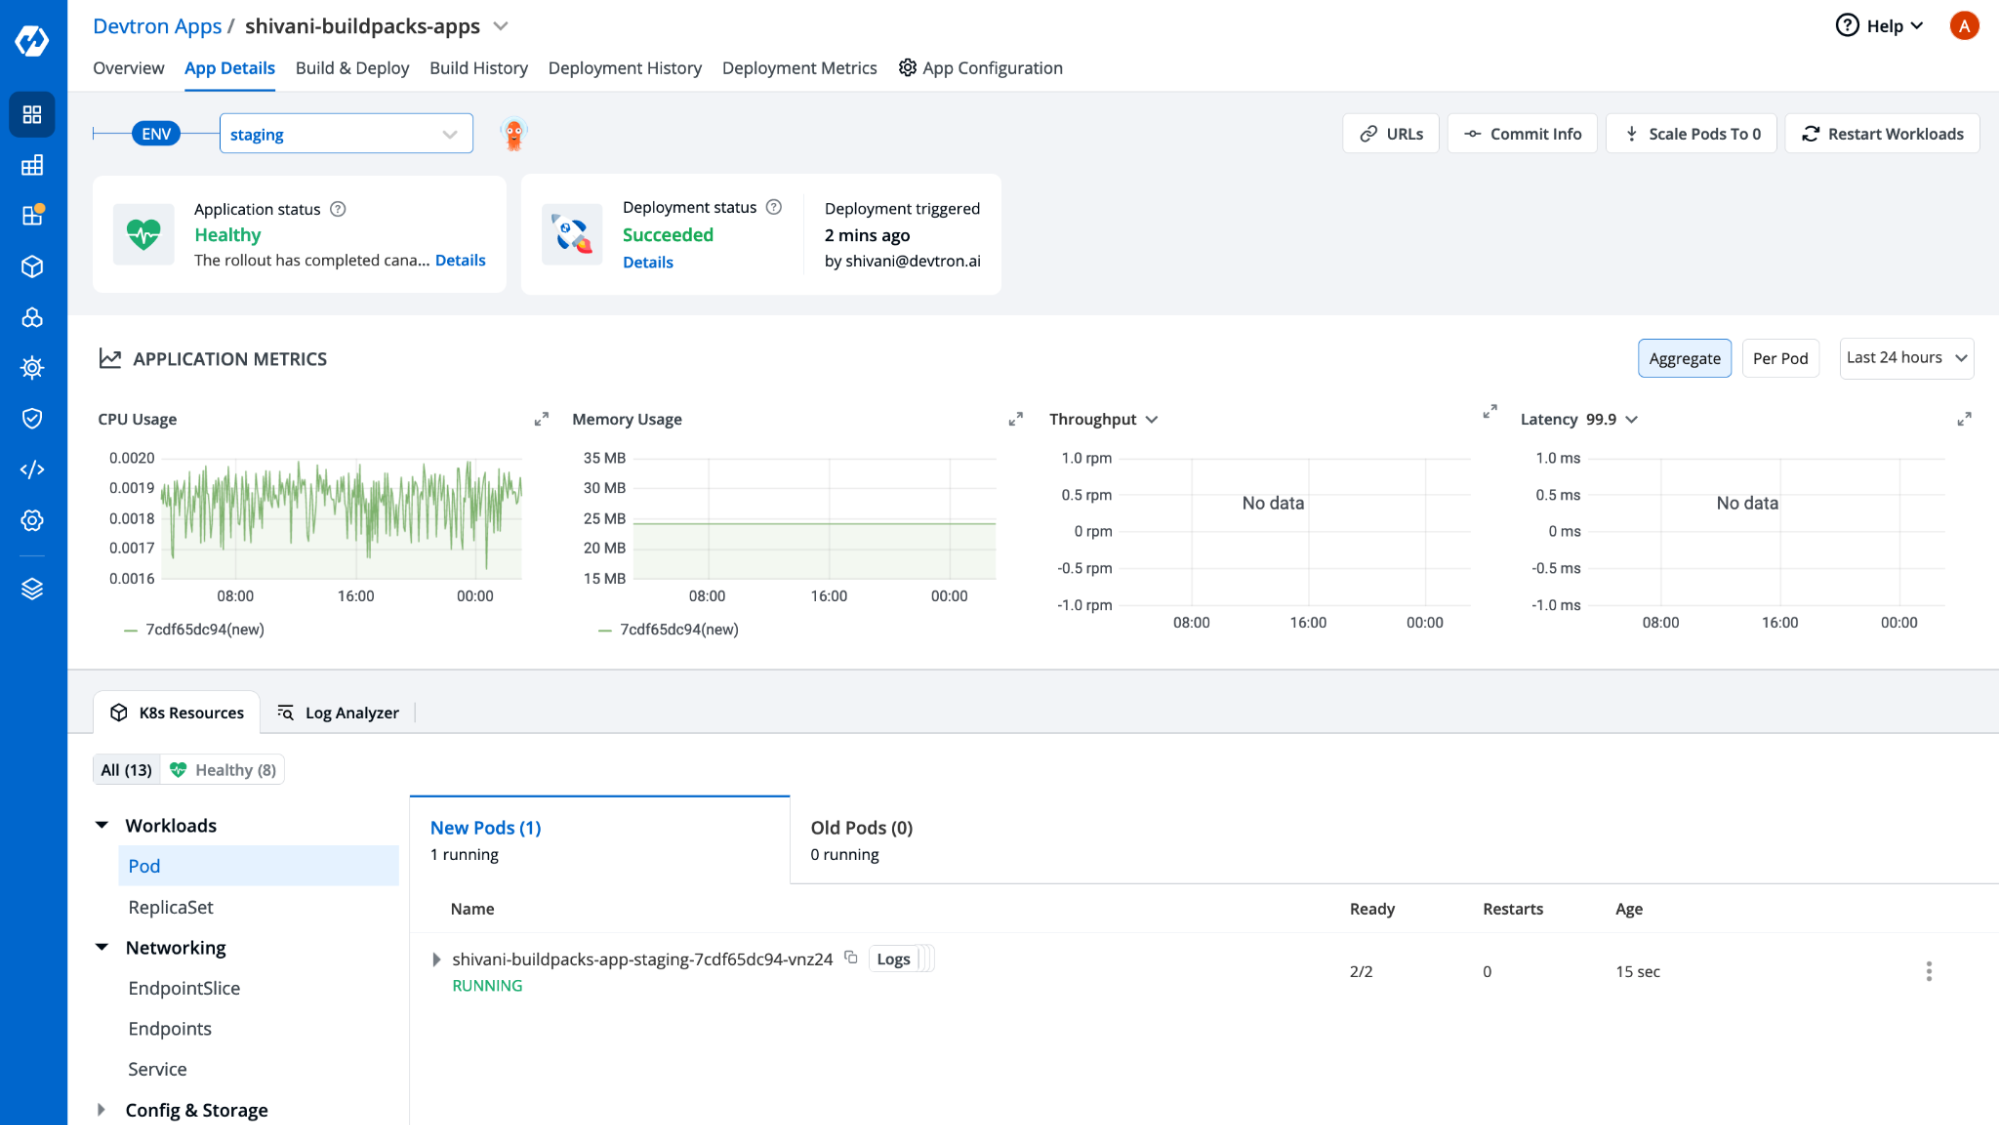
When you click on Deploy, the deployment will start and after successful deployment, you can see the status as shown below. You can also track the progress of application deployment and the status that you see on the App Details tab is the real-time status fetched from ArgoCD if using GitOps-based deployment.
Conclusion
Hurray!! We have successfully deployed an application without Dockerfile by leveraging Buildpacks integration with Devtron. This can be helpful when you have multiple applications with different behaviors that need to be containerized and deployed on Kubernetes. With Devtron’s user-friendly dashboard, it becomes really easy to set up CI/CD pipelines for Kubernetes to deploy an application just with a few clicks.
Don't forget to apply security best-practices to your containers.
If you have any questions, feel free to join our discord community and ask. Also if you like what we are building, do start the Devtron repo. All feedback and suggestions are welcome.


