Setting up a server and deploying a LAMP Stack has been a pain for years. In this blog we will see how easily we can deploy a complete LAMP Stack over kubernetes just in minutes and all thanks to Devtron. If you are not aware of what Devtron is, let me grab a minute of yours.
What is Devtron?
Devtron is a web based CI/CD platform for Kubernetes widely known for its no-code solution for all your kubernetes deployments and managing the complete lifecycle of containerised applications over the k8s.
What is a LAMP Stack?
Lamp stack is a combination of applications where apache, mysql and php work together to deploy any 2 tier applications where one server has apache+php another one has mysql.
The LAMP is an acronym of the following programs -
- Linux Operating System
- Apache HTTP server
- MySQL database management system
- PHP programming language
Overview of LAMP Application
Project contains the following files
- Dockerfile - wrap up all php files into container
- Setup.php - fulfill the basic requirements
- Index.php - where users can post comments that are stored in a database.
Note:- Please first access setup.php file to fulfill the basic requirements of above application which is publically accessible in the Github Repository
Prerequisites to deploy the Application
- Must have a k8s cluster - In our case, we have installed a k8s cluster using microk8s
- Devtron installed on cluster - Feel free checkout its well managed documentation for installing Devtron
- The application repo must have Dockerfile for the application.
Before moving ahead with the deployment, let’s set up the global configuration of Devtron after its installation. These are a bunch of configs required to begin with the deployments.
Step-1: Setup GitOps
It is used to store k8s configuration files of all applications.
Let’s begin with configuring GitOps.

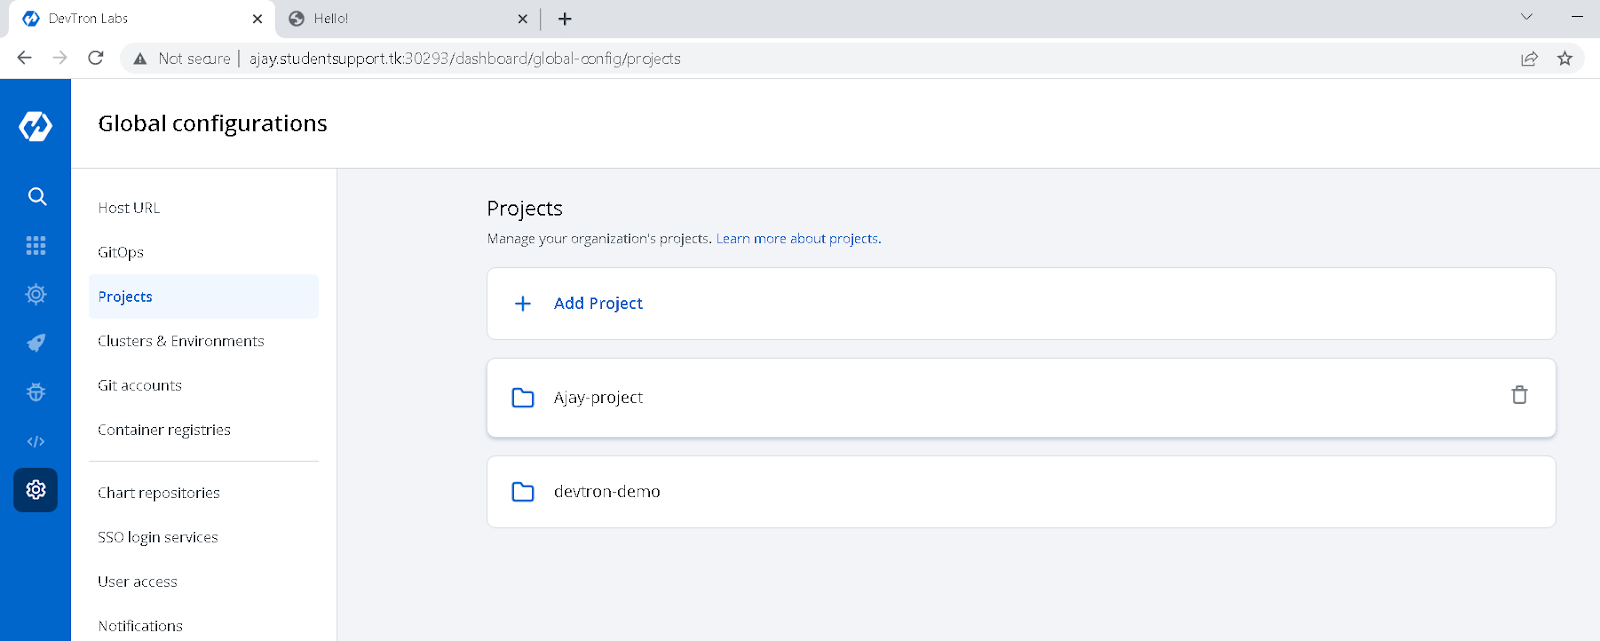
Step-2: Setup project
In simple words, a project is a way to manage the applications in devtron dashboard.
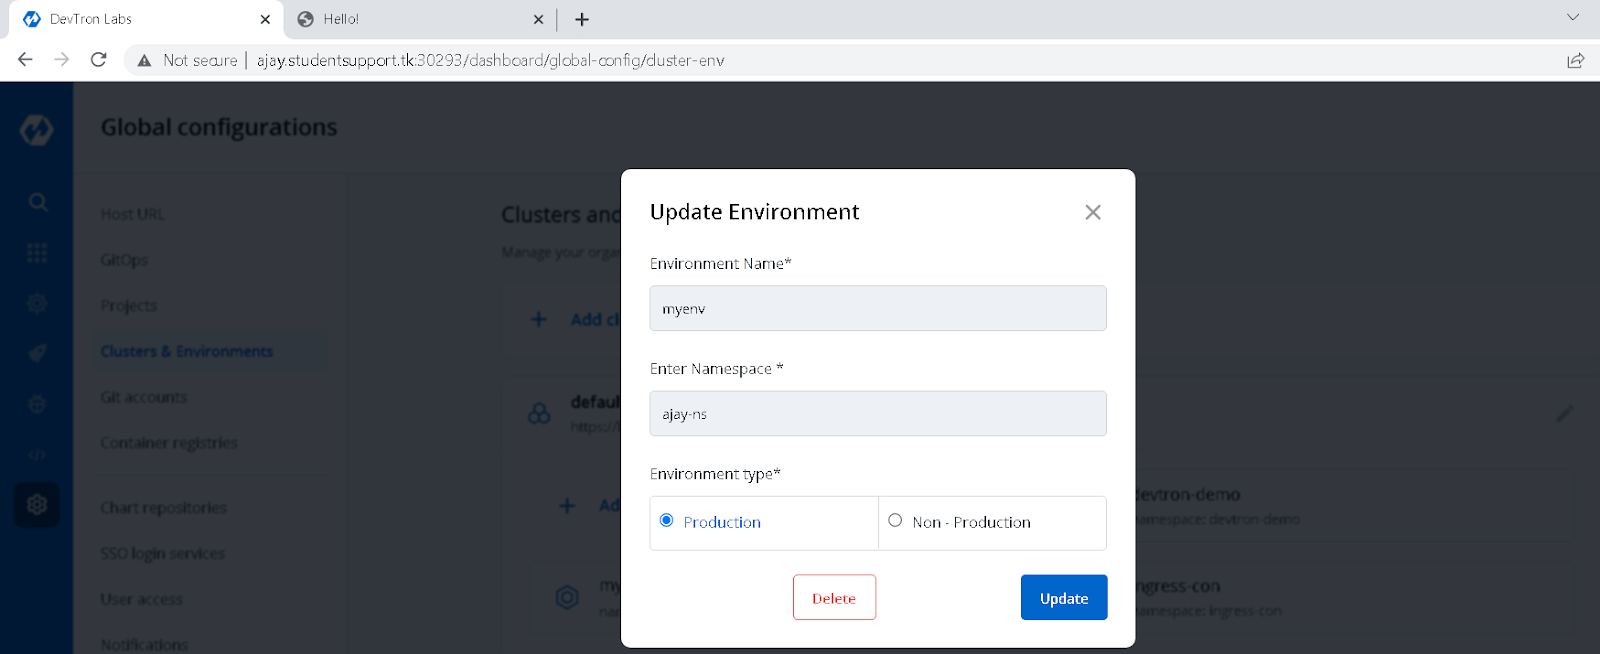
Step-3: Create Environment
It will create the namespace in our k8s cluster to manage the applications.
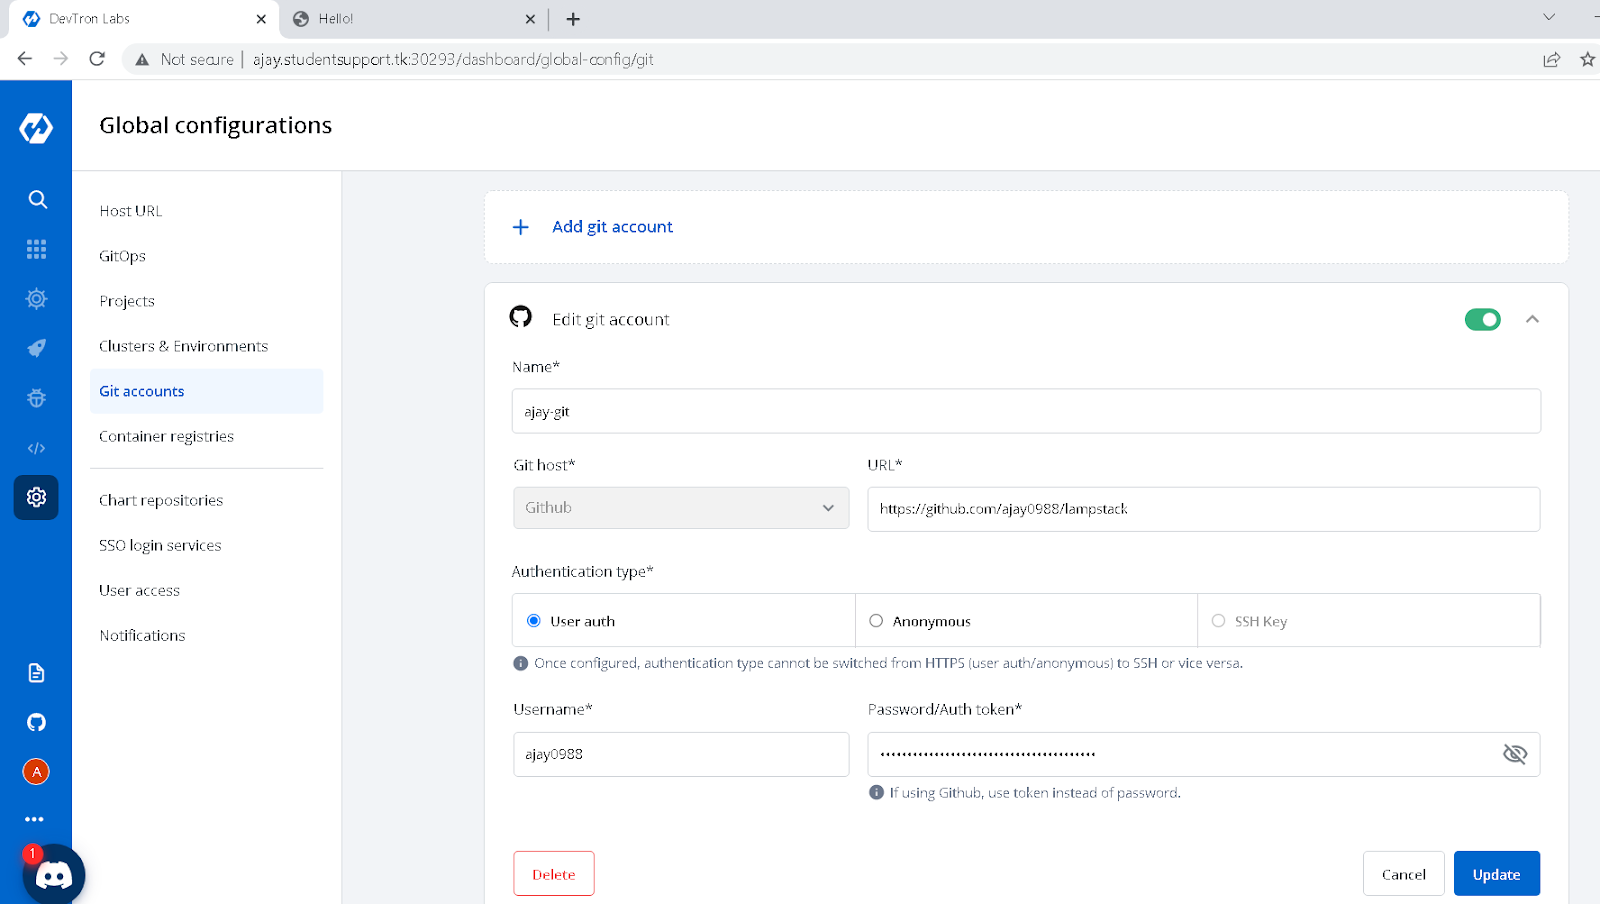
Step-4: Git Account
In the case of a public repo we do not need to create a git account but in the case of a private repo it is required. For detailed understanding of Git Accounts, please refer to our adding your git account documentation.
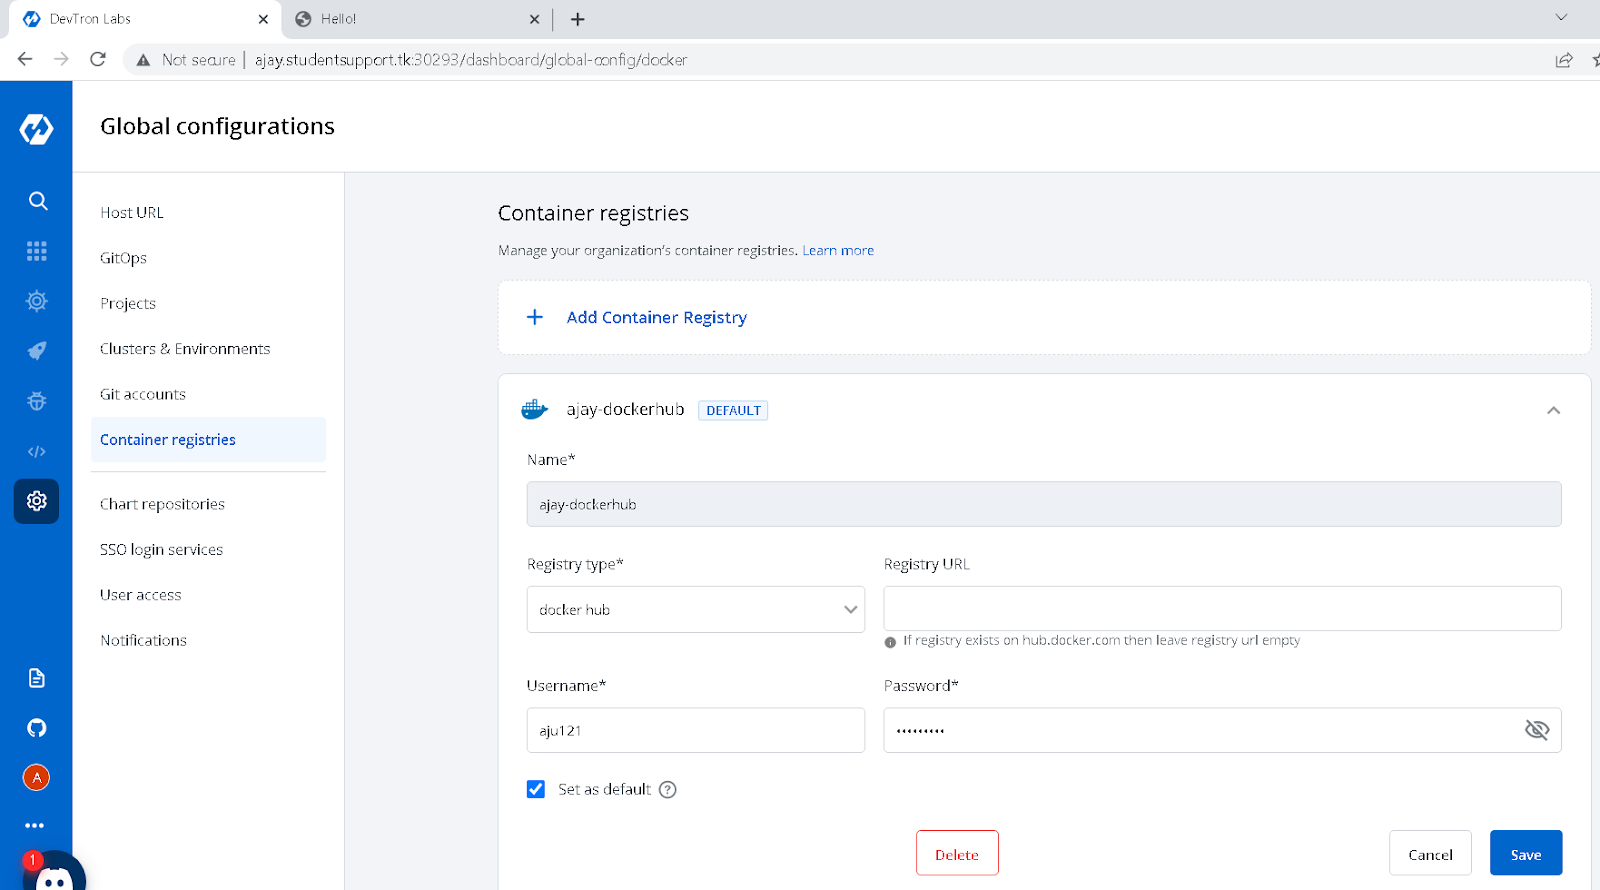
Step-5: Container registry
These are used to push the images built after running the CI Pipeline. To know more details about the container registry and supported registries by devtron, please refer to our Container/OCI registry documentation.
Application setup
Step-1: Setup MYSQL
First we need to deploy the mysql database using the helm chart from devtron dashboard. Devtron provides an easy way to deploy applications using helm charts and we can also provide our custom chart repo from Global Configurations if required.
How to deploy mysql helm chart
Click on charts (from the left menu of the dashboard) and search for mysql in the chart store. You will see a lot of charts present there from different chart repositories. Then click on deploy as seen below, it will open the chart configs where you have to fill in details like - App Name, Project, Environment and the version of chart you want to deploy. After giving the details, and configuring values as per your requirements, click on deploy chart.
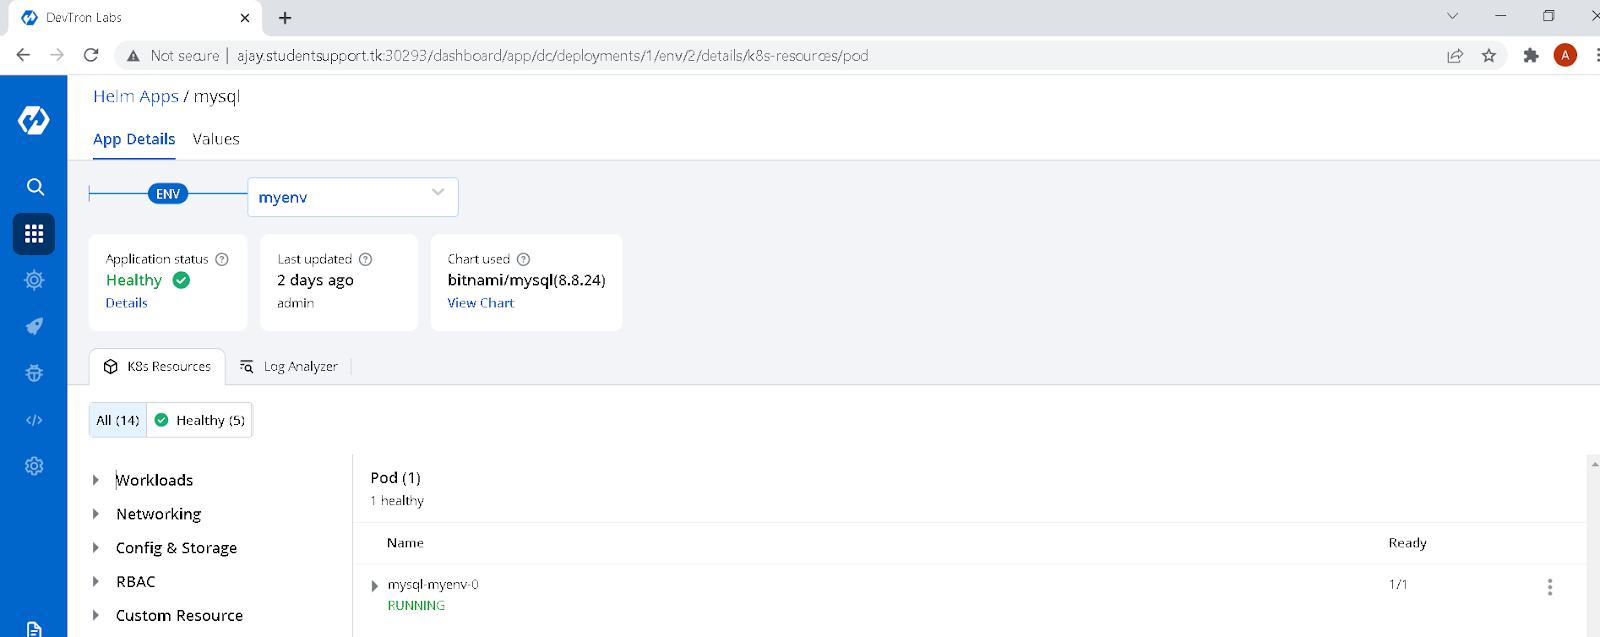
As you can see in the image below, all the kubernetes objects have been deployed successfully and listed down in devtron dashboard.
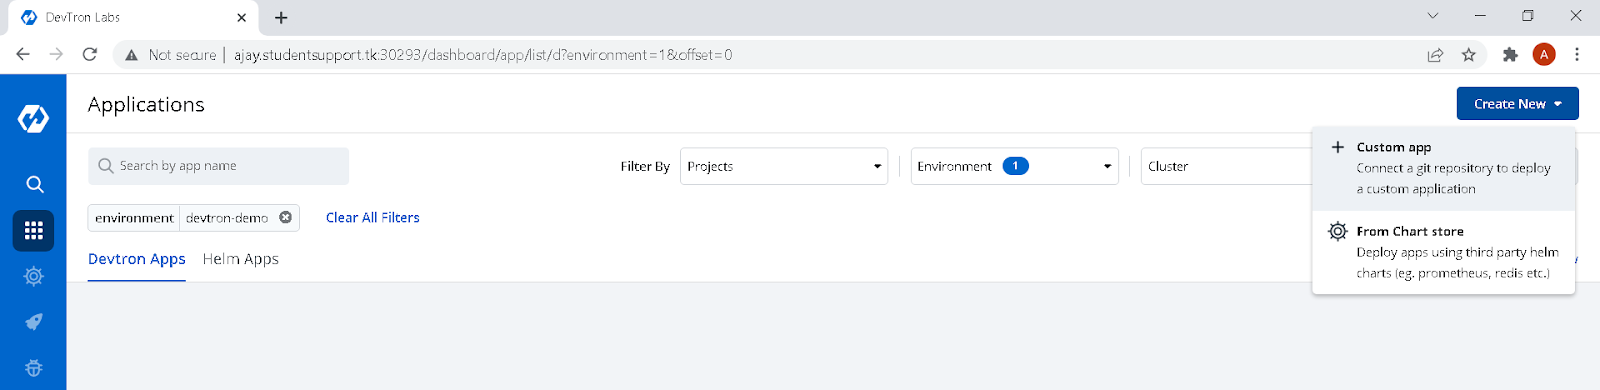
Step-2: Now let’s create an application and set up CI/CD using Devtron.
Click on Create New >> Click on Custom App
Give the details of application
From here we can give the App Name, Project and select the Template. Selecting a template allows up to copy the same configurations of an existing app but here we will create it from scratch.
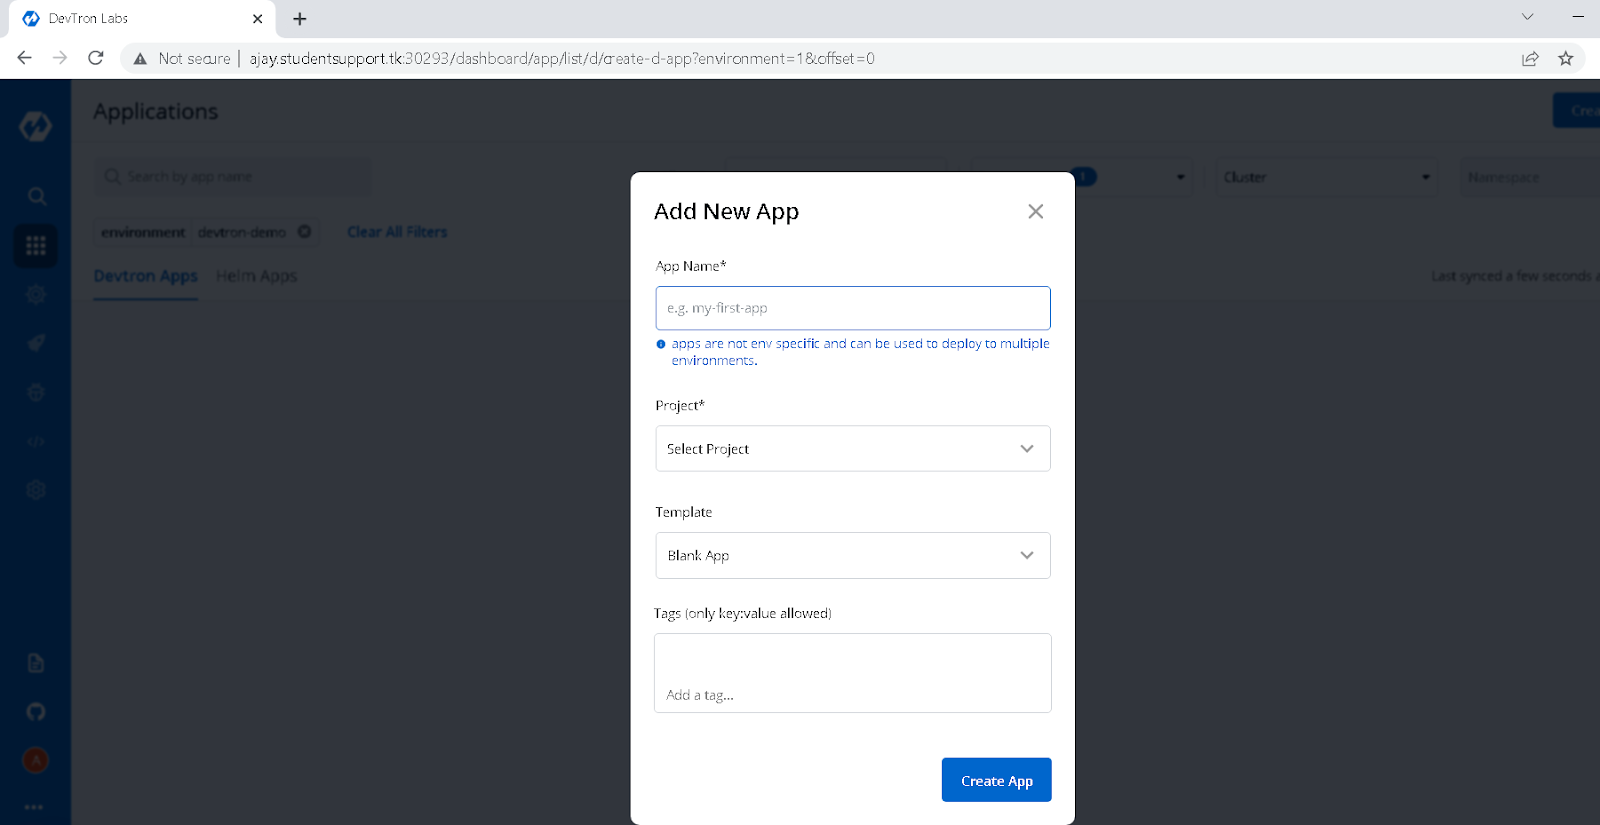
After you click on Create App, it will redirect you to the App Configuration tab where need to provide few configurations to setup application’s CI/CD.
Configure Git Repository
In Git Repository, select the Git Account (public by default or for private repos, select the account added) and provide the git repo url of application which needs to be deployed.
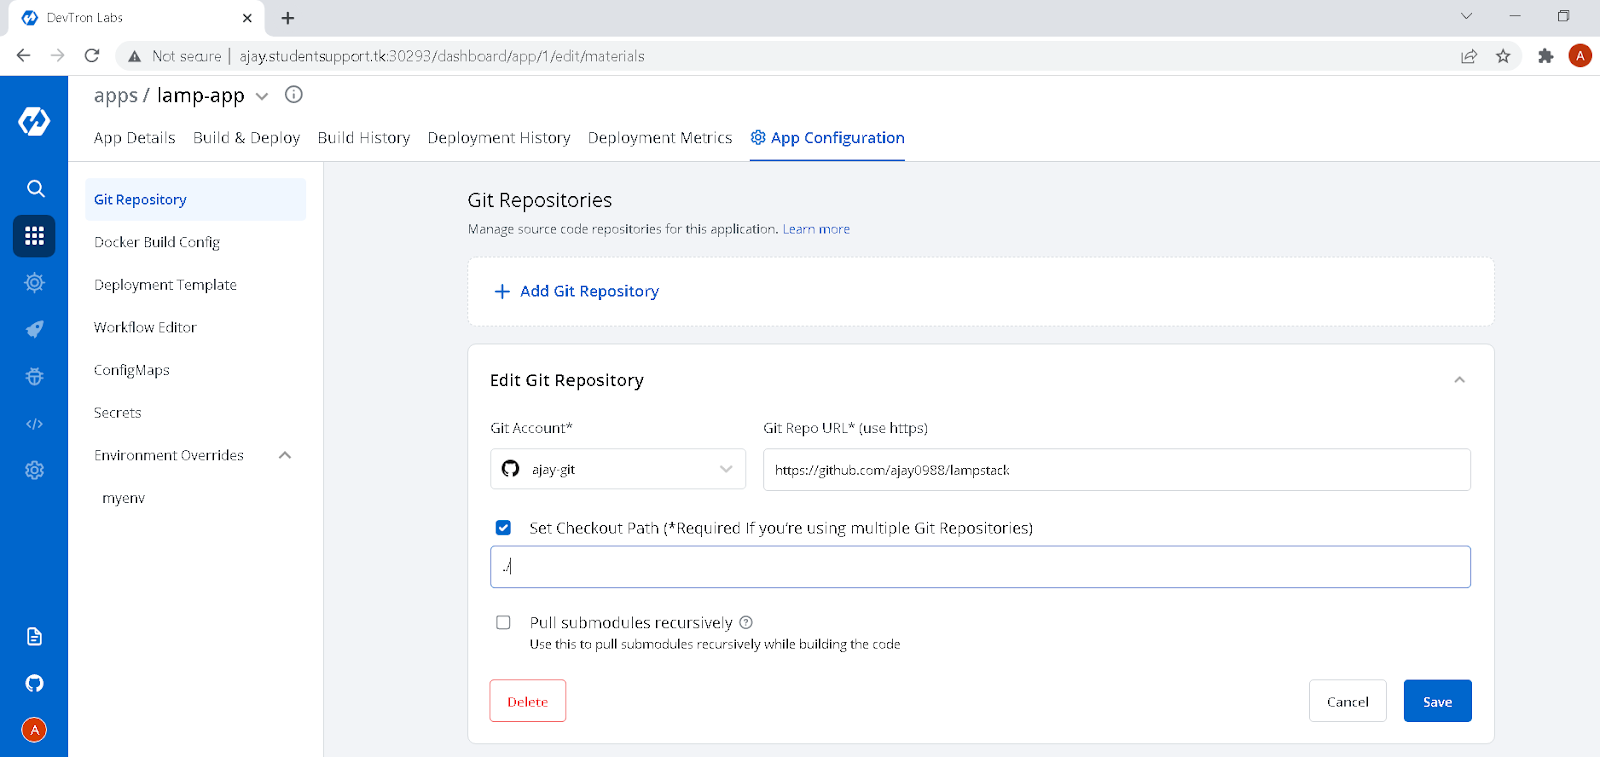
Configure Docker Build Config
In Docker Build Config select the container registry from dropdown, provide the repository name and give a path to the Dockerfile of application.
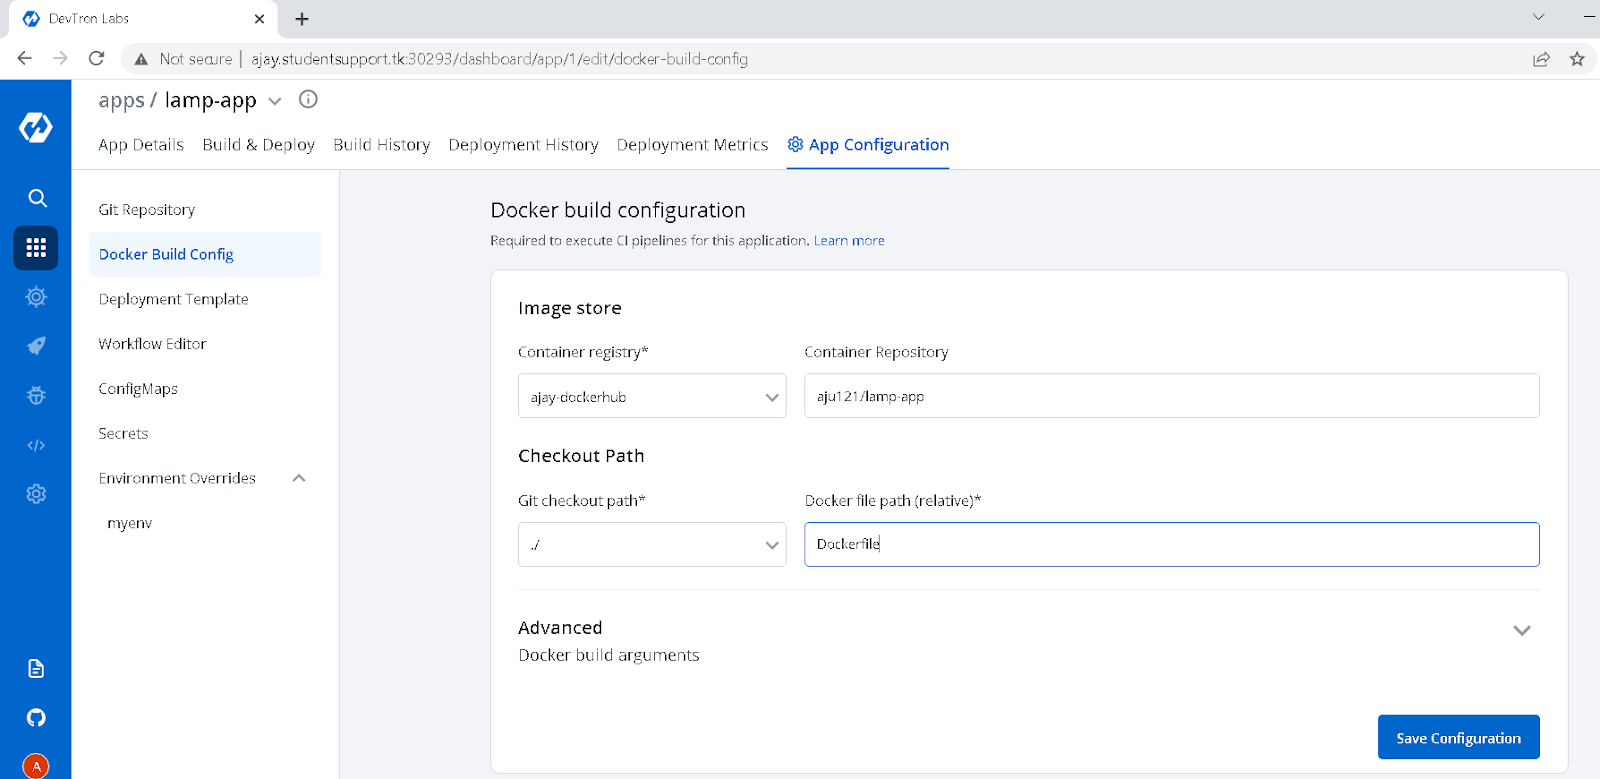
Configure Deployment Template
Devtron provides a pre-installed deployment template consisting of all the important configuration required to deploy an application. Just change the configs as per requirements and save the deployment template as shown in below. In our case we have changed the container port to 80 and service to NodePort so that the application would be accessible by any public user.
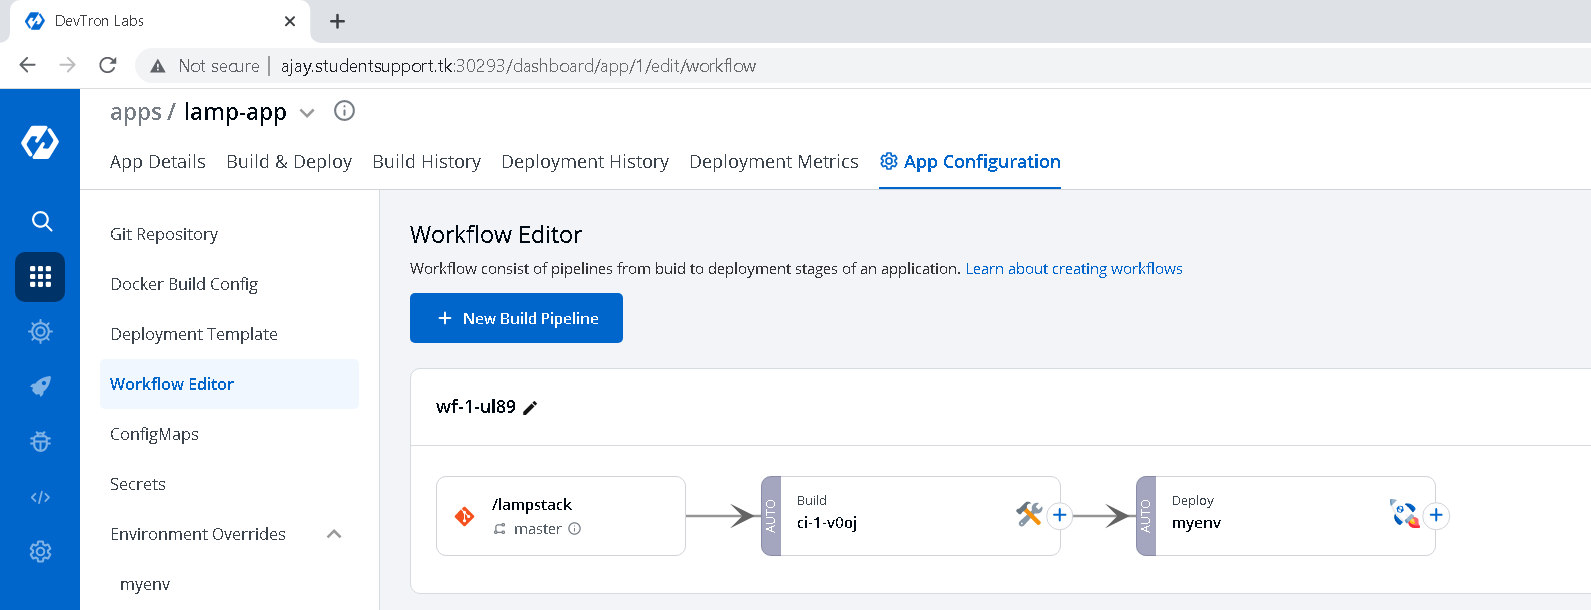
Configure workflow
Now after saving the deployment template, need to create a CI-CD workflow. Devtron provides an awesome feature to configure the CI & CD of applications which make life easy. For more details and advance configuration for creating workflow, please refer to our workflow editor documentation.
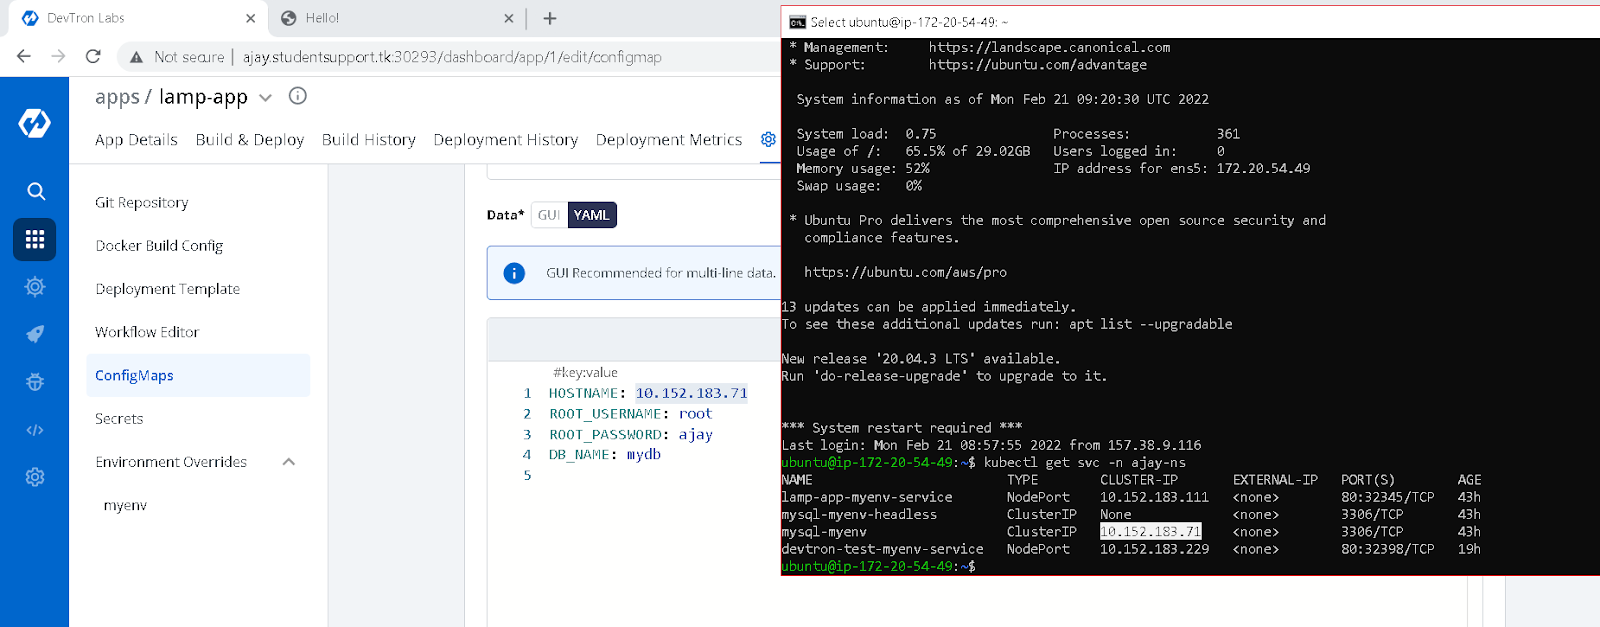
Configure ConfigMap
Now need to create ConfigMaps with the following environment variables for application so that it can communicate with a mysql application. After providing the environment variables, save the configmap.
Note: There are 2 options to trigger our pipeline (manual and automatic).
After all the Application configurations are done, we need to trigger our CI pipeline which would build an image and then trigger the CD pipeline, which would deploy the application. Navigate to the Build & Deploy tab, >> click on Select Material and select the commit for which you want to create an image. Once the CI part is done, click on Select Image and select the image you want to deploy.
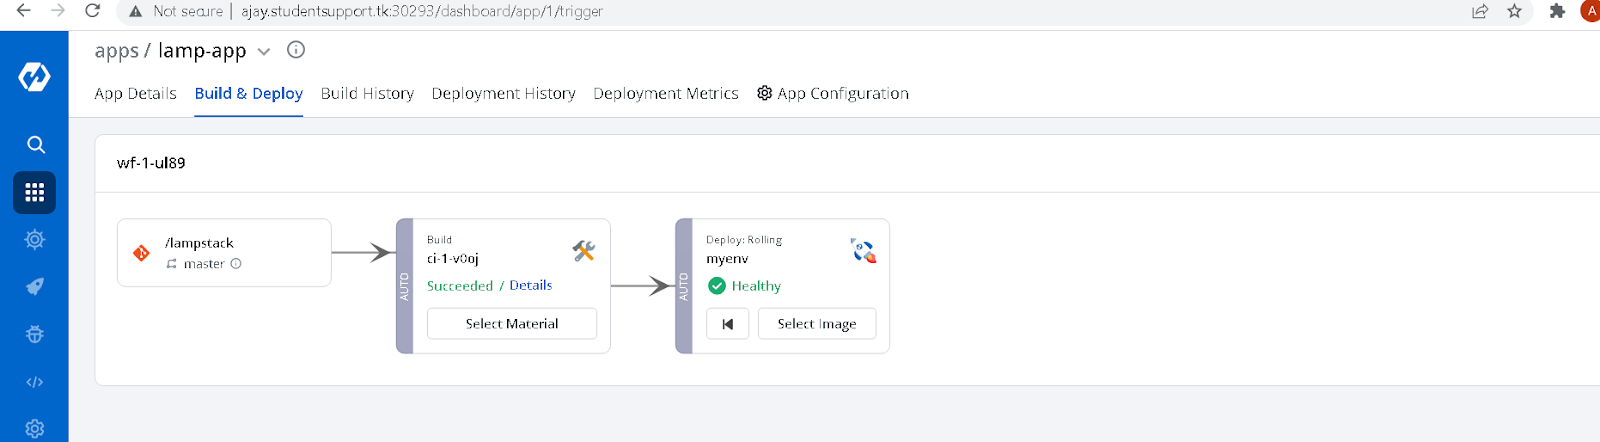
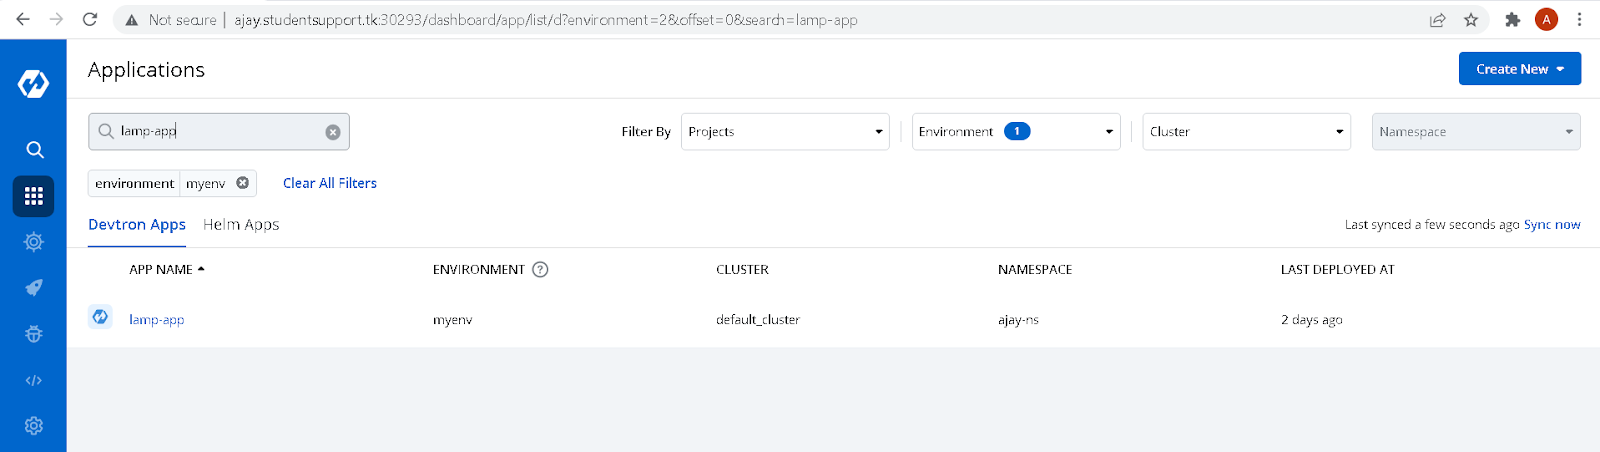
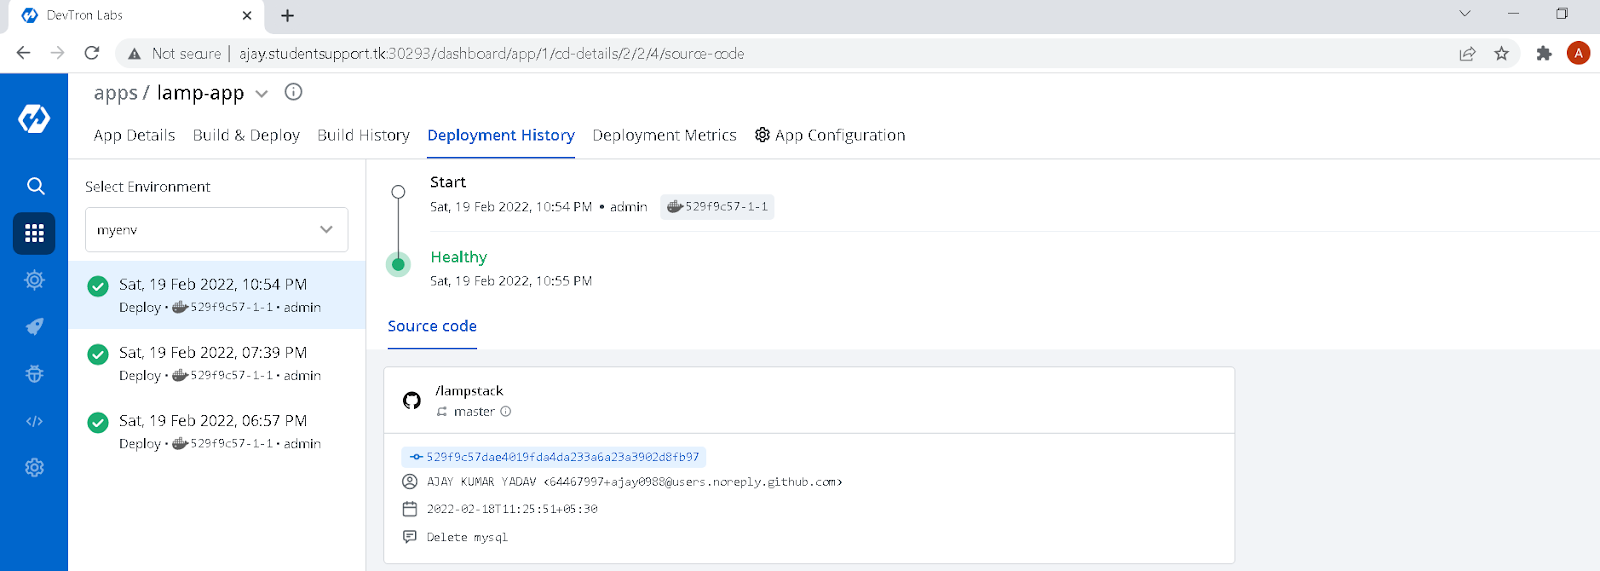
Once you trigger the CD pipeline, check the status of deployment through Deployment History as you can see in the below image. In our case the application has been successfully deployed.
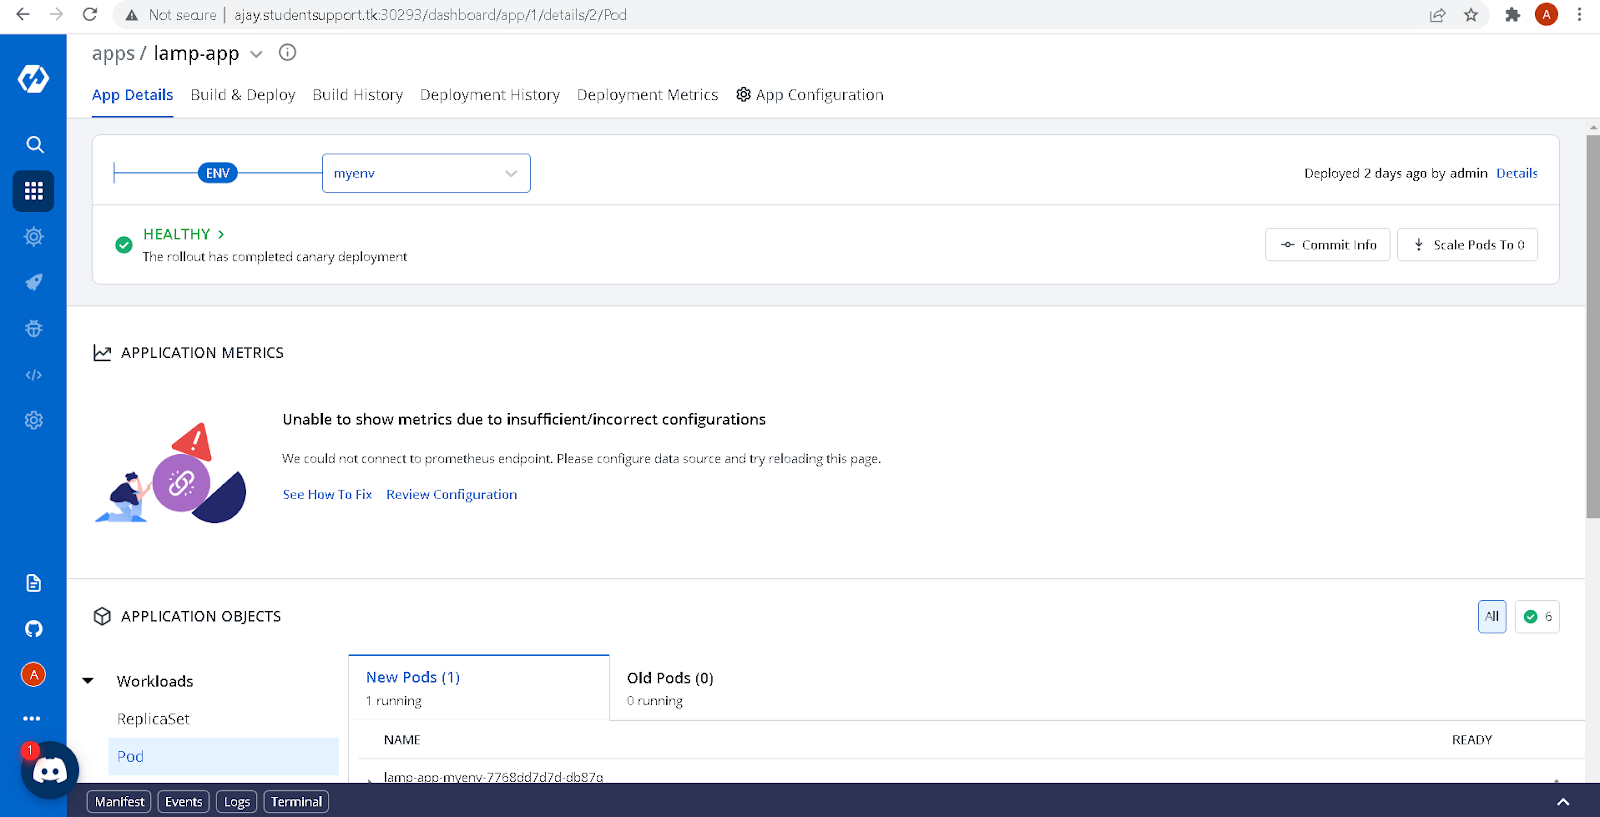
Now navigate to the App Details tab and see the status as Healthy and all the k8s workload in the dashboard. Since we have not enabled the Application Metrics, we are not able to see it in the dashboard, but it can easily be enabled just by a click of a button.
Now open the manifest of the pod, and you would be able to see the NodePort port number i.e, 32345 (in our case). Open another tab and access the application by appending the nodeport port after your application’s domain name/IP as you can see in the image below.
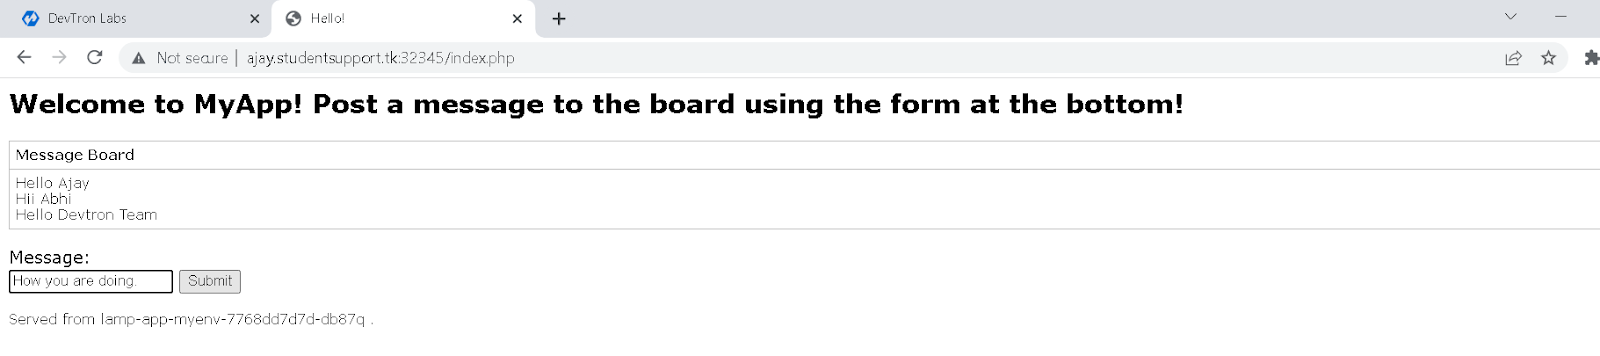
Congratulations! We are able to access application. Here write the message and click on the submit button, it will store the message in mysql db and print the message in the website as you can see in the above image.
messages stored in db

Hurray! Finally We have deployed the complete LAMP Stack through Devtron’s intuitive dashboard. Hope you get a better understanding on how to deploy and manage applications as well as helm charts through Devtron and how easy it is. If you have any doubts, feel free to let us know through comments.
FAQ
How can I deploy a LAMP stack on Kubernetes using Devtron?
You can deploy a LAMP stack using Devtron by installing MySQL with Helm charts, setting up PHP and Apache via a custom app, configuring the Git repo, Dockerfile, CI/CD workflows, and exposing the app using a NodePort service.
What are the prerequisites for deploying a LAMP application with Devtron?
You need a running Kubernetes cluster, Devtron installed on the cluster, a Dockerfile in your application repo, and access to Git and container registries for CI/CD integration.
Why use Devtron for deploying applications on Kubernetes?
Devtron simplifies Kubernetes deployments with a no-code UI, built-in CI/CD pipelines, Helm chart support, GitOps integration, and easy management of config maps, secrets, and environments.
Can I use Helm charts in Devtron to deploy databases like MySQL?
Yes, Devtron allows you to deploy Helm charts directly from its Chart Store. You can search for MySQL, configure the required values, and deploy it into a selected Kubernetes namespace in just a few clicks.