What is VPN ?
VPN stands for Virtual Private Network and describes the opportunity to establish a protected network connection when using public networks. VPNs encrypt your internet traffic and disguise your online identity. This makes it more difficult for third parties to track your activities online and steal data.
VPN is a covered bridge or tunnel for your data. It blocks your IP address. Using a VPN makes you virtually untraceable because your IP is masked, so no one can pinpoint you.
What are the benefits of a VPN
- Hide IP address and browsing activity, and personal data on any Wi-Fi network.
- If we do not want to allow traffic to internal applications from other sources rather than vpn ip.
- It works as a guard against hackers and snoops on public networks and provides privacy or security for the organization's internal data
Setting up a vpn to access Devtron dashboard is sometimes tedious and time consuming. In this blog we will walk through the steps to set up vpn to restrict the access of Devtron apart from VPN server over the Kubernetes just in minutes and all thanks to Devtron.
Here we will be using the intuitive dashboard of Devtron to set up a VPN to access the Devtron dashboard itself, seems interesting!
Prerequisites to set up vpn
- Must have a k8s cluster - In our case, we have an EKS cluster.
- Devtron installed on cluster - Feel free to checkout its well managed documentation for installing Devtron
- openvpn client should be installed in your system.
Note: Setup the global configuration of Devtron after its installation.
Deploy VPN using helm chart
Step 1: Create a PVC of name efs-openvpn-dev-pvc using generic helm chart form devtron UI.
Hit the Devtron service to access Devtron dashboard and click on the Charts store (from the left menu of the dashboard) and search for devtron-generic-helm and then click on deploy as seen below, it will open the chart configs where we have to fill details like - App Name, Project, Environment and the version of chart and give the pvc object definition then click on Update and Deploy.
Step 2: Deploy VPN chart
Click on the Charts store and search for OpenVPN and then click on deploy as seen below, it will open the chart configs where we have to fill details like above chart deployment then click on Update and Deploy.
Now let’s go through the deployed VPN application.
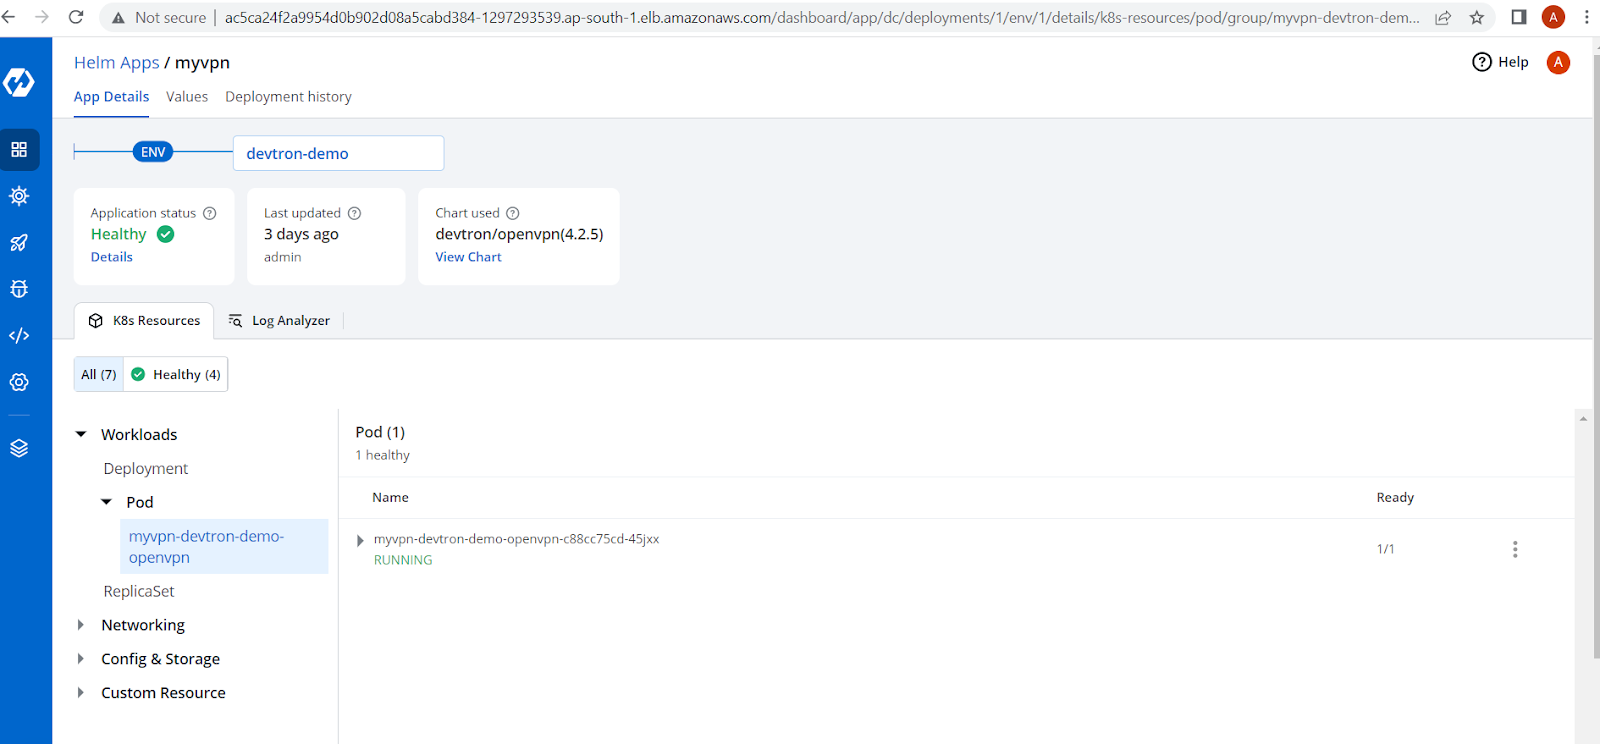
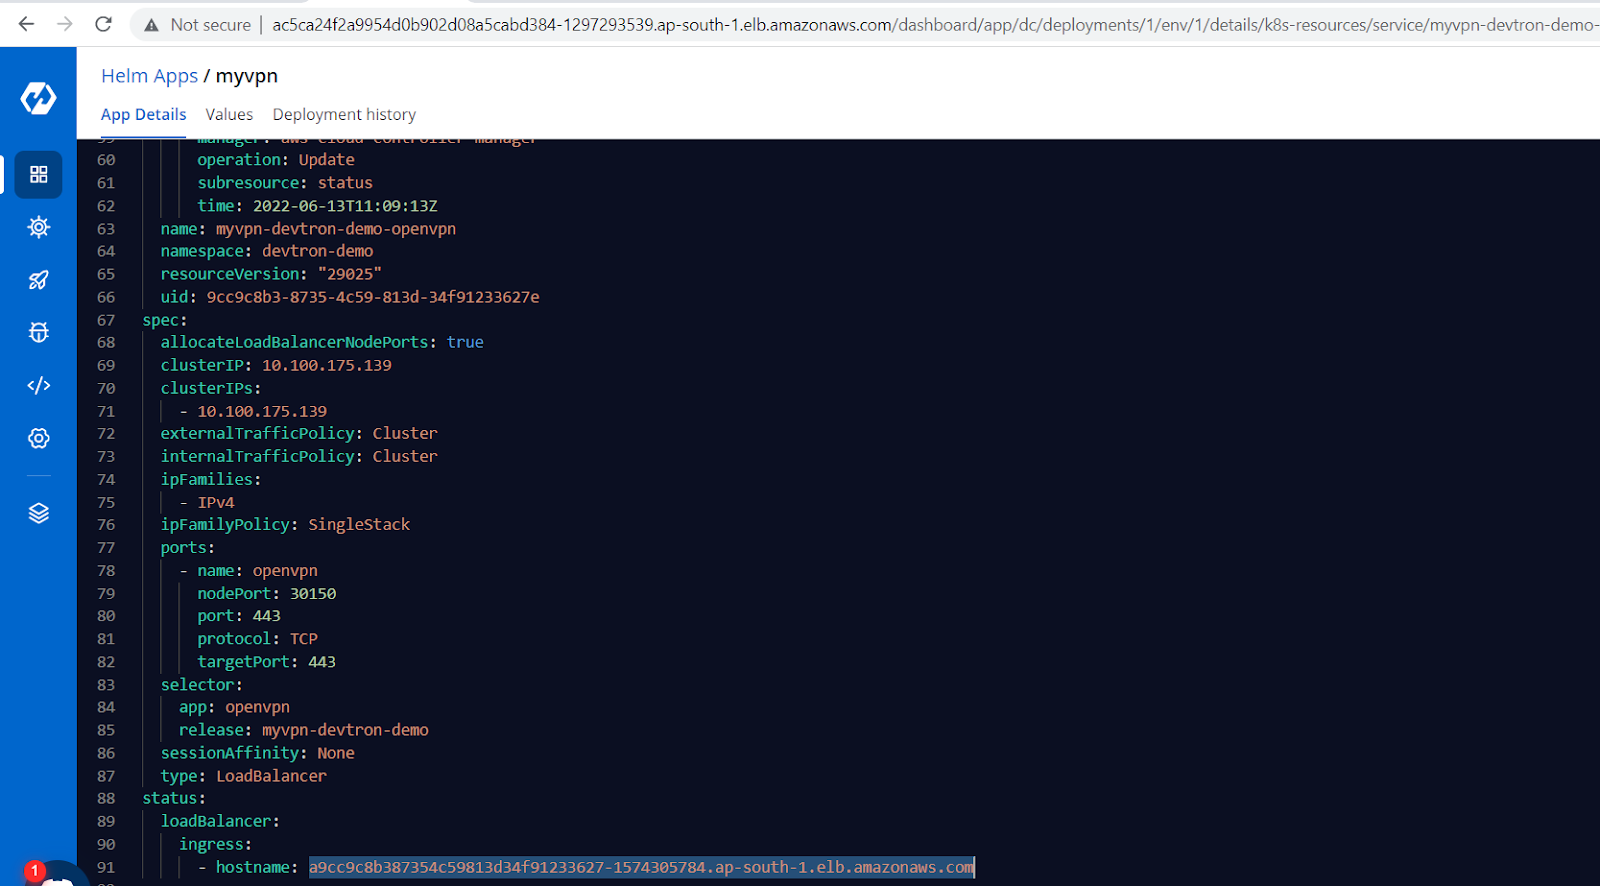
Here we can see the hostname of VPN load balancer.
We need to generate an ovpn file to connect through the openvpn client program so we need to execute the below script where we have EKS cluster access.
!/bin/bash

if [ $# -ne 3 ]
then
echo "Usage: $0 <CLIENT_KEY_NAME> <HELM_RELEASE>"
exit
fi

KEY_NAME=$1
NAMESPACE=$2
HELM_RELEASE=$3
POD_NAME=$(kubectl get pods -n "$NAMESPACE" -l "app=openvpn,release=$HELM_RELEASE" -o jsonpath='{.items[0].metadata.name}')
SERVICE_NAME=$(kubectl get svc -n "$NAMESPACE" -l "app=openvpn,release=$HELM_RELEASE" -o jsonpath='{.items[0].metadata.name}')
SERVICE_IP=$(kubectl get svc -n "$NAMESPACE" "$SERVICE_NAME" -o go-template='{{range $k, $v := (index .status.loadBalancer.ingress 0)}}{{$v}}{{end}}')
kubectl -n "$NAMESPACE" exec -it "$POD_NAME" /etc/openvpn/setup/newClientCert.sh "$KEY_NAME" "$SERVICE_IP"
kubectl -n "$NAMESPACE" exec -it "$POD_NAME" cat "/etc/openvpn/certs/pki/$KEY_NAME.ovpn" > "$KEY_NAME.ovpn"
During run this script we need to pass 3 arguments listed below:-
- CLIENT_KEY_NAME : File to save the ovpn configuration.
- NAMESPACE :- Namespace where the VPN chart deployed.
- HELM_RELEASE : Release name of your VPN (we can see in annotation of any k8s object of this chart)
Run like ./vpn.sh my-key devtron-demo myvpn-devtron-demo
After executing the above cmd you will see the file of name my-key.ovpn.
There are 3 ways to restrict the Devtron dashboard through VPN.
Method 1
Here take the VPN IP that is nat gateway of eks cluster and edit the devtron-service and add below section in spec.
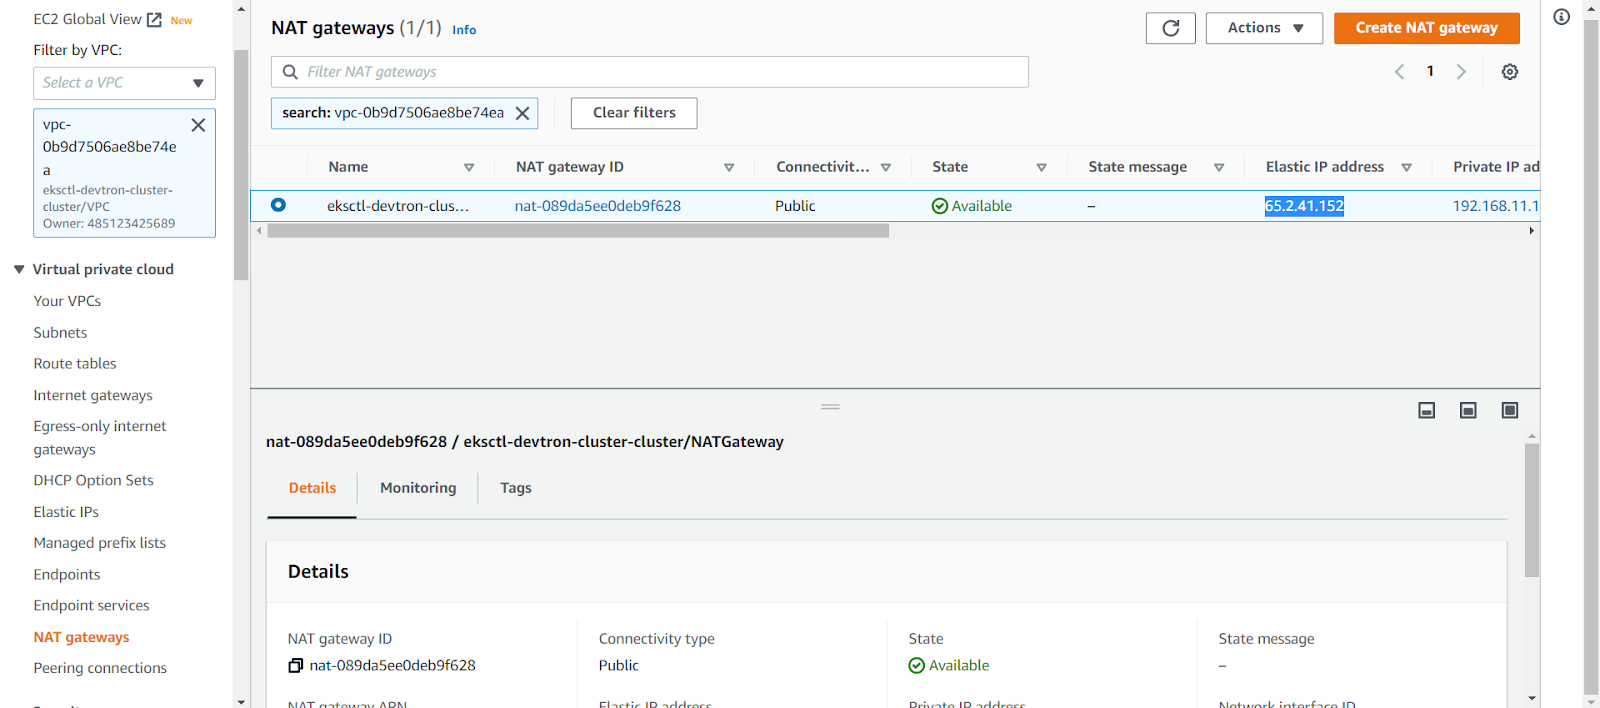
loadBalancerSourceRanges
- 65.2.41.152/32
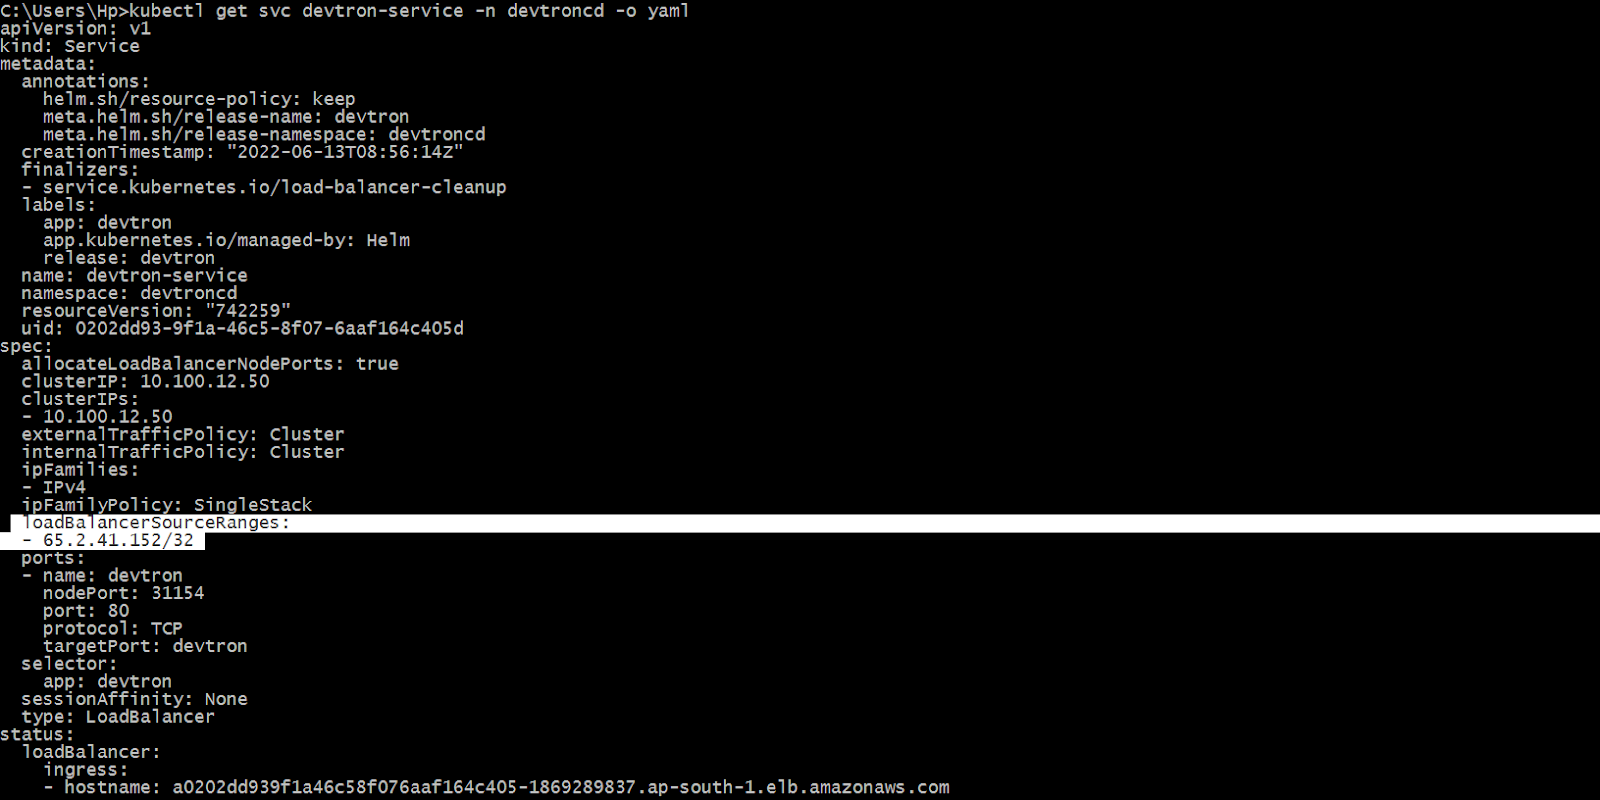
After updating we can see the service yaml
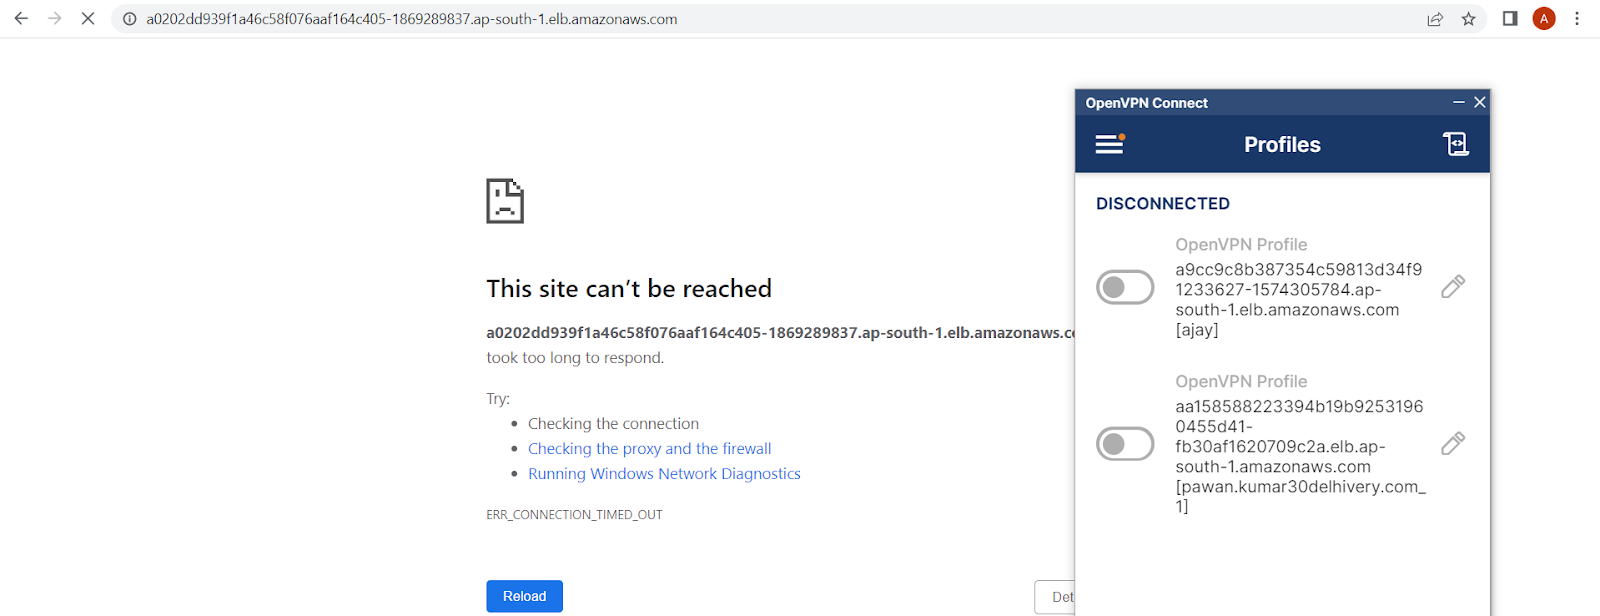
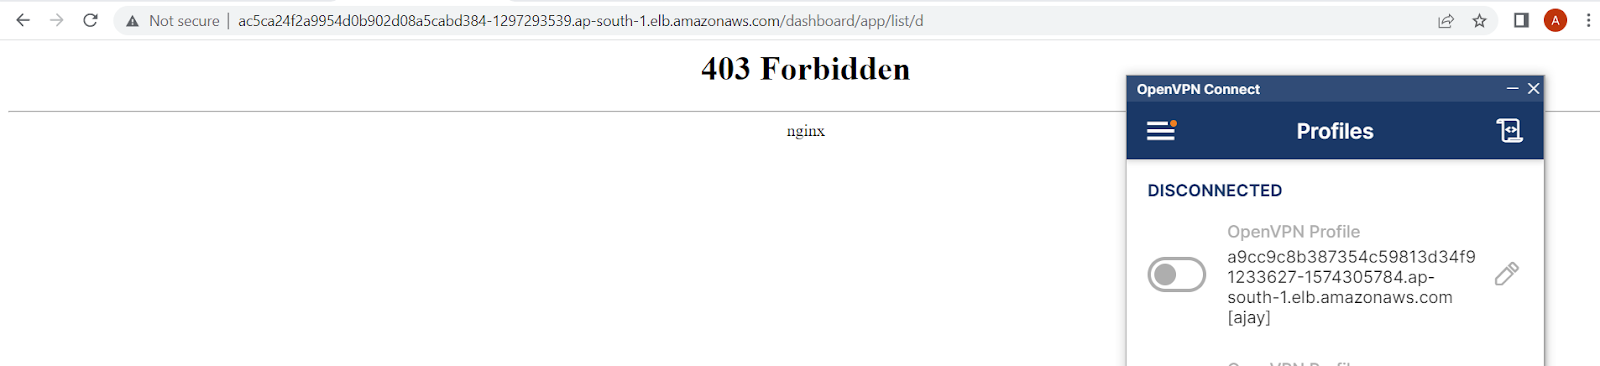
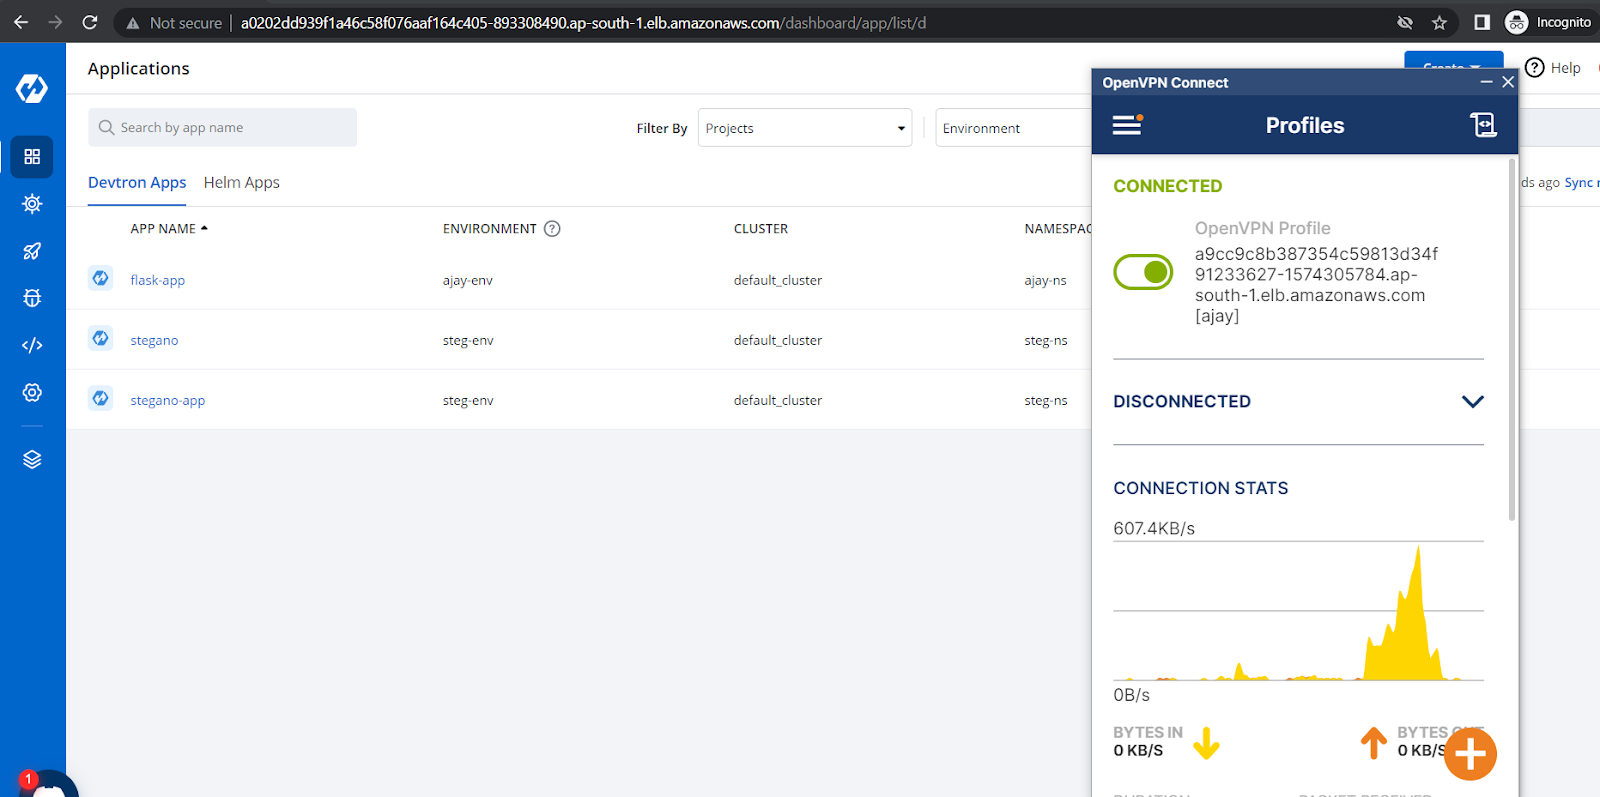
Right now if we try to connect this load balancer hostname of devtron-service without connecting to VPN , we will not be able to connect like in the figure below.
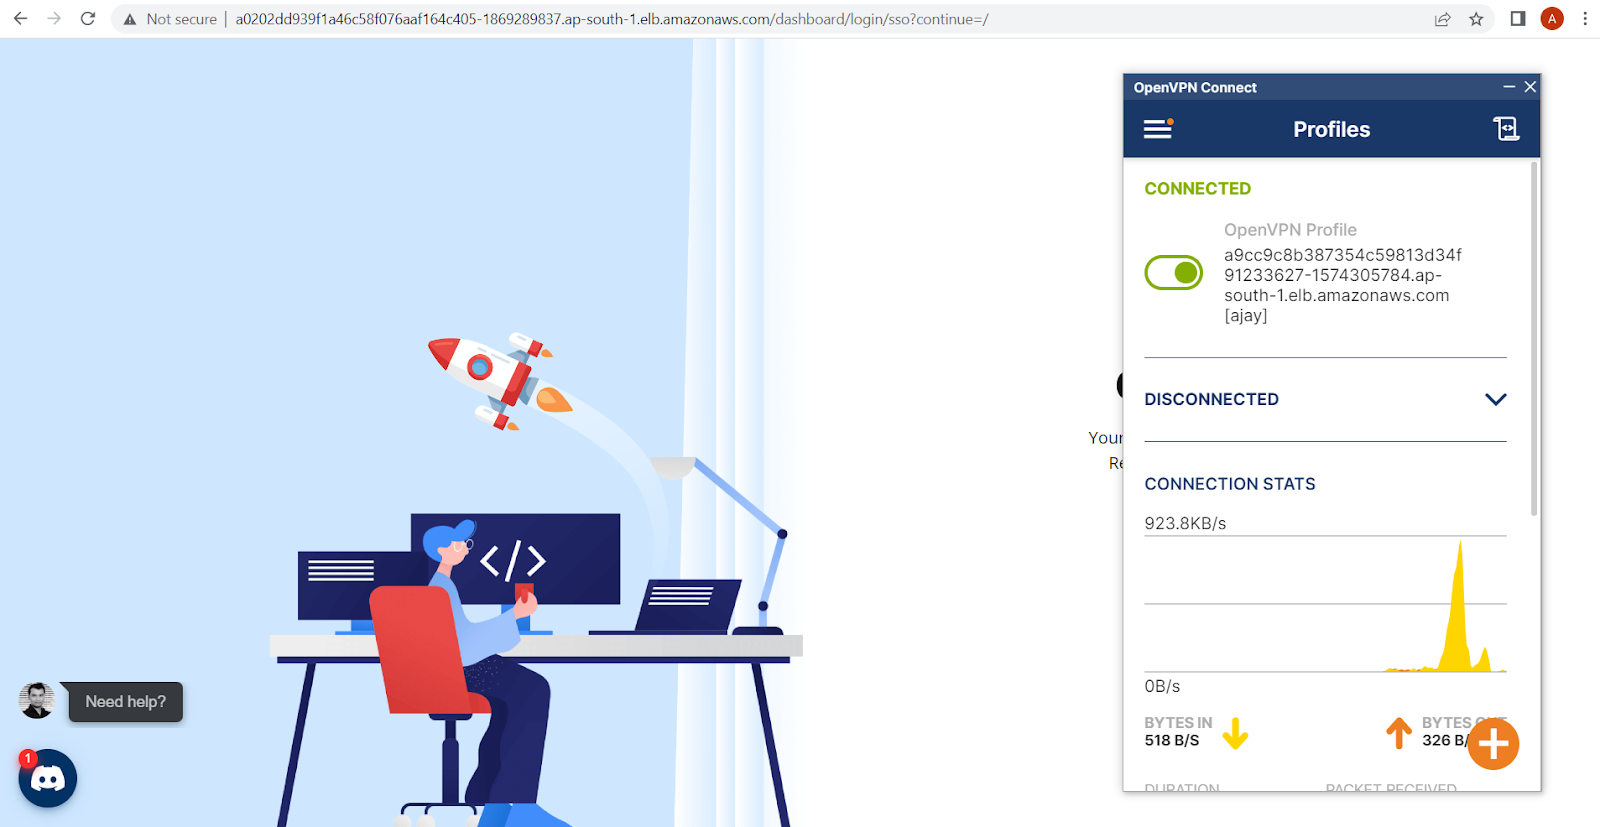
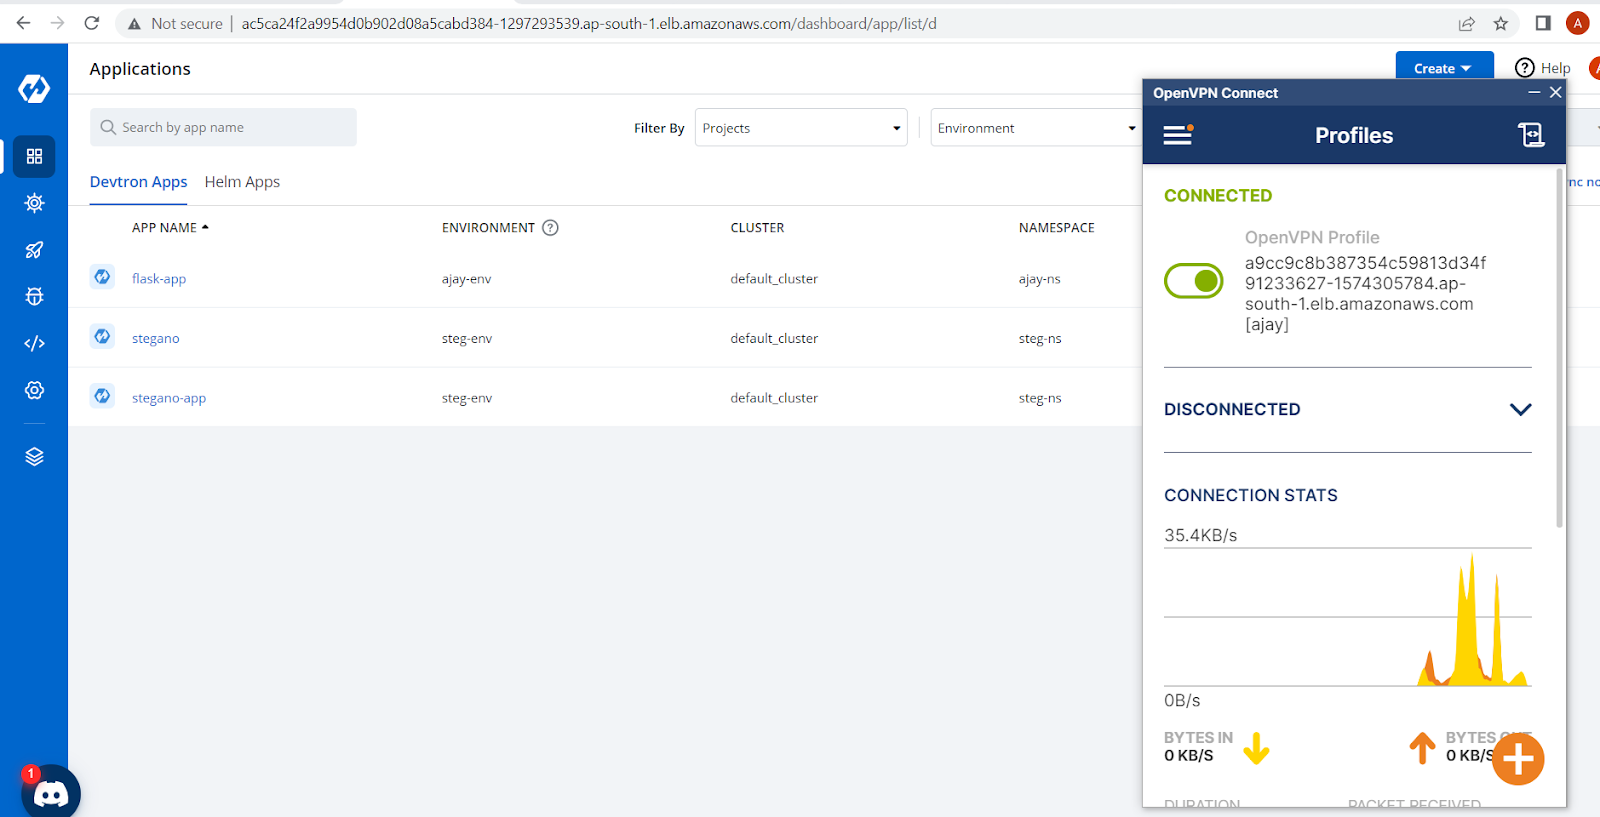
But as soon as we connect to VPN we will be able to access the Devtron dashboard.
Method 2 (Recommended )
We can whitelist the IP of VPN in ingress.
Before setting up ingress we have to deploy the ingress controller to control the ingress rule so we are going to deploy it using a helm chart with the help of Devtron.
How to deploy an ingress controller helm chart?
Click on Charts store (from the left menu of the dashboard) and search for ingress. We will see a lot of charts present there from different chart repositories.Then click on deploy as seen below, it will open the chart configs where we have to fill details like App Name, Project, Environment and the version of chart you want to deploy. After giving the details, and configuring values as per requirements then click on Update and Deploy.
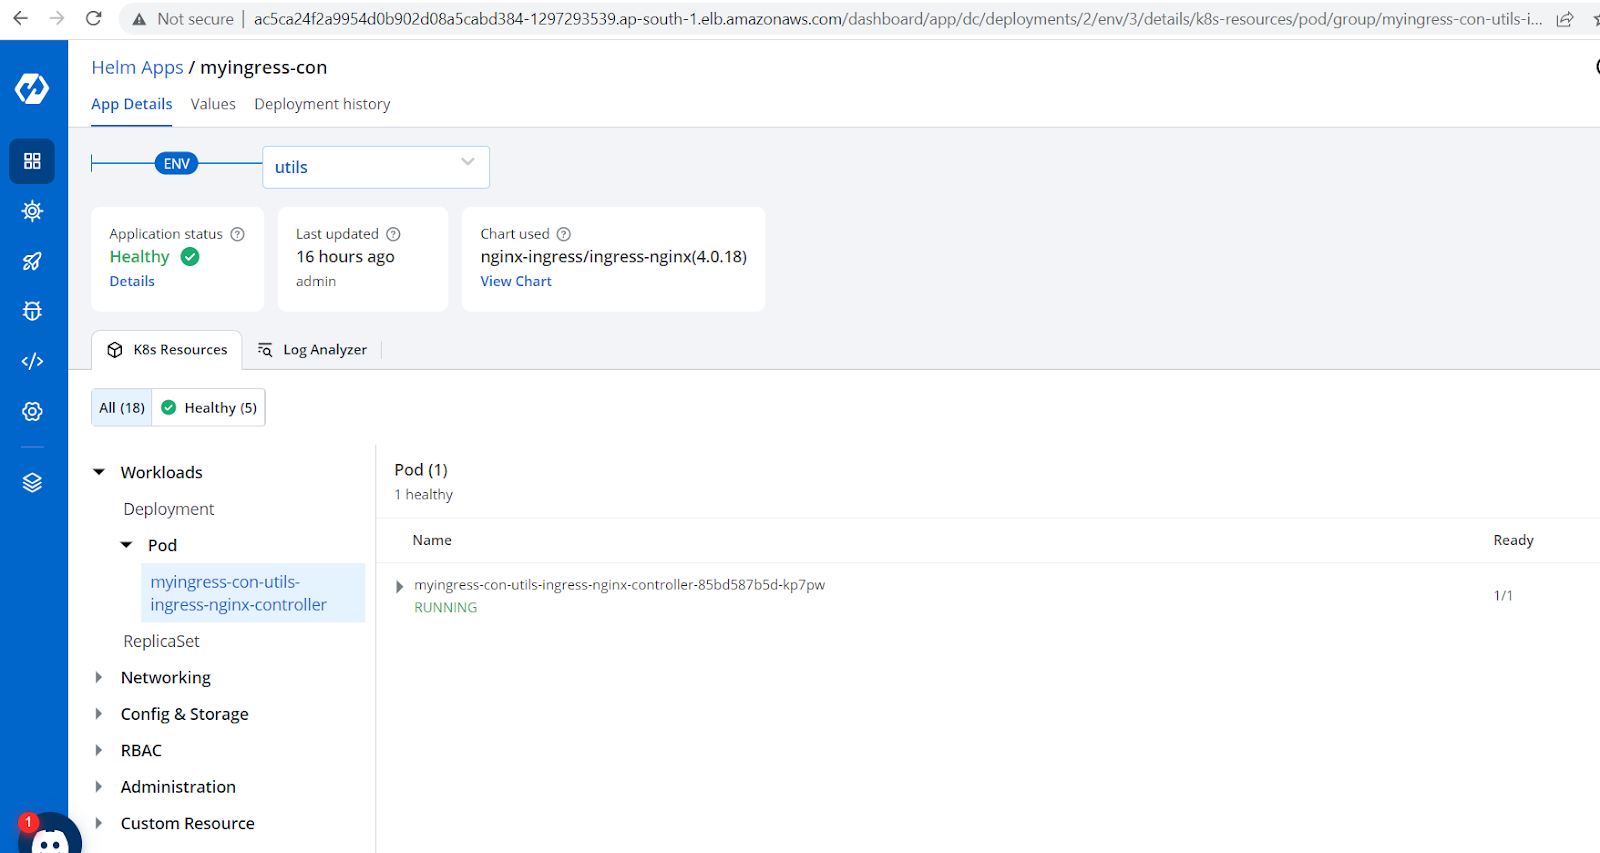
Here we can see the objects of the ingress controller.
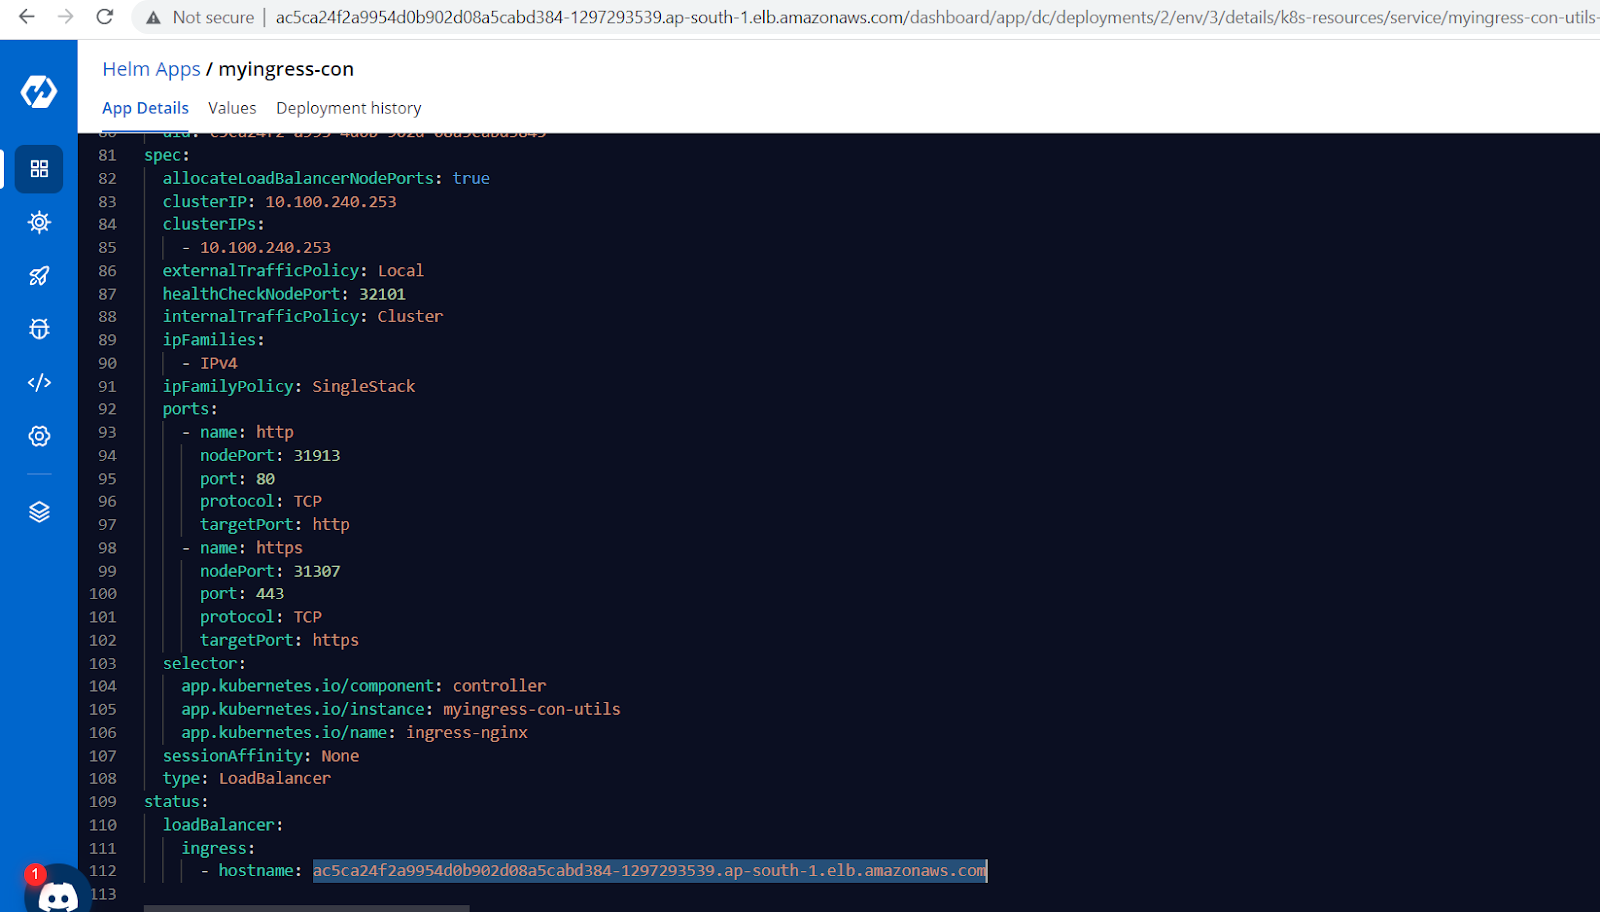
Here we will see dns of ingress controller service
Now we have to create an ingress object for devtron-service with help of generic helm charts for the same.
Link of ingress object is this
Note: After creating an ingress object we have to add the below line in annotation in itself.
nginx.ingress.kubernetes.io/whitelist-source-range: 65.2.41.152/32
Now when we try to access the Devtron dashboard without VPN , we can not do it.
But as soon as we connect to VPN we will be able to access the dashboard.
Method 3
In this method we will create a security group in VPC where eks cluster is present and allow the IP of VPN
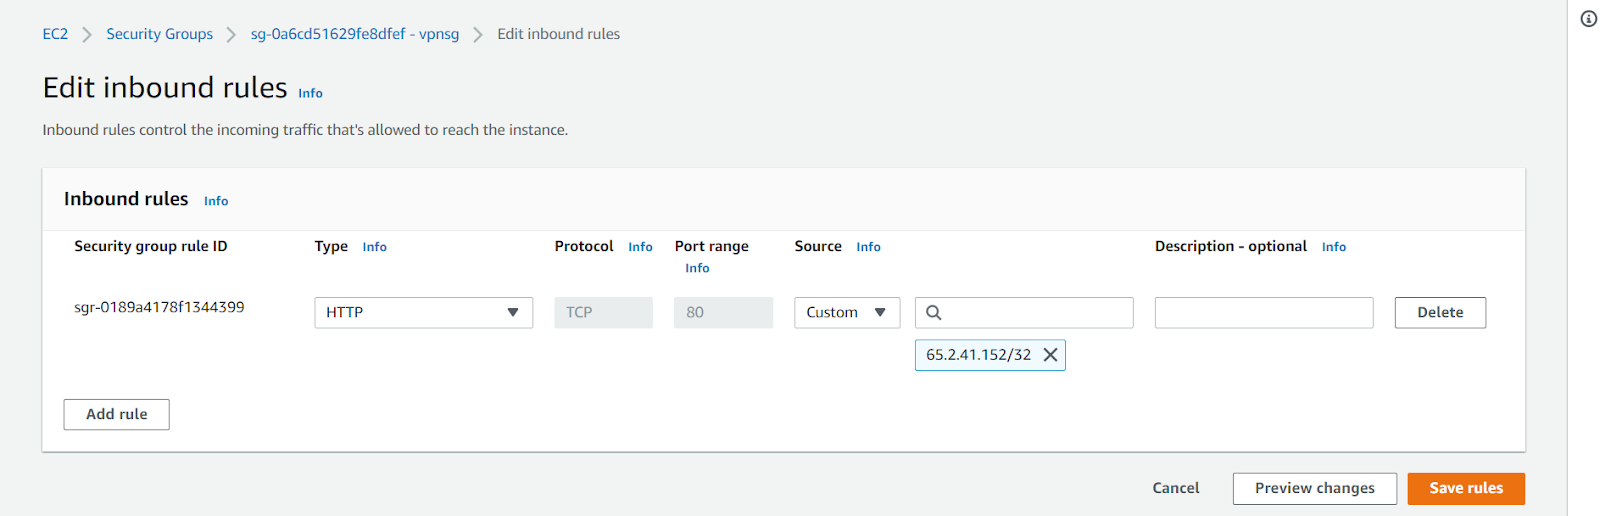
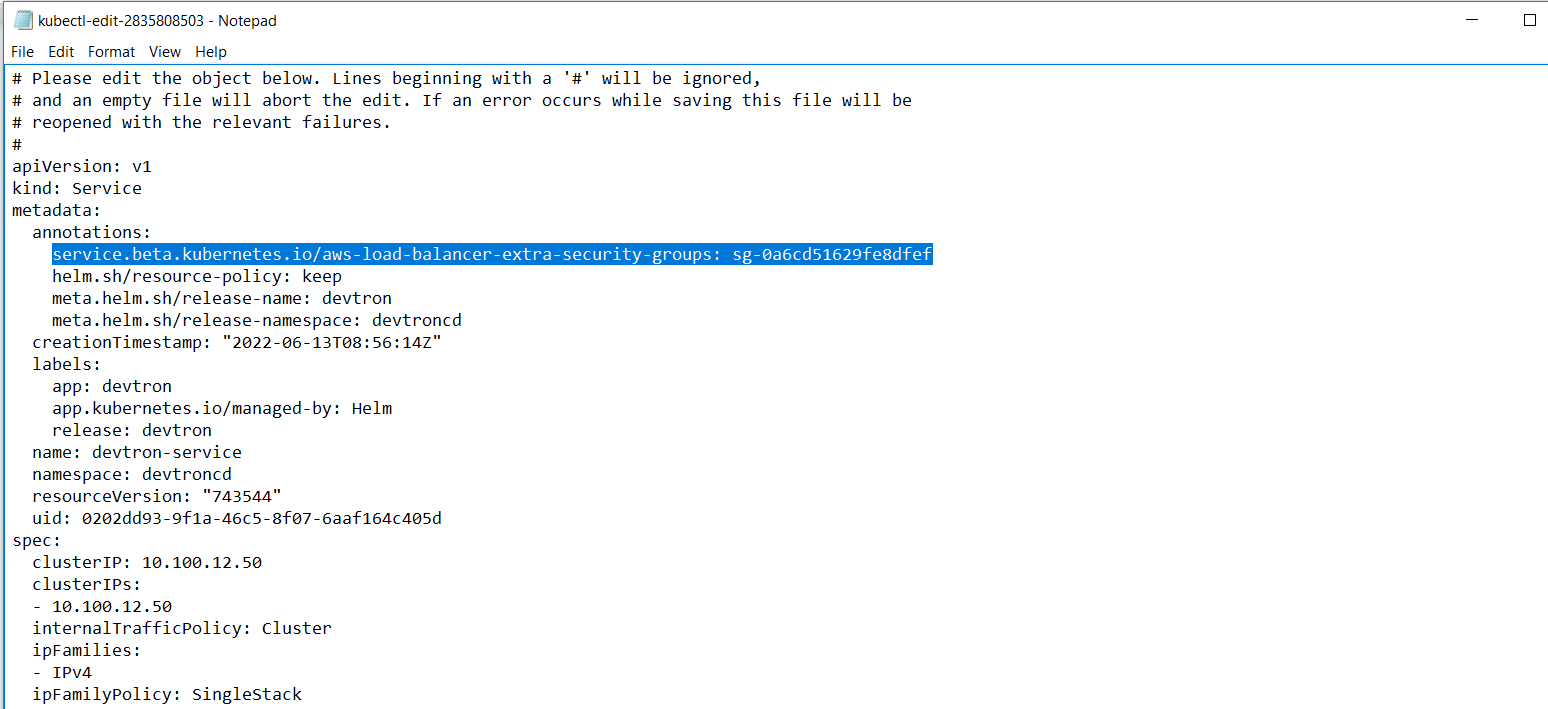
Just take this id of the security group and edit the devtron-service after that add below line in its annotation.
service.beta.kubernetes.io/aws-load-balancer-extra-security-groups: sg-0a6cd51629fe8dfef

Now we will connect to VPN and you are able to access the Devtron dashboard.
Hurray! Finally We have set up VPN to restrict Devtron dashboard through Devtron’s intuitive dashboard itself. Hope you get a better understanding on how to set up VPN using helm charts through Devtron and how easy it is. If you have any doubts, feel free to let us know through comments.
FAQ
How can I set up a VPN to restrict access to the Devtron dashboard in Kubernetes?
You can set up a VPN using the OpenVPN Helm chart via Devtron’s UI. Once deployed, you can generate a .ovpn client config, connect to the VPN, and restrict dashboard access by whitelisting the VPN IP through service, ingress, or security group settings.
What are the benefits of using a VPN for accessing Devtron in Kubernetes?
Using a VPN secures access to your Devtron dashboard by masking your IP and limiting access to trusted networks. It protects internal data, ensures only authorized users can connect, and adds an extra security layer on public or shared networks.
What are the different methods to restrict Devtron access via VPN?
There are three main methods:
1: Add loadBalancerSourceRanges to Devtron’s service.
2 (Recommended): Whitelist the VPN IP in the ingress annotations.
3: Use AWS security group to allow only the VPN IP.
How do I generate and use an OpenVPN .ovpn config for Kubernetes access?
After deploying OpenVPN with Helm via Devtron, run a script that creates a .ovpn config file using the VPN pod’s details. Use this config with an OpenVPN client to securely connect to your Kubernetes cluster and access restricted Devtron services