Kubernetes is a powerful container orchestration tool, with lots of tiny components working together to manage your application. As the applications start scaling, so does the number of individual Kubernetes resources like services, deployments, ingresses, and persistent volumes. Now, these resources might belong to the same application or different, but without a way to sort them, it becomes very difficult to track which resources are related to each other. For example, pinpointing the right Kubernetes resource may feel like a nightmare when you're trying to make changes in your application or troubleshoot issues without a way to identify resources.This is where labels and selectors comes in. They provide a very straightforward solution to organize, select, and connect Kubernetes resources. By using labels and selectors, you can easily group and identify Kubernetes resources based on specific attributes using key-value pairs. They improve visibility, showing you how different Kubernetes resources are working together and enabling connections like linking a service to its pods or applying scheduling rules.
In this blog, you'll discover the importance of labels and selectors and how to use them in your Kubernetes clusters.
What are Kubernetes Labels and Selectors?
Kubernetes Labels are key-value pairs that are attached to any Kubernetes resource, including pods, services, deployments, and more. You can think of them as simple tags like env=prod or color=black that are used to identify Kubernetes resources. It is defined in the metadata section of the YAML files of the resources.
Here's an example of what Labels look like in a YAML file:
apiVersion: apps/v1
kind: pod
metadata:
 name: my-app
 labels:
   app: frontend
Let’s understand what is being defined in the above YAML file.
- apiVersion: The version of the Kubernetes API being used.
- kind: The type of Kubernetes resource.
- metadata: Contains information that helps identify and describe the resource.
- name: Sets a name for the pod, here called my-app.
- labels: Here, the label is app: frontend, meaning this pod is part of the "frontend" application or layer.
The label app: frontend makes it easy to find and work with all pods marked as "frontend". Imagine you have 10 pods and half of them are for the frontend while the others are for the backend. By labeling them, you can quickly filter them by using kubectl commands like kubectl get pods -l app=frontend, this will list out all frontend pods.
Kubernetes Selectors, on the other hand, work in conjunction with labels allowing Kubernetes to find specific resources based on these tags.
For example, let’s understand the service YAML file below:
apiVersion: v1
kind: Service
metadata:
 name: my-app
spec:
 ports:
 - port: 80
   targetPort: 8000
 selector:
   app: frontend
Let’s go through it step-by-step:
- name: The name of the service
- kind: The type of Kubernetes resource
- selector: The selector for the label that we want to target. In this case, we are selecting every pod that has labeled as:
app:frontend - ports: The port and protocols where the service should expose the pod.
The label app: frontend on the pods and the selector in the service work together to make sure traffic only reaches the right pods. Imagine you have a few different types of pods running, some for the frontend, and some for the backend. This setup keeps things organized by routing traffic only to the frontend pods labeled app: frontend.
You can refer to this blog if you wish to learn about Kubernetes services and their types, along with examples.
Types of Selectors
Labels and Selectors are very tightly bound to each other. We cannot have selectors without labels. Now, let’s discuss the types of Selectors provided by Kubernetes.
Equality-Based Selectors
Equality-based selectors are mostly used in the Imperative or Command line statements. These are simple rules that check if a label has a specific value. There are three kinds of operators admitted to it, =, ==, !=.
- =: Checks if a label has a specific value (same as ==).Example: env=production selects resources where the label env is set to production.
- ==: Also checks if a label has a specific value (synonym for =).Example: env==production selects resources where the label env is set to production.
- !=: Checks if a label does not have a specific value.Example: env!=staging selects resources where the label env is not set to staging.
Let’s take an example scenario where we want to filter resources based on exact label matches using Equality Selectors.
You want to find all resources where the env label is set to production
To find resources with the label env=production, you can use the following CLI command:
kubectl get pods -l env=productionThis command filters and lists all Pods with the env=production label.
Set-Based Selectors
Set-Based selectors are typically used in declarative statements using the YAML file. They provide more flexibility than Equality-Based selectors. Three kinds of operators are supported: In, NotIn, and Exists.
- In: Selects resources with a label that matches any of the given values.
Example: environment In (production, staging) will find resources in either production or staging.
- NotIn: Excludes resources with a label that matches any of the given values.
Example: team NotIn (dev, qa) will skip resources labeled as dev or qa.
- Exists: Selects resources that have the specified label, regardless of its value.Example:
tier Existsselects resources that have thetierlabel.
Here’s an example where we define these selectors in a YAML file:
selector:
  matchExpressions:
    - key: env
      operator: In
      values:
        - production
  matchExpressions:
    - key: app
      operator: NotIn
      values:
        - python
Let’s breakdown the above YAML file:
- The
matchLabelssection usesInoperator to filter out resources where theenvlabel isproduction. - The
matchExpressionssection usesNotInoperator to filter out resources where theapplabel ispython.
In the Set-Based selectors, we select Labels using two keywords. These are as follows:
matchLabels
matchLabels is a very straightforward way to select objects based on label keys and values. You provide a list of labels with their exact values, and Kubernetes will match resources with those labels.
For example, let’s have a look at its syntax and YAML configuration.
selector:
  matchLabels:
    app: java
    environment: production
This says that find all resources where app is java and environment is production.
If you look carefully, matchLabels are actually equality conditions.
Here, the app should only be java and environment should only be production. It cannot have multiple values for one key.
matchExpressions
matchExpressions is an extension of matchLabels where we have a label key, an operator (In, NotIn, Exists, and DoesNotexists), and then its values which can be more than one.
Again, let’s understand the syntax and its use through an example:
selector:
matchExpressions:
- { key: environment, operator: In, values:[k8straining] }
- { key: app, operator: NotIn, values: [python, java] }
This selector uses matchExpressions to define two conditions for filtering resources based on their labels:
environment In (k8straining)This condition selects resources that have the label environment with the value k8straining.app NotIn (python, java)This condition excludes resources that have the label app with the value python or java. It also includes resources that don’t have the app label at all.
Kubernetes will select resources that:
- Have the environment label set to
k8straining. - Do not have the app label set to
pythonorjava.
Why use Kubernetes Labels & Selectors?
So far, we’ve discussed what labels and selectors are and how we use them to organize and select our Kubernetes resources in a simple and efficient way. By now, you might already appreciate their importance. Now, let’s dive into why they’re so essential and look at some real-world scenarios.Here are two key aspects of Kubernetes where Labels and Selectors play a vital role:
- Staying Organized: Labels let you group your resources by categories like environment (production, staging) or app type (frontend, backend). This makes it easy to know what’s what.
- Quickly Find Resources: Using simple commands, you can quickly locate specific resources. For example
kubectl get pods -l app=frontendThis lists all Pods with the label app=frontend.
Now, let’s discuss some real-life examples as well:
- Resource Selection: If you have a backend service that needs to connect to your backend Pods. You can label the Pods with app=backend and use a selector in the Service to find them. For, example in the below YAML, the Service always routes traffic to the pods that have the label backend, even as new Pods are added or removed.
selector:
app: backend- Distinguishing between applications meant for production or staging environments: If you’re running apps in both production and staging, you can label resources with
environment: productionorenvironment: staging. This helps you keep them separate and work with just the ones you need. A Service targeting only theproductionenvironment would use a selector as shown in the below YAML. This ensures the Service sends traffic only to Pods in the production environment, keeping staging andproductionenvironments isolated.
selector:
  app: frontend
environment: production- Grouping Related Resources: Labels are a great way to group all the resources that belong to the same application. For example, if you have an e-commerce app, you can label all its related resources like Deployments, Services, and ConfigMaps with app: e-commerce. This makes it easy to identify and manage all resources for the e-commerce app as a group:
labels:
  app: e-commerce
You can then run a simple command to view all resources for the e-commerce app:
kubectl get all -l app=e-commerce
Hands-on: Connecting Pods to a Kubernetes Service Using Labels and Selectors
We’ve talked about Labels and Selectors, their types, examples, and how they’re used in real-life situations. By now, you probably have a good idea of what they are and why they’re important. But understanding them isn’t enough! You need to try them out yourself! Let’s jump into a hands-on session where we’ll connect our Pods to a Kubernetes Service using Labels and Selectors.
Prerequisites:
To follow along you’ll need a Kubernetes Cluster with two or more nodes. You can create one by using minikube or you can use one of these Kubernetes playgrounds:
Create a Pod with Labels
First, we’ll create a pod and add labels to it so that Kubernetes can identify it using the below YAML file.
apiVersion: v1
kind: Pod
metadata:
  name: my-pod
  labels:
    app: demo
    environment: production
spec:
  containers:
  - name: nginx
    image: nginx-latest
Let’s break the above YAML manifest down and understand what’s happening in it.
- A Pod named
my-podis created. - It includes two labels:
app: demoidentifies it as part of the "demo" application.environment: productioncategorizes it under the production environment.
- The Pod runs an Nginx container using the default Nginx image.
You can save the above configuration in a YAML file called as my-pod.yaml, and use the below command to create a pod with the labels and spec.
kubectl apply -f my-pod.yaml
Check your Pod and its labels:
kubectl get pods --show-labelsYou’ll see your Pod listed with its labels.
Create a Service to Connect the Pod
Now, let’s create a Service to expose the Pod. We’ll use a selector in the Service to match the Pod’s label. This will allow our service to send traffic to our Pod.
apiVersion: v1
kind: Service
metadata:
  name: my-service
spec:
  selector:
    app: demo    # Looks for Pods with label "app: web"
    environment: production # Looks for Pods with label "environment: production"
  ports:
    - port: 80
  type: ClusterIP
Let’s break the above YAML manifest down again and understand what’s happening before applying it.
- A Service named my-service is created.
- Selector: The Service targets Pods with both
app: demoandenvironment: productionlabels. - Ports: The Service listens on
port: 80and forwards traffic to Pods matching the selector. - Type: The ClusterIP type makes the Service accessible within the Kubernetes cluster using an internal IP.
This Service makes sure only Pods with the right labels get traffic. The service makes use of the selector to make sure that the correct set of pods are being exposed.
You can save the above configuration in a YAML file called as my-service.yaml, and use the below command to create a service.
kubectl apply -f my-service.yamlCheck that everything is connected:
kubectl get pods --show-labelsThe command lists all Pods in the current namespace and displays their associated labels. So, you’ll see the labels app: demo and environment: production associated with the pod.
Testing the connection
To test the service locally, run the following command
kubectl port-forward service/my-service 8080:80This command connects port 80 of the my-service to port 8080 on your computer.
You’ll see output like this
Forwarding from 127.0.0.1:8080 -> 80
Forwarding from [::1]:8080 -> 80
Once you've port-forwarded the service to your local machine, run the command curl localhost:8080 in a new terminal. If you receive the Nginx response, it means that the service is successfully running and accessible locally. This confirms that the port-forwarding is working as expected, and your service is set up properly to handle requests.
Labels & Selectors with Devtron
Kubernetes Labels provide a built-in solution to identify Kubernetes resources and find out which resources are interrelated. Selectors on the other hand can help assign specific behaviour for the resource. For example, a selector can be used for scheduling a pod to specific nodes, or to select a specific set of pods to expose with a service. As you have already learned in this blog, Labels and Selectors are very useful when it comes to
- Organizing Kubernetes Resources
- Identifying the purpose of Kubernetes Resources
- Determine the type of applications
- Select a set of resources for further action
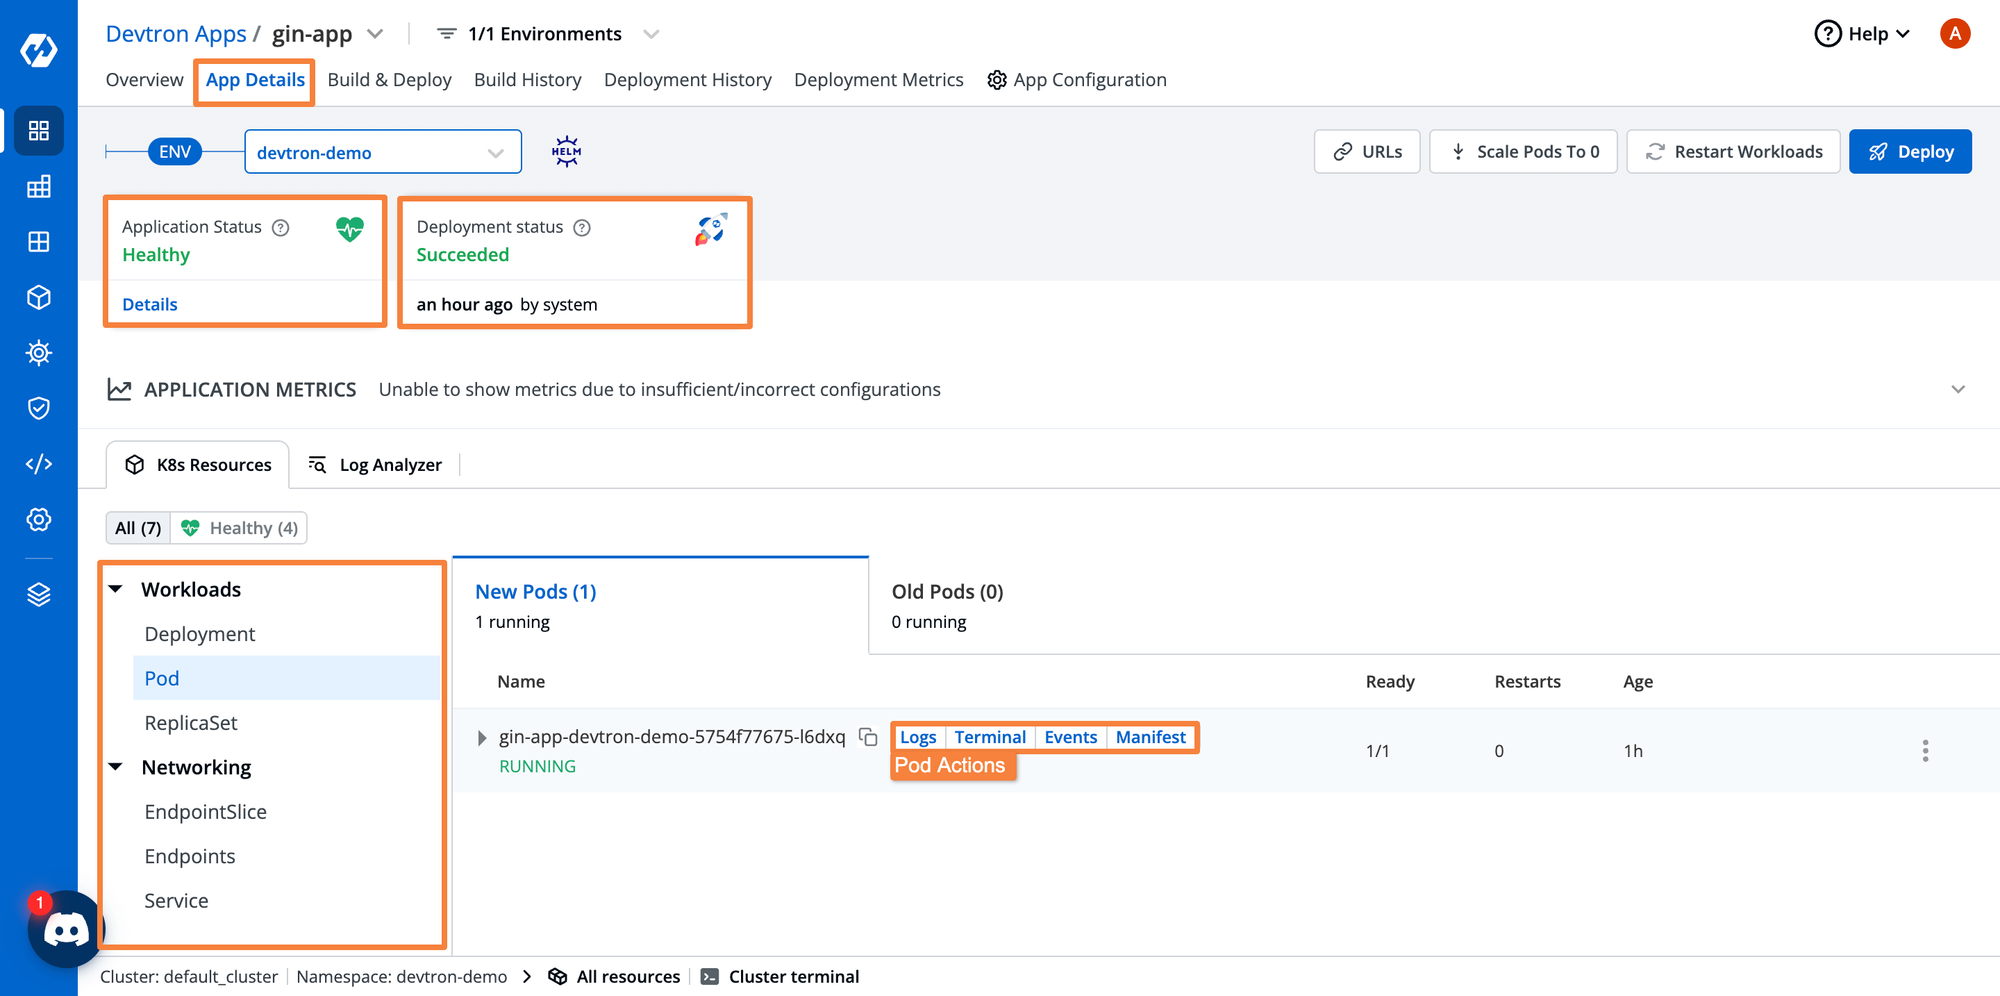
Devtron is an open-source Kubernetes management platform, that can abstract out the use of Labels and Selectors. Instead of having to manually label the Kubernetes resources, and use selectors for exposing pods with services, Devtron can manage everything for you.
While deploying the application, you can configure all the different application components such as service types, ingress resources, auto scalers, etc, and Devtron will systematically label all the resources. Devtron can take things one step further by providing you with proper visibility into all the resources related to a particular application.

If you are looking for a platform for managing your Kubernetes applications, you can try out Devtron for managing your entire application lifecycle.
Conclusion
In this blog, we learned about labels and selectors in Kubernetes and how they help organize and connect our Kubernetes resources. We covered how to use selectors to target specific Pods or services and connected a Pod to a Service using labels. We also tested our setup with port-forwarding and checked the service using a curl command. By the end, you should have a good understanding of how to use labels and selectors to manage your Kubernetes resources.


