As more businesses move their operations to the cloud, Kubernetes has emerged as one of the most popular container orchestration platforms. However, managing a Kubernetes cluster securely can be a challenge, particularly when it comes to protecting sensitive data and resources. One solution that can help is using a VPN or Virtual Private Network. This blog discusses setting up a VPN to access Devtron with SSO integration from scratch.
In this blog post, we'll cover the following topics:
- Why should we restrict access to the Devtron dashboard through VPN?
- How to configure Amazon VPC to create a private Kubernetes cluster?
- How to create a private EKS cluster?
- Installing Devtron on the k8s cluster.
- Installing OpenVPN Helm chart.
- Why is persistent volume required for VPN?
- Configuring profile on OpenVPN client.
- Restrict the Devtron dashboard through VPN.
Why should we restrict access to the Devtron dashboard through VPN?
Devtron is an open-source platform that provides tools for managing and deploying applications in a Kubernetes environment. The Devtron dashboard is a web-based interface that allows users to manage and monitor their Devtron deployments. Here are a few reasons why it's a good idea to restrict access to the Devtron dashboard through VPN:
- Security: Restricting access to the Devtron dashboard through VPN adds an extra layer of security by ensuring only authorized users can access the dashboard. This can help prevent unauthorized access and attacks.
- Compliance: Many organizations are subject to regulatory requirements that mandate secure access controls to web applications. Organizations can ensure compliance with these requirements by restricting access to the Devtron dashboard through VPN.
- Privacy: The Devtron dashboard may contain sensitive information such as application logs, deployment status, and user data. By restricting access to the dashboard through VPN, organizations can protect this information from unauthorized access and disclosure.
- Network Segmentation: VPNs can be used to segment network traffic and restrict access to specific resources. By restricting access to the Devtron dashboard through VPN, organizations can ensure that only authorized users can access the dashboard and can prevent the dashboard from being accessed by unauthorized users or entities.
Overall, restricting access to the Devtron dashboard through VPN can help organizations maintain the security, privacy, and compliance of their Devtron deployments.
Now, let's move to setting up Devtron from scratch. For installing Devtron, we need a K8s cluster, and for creating an EKS cluster, we'll create a separate VPC for this. So, let's start with configuring Amzon VPC.
How to Setup VPN for Restricting the Dashboard Access
Let us now look at how we can configure to restrict the Dashboard access using an open-source VPN protocol - OpenVPN. In the current process explained below, we will use a managed Kubernetes Cluster on AWS where the Devtron instance is already running. This setup will require a helm chart manifest file that is available pre-configured on the Devtron Platform.
Now, let's move to setting up Devtron from scratch. For installing Devtron, we need a K8s cluster, and for creating an EKS cluster, we'll create a separate VPC for this. So, let's start with configuring Amazon VPC.
Step 1: Configure Amazon VPC
To configure an Amazon VPC, you can follow the steps outlined below:
- Create a VPC: Start by creating a new VPC with a CIDR block that suits your needs.
- Create public subnets: Create one or more public subnets within your VPC. These subnets should have a route to an internet gateway, so they can access the internet directly.
- Create a custom route table: Create a custom route table for your public subnets. This route table should route all outbound traffic to the internet gateway.
- Associate subnets with the custom route table: Associate your public subnets with the custom route table you created in step 3.
- Create a NAT Gateway: Create a NAT Gateway in one of your public subnets. This will provide a way for resources in your private subnets to access the internet.
- Create private subnets: Create one or more private subnets within your VPC. These subnets should not have direct access to the internet.
- Configure security groups: Create security groups for the resources within your VPC. Make sure to configure the security groups to allow traffic only from the sources you specify.
- Create a custom route table for your private subnets: Create a custom route table for your private subnets. This route table should route all outbound traffic through the NAT Gateway.
- Associate subnets with the custom route table: Associate your private subnets with the custom route table you created in step 8.
Step 2: Create an EKS cluster
To create an EKS cluster using eksctl, you can follow these general steps:
- Install
eksctl: If you haven't already, installeksctlon your local machine by following the installation instructions provided in the official documentation. - Create an
eksctlconfiguration file: Create a YAML file that defines the configuration for your EKS cluster. Here's an exampleeksctlconfiguration file for creating an EKS cluster:
apiVersion: eksctl.io/v1alpha5
kind: ClusterConfig

metadata:
  name: devtron-cluster
  region: ap-south-1
  version: "1.23"

vpc:
  id: "vpc-05470815b7c24f200"
  cidr: "192.168.0.0/16"
  subnets:
    private:
      private-1A:
          id: "subnet-09f2f5916355c4a35"
          cidr: "192.168.2.0/24"
      private-1B:
          id: "subnet-06b8dad239208ef22"
          cidr: "192.168.4.0/24"
    public:
      public-1A:
          id: "	subnet-05498027d9bfd6ffd"
          cidr: "192.168.1.0/24"
      public-1B:
          id: "subnet-014c32d0d361deb6c"
          cidr: "192.168.3.0/24"

nodeGroups:
  - name: nodes-ap-south-1a
    privateNetworking: true
    availabilityZones:
      - ap-south-1a
    desiredCapacity: 1
    minSize: 1
    maxSize: 5
    instancesDistribution:
      maxPrice: 0.5
      instanceTypes: ["c5n.2xlarge","m5a.2xlarge","m4.2xlarge"]
      onDemandBaseCapacity: 1
      onDemandPercentageAboveBaseCapacity: 0
      spotAllocationStrategy: "capacity-optimized-prioritized"
    iam:
      withAddonPolicies:
        autoScaler: true
      attachPolicyARNs:
        - arn:aws:iam::aws:policy/AmazonEKSWorkerNodePolicy
        - arn:aws:iam::aws:policy/AmazonEKS_CNI_Policy
        - arn:aws:iam::aws:policy/AmazonEC2ContainerRegistryFullAccess
        - arn:aws:iam::aws:policy/AmazonS3FullAccess
    ssh:
      allow: true
      publicKeyName: "devtron-cluster"
    volumeSize: 100
    tags:
      Component : prod
    kubeletExtraConfig:
        kubeReserved:
            cpu: "100m"
            memory: "100Mi"
            ephemeral-storage: "1Gi"
        kubeReservedCgroup: "/kube-reserved"
        cpuManagerPolicy: "static"
        systemReserved:
            cpu: "100m"
            memory: "100Mi"
            ephemeral-storage: "1Gi"
        evictionHard:
            memory.available:  "200Mi"
            nodefs.available: "10%"
        featureGates:
            DynamicKubeletConfig: true
            RotateKubeletServerCertificate: true
            CPUManager: true
Example eksctl config to create a Kubernetes cluster
You can customize this example configuration file to suit your needs.
3. Create the EKS cluster: Use the eksctl create cluster command to create the EKS cluster using the configuration file. For example:
eksctl create cluster -f devtron-cluster.yaml4. Wait for the cluster to be created: eksctl will create the necessary resources in your AWS account to create the EKS cluster. This may take a few minutes.
5. Verify the cluster: Use the kubectl command to verify that the EKS cluster is running correctly. For example, run:
kubectl get nodesStep 3: Install and access Devtron
You can install Devtron on the cluster using Helm by running the following commands:
helm repo add devtron https://helm.devtron.ai

helm repo update

helm install devtron devtron/devtron-operator \
--create-namespace --namespace devtroncd \
--set installer.modules={cicd} \
--set argo-cd.enabled=true
For more installation options, you can visit here.
Run the following command to get the Devtron dashboard URL:
kubectl get svc -n devtroncd devtron-service \
-o jsonpath='{.status.loadBalancer.ingress}'
Run the following command to get the admin password:
kubectl -n devtroncd get secret devtron-secret \
-o jsonpath='{.data.ADMIN_PASSWORD}' | base64 -d
Step 4: Set up OpenVPN to access Devtron’s Kubernetes Dashboard.
To enable access to Devtron through OpenVPN and establish a secure connection with Devtron Dashboard, follow the steps as described below.
Create PVC for OpenVPN pod.
When an OpenVPN pod is created, it needs to store the configuration and certificates so that clients can connect to the VPN server. However, the pod is ephemeral, meaning that any data stored within it will be lost when the pod is deleted. To avoid losing the OpenVPN server configuration and client certificates, a PVC is used to claim a persistent volume in Kubernetes that will store this data outside of the OpenVPN pod.
By using a PVC, the OpenVPN server configuration and client certificates can persist even when the pod is deleted or recreated, ensuring that the VPN service remains available to clients.
To create PVC, we can use devtron-generic-helm chart from the chart store and use the following YAML :
kind: PersistentVolumeClaim
apiVersion: v1
metadata:
  name: efs-openvpn-dev-pvc
spec:
  accessModes:
    - ReadWriteOnce
  storageClassName: gp2
  resources:
    requests:
      storage: 10Gi
YAML file to create PVC for OpenVPN

Install OpenVPN using Helm chart.
To install OpenVPN, go to chart store and search for openvpn. Configure the OpenVPN helm chart and deploy.
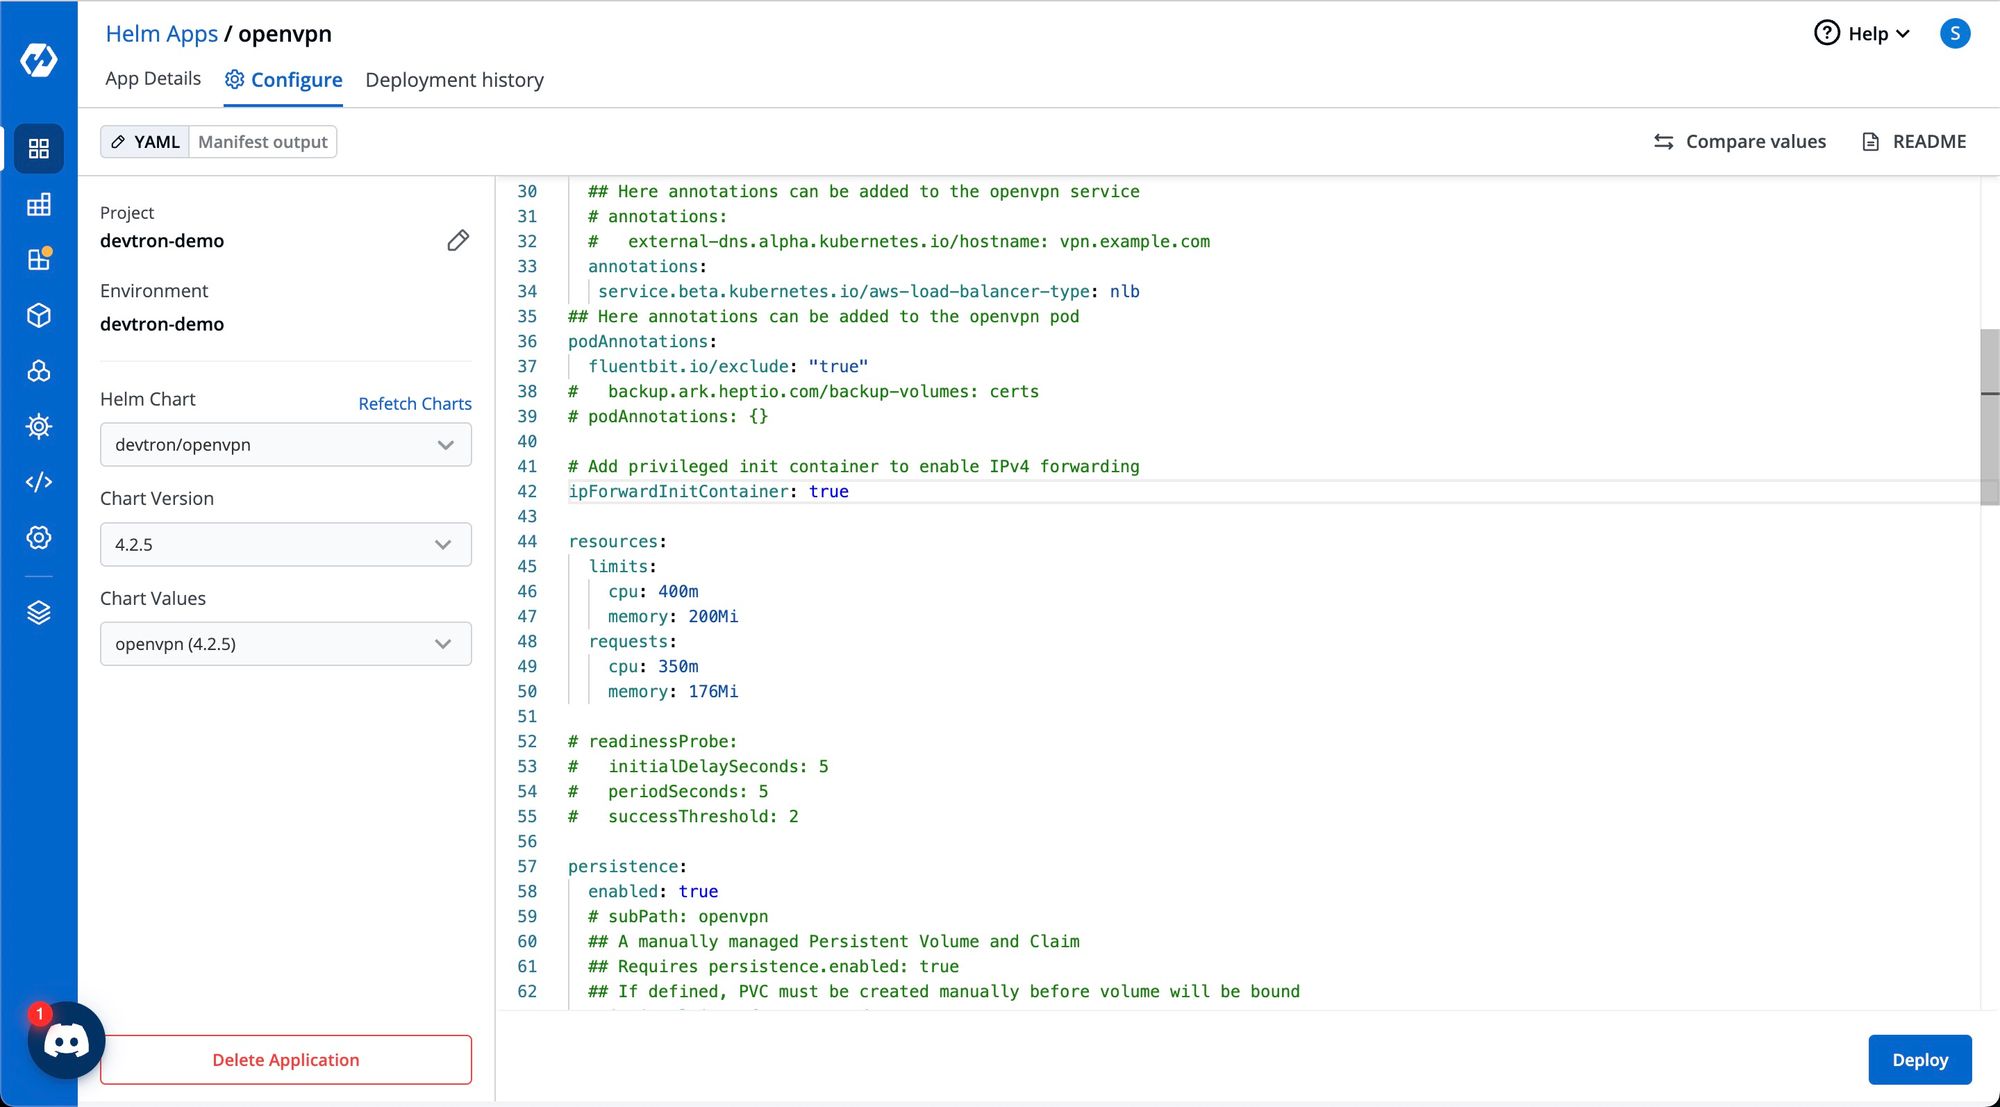
After installing the OpenVPN Helm chart, we need to execute a bash script to create the OpenVPN certificates.
!/bin/bash

if [ $# -ne 3 ]
then
echo "Usage: $0 <CLIENT_KEY_NAME> <HELM_RELEASE>"
exit
fi

KEY_NAME=$1
NAMESPACE=$2
HELM_RELEASE=$3
POD_NAME=$(kubectl get pods -n "$NAMESPACE" -l "app=openvpn,release=$HELM_RELEASE" -o jsonpath='{.items[0].metadata.name}')
SERVICE_NAME=$(kubectl get svc -n "$NAMESPACE" -l "app=openvpn,release=$HELM_RELEASE" -o jsonpath='{.items[0].metadata.name}')
SERVICE_IP=$(kubectl get svc -n "$NAMESPACE" "$SERVICE_NAME" -o go-template='{{range $k, $v := (index .status.loadBalancer.ingress 0)}}{{$v}}{{end}}')
kubectl -n "$NAMESPACE" exec -it "$POD_NAME" /etc/openvpn/setup/newClientCert.sh "$KEY_NAME" "$SERVICE_IP"
kubectl -n "$NAMESPACE" exec -it "$POD_NAME" cat "/etc/openvpn/certs/pki/$KEY_NAME.ovpn" > "$KEY_NAME.ovpn"
bash script to create OpenVPN certificates in a .ovpn file
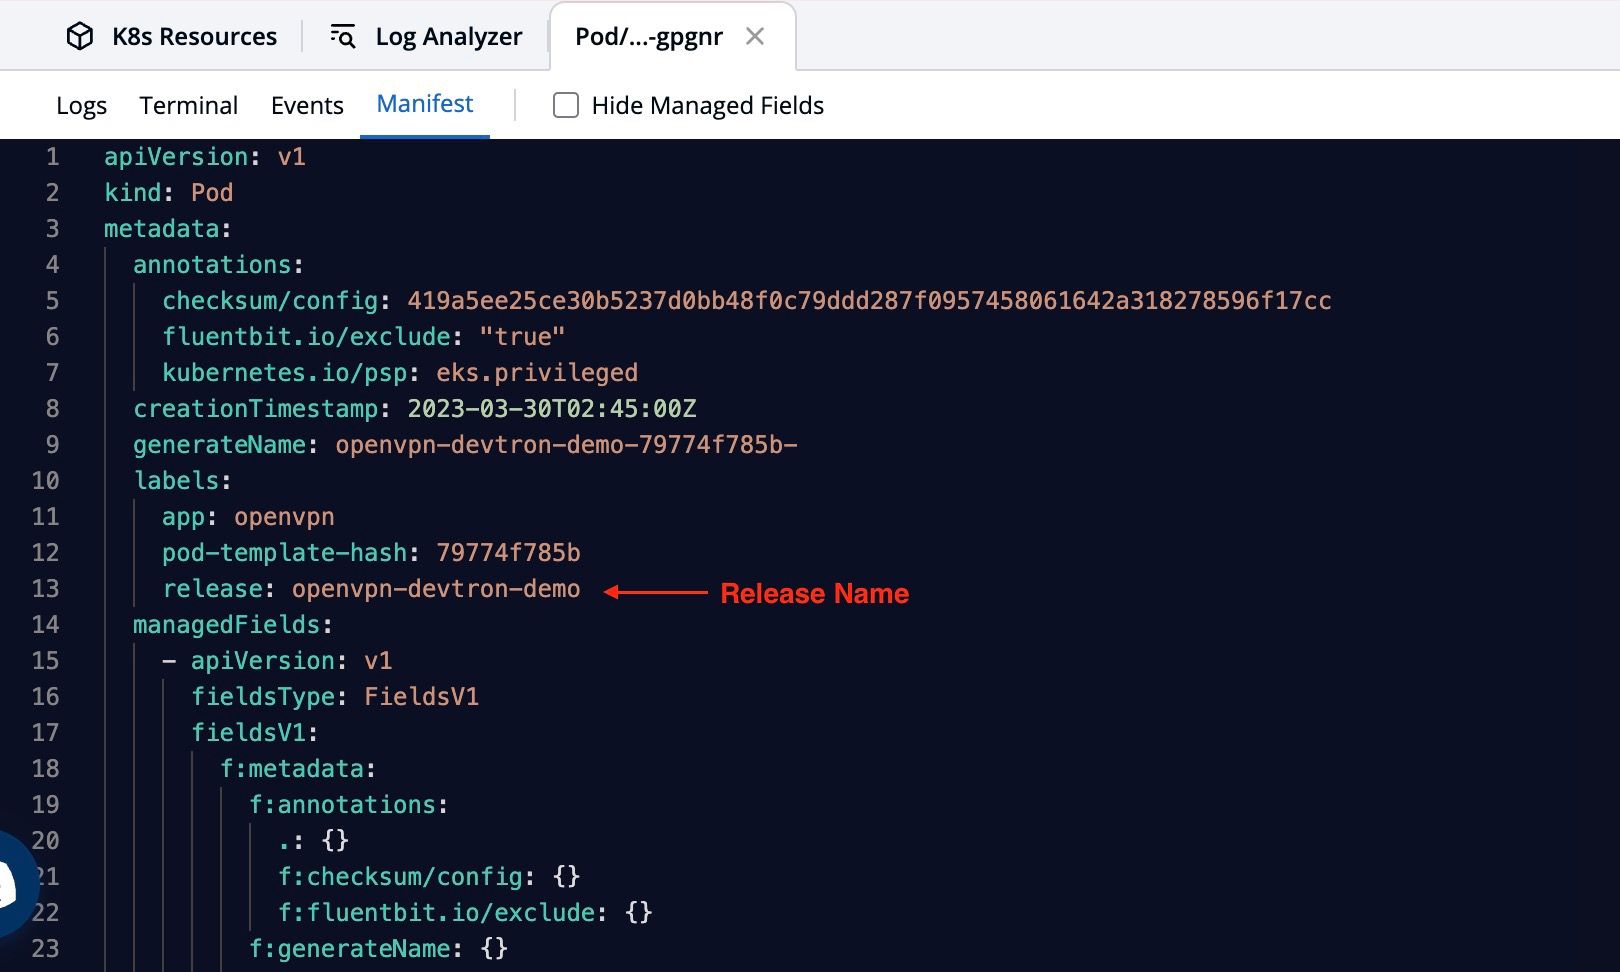
Also, we need to pass the three arguments listed below with the script.
- CLIENT_KEY_NAME: File to save the OpenVPN configuration.
- NAMESPACE: Namespace where the OpenVPN chart is deployed.
- HELM_RELEASE: Release name of the deployed OpenVPN Helm chart.
Example:
./vpn.sh devtron-vpn devtron-demo openvpn-devtron-demoAfter executing this script, devtron-vpn.ovpn file is created. Now we need to create a profile on the OpenVPN client using the same file.
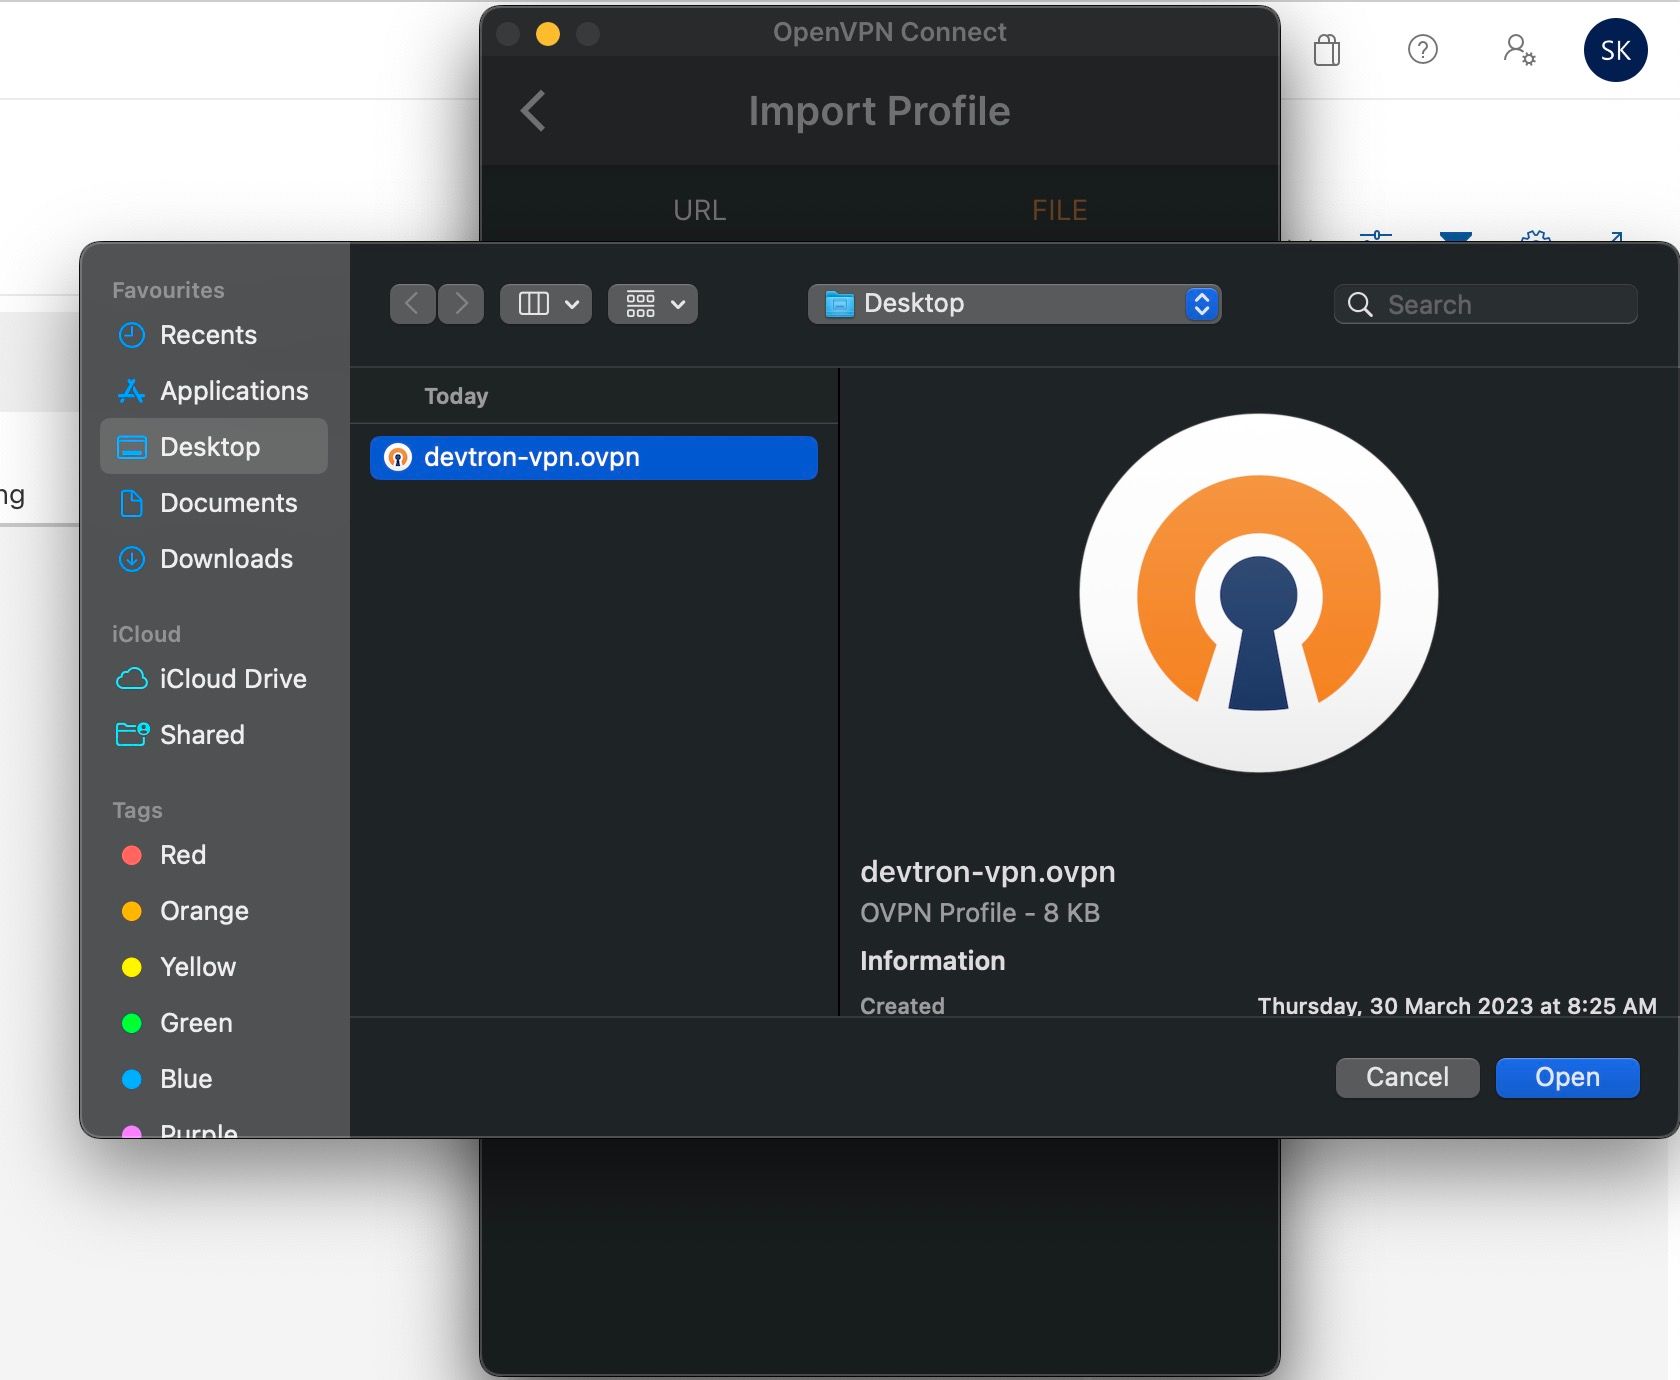
Once the OpenVPN client is configured, now we can restrict the Devtron dashboard either on the service level or the controller level if the Devtron dashboard is running on ingress.
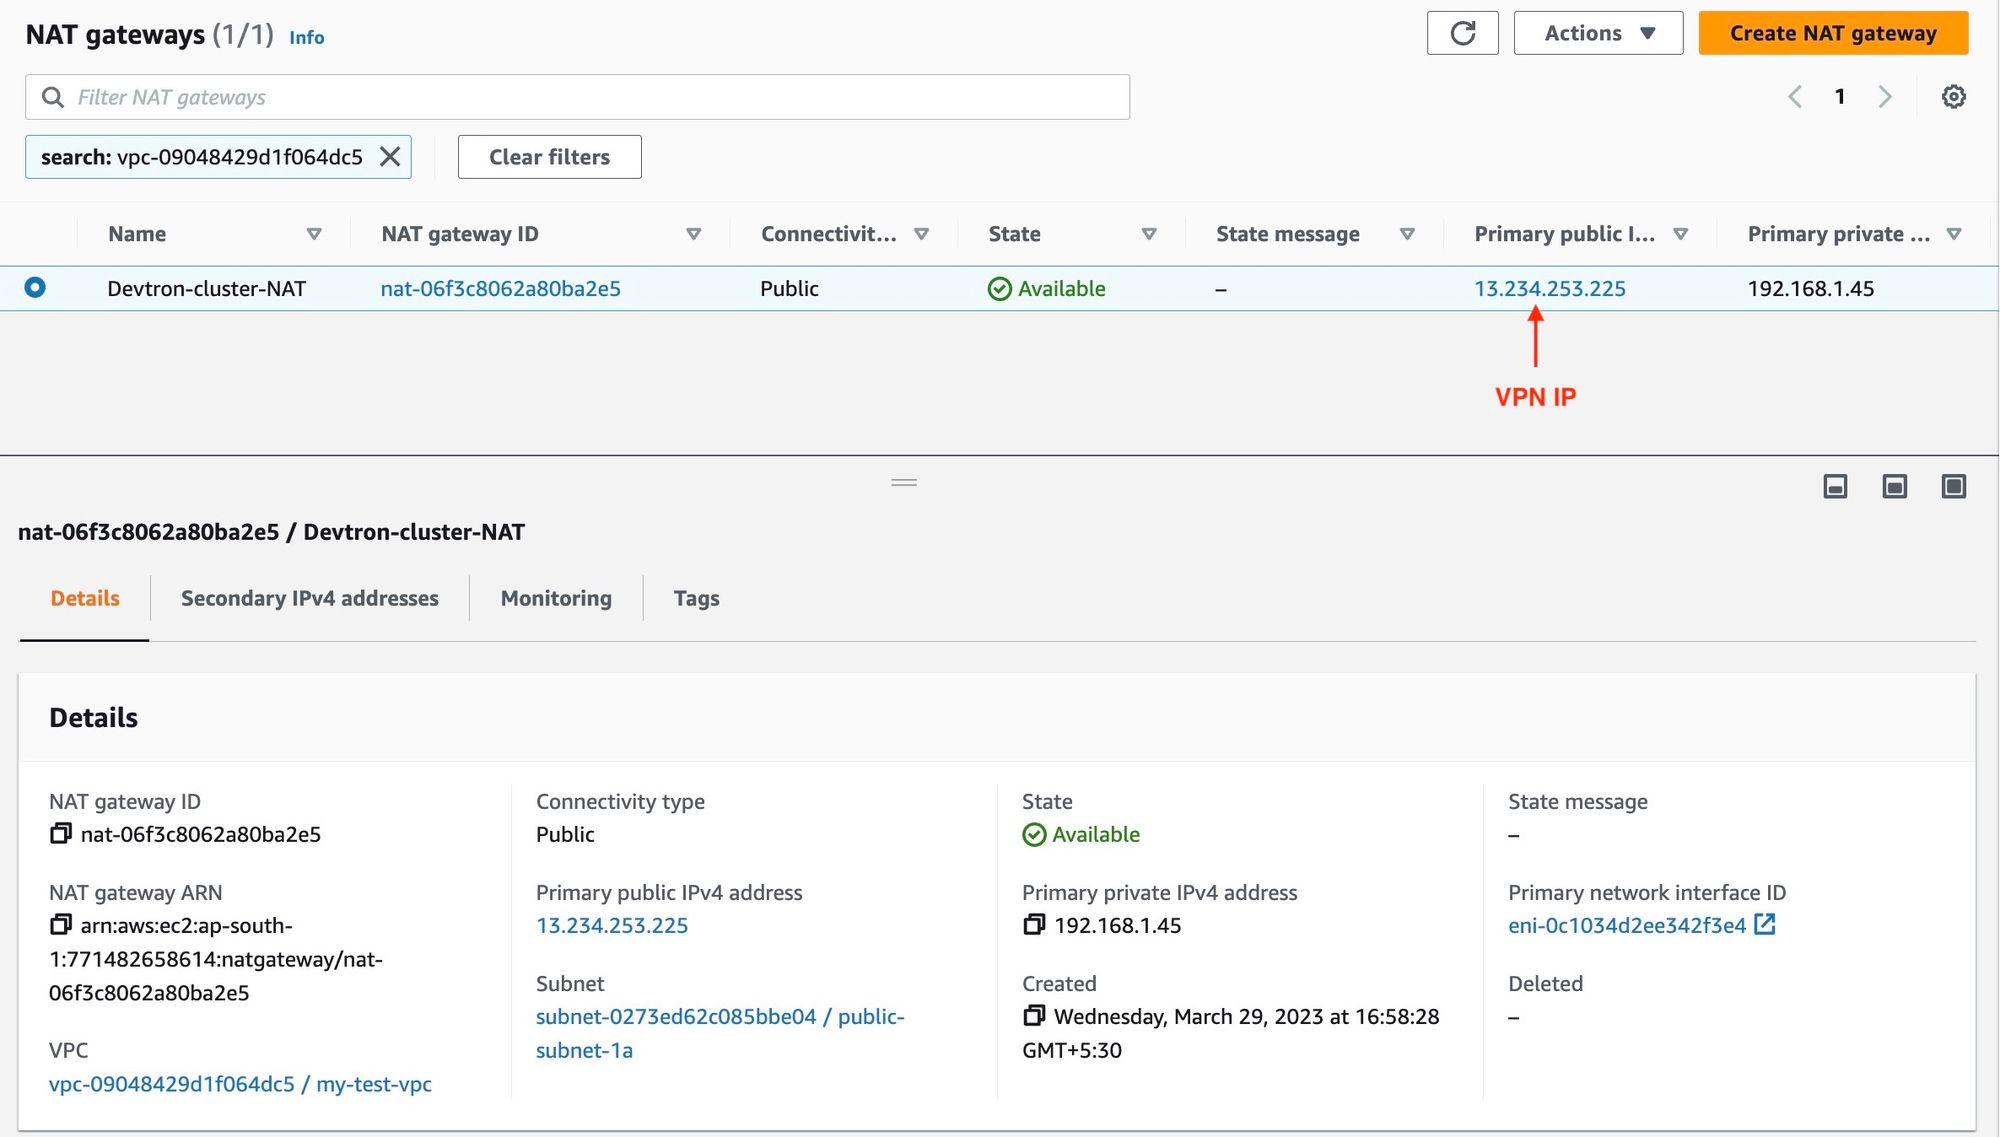
For restricting the Devtron dashboard through VPN, you need to copy the VPN IP i.e the elastic IP of the NAT gateway.
Restrict Devtron dashboard through OpenVPN on service level.
If you want to restrict the Devtron dashboard on the service level, edit the devtron-service in devtroncd namespace and add the following configuration under .spec:
loadBalancerSourceRanges:
- 13.234.253.225/32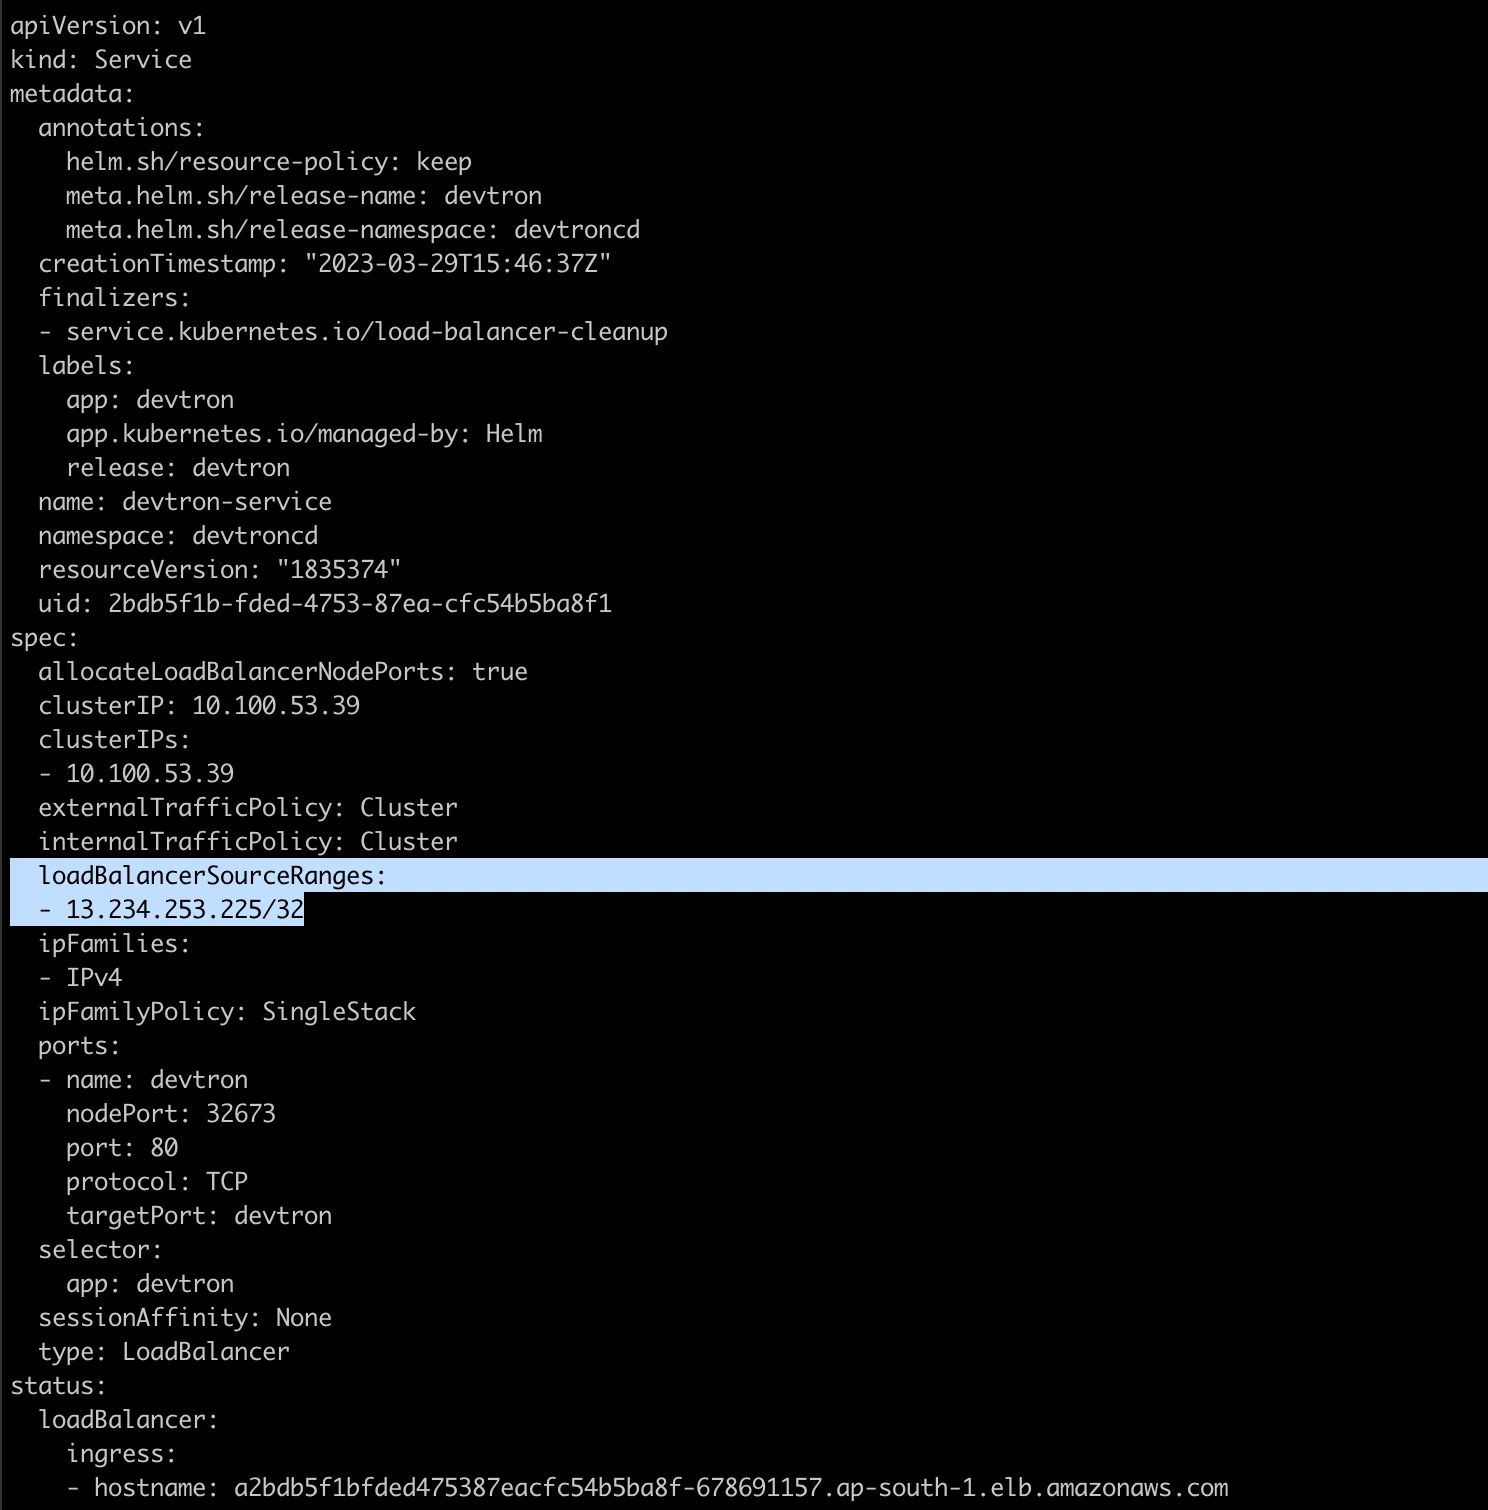
To edit the devtron-service, you can run the following command:
kubectl edit svc devtron-service -n devtroncdAfter editing the devtron-service, you won't be able to access the Devtron dashboard.
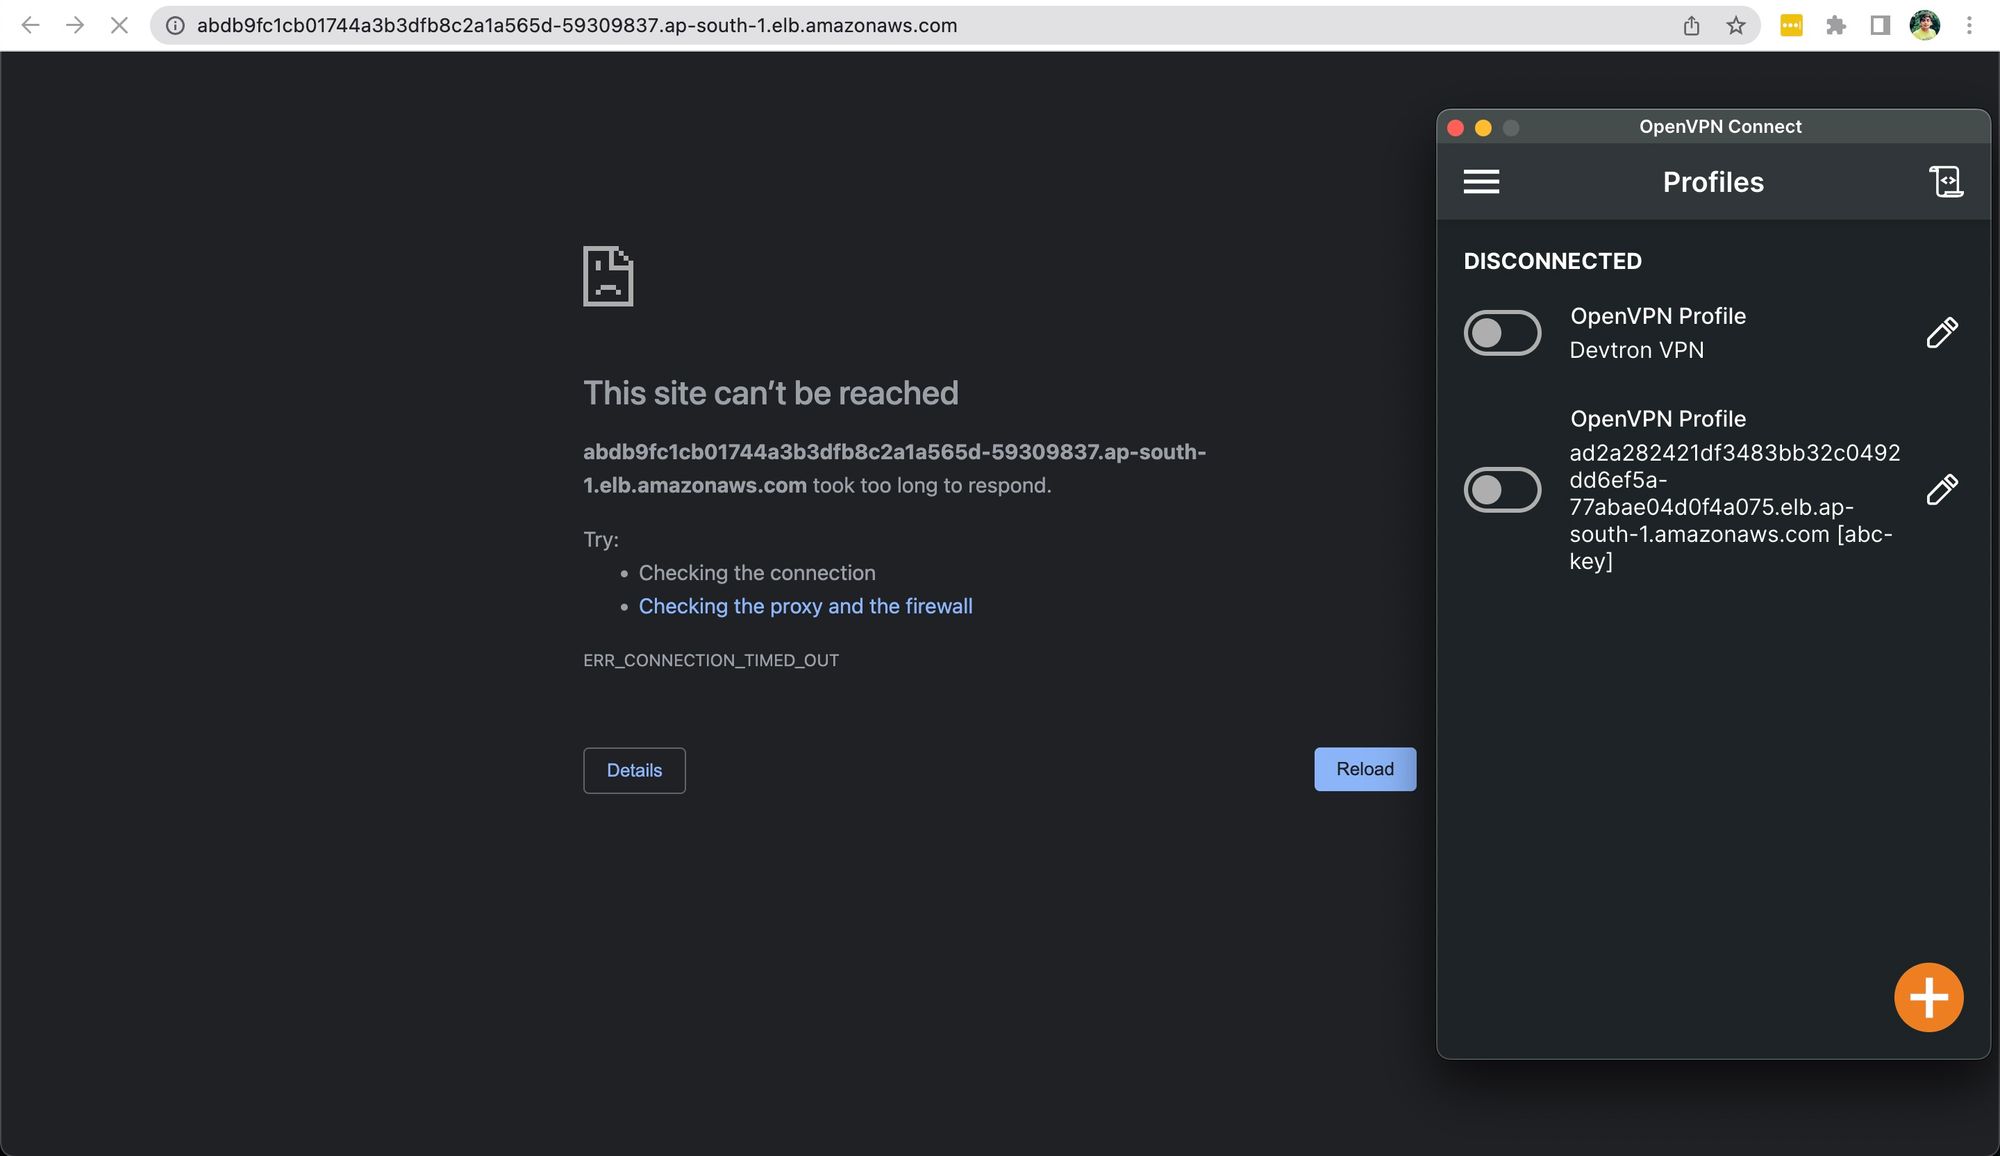
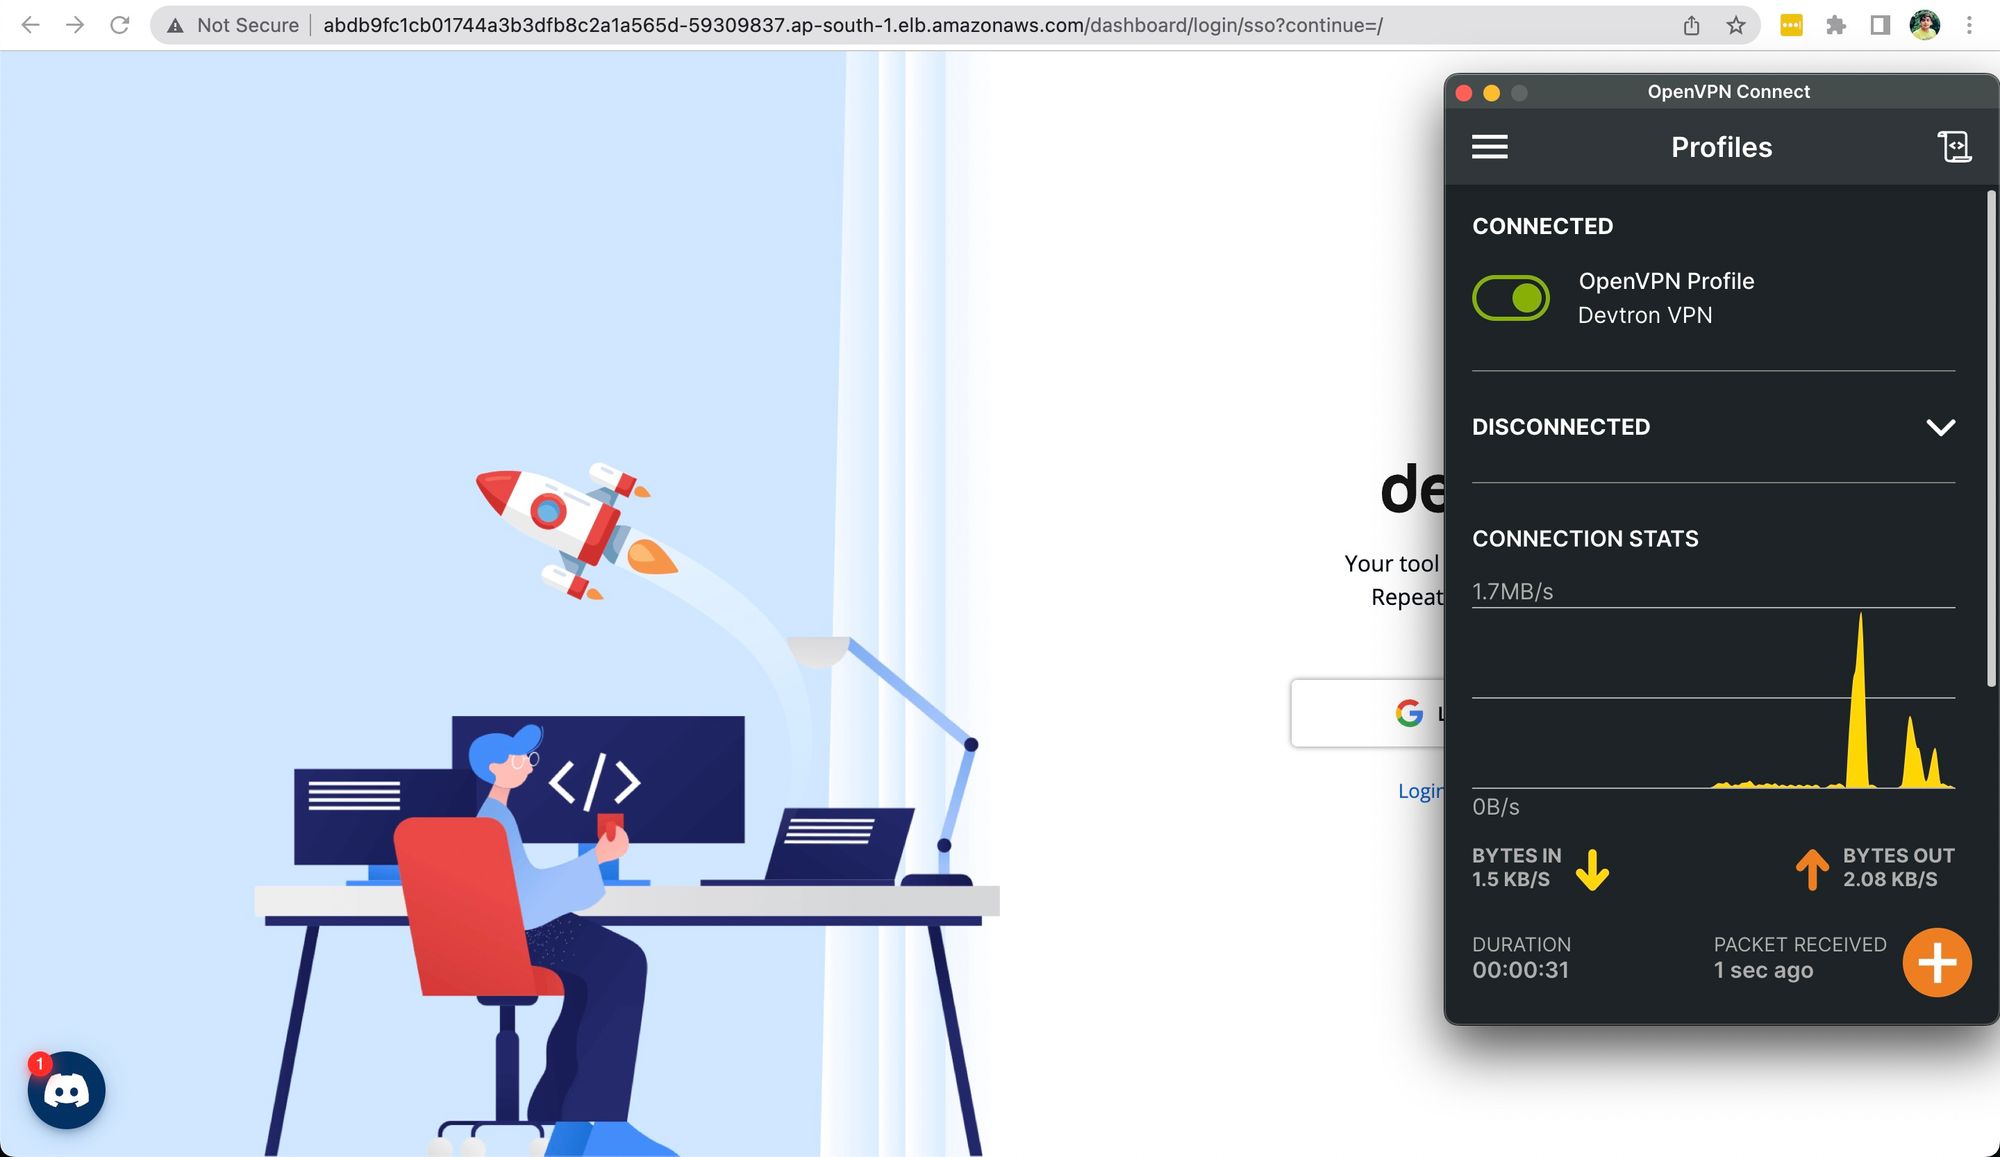
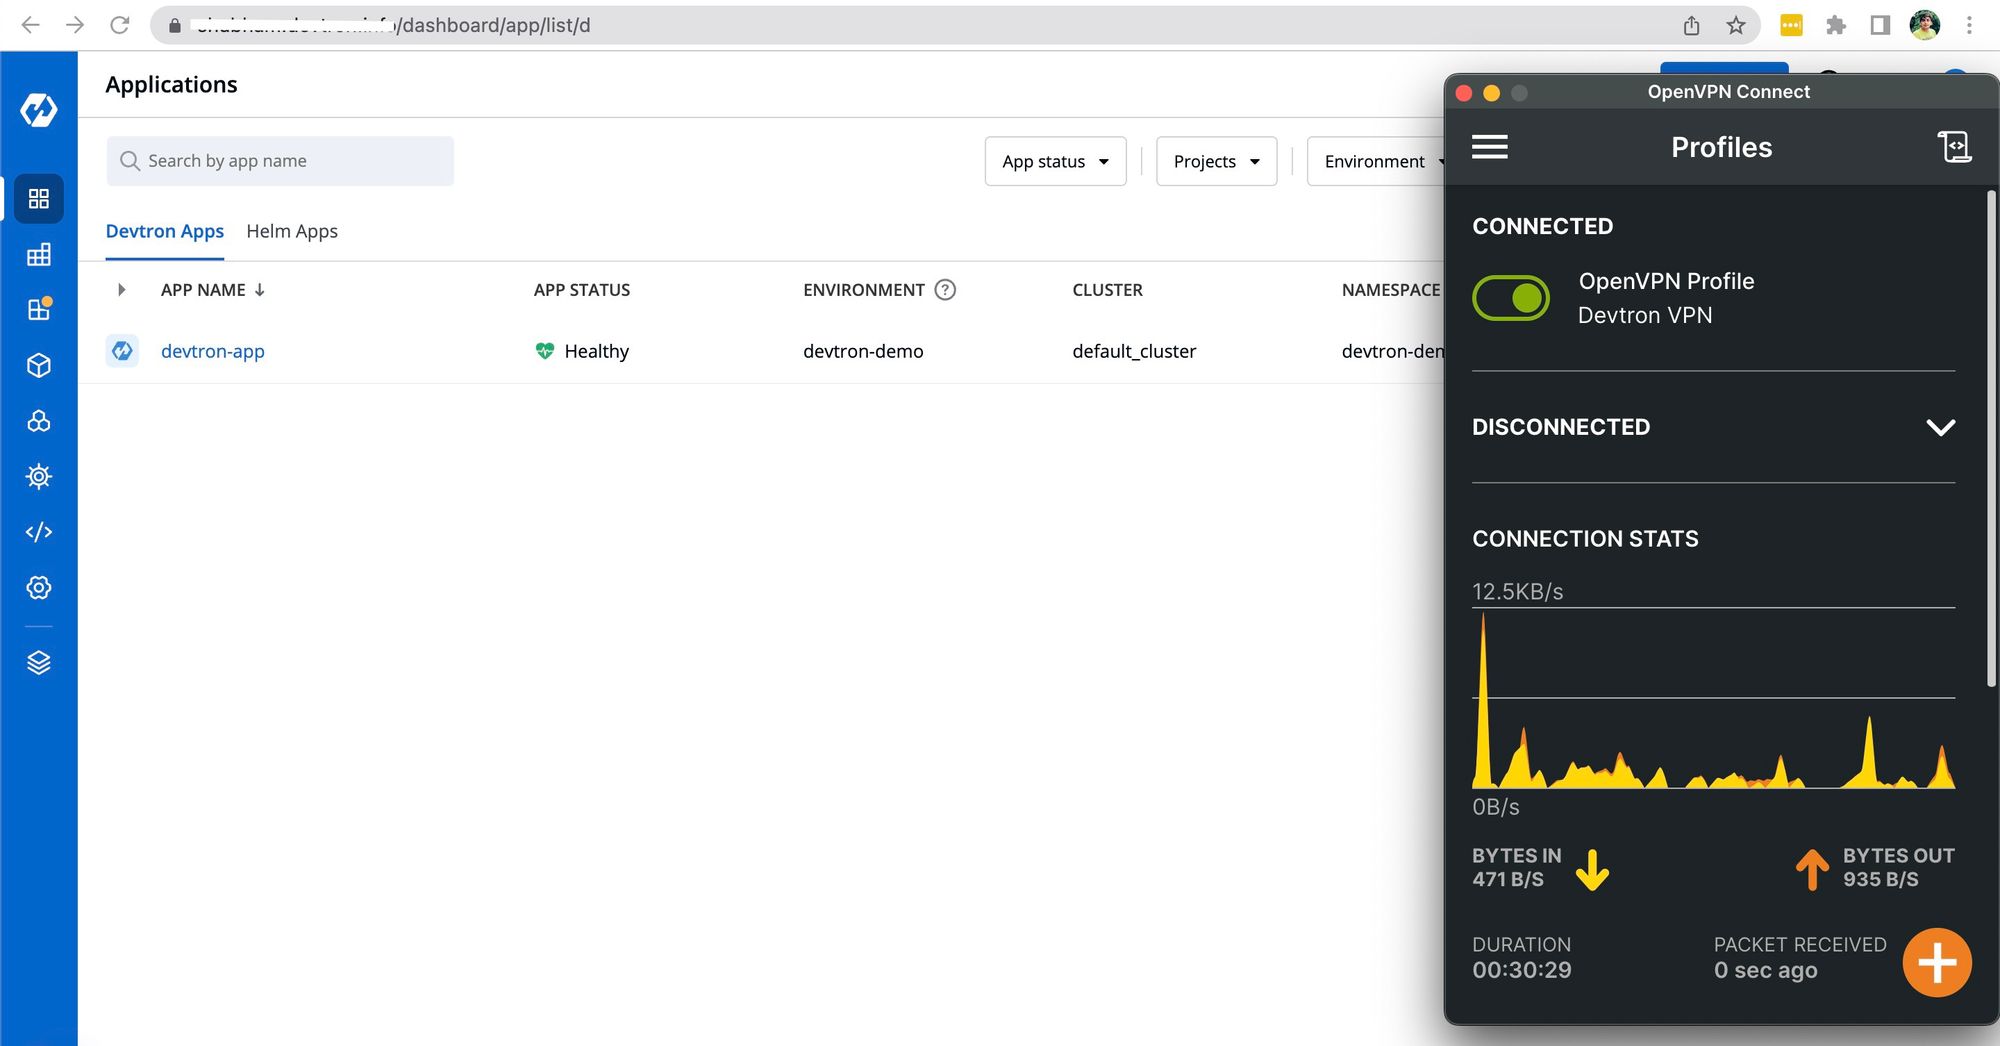
But as soon you connect to the VPN, the Devtron dashboard will be accessible for you.
Restrict the Devtron dashboard through OpenVPN on the ingress controller level.
If you want to restrict the Devtron dashboard on the ingress-controller level, you just need to add the same configuration i.e.
loadBalancerSourceRanges:
- 13.234.253.225/32
in ingress-controller and do update and deploy .

Once the ingress-controller service gets updated, the Devtron dashboard will only be accessible if the VPN is connected.
If you have configured SSO login for the Devtron dashboard and the VPN and the Devtron are running in two different VPCs, then you need to whitelist the VPN IP under loadBalancerSourceRanges: either way i.e., by editing the devtron-service by whitelisting the IP from the ingress controller.
Note: Additionally, look further to improve your security practices by configuring SSO login for the Devtron dashboard.
Conclusion
We saw that configuring a VPN to access your Kubernetes Dashboard is easy on the Devtron Platform. You get pre-configured helm charts for quick setup. VPN adds an extra layer of security to your Kubernetes environment, but it is also vital to secure your Kubernetes Cluster. Read how you can secure your Kubernetes Clusters using Kyverno Policies. Feel free to join our discord server.