1. Autoscaling saves costs by automatically adjusting Kubernetes resources (pods/nodes) based on demand.
2. KEDA enables event-driven scaling by reacting to external triggers like ALB metrics from AWS CloudWatch.
3. Application Load Balancer (ALB) metrics such as request count, target response time, and active connections play a crucial role in scaling decisions.
4. Devtron simplifies the process with native KEDA integration, Helm-based installations, and an intuitive UI to manage autoscaling without complex YAML or CLI commands.
Introduction
Autoscaling is one of the key benefits of Kubernetes. It helps reduce the utilization of resources, thus reducing the cost of cloud infrastructure. When demand drops, the autoscaling mechanism automatically removes the resources to avoid overspending. The scaling of nodes or pods increases or decreases as the demand for the service response.
KEDA is a Kubernetes-based Event Driven Autoscaler. It can scale the Kubernetes workloads based on events needed to be processed. It is a lightweight, single-purpose component that can be added to the Kubernetes cluster and has support for multiple scalers that can be used. For this article, we would be autoscaling our applications using ALB metrics, which are being fetched from AWS Cloud Watch and we will dive into the practical hands-on.
Are you looking to optimize your Kubernetes workloads by implementing event-driven autoscaling with KEDA and Application Load Balancer (ALB) metrics? Devtron, by integrating with these technologies, enhance your application's performance and resource efficiency.
What is an Application Load Balancer?
An application load balancer distributes incoming traffic among multiple applications, which we call servers or instances. An application load Balancer (ALB) is typically used to route HTTP and HTTPS requests to specific targets, such as Amazon ec2 instances, containers, and IP addresses.
What are the ALB Metrics
Application Load balancer publishes data points to the cloud watch, enabling it to retrieve statistics about these data points, known as metrics. These performance and usage metrics are known as ALB metrics.
Some common ALB metrics include:
- Request Count: This metric tells us about the total number of requests received by ALB.
- HTTP Code Count: This metric tracks the HTTP response codes returned by the ALB, such as 2xx, 3xx, 4xx, and 5xx.
- Target Response Time: This metric measures the time taken by the target instances to respond to requests forwarded by the ALB.
- Active Connection Count: This metric tracks the number of active connections between the ALB and the target instances.
- Target Connection Error Count: This metric counts the number of errors that occur when the ALB tries to establish connections with target instances.
- Target Response Error Count: This metric counts the number of errors that occur when the target instances fail to respond to requests forwarded by the ALB.
Now, let's dive into the practical world and setup KEDA for autoscaling based on ALB metrics.
Autoscale based on ALB Metrics using KEDA
For setting up the autoscaling, we will be using KEDA and autoscale our cluster with ALB metrics. To execute all the tasks, we will use Devtron, which has native integration of KEDA (event-driven autoscaler).
Step-1: Install ALB Controller using Helm Chart
With Devtron's Helm dashboard, you can install any helm chart and manage it directly from Devtron's intuitive user interface. For alb controller, CRDs can be installed from Helm charts. To deploy the controller through the chart, navigate to chart store and search for aws-load-balancer.
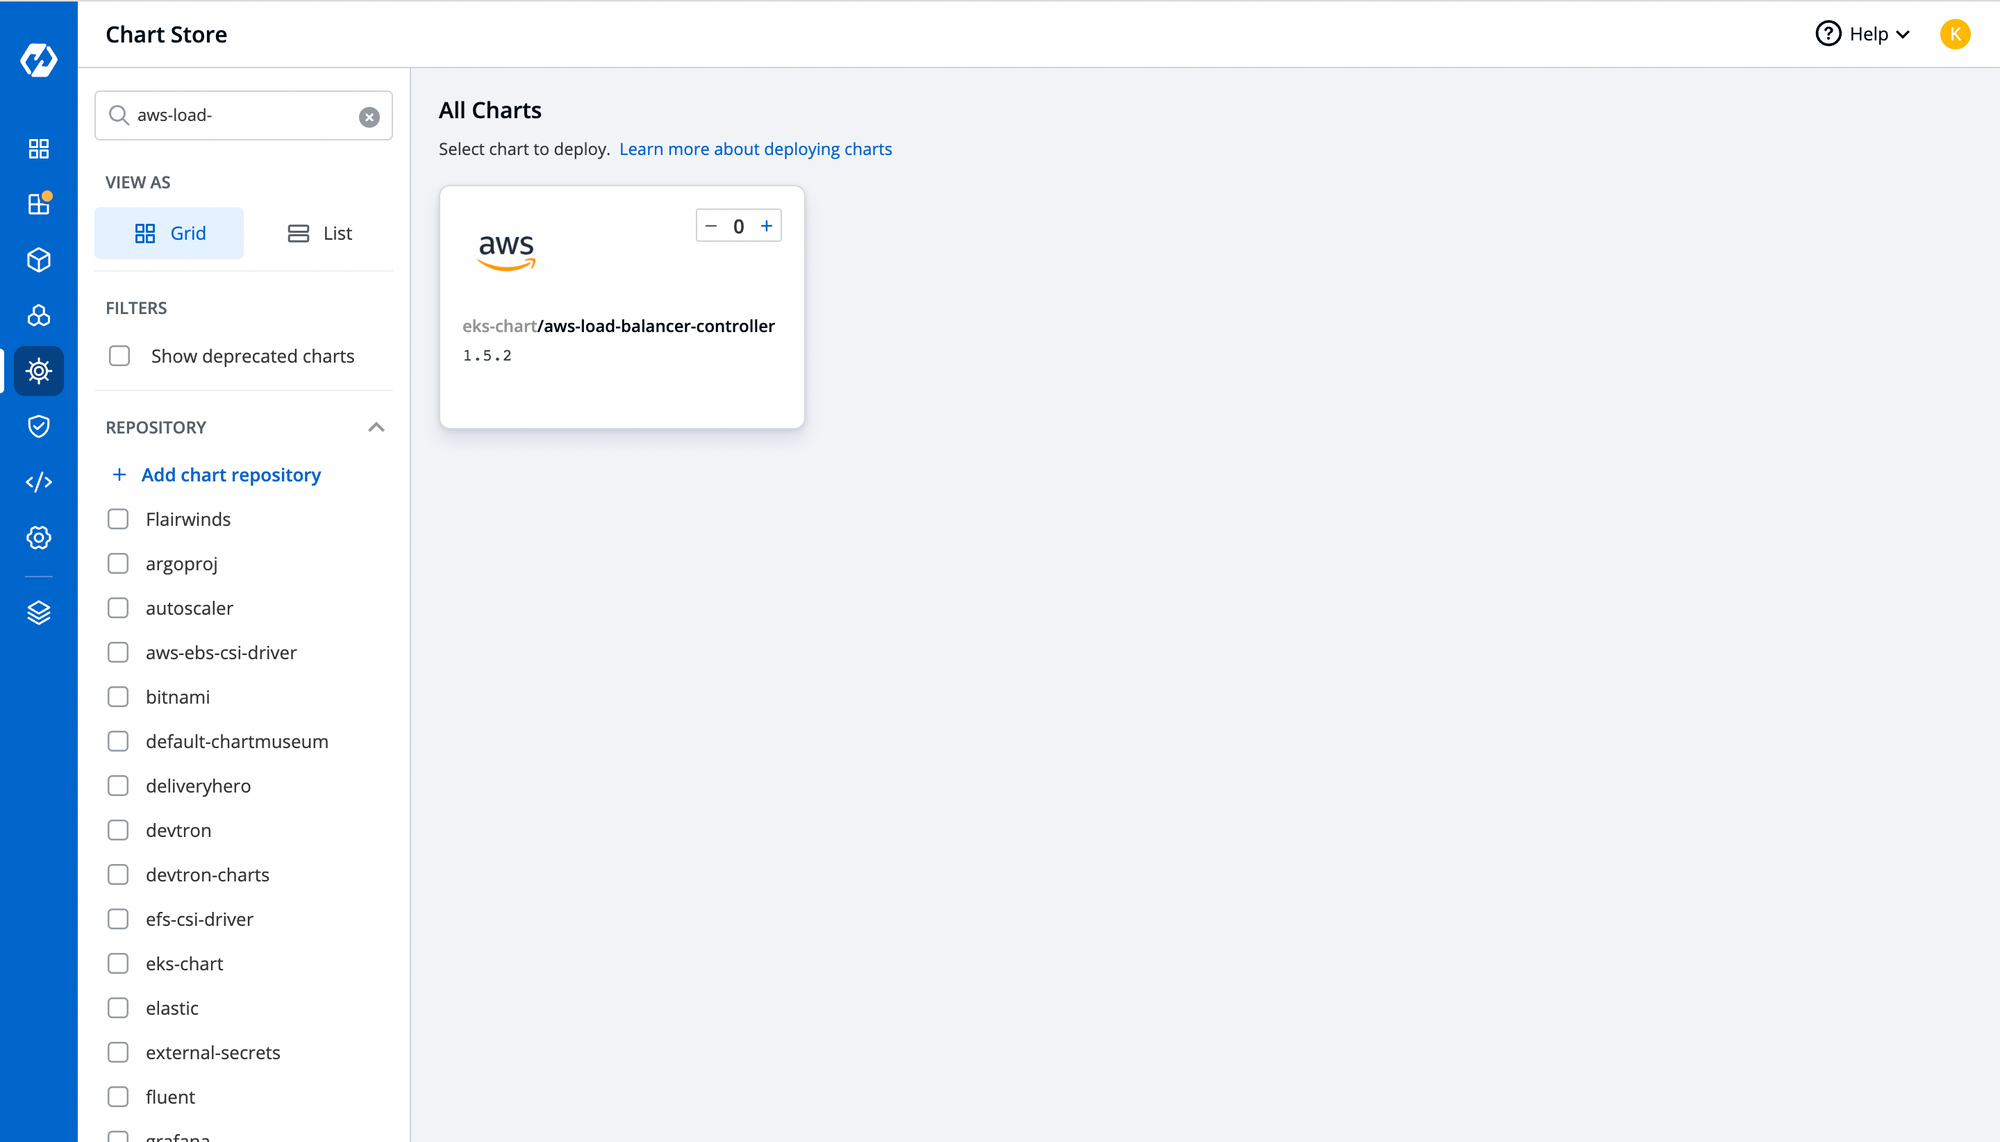
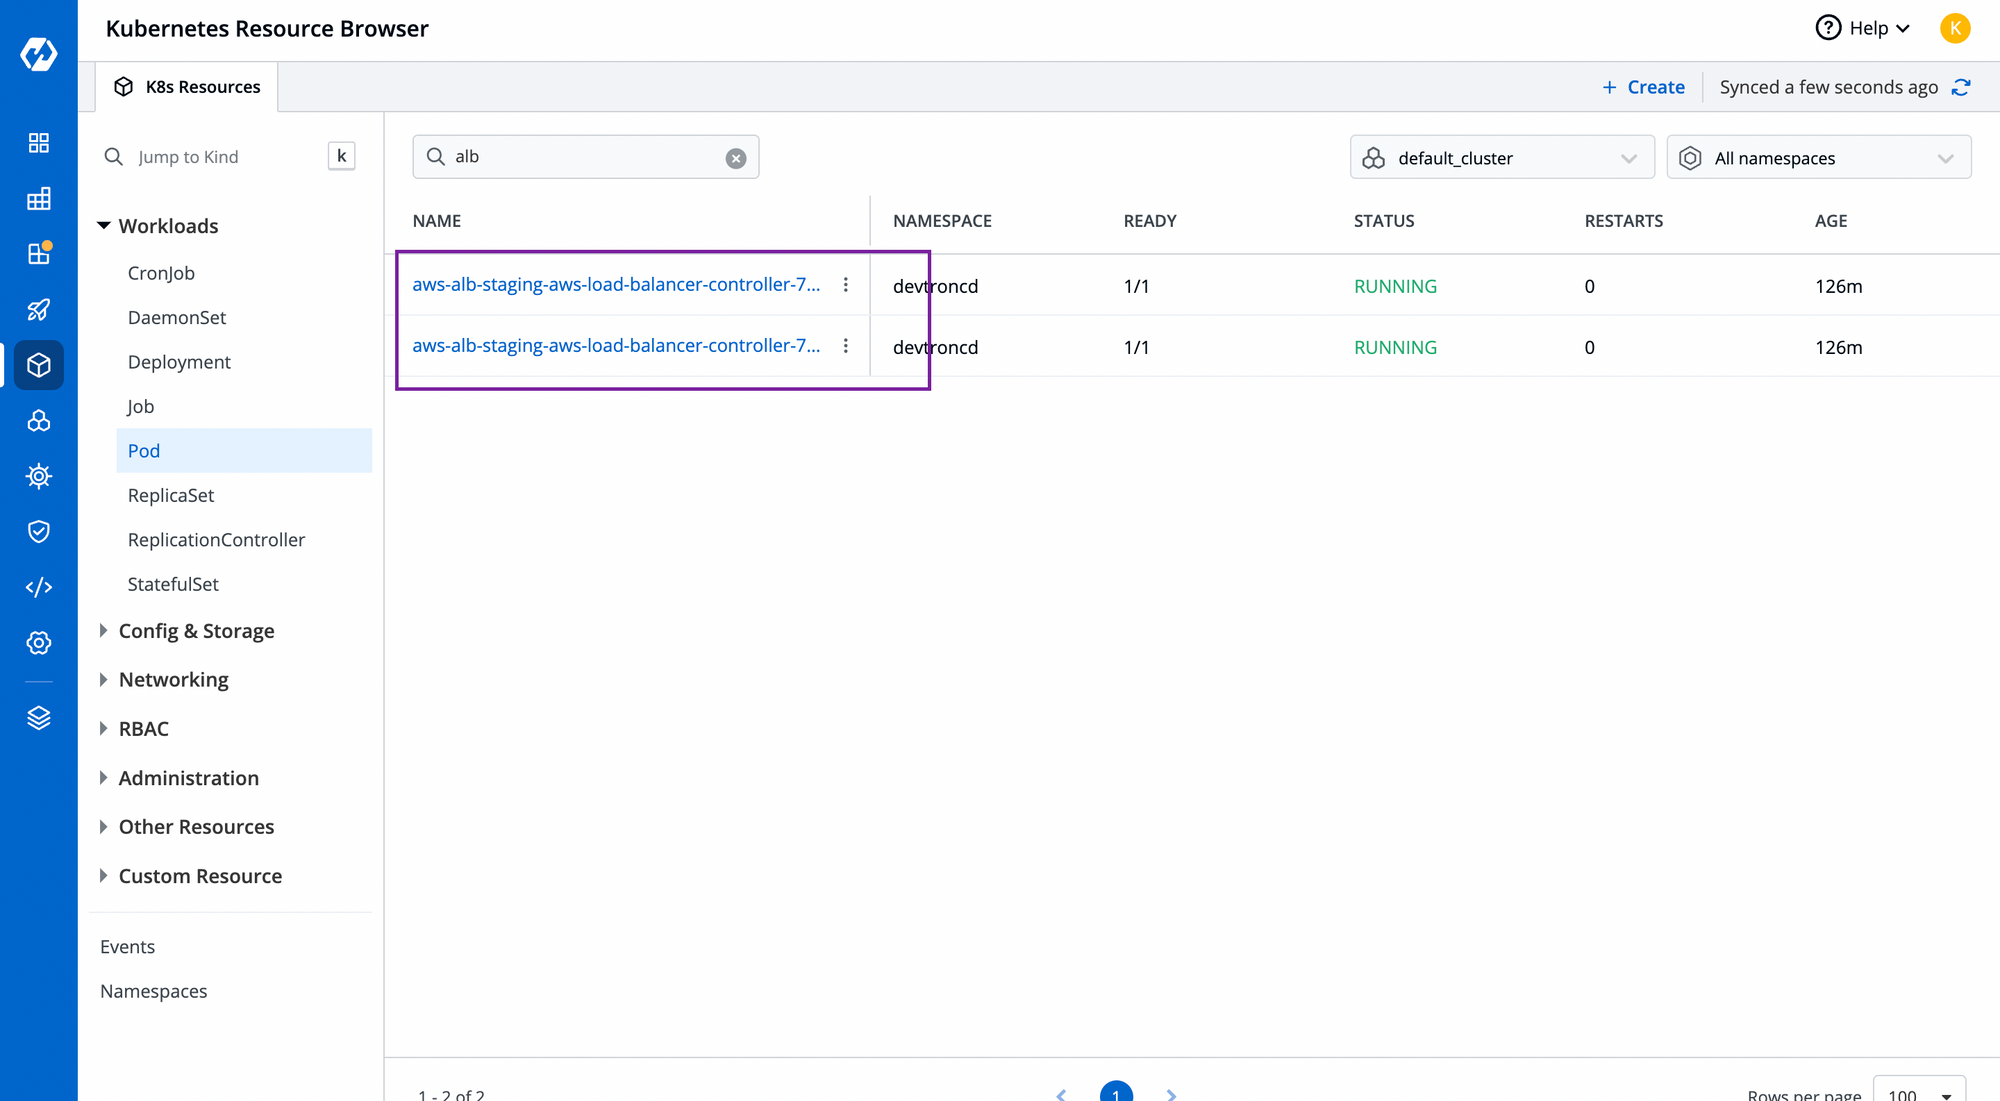
Configure the YAML file and choose the cluster where you want to deploy it. To check the status of your chart, you can search your app in the helm app or navigate to the resource browser to check the controller pod. To know more about Resource browser, feel free to read this article.
Step-2: Install KEDA controller from Chart Store.
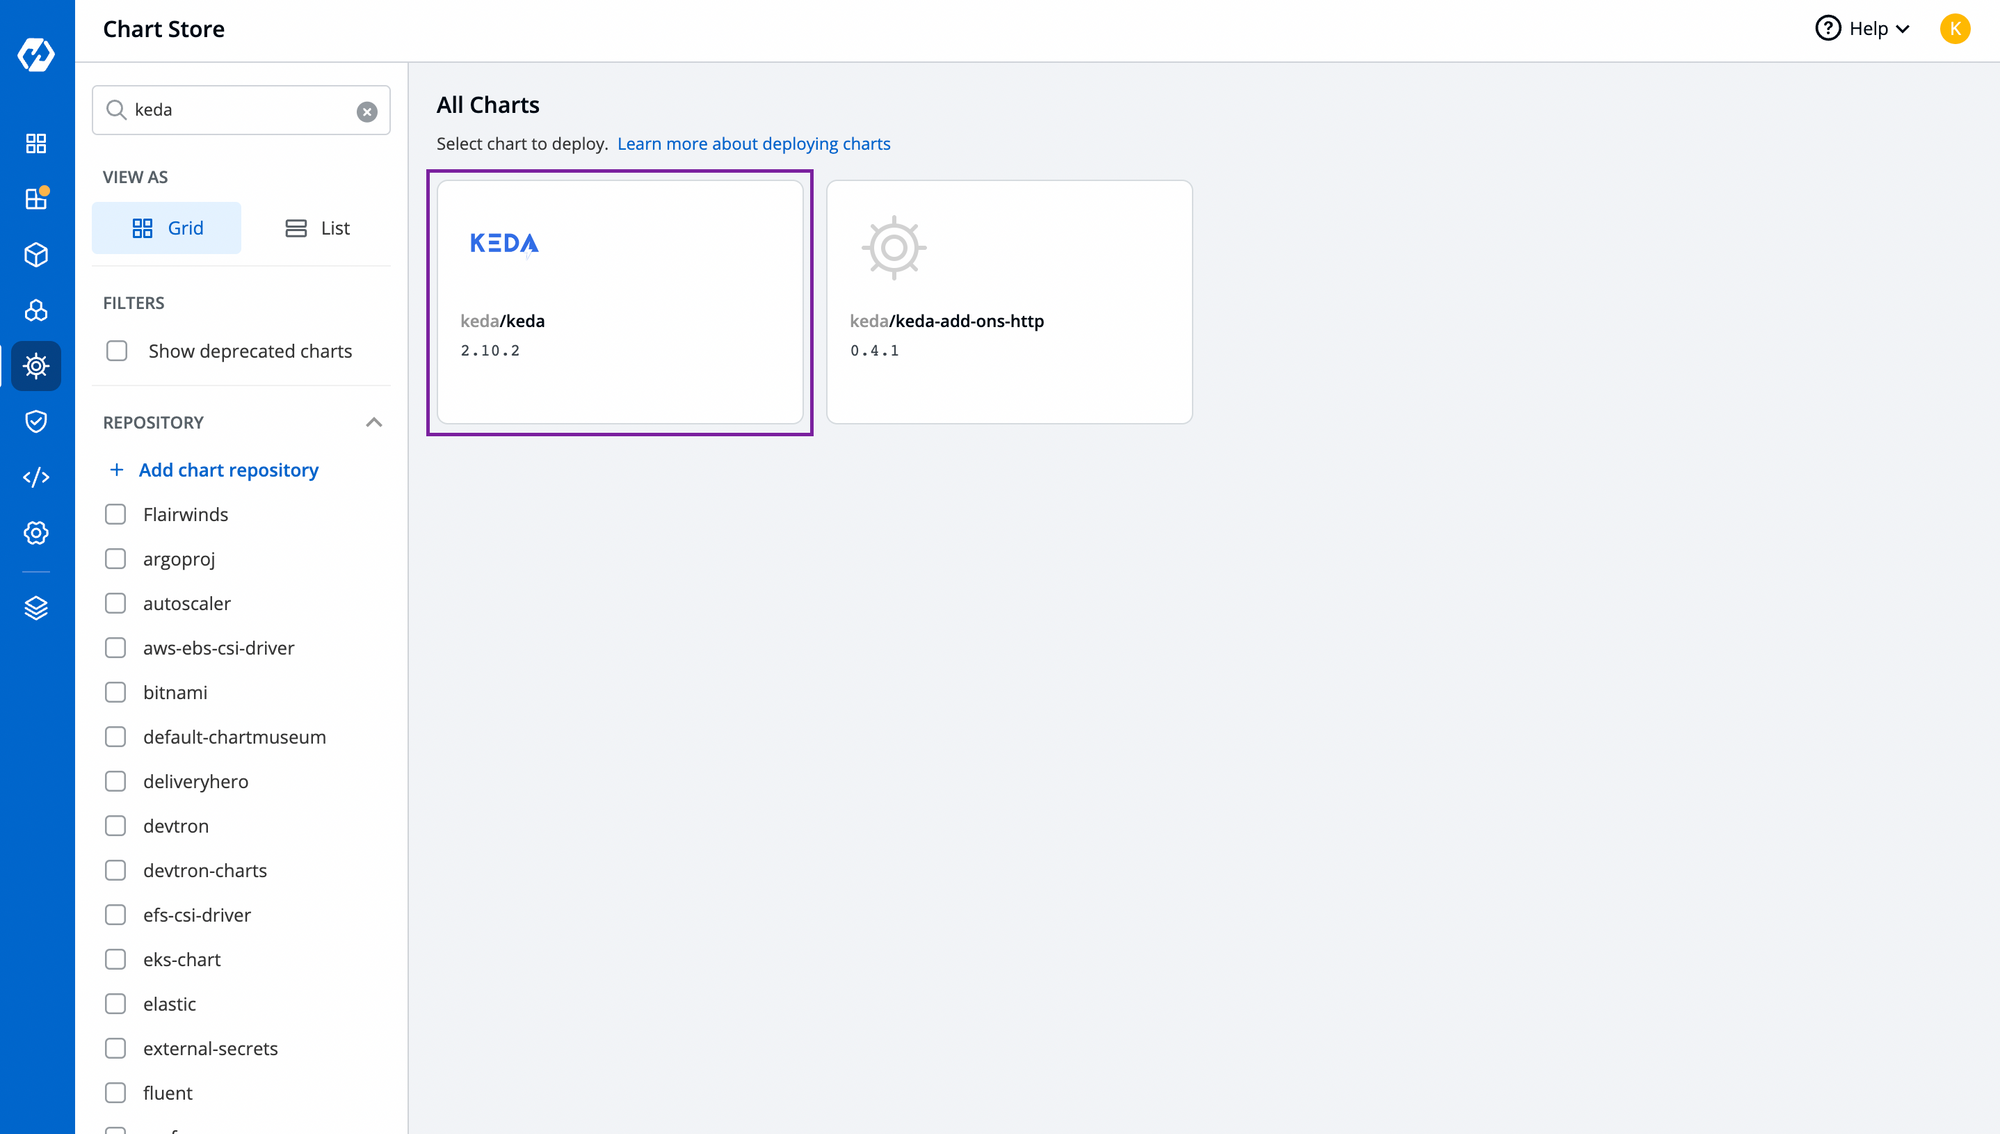
Just like alb-controller chart, you can install KEDA controller as from the chart store and deploy it through Devtron.
Step-4: Configure the Application
Now let's configure the application where KEDA needs to be used for autoscaling. To learn application deployment with Devtron, feel free to check out how to deploy applications with Devtron.
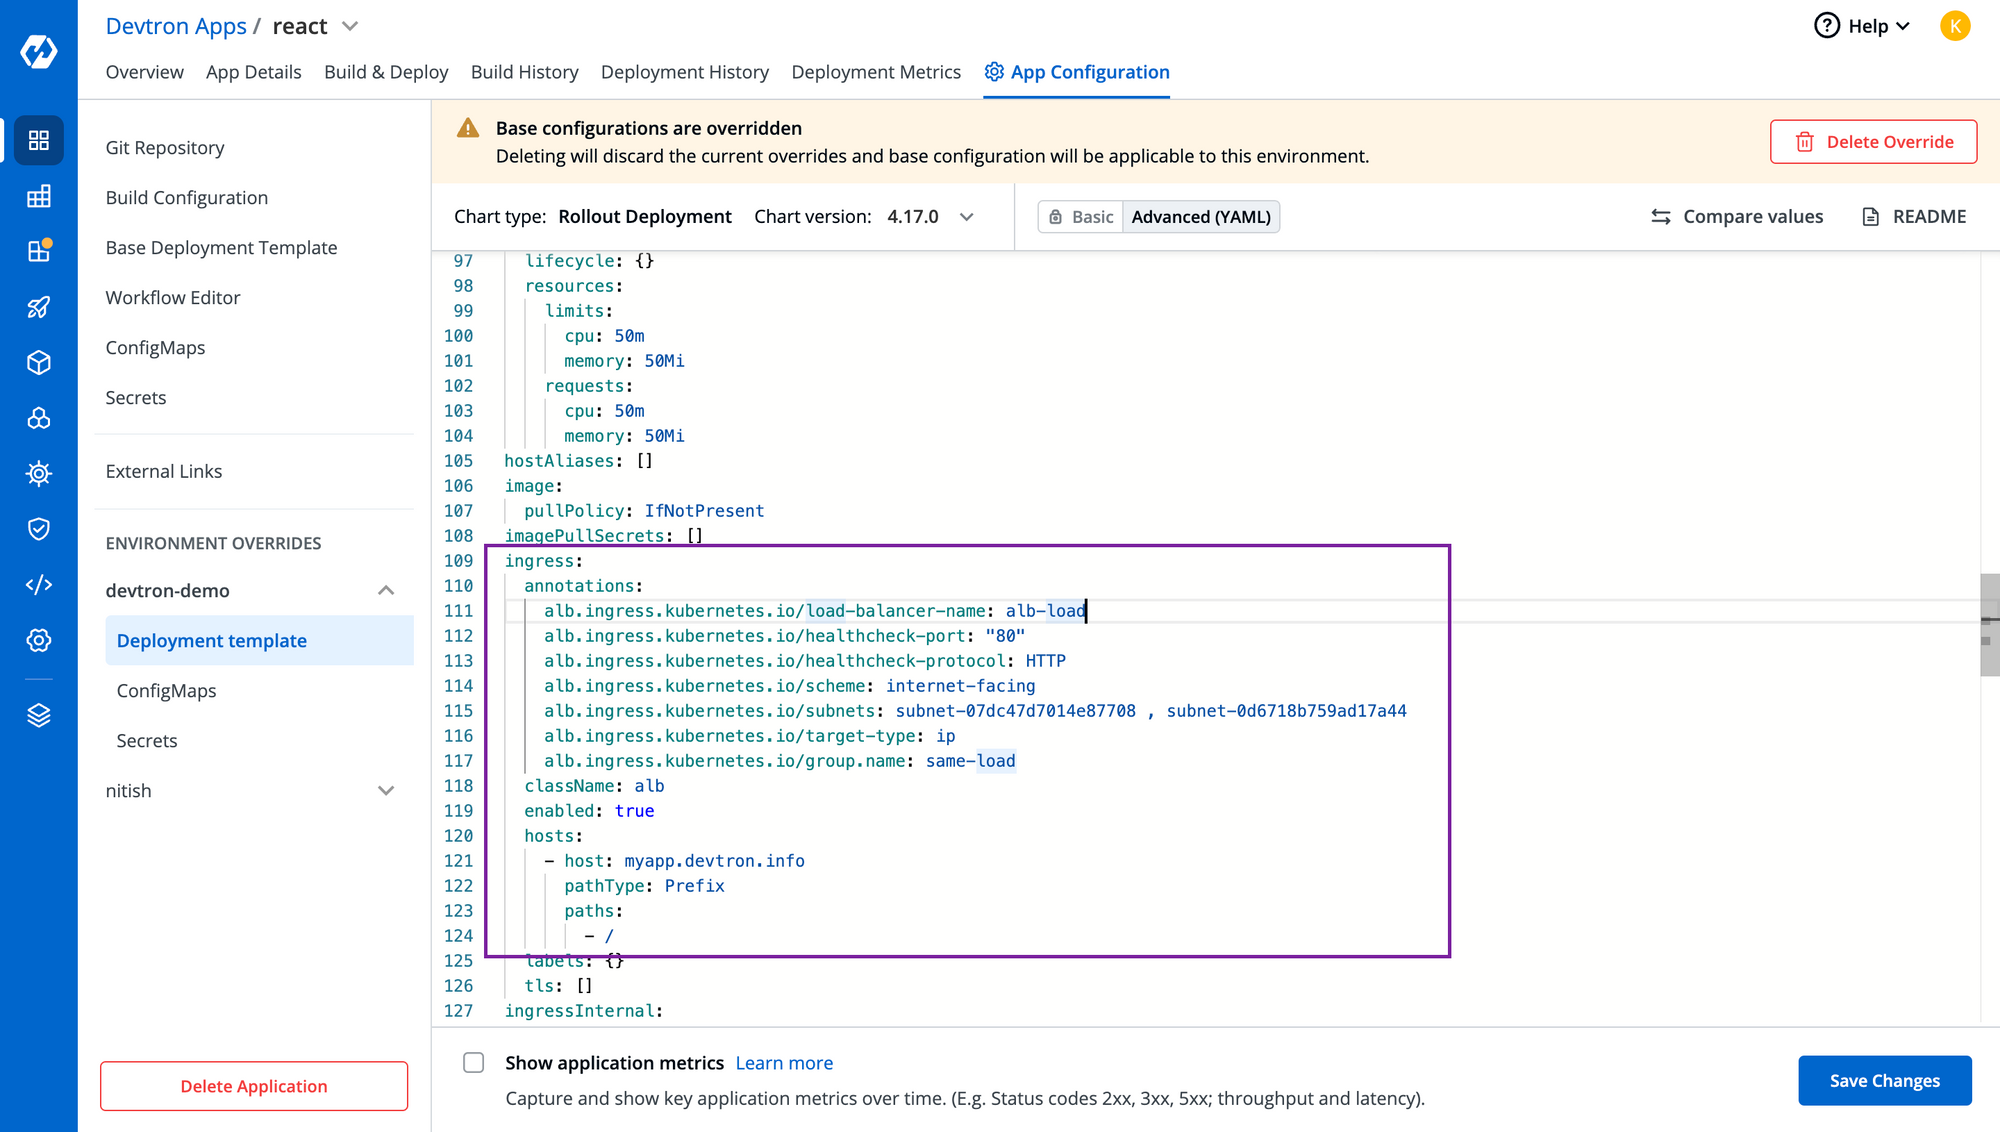
For this application, you have to enable the ingress from deployment-template, and configure it according to your requirements. Here's sample configuration and annotations that we have used.
ingress:
  annotations:
    alb.ingress.kubernetes.io/load-balancer-name: <CustomName>
    alb.ingress.kubernetes.io/healthcheck-port: "80"
    alb.ingress.kubernetes.io/healthcheck-protocol: HTTP
    alb.ingress.kubernetes.io/scheme: internet-facing
    alb.ingress.kubernetes.io/sub1nets: subnet-id , subnet-id
    alb.ingress.kubernetes.io/target-type: ip
    alb.ingress.kubernetes.io/group.name: <GroupName>
  className: alb.    #Required
  enabled: true
  hosts:
    - host: <YourHostName>
      pathType: Prefix
      paths:
        - /
Step-5: Add your AWS credentials
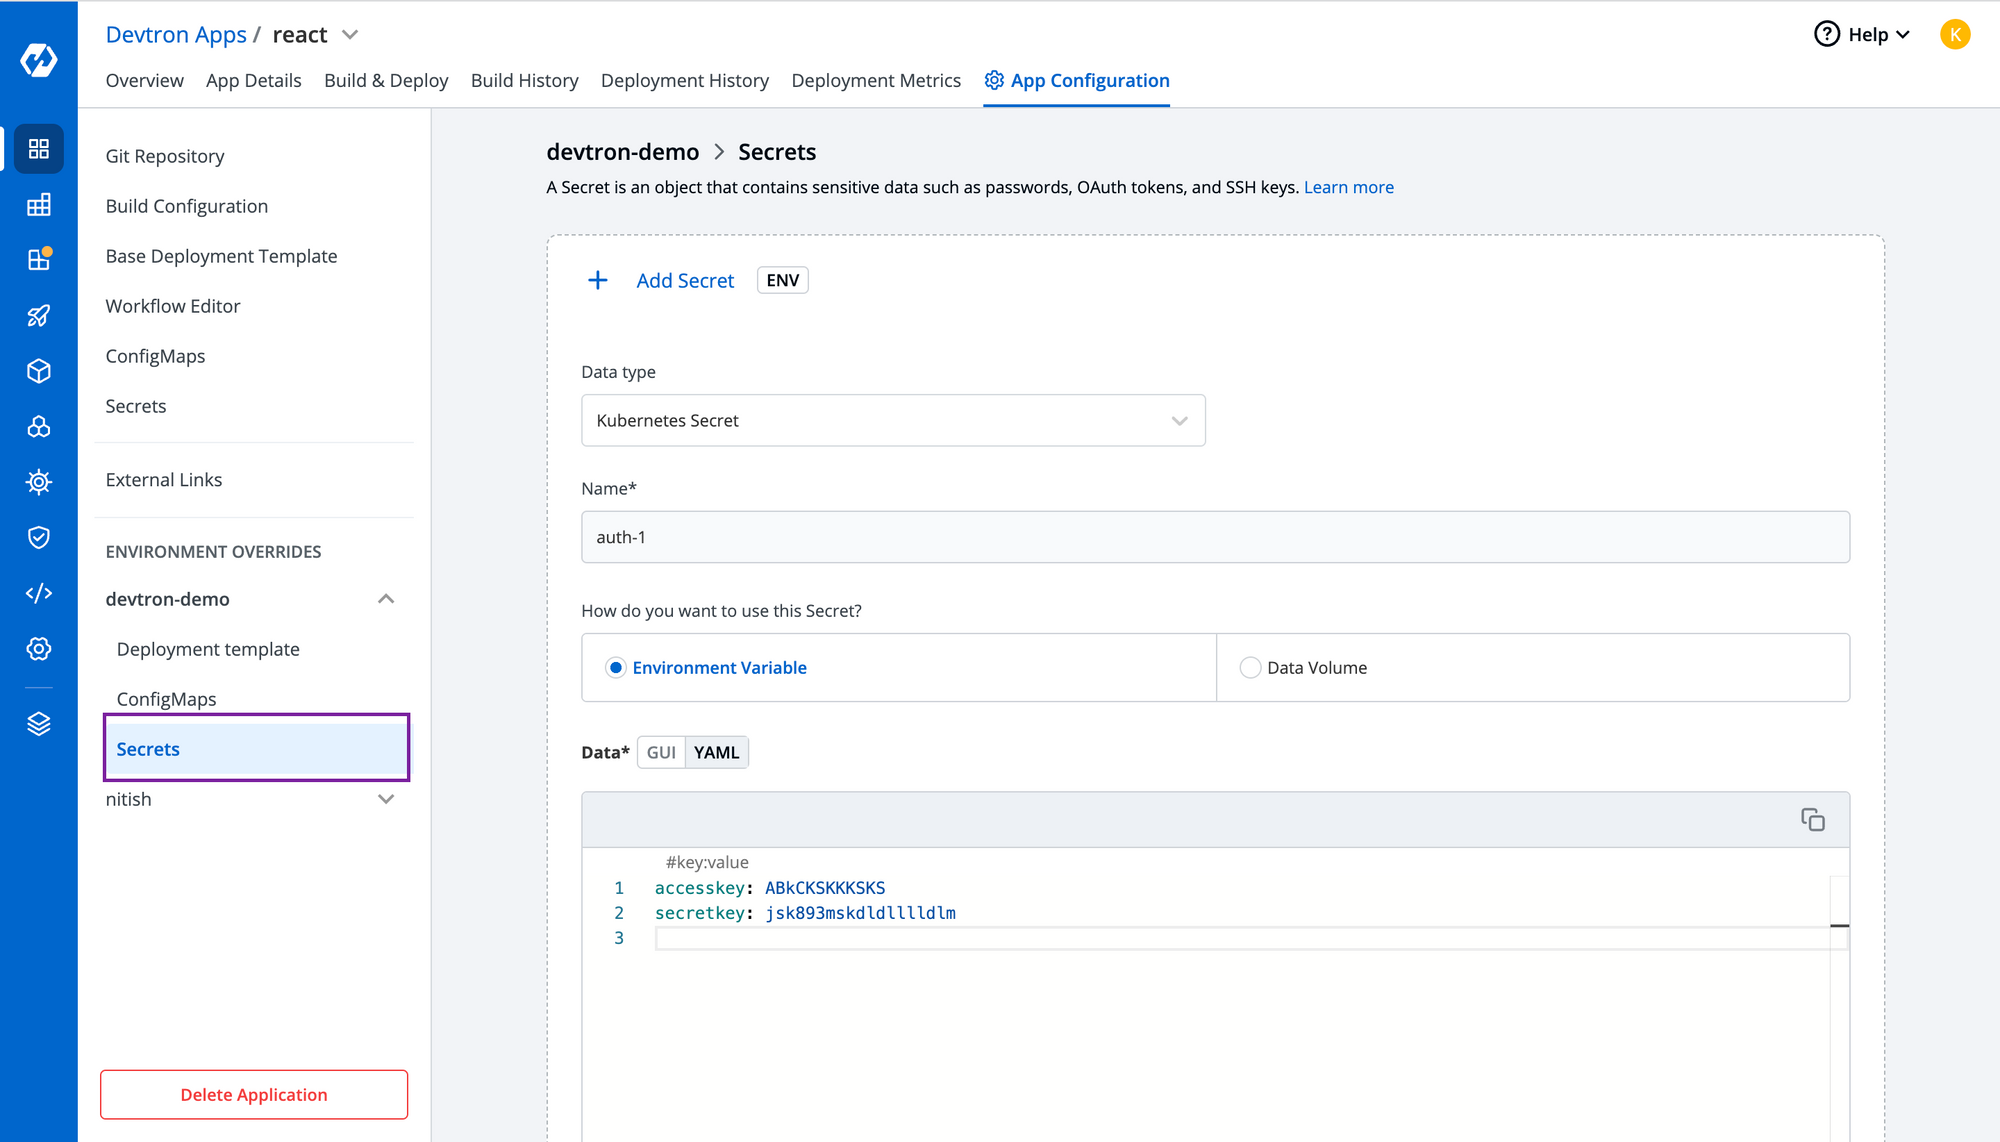
To add any confidential data, you can create secrets directly from Devtron and pass the key-value pair as shown in the below image.
Note: Make sure you have given permission to the node group to create a load balancer and autoscaling it.
Step-6: Create KEDA Scaled Object
Now, time to configure KEDA. With Devtron's deployment-template, KEDA is natively integrated so that you don't need to worry about managin maniests for that. Just enable the kedaAutoscaling object and pass the necessary configurations. You can also specify the trigger for which you want to autoscale this application and in our case, it's aws-cloudwatch as you see in the below image.
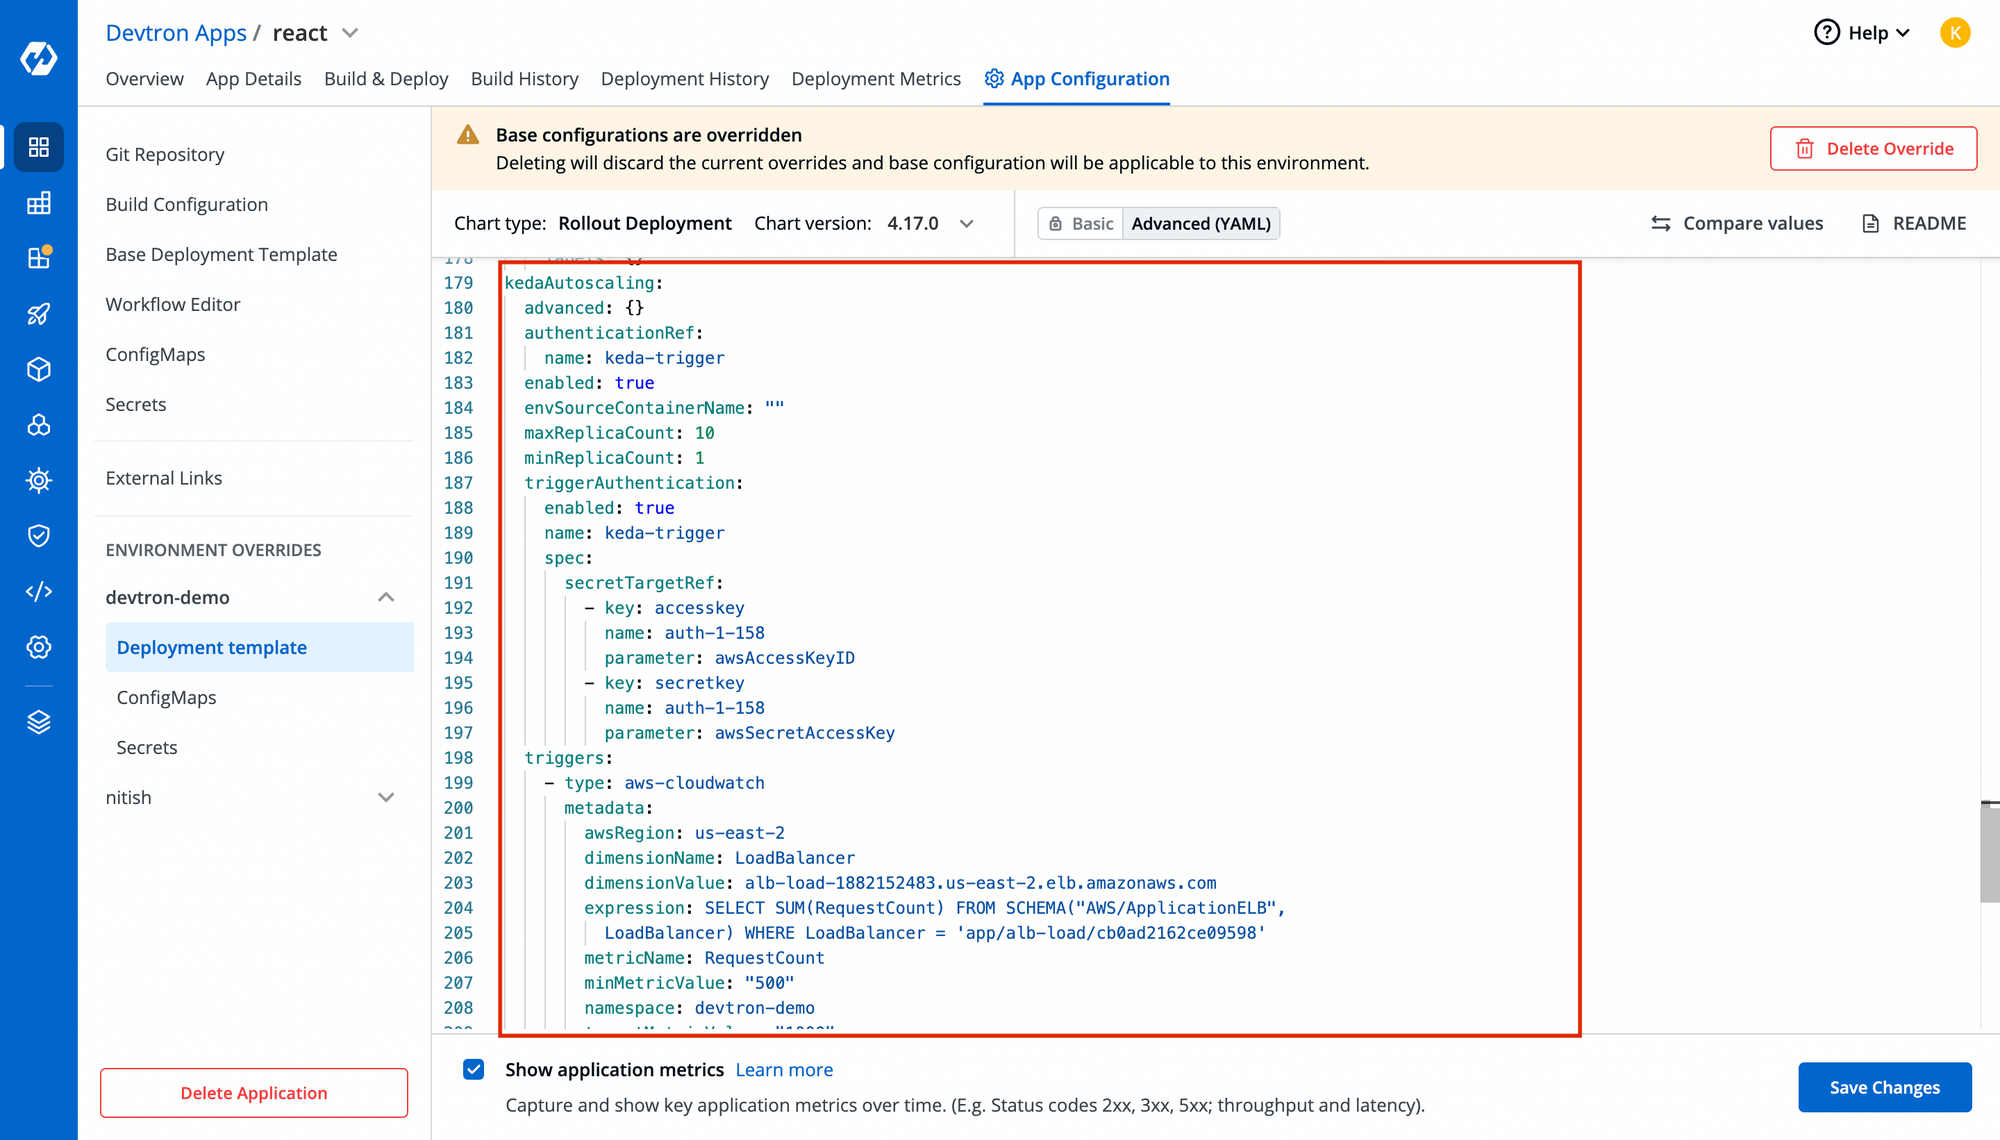
Note: Make sure you use the secret name correctly in triggerAuthentication of KEDA object!!You can view your KEDA objects in Custom resources once the aplication is succesfully deployed.
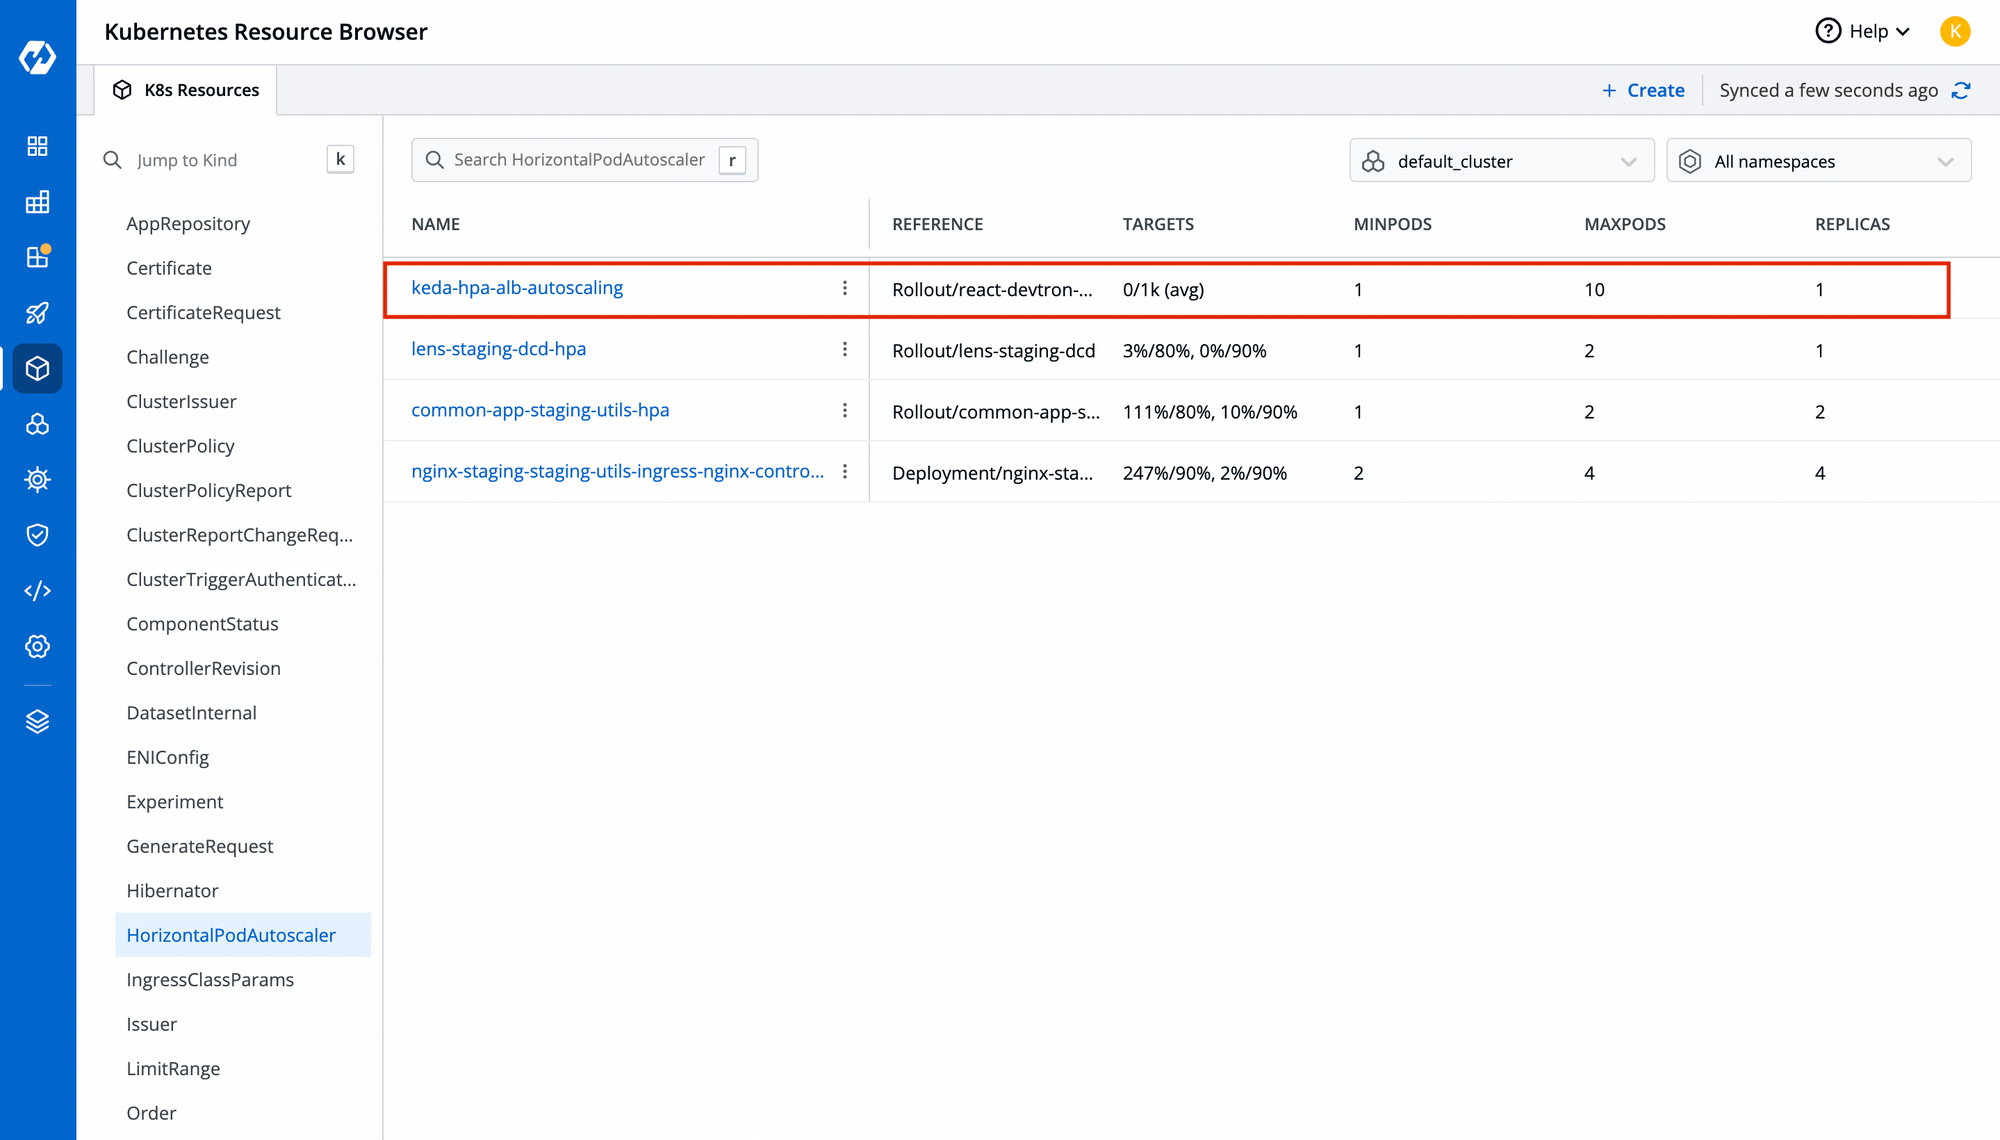
Step-7: Test your HPA by increasing your request to your application
You will be able to view the number of replicas increasing as per request in your HPA. Run this command to automatically increase requests on your load balancer
While true
Do
Curl <hostname>
Done
Conclusion
To run software applications efficiently and smoothly, they must automatically scale up and down according to traffic. So, the cloud provider provides a load balancer to expose the application, and ALB is one of them. So to autoscale according to ALB metrics, KEDA is used, which helps to fetch metrics from AWS cloud watch and auto-scales the application accordingly.
Handling Kubernetes resources through the command line requires lots of experience, and debugging and troubleshooting require effort. Devtron provides Kubernetes Dashboard, which drives things without commands. It provides full-stack observability of resources for easy debugging.
FAQ
What is KEDA in Kubernetes?
KEDA (Kubernetes Event-Driven Autoscaler) is a lightweight component that allows you to scale Kubernetes workloads based on external event sources like metrics, message queues, or cloud services.
Why should I use ALB metrics for autoscaling?
ALB metrics provide real-time insights such as request count, response time, and error rates. Using these metrics ensures that applications scale automatically based on actual traffic and performance demands.
How does Devtron simplify autoscaling with KEDA?
Devtron integrates KEDA natively, eliminating the need to manually manage YAML manifests. It provides an intuitive dashboard for configuring ALB metrics, KEDA triggers, and secrets directly through the UI.
Can I use KEDA with other event sources apart from ALB metrics?
Yes. KEDA supports 60+ event sources including Prometheus, Kafka, RabbitMQ, AWS SQS, Azure Monitor, and more. ALB metrics are just one of the supported scalers.
Do I need advanced Kubernetes expertise to set up KEDA in Devtron?
Not necessarily. With Devtron’s UI-driven workflows and integrated helm support, even teams with limited Kubernetes expertise can configure autoscaling effectively.


