In this blog, we will set up Devtron over k3s - Lightweight Kubernetes. If you haven't heard about Devtron yet, let's take a moment to walk you through it. Devtron is an open-source AppOps solution that caters and supports end-to-end software delivery workflow for Kubernetes, written in Go. It can be used for the deployment of your applications over Kubernetes through simple configurations over user-intuitive UI.
Why k3s?
Devtron is cloud-agnostic and can easily be installed over the k3s cluster. Let’s understand about k3s - Lightweight Kubernetes, shall we? It is essentially a lightweight version of Kubernetes that can be installed in a binary less than 100MB. It can be installed as a single-node as well as multi-node cluster and is fully compatible and production-ready Kubernetes distribution.
Some of the advantages of having k3s cluster are -
- Less System Resources
- Quick Cluster Setup
- Easy to add Worker Nodes (k3s-agent)
- Lightweight
- All features as that of k8s
K3s Cluster Setup
Before we get started and install Devtron, we need to set up the k3s cluster in our servers. We will be setting up a single node cluster. Please execute the following commands to set up the single-node k3s cluster for Devtron.
The only thing we need to do is set up the k3s server/master node where the necessary configuration files will be installed. The command below downloads and sets up the master node in the server with an extra flag for setting up the right permission of the KubeConfig file.
curl -sfL https://get.k3s.io | sh -s - --write-kubeconfig-mode 644Please note that the below command is not mandatory for setting up the k3s cluster, but for Devtron installation, we need to deploy the local-path-storage as it will create hostPath to dynamically provision Persistent Volume (PV) based on Persistent Volume Claim (PVC) for Devtron installation.
kubectl apply -f https://raw.githubusercontent.com/rancher/local-path-provisioner/master/deploy/local-path-storage.yamlCongratulations! You have successfully set up the k3s cluster. To verify the nodes, please execute the command - kubectl get nodes, it will result in the nodes which are created. For the single cluster setup, you will find only one node as control-plane,master.
[Note: You need to deploy all the commands in the same cluster where the master is being installed]
System Configurations for Devtron Installation
- 2 CPUs+ cores
- 4GB+ of free memory
- 20GB+ free disk space
Devtron Installation
After the cluster is successfully set up, we are ready to go with the Devtron installation over it. Installing Devtron is quite a straightforward process with just a few commands. It can be installed using helm3 and kubectl. For this particular demonstration, we will be using helm3. If you haven’t installed helm3 in your k3s cluster, please follow along -
Helm3 Setup
Before moving ahead, let’s set up helm3 in our cluster. The helm3 can be installed in the traditional way. Please follow the commands for installation -
The below command will download the helm3 installation script on our server.
curl -fsSL -o get_helm.sh https://raw.githubusercontent.com/helm/helm/master/scripts/get-helm-3Making the script executable so that we can run the helm3 installation script.
chmod 700 get_helm.shThe command below will execute the installation script and download helm3 on our server.
./get_helm.shTo make the helm interact with the k3s master, we need to set up the path of the KUBECONFIG file. Please execute the following command -
export KUBECONFIG=/etc/rancher/k3s/k3s.yamlFor detailed information about the KUBECONFIG file in the k3s cluster, please refer to this documentation.
Devtron Installation
Now, as we have successfully set up our cluster for Devtron Installation, please execute the following commands, and let’s complete the Devtron installation with just a few simple commands -
The command below will add Devtron repo in helm known repositories
helm repo add devtron https://helm.devtron.aiThe below command will install Devtron in the provided namespace, i.e., devtroncd. The install command initiates Devtron-operator, which spins up all the Devtron micro-services one by one in about 15-20 mins.
helm install devtron devtron/devtron-operator --create-namespace --namespace devtroncdTo check the status of the installation, please execute the following command. If the installation is still in progress, it will print Downloaded. And when the installation is complete, it prints Applied.
kubectl -n devtroncd get installers installer-devtron -o jsonpath='{.status.sync.status}'After the installation, we need to access the Devtron dashboard with the right credentials. For this blog, we will be using the concept of NodePort as service type to access the dashboard. Please execute the following command and edit the type from LoadBalancer to NodePort.
kubectl edit svc devtron-service -n devtroncdThe command will open the editor for you. Press i for insert mode, change type from LoadBalancer to NodePort and then enter :wq to save and exit the editor mode.
To verify that the changes have been made, please execute the following command. It will give all the services running with their port number. For Devtron-service, please note down the port number given. It will be used for accessing the dashboard.
kubectl get svc -n devtroncdAfter changing the type to NodePort, we are now ready to access the dashboard. To do so, type the IP of the server with the port number given for devtron-service.
[Note : The NodePort port must be added in the security group of your instance.]
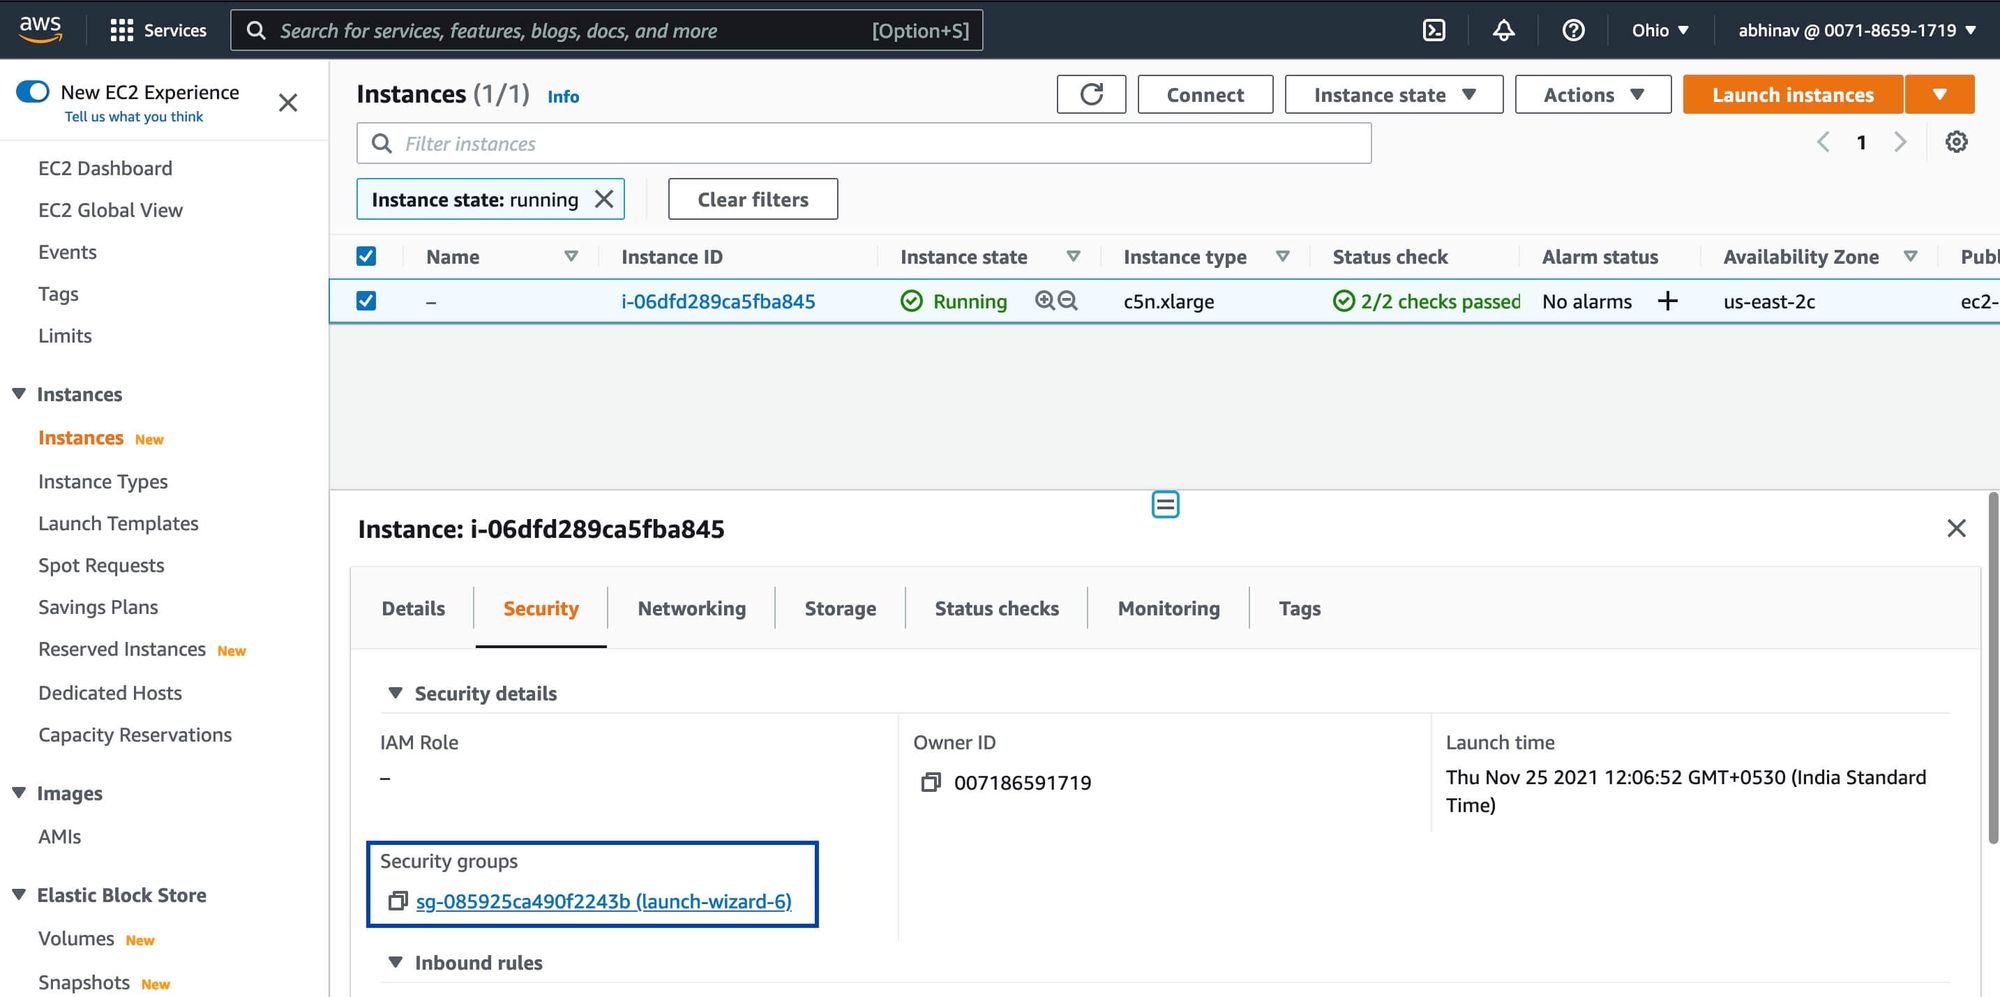
In my case I am using AWS so here's how you can add the NodePort number or range in the security group of your instance.
Step-1 : Check the instance, click on security group under the the security tab, as shown below.
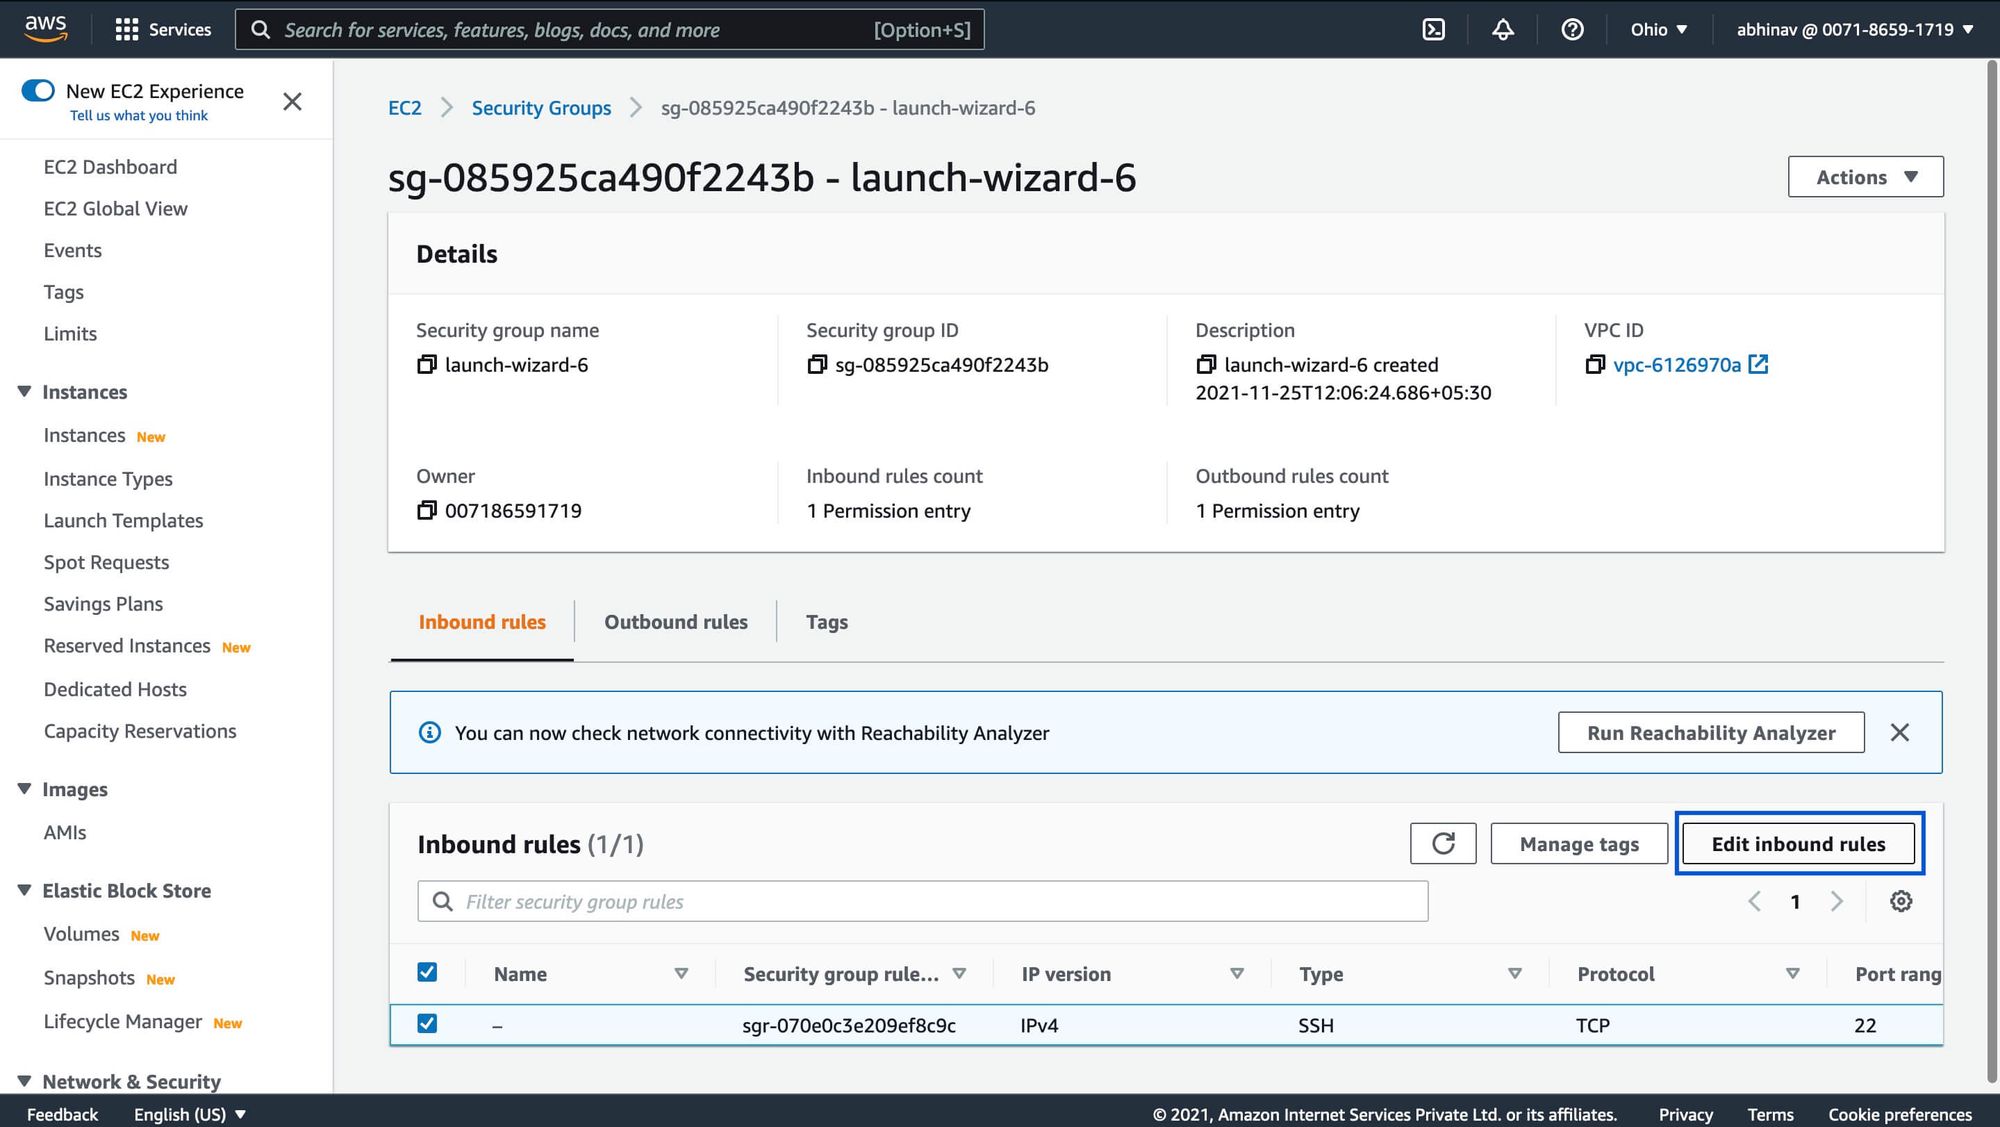
Step-2 : Click on the edit inbound rules as shown in the image below.
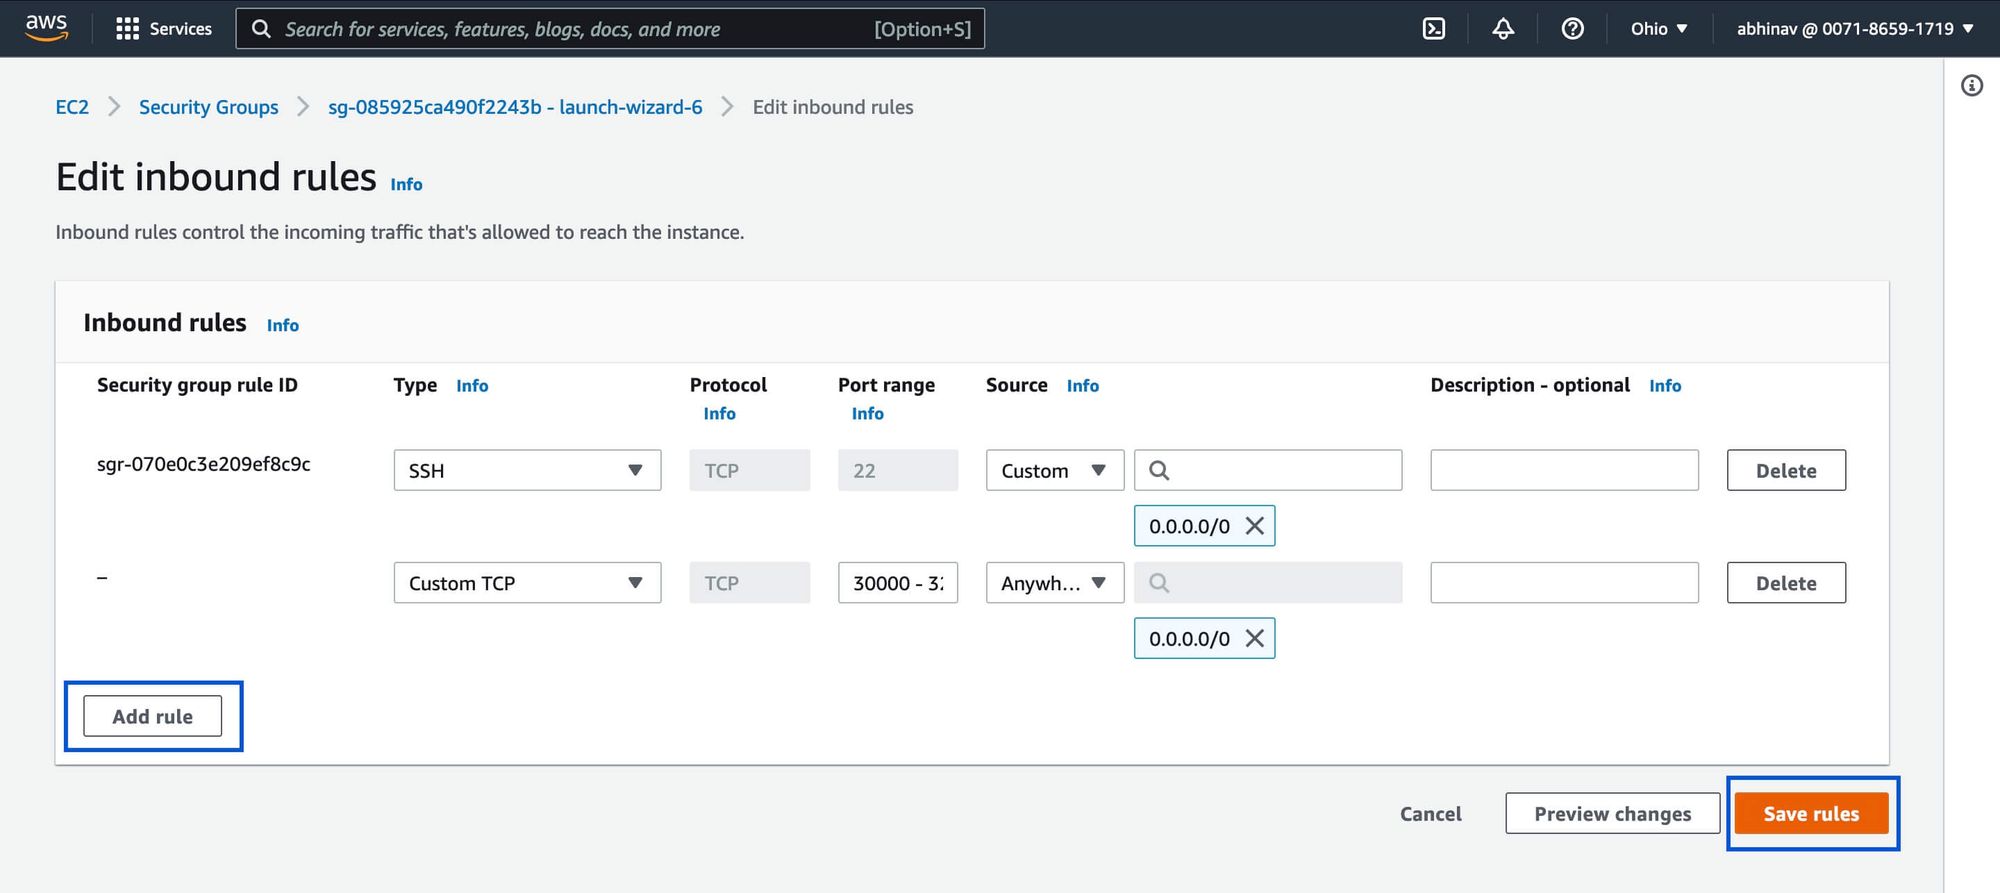
Step-3 : Now you need to add rules as per your requirement. In our case, we need to add a rule of type Custom TCP and then enter the range of NodePort or specific NodePort port which you got for devtron-service and then click on Save-rules. Also for security reasons you can add the source as per your requirement. 0.0.0.0/0 is for anywhere, means it can be accessed by anyone from any IP.
Now we would be able to access the dashboard with IP:NodePort-Port/dashboard. For admin credentials, the username is admin , and for password, run the below command.
kubectl -n devtroncd get secret devtron-secret -o jsonpath='{.data.ACD_PASSWORD}' | base64 -dKudos! We have successfully installed Devtron in our single node k3s cluster and accessed the dashboard. For any doubts, feel free to comment down or read the official documentation of Devtron.
To continue the learning journey, check out this blog post showing how to auto-scale K8s based on Kafka logs.
FAQ
Why use K3s for application deployment?
K3s offers a quick and easy way to get a Kubernetes cluster up and running, making it ideal for development, testing, and smaller production environments where resource consumption is a concern.
How is K3s different from Kubernetes (K8s)?
K3s is a more streamlined version of Kubernetes, optimized for resource efficiency and ease of use. It achieves this by removing some less frequently used features and components.
Why use k3s for Devtron?
K3s is a lightweight Kubernetes distribution that requires fewer system resources and sets up quickly. It’s fully compatible with Devtron and ideal for local development, testing, or running in edge environments.
How do I access the Devtron dashboard on k3s?
After installation, change the Devtron service type to NodePort, then access the dashboard using your server's IP and the assigned NodePort. You can retrieve the admin password using a kubectl command that decodes it from the secret.


