In the last part, we issued certificates based on hosts mentioned in our ingress resources but it has the following limitations:
1. Your ingress host must be mapped on your ingress controller loadbalancer before you try to issue a certificate
2. You have to get the certificate issued each time for every new host as the certificates are host based which means you can't use certificate issued using one host on any other ingress having another host
3. Ingress based certificate issuance doesn't support issuing wildcard certificates as their is no way to verify that you own that domain
4. Your certificate won't be issued if you are using ingress controller on nodeport or else you'll have to allow hostports in ingress controller because certmanager or ACME protocol tries to verify your host on port 80 or 443 only
5. You can't issue certificates for root domain like devtron.ai, it will issue certificates for subdomains only.
Setup DNS based certificate issuer
In this part, we'll try to overcome all the above discussed limitations by getting a wildcard certificate using cert-manager. We'll do it through both the ways using CLI as well as GUI as we did in the previous part. We'll modify our existing clusterissuer to use DNS based verification and issue a wildcard certificate as well as a certificate for our root domain. I am assuming that you have already checked the previous part and you already have cert-manager, clusterissuer and other things deployed in your kubernetes cluster, if you haven't already, please read part 1 first because I'll continue from where we left in the last part.
Now, to get an SSL certificate for root domain (example.com) or a wildcard certificate (*.example.com), we need to prove that we are the owner of domain for which we are trying to issue a certificate or we have admin level access on the same. A wildcard certificate is the one which can be used on any subdomain and you won't have to issue a certificate for every new subdomain or ingress host that you want to use. To verify the ownership of a domain, we have to provide credentials to access with read and write permissions or certmanager using clusterissuer. Certmanager supports most of the popular domain name registrars, which you can check here or you'll be having webhooks for other DNS providers, if not, then you can create your own webhook for non-supported DNS providers by following their documentation.
Pre-requisites for DNS based clusterissuer
We'll modify our existing clusterissuer for dns based verifications and for this part, we'll be going forward with AWS Route53 which is supported by certmanager. Let's begin by creating an IAM policy to access and modify Route53 records.
Create IAM policy
Create the following IAM policy using the commands given below which'll give the user permission to access and modify route53 records.
cat << EOF > json/certmanager-wildcard.json
{
  "Version": "2012-10-17",
  "Statement": [
    {
      "Effect": "Allow",
      "Action": "route53:GetChange",
      "Resource": "arn:aws:route53:::change/*"
    },
    {
      "Effect": "Allow",
      "Action": [
        "route53:ChangeResourceRecordSets",
        "route53:ListResourceRecordSets"
      ],
      "Resource": "arn:aws:route53:::hostedzone/*"
    },
    {
      "Effect": "Allow",
      "Action": "route53:ListHostedZonesByName",
      "Resource": "*"
    }
  ]
}
EOF
and then run the following command to create the policy:
aws iam create-policy --policy-name certmanager-wildcard --policy-document file://json/certmanager-wildcard.json
Create User and Attach Policy
Now, we'll create and new user and attach the above created policy to the same user and then'll we'll use the credentials of this user to verify ownership of our domain and issue a wildcard certificate for our domain.
Create the user:
aws iam create-user --user-name certmanager
Get ARN for the policy we created:
CERT_POLICY_ARN=$(aws iam list-policies --output json --query 'Policies[*].[PolicyName,Arn]' --output text | grep certmanager-wildcard | awk '{print $2}')
Attach this IAM policy to user certmanager:
aws iam attach-user-policy --policy-arn ${CERT_POLICY_ARN} --user-name certmanager
Generate credentials and create a secret
We have our IAM user ready with the required permissions and now, we'll create access and secret key for the same user. We'll pass access access key as it is to the clusterissuer but we'll create a secret for secret key and we'll pass the secret name to clusterissuer for the same.
Generate credentials:
aws iam create-access-key --user-name certmanager
Note down the access key and secret key that you receive from above command and run the given commands one by one to create a secret for aws secret key:
AWS_SECRET_ACCESS_KEY=your-secret-key
echo ${AWS_SECRET_ACCESS_KEY} > aws-secret-key.txt
kubectl create secret generic aws-route53-creds --from-file=aws-secret-key.txt -n cert-manager
rm -f aws-secret-key.txt
Replace your-secret-key with the aws secret key that you received and -n cert-manager to whichever namespace you deployed your cert-manager.
Modify our existing clusterissuer using CLI
Now we have everything that we needed for our DNS based verification to work, let's modify our clusterissuer to work with both ingress as well as DNS based certificate issuance. Use the command given below to apply the changes:
cat <<EOF | kubectl apply -f -
apiVersion: cert-manager.io/v1
kind: ClusterIssuer
metadata:
 name: letsencrypt-staging
spec:
 acme:
   # You must replace this email address with your own.
   # Let's Encrypt will use this to contact you about expiring
   # certificates, and issues related to your account.
   email: user@example.com
   server: https://acme-staging-v02.api.letsencrypt.org/directory
   privateKeySecretRef:
     # Secret resource that will be used to store the account's private key.
     name: example-issuer-account-key
   # Add a single challenge solver, HTTP01 using nginx
   solvers:
   - http01:
       ingress:
         class: nginx
   - dns01:
       route53:
         accessKeyID: AWSACCESSKEYID
         region: us-east-2
         secretAccessKeySecretRef:
           key: aws-secret-key.txt
           name: aws-route53-creds
     selector:
       dnsZones:
       - example.com
       - '*.example.com'
EOF
Replace AWSACCESSKEYID with your access key that you received from AWS command and example.com as well as '*.example.com' with your domain for which you are trying to issue certificate.
Issue a wildcard certificate using CLI
In this case, we don't need any ingress to issue a certificate. We'll instead create a Certificate resource separately. Ensure one thing that you do not have any existing DNS records starting with _acme-challenge or it may conflict when certmanager tries to verify your domain as it creates and then deletes the same type of records for verification and you may not be able to get a certificate. Use the command given below to issue a certificate which will work for root domain as well as wildcard:
cat <<EOF | kubectl apply -f -
apiVersion: cert-manager.io/v1
kind: Certificate
metadata:
  name: example-com-cert
  namespace: cert-manager
spec:
  secretName: example-com-tls
  dnsNames:
  - example.com
  - '*.example.com'
  issuerRef:
    name: letsencrypt-staging
    # We can reference ClusterIssuers by changing the kind here.
    # The default value is Issuer (i.e. a locally namespaced Issuer)
    kind: ClusterIssuer
    group: cert-manager.io
EOF
Replace example.com and '*.example.com' with the domains for which you want to issue the certificate as well as replace the name of certificate and secret from example-com-cert and example-com-tls to whatever you like to give. This will issue a certificate for your domains and that certificate will get stored in a secret named example-com-tls in our case in the namespace cert-manager. You can also change the namespace to whichever namespace you want to issue the certificate.
Modify existing clusterissuer and issue wildcard certificate using GUI
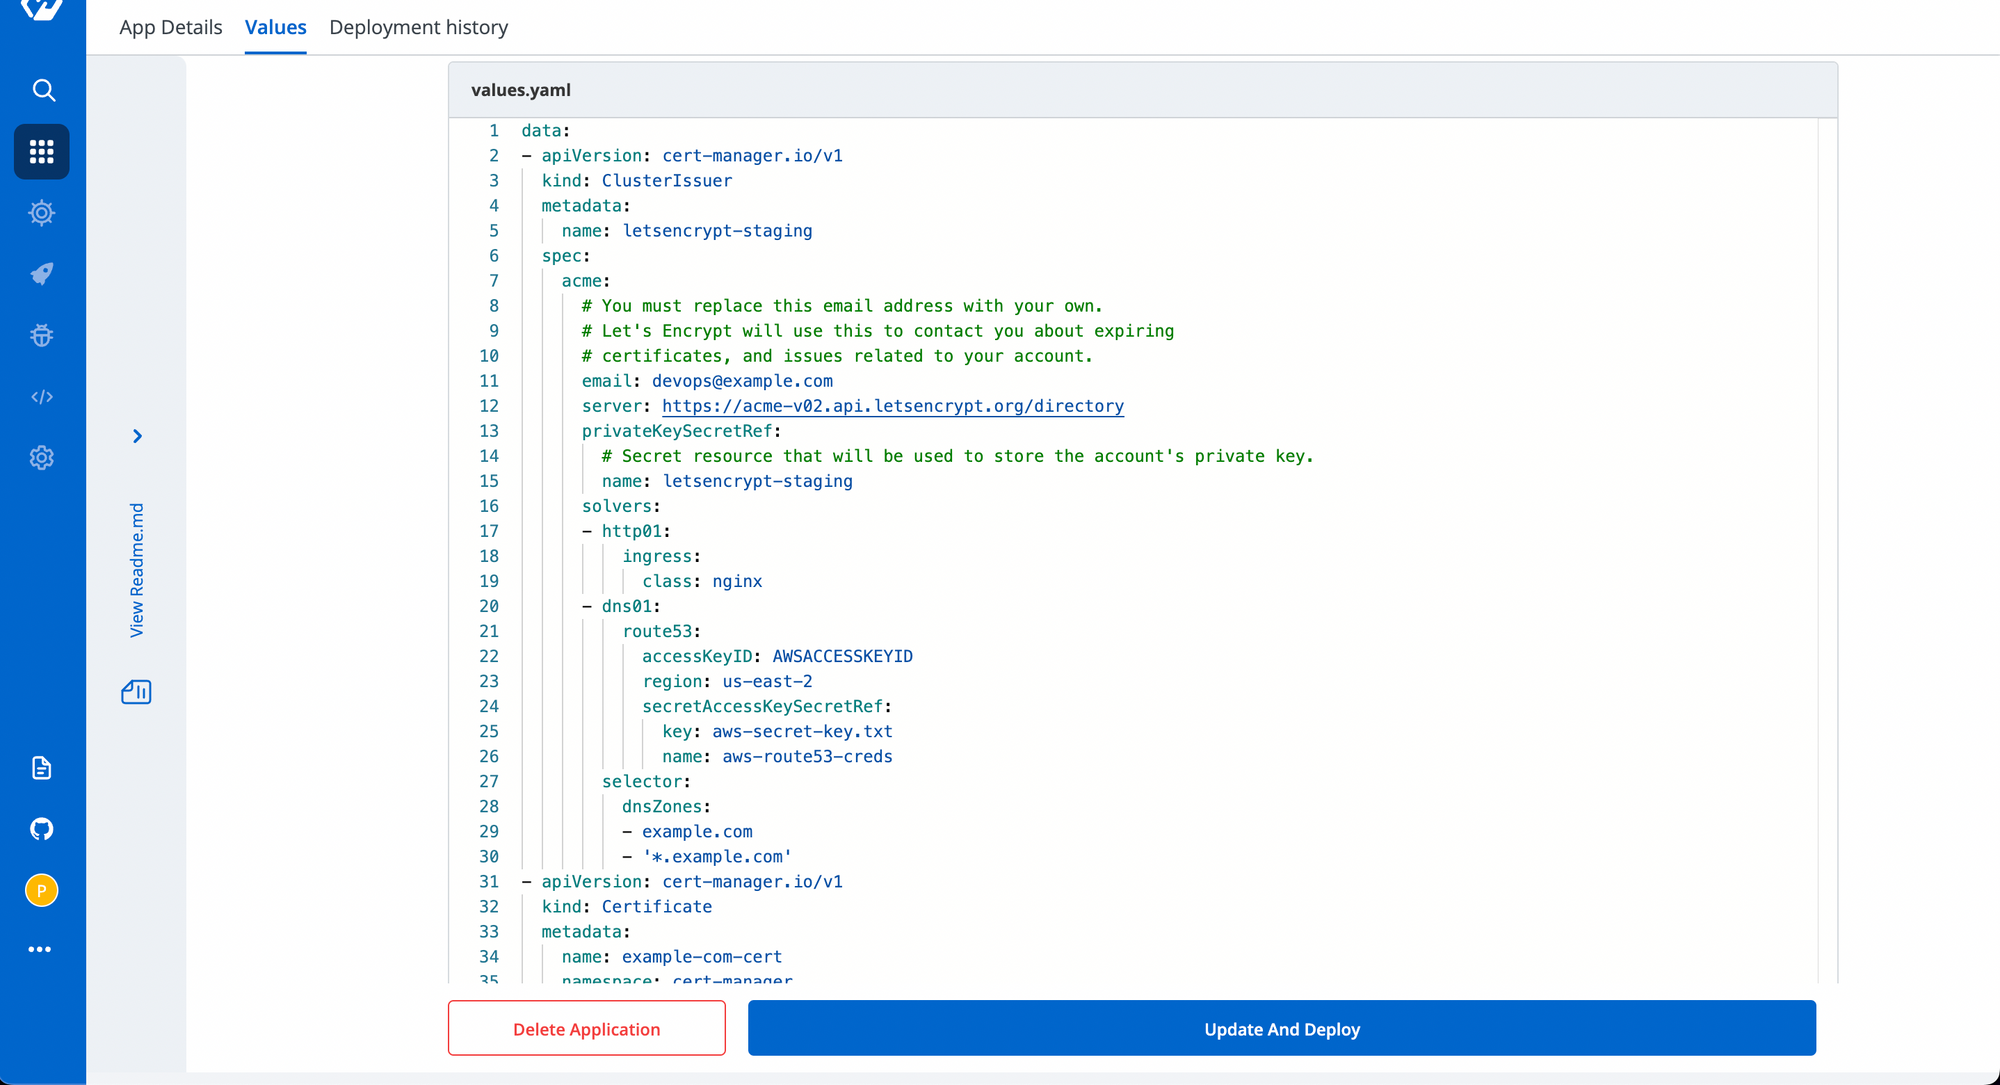
Let's modify the existing generic chart that we had deployed and as it's a generic chart, we support adding multiple resources and yaml values so we'll modify our clusterissuer as well as we'll add certificate resource also to the same. Go to Helm Apps and search for the chart we deployed and then click on values to edit it's values. Enter the given values:
data:
- apiVersion: cert-manager.io/v1
  kind: ClusterIssuer
  metadata:
    name: letsencrypt-staging
  spec:
    acme:
      # You must replace this email address with your own.
      # Let's Encrypt will use this to contact you about expiring
      # certificates, and issues related to your account.
      email: devops@example.com
      server: https://acme-v02.api.letsencrypt.org/directory
      privateKeySecretRef:
        # Secret resource that will be used to store the account's private key.
        name: letsencrypt-staging
      solvers:
      - http01:
          ingress:
            class: nginx
      - dns01:
          route53:
            accessKeyID: AWSACCESSKEYID
            region: us-east-2
            secretAccessKeySecretRef:
              key: aws-secret-key.txt
              name: aws-route53-creds
        selector:
          dnsZones:
          - example.com
          - '*.example.com'
- apiVersion: cert-manager.io/v1
  kind: Certificate
  metadata:
    name: example-com-cert
    namespace: cert-manager
  spec:
    secretName: example-com-tls
    dnsNames:
    - example.com
    - '*.example.com'
    issuerRef:
      name: letsencrypt-staging
      # We can reference ClusterIssuers by changing the kind here.
      # The default value is Issuer (i.e. a locally namespaced Issuer)
      kind: ClusterIssuer
      group: cert-manager.io
Replace AWSACCESSKEYID, example.com, example-com-cert and example-com-tls with your own desired values and then click on Update and Deploy button.

It may take 5-7 minutes for verifying and issuing the certificate but have patience it will be done for sure. If you think it's taking time then you can describe the certificate to know what's going on. Describing the certificate will show you that it has created a CertificateRequest resource, then describe that certificaterequest resource which creates an order in return and if you describe that order you'll get a challenge resource which is the main resource for verification and issuing the certificate. When you verify that challenge resource you'll get to know what's going on, where it's taking time or if there's an issue then you'll get to know the same too. Keep digging and you'll have the certificate ready. Run the given command to verify if the certificate is issued:
kubectl describe certificate example-com-cert -n cert-manager | egrep "Message|Status|Type"
Don't forget to change the namespace with the namespace where you have deployed the certificate because certificates are stored and accessible in that particular namespace only. You should see the following output:
Status:
   Message:               Certificate is up to date and has not expired
   Status:                True
   Type:                  Ready
If you see this output, your certificate is ready to be used. On devtron, Just check if the resource Certificate in the app under Custom Resource is showing healthy or not. If healthy, that means Certificate is
successfully issued and stored in the secret. You can also hover on the Certificate and click on Manifest to check the status given above at the end of Certificate Manifest.
Modify ingress controller to use our wildcard certificate
Now, if you have this wildcard certificate stored in a secret, you don't have to worry about sharing it across namespaces. You can simply provide the certificate to ingress controller and it'll be available cluster wide to all ingresses without mentioning it in the tls[] section. If you have installed the ingress controller through helm, then edit the values and add the following and re-deploy:
extraArgs:
  default-ssl-certificate: "cert-manager/example-com-tls"
If you have deployed the controller directly without helm as deployment or daemonset, then add the following argument to their yaml manifest and re-deploy:
--default-ssl-certificate: "cert-manager/example-com-tls"
This goes in the format namespace/secret-name so replace it with your certifcate namespace and secret name in which your certificate is stored. Now you won't have to worry about if your ingress controller is using service as nodePort or loadbalancer or any other, it'll work for all.
You can still use the old way to add it in tls[] section of the ingress, just don't use the annotation cert-manager.io/cluster-issuer: letsencrypt-staging because if you use this annotation then it'll try to re-issue the certificate and contents of the secret will be modified to this host only and it won't be a wildcard certificate anymore.
Moreover, if you want to use any other domain which is not using the subdomain of our wildcard certificate, you can still go for ingress based issuance and it'll work for that ingress. Until and unless you define a particular certificate/secret in tls[] of the ingress, it'll use the default certificate provided to the ingress controller.
Not to mention, your wildcard certificate is also managed by certmanager so, you don't have to worry about it's auto renewal as it's the job of certmanager to keep it up to date. Now, you are even ready to go into production with cert-manager as this method overcomes all the limitations too which were covered at the start.
One more thing, if you are the one who doesn't need any CI/CD pipelines and just works with helm charts only, then Devtron also provides the flexibility to install its lightweight version without CI/CD. You can manage all your helm charts with an intuitive UI dashboard even the ones which you deployed using helm CLI that too with the same fine grained access control for your team. You can read more about Devtron and it's installation steps here.
FAQ
How do I issue a wildcard SSL certificate in Kubernetes using cert-manager?
You can issue a wildcard SSL certificate using cert-manager by configuring a ClusterIssuer with DNS-01 challenge through a supported DNS provider like AWS Route53. This verifies domain ownership and allows issuing certificates for *.example.com without requiring an Ingress resource.
What are the limitations of Ingress-based certificate issuance in Kubernetes?
Ingress-based certificate issuance doesn't support wildcard or root domains, requires public access on ports 80/443, and mandates DNS mapping before issuance. It also can't reuse certificates across hosts, making DNS-based verification a more scalable option.
Can I use a wildcard certificate as the default TLS certificate in Kubernetes?
Yes, once issued, the wildcard certificate can be set as the default TLS certificate for your Ingress controller. This ensures HTTPS for all hosts without configuring TLS per Ingress and works even when using NodePort or other service types.
Does cert-manager automatically renew wildcard certificates issued via DNS?
Yes, cert-manager handles automatic renewal of wildcard certificates issued using DNS-01 challenge. As long as the DNS credentials and issuer configuration remain valid, cert-manager will keep your certificate updated without manual intervention.


