Kubernetes has revolutionized how teams build, deploy, and scale applications—but its complexity still poses real challenges. Even experienced DevOps engineers often face issues like tangled deployments, resource conflicts, security misconfigurations, and operational overhead. For developers, the learning curve and manual maintenance can pull focus away from core innovation.
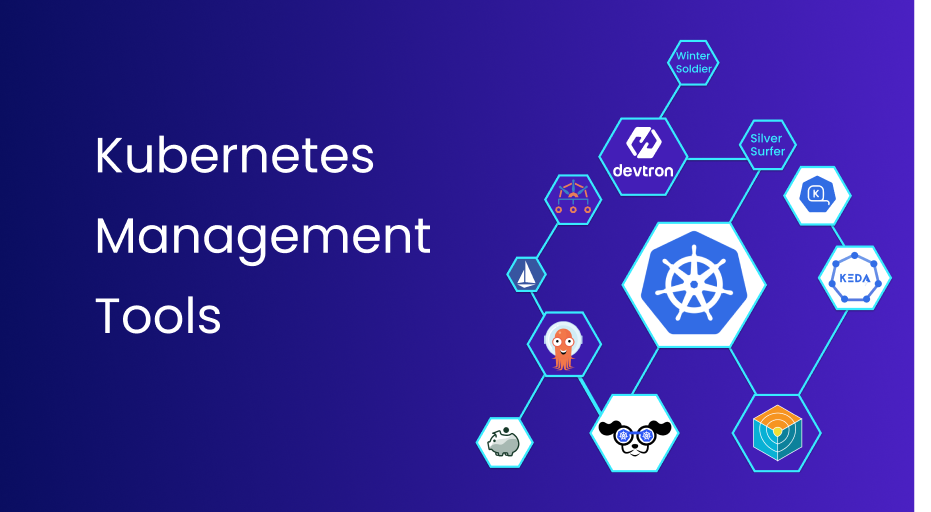
To simplify this journey, we’ve curated a list of 12 essential Kubernetes management tools designed to reduce complexity, automate routine tasks, and improve cluster visibility and control. Whether you're managing multi-cloud infrastructure or just starting with Kubernetes, these tools will help you manage it more efficiently in 2025.
Kubernetes simplifies app deployment and scaling, but managing it can be complex—even for seasoned DevOps teams. From resource conflicts to security gaps, the challenges are real. This guide explores 12 powerful Kubernetes management tools that help automate operations, improve visibility, and streamline workflows—making Kubernetes easier to manage in 2025 across any environment.
- Kubernetes Adoption is nearly Universal Used by 96% of Enterprises - Source: Edge Delta
- 75% of Teams Struggle with Kubernetes Complexity - Source: Spectro Cloud
- Security Delays 67% of Kubernetes Deployments - Source: Red Hat
Top 12 Kubernetes Management Tools
Managing Kubernetes can prove to be both exciting and daunting based on its rich capabilities and inherent complexities. Luckily, numerous tools are available to simplify the operation of Kubernetes, increase productivity, and make management more straightforward.
Below are the top 12 management tools for Kubernetes, each with its different strengths to tackle unique issues.
1. KEDA
Keda (Kubernetes Event-Driven Autoscaling) is an event-driven autoscale for Kubernetes workloads. Simply defined, it can scale an application based on the number of events needing to be handled.
Installing KEDA
KEDA has well-documented steps for installation in their documentation. You can install it with Helm, Operator Hub, or YAML declarations. In this blog, let's go with the helm.
Step 1: Add Helm Repo
helm repo add kedacore https://kedacore.github.io/charts
Step 2: Update Helm Repo
helm repo update
Step 3: Install KEDA in keda Namespace
helm install keda kedacore/keda --namespace keda --create-namespace
Use Cases
KEDA is a classic example of autoscaling based on different metrics. When you want to autoscale your application beyond the resource metrics like CPU/ Memory, you can use KEDA. It listens to specific events such as messages from message queues, HTTP requests, custom Prometheus metrics, Kafka lag, etc. To deep dive into KEDA, check out this blog.
2. Karpenter
Built in AWS, Karpenter is a high-performance, flexible, open-source Kubernetes cluster auto-scaler. One of its key features is the ability to launch EC2 instances based on specific workload requirements such as storage, compute, acceleration, and scheduling needs.
Installation
Install Karpenter in the Kubernetes cluster using Helm charts. But before doing this, you must ensure enough computing capacity is available. Karpenter requires permissions to provision compute resources that are based on the cloud provider you have chosen.
Step 1: Install Utilities
Karpenter can be installed in clusters using a Helm chart. Install these tools before proceeding:
- AWS CLI
- kubectl - the Kubernetes CLI
- eksctl (>= v0.180.0) - the CLI for AWS EKS
- helm - the package manager for Kubernetes
Configure the AWS CLI with a user that has sufficient privileges to create an EKS cluster. Verify that the CLI can authenticate properly by running aws sts get-caller-identity.
Step 2: Set Environment Variables
After installing the dependencies, set the Karpenter namespace, version and Kubernetes version as follows.
export KARPENTER_NAMESPACE="kube-system"
export KARPENTER_VERSION="0.37.0"
export K8S_VERSION="1.30"
Then set the following environment variables which would be further used for creating an EKS cluster.
export AWS_PARTITION="aws" # if you are not using standard partitions, you may need to configure to aws-cn / aws-us-gov
export CLUSTER_NAME="${USER}-karpenter-demo"
export AWS_DEFAULT_REGION="us-west-2"
export AWS_ACCOUNT_ID="$(aws sts get-caller-identity --query Account --output text)"
export TEMPOUT="$(mktemp)"
export ARM_AMI_ID="$(aws ssm get-parameter --name /aws/service/eks/optimized-ami/${K8S_VERSION}/amazon-linux-2-arm64/recommended/image_id --query Parameter.Value --output text)"
export AMD_AMI_ID="$(aws ssm get-parameter --name /aws/service/eks/optimized-ami/${K8S_VERSION}/amazon-linux-2/recommended/image_id --query Parameter.Value --output text)"
export GPU_AMI_ID="$(aws ssm get-parameter --name /aws/service/eks/optimized-ami/${K8S_VERSION}/amazon-linux-2-gpu/recommended/image_id --query Parameter.Value --output text)"
Step 3: Create a Cluster
The following configs will create an EKS cluster with the user configured in aws-cli having the relevant permissions to create an EKS cluster.
curl -fsSL https://raw.githubusercontent.com/aws/karpenter-provider-aws/v"${KARPENTER_VERSION}"/website/content/en/preview/getting-started/getting-started-with-karpenter/cloudformation.yaml  > "${TEMPOUT}" \
&& aws cloudformation deploy \
  --stack-name "Karpenter-${CLUSTER_NAME}" \
  --template-file "${TEMPOUT}" \
  --capabilities CAPABILITY_NAMED_IAM \
  --parameter-overrides "ClusterName=${CLUSTER_NAME}"

eksctl create cluster -f - <<EOF
---
apiVersion: eksctl.io/v1alpha5
kind: ClusterConfig
metadata:
  name: ${CLUSTER_NAME}
  region: ${AWS_DEFAULT_REGION}
  version: "${K8S_VERSION}"
  tags:
    karpenter.sh/discovery: ${CLUSTER_NAME}

iam:
  withOIDC: true
  podIdentityAssociations:
  - namespace: "${KARPENTER_NAMESPACE}"
    serviceAccountName: karpenter
    roleName: ${CLUSTER_NAME}-karpenter
    permissionPolicyARNs:
    - arn:${AWS_PARTITION}:iam::${AWS_ACCOUNT_ID}:policy/KarpenterControllerPolicy-${CLUSTER_NAME}

iamIdentityMappings:
- arn: "arn:${AWS_PARTITION}:iam::${AWS_ACCOUNT_ID}:role/KarpenterNodeRole-${CLUSTER_NAME}"
  username: system:node:{{EC2PrivateDNSName}}
  groups:
  - system:bootstrappers
  - system:nodes
  ## If you intend to run Windows workloads, the kube-proxy group should be specified.
  # For more information, see https://github.com/aws/karpenter/issues/5099.
  # - eks:kube-proxy-windows

managedNodeGroups:
- instanceType: m5.large
  amiFamily: AmazonLinux2
  name: ${CLUSTER_NAME}-ng
  desiredCapacity: 2
  minSize: 1
  maxSize: 10

addons:
- name: eks-pod-identity-agent
EOF

export CLUSTER_ENDPOINT="$(aws eks describe-cluster --name "${CLUSTER_NAME}" --query "cluster.endpoint" --output text)"
export KARPENTER_IAM_ROLE_ARN="arn:${AWS_PARTITION}:iam::${AWS_ACCOUNT_ID}:role/${CLUSTER_NAME}-karpenter"

echo "${CLUSTER_ENDPOINT} ${KARPENTER_IAM_ROLE_ARN}"
Unless your AWS account has already been onboarded to EC2 Spot, you will need to create the service-linked role to avoid the ServiceLinkedRoleCreationNotPermitted error.
aws iam create-service-linked-role --aws-service-name spot.amazonaws.com || true
# If the role has already been successfully created, you will see:
# An error occurred (InvalidInput) when calling the CreateServiceLinkedRole operation: Service role name AWSServiceRoleForEC2Spot has been taken in this account, please try a different suffix.
Step 4: Install Karpenter
# Logout of helm registry to perform an unauthenticated pull against the public ECR
helm registry logout public.ecr.aws

helm upgrade --install karpenter oci://public.ecr.aws/karpenter/karpenter --version "${KARPENTER_VERSION}" --namespace "${KARPENTER_NAMESPACE}" --create-namespace \
  --set "settings.clusterName=${CLUSTER_NAME}" \
  --set "settings.interruptionQueue=${CLUSTER_NAME}" \
  --set controller.resources.requests.cpu=1 \
  --set controller.resources.requests.memory=1Gi \
  --set controller.resources.limits.cpu=1 \
  --set controller.resources.limits.memory=1Gi \
  --wait
Once the installation is done, you can create NodePool and define the instance family, architecture, and start using Karpenter as your cluster autoscaler. For detailed installation information and its usage, feel free to refer to its documentation.
Use Cases
Karpenter is used to automatically provision and optimize Kubernetes cluster resources, ensuring efficient and cost-effective scaling. It dynamically adjusts node capacity based on workload demands, reducing over-provisioning and underutilization, thus enhancing performance and lowering cloud infrastructure costs. Check out this blog to understand in-depth about Karpenter and Cluster Autocaler.
3. Devtron
Devtron is a tool integration platform for Kubernetes and enables swift app containerization, seamless Kubernetes deployment, and peak performance optimization. It deeply integrates with products across the lifecycle of microservices i.e., CI/CD, security, cost, debugging, and observability via an intuitive web interface.
Devtron helps you to deploy, observe, manage & debug the existing Helm apps in all your clusters.
Installation
Run the following command to install the latest version of Devtron along with the CI/CD module:
helm repo add devtron https://helm.devtron.ai
helm repo update devtron
helm install devtron devtron/devtron-operator \
--create-namespace --namespace devtroncd \
--set installer.modules={cicd}
Check out the complete guide here. If you have questions, please let us know on our discord channel.
Use Cases
Devtron simplifies Kubernetes adoption by addressing key challenges, making it easier to deploy, monitor, observe, and debug applications at scale.
Here's how Devtron helps:
1. Simplifying the Adoption Process:
- Single Pane of Glass: Provides a unified view of all Kubernetes resources, enabling easy navigation and understanding of cluster components.
- Real-Time Application Status Monitoring: Displays the health and status of applications in real-time, highlighting potential issues and unhealthy components.
- Simplified Debugging: Offers tools like event logs, pod logs, and interactive shells for debugging issues within the Kubernetes environment.
- Containerization Made Easy: Provides templates and options for building container images, simplifying the containerization process for various frameworks and languages.
2. Streamlining Tool Integration:
- Helm Marketplace: Integrates with the Helm chart repository to easily deploy and manage various Kubernetes tools.
- Built-in Integrations: Offers native integrations with popular tools like Grafana, Trivy, and Clair for enhanced functionality.
3. Simplifying Multi-Cluster/Cloud Workloads:
- Centralized Visibility: Provides a unified view of applications across multiple clusters and cloud environments, enabling consistent management.
- Environment-Specific Configurations: Allows setting environment-specific configurations, making it easier to manage applications in diverse environments.
4. Simplifying DevSecOps:
- Fine-Grained Access Control: Enables granular control over user permissions for Kubernetes resources, ensuring secure access.
- Security Scanning and Policies: Offers built-in security scanning with Trivy and allows configuring policies to enforce security best practices.
If you liked what Devtron is solving, do give it a Star ⭐️ on GitHub.
4. K9s
K9s is a terminal-based UI to interact with your Kubernetes clusters. This project aims to make it easier to navigate, observe, and manage your deployed applications in the wild. K9s continually watch Kubernetes for changes and offer subsequent commands to interact with your observed resources.
Installation
K9s is available on Linux, macOS, and Windows platforms. You can get the latest binaries for different architectures and operating systems from the releases on GitHub.
MacOS/ Linux
 # Via Homebrew
 brew install derailed/k9s/k9s
Windows
# Via chocolatey
choco install k9s
For other ways of installation, feel free to check out the documentation of K9s.
Use Cases
K9s make it much easier as compared to other Kubernetes clients like kubectl to manage and orchestrate applications on Kubernetes. You get a terminal-based GUI which helps you manage your resources,
- Resource Monitoring and Visibility: It provides continuous monitoring of your Kubernetes cluster, offering a clear view of resource statuses. It helps you understand your K8s cluster by displaying information about pods, deployments, services, nodes, and more. With K9s, you can easily navigate through cluster resources, ensuring better visibility and awareness.
- Resource Interaction and Management: K9s allows you to interact with resources directly from the terminal. You can view, edit, and delete resources without switching to a separate management tool. Common operations include scaling deployments, restarting pods, and inspecting logs. You can also initiate port-forwarding to access services running within pods.
- Namespace Management: This lets you focus on specific namespaces within your cluster. You can switch between namespaces seamlessly, making it easier to work with isolated environments. By filtering resources based on namespaces, you can avoid clutter and stay organized.
- Advanced Features: It also offers advanced capabilities, such as opening a shell in a container directly from the UI. It supports context switching between different clusters, making it convenient for multi-cluster environments. Additionally, K9s integrate with vulnerability scanning tools, enhancing security practices.
5. Winter Soldier
Winter Soldier is an open-source tool from Devtron, it enables time-based scaling for Kubernetes workloads. The time-based scaling with Winter Soldier helps us to reduce the cloud cost, it can be deployed to execute things such as:
- Batch deletion of the unused resources
- Scaling of Kubernetes workloads
Installation
If you want to dive deeper into it, please check the following resources -https://devtron.ai/blog/winter-soldier-scale-down-your-infrastructure-in-the-easiest-possible-way
Give it Star on the Github if you like the project: https://github.com/devtron-labs/winter-soldier
Use Cases
Winter Soldier is a valuable tool for anyone who wants to:
- Optimize Cloud Costs: By automatically scaling Kubernetes workloads based on time, Winter Soldier helps reduce unnecessary resource usage, lowering cloud bills.
- Automate Routine Tasks: Tasks like deleting unused resources or scaling workloads at specific times can be automated, freeing up time for other initiatives.
- Improve Resource Utilization: By ensuring resources are only allocated when needed, Winter Soldier maximizes resource utilization and improves overall efficiency.
- Implement Time-Based Scaling: It's ideal for scenarios where workloads have predictable usage patterns (e.g., a website that experiences heavy traffic during specific hours) or when resources need to be adjusted based on time.
Examples:
- E-commerce Website: Scale up resources during peak shopping hours and scale down during off-peak periods to reduce costs.
- Data Processing Jobs: Schedule resource scaling for batch processing jobs that run only during specific time windows.
- Development and Testing Environments: Automatically scale down development and testing environments after hours to minimize resource usage.
Key Benefits:
- Cost Reduction: Optimizing resource utilization translates to lower cloud bills.
- Improved Efficiency: Automating resource management frees up time for other tasks.
- Enhanced Reliability: By ensuring resources are allocated appropriately, Winter Soldier helps improve the reliability of Kubernetes applications.
6. Silver Surfer
Currently, there is no easy way to upgrade Kubernetes objects in case of Kubernetes upgrade. It's a tedious task to know whether the current ApiVersion of the Object is Removed, Deprecated, or Unchanged. It provides details of issues with the Kubernetes object in case they are migrated to a cluster with a newer Kubernetes version.

Installation
Just with a few commands, it's ready to serve your cluster.
git clone https://github.com/devtron-labs/silver-surfer.git
cd silver-surfer
go mod vendor
go mod download
make
It's done. A bin directory might have been created with the binary ready-to-use ./kubedd command.
It categorizes Kubernetes objects based on changes in ApiVersion. Categories are:
- Removed ApiVersion
- Deprecated ApiVersion
- Newer ApiVersion
- Unchanged ApiVersion
Within each category it identifies the migration path to the newer API Version, possible paths are:
- It cannot be migrated as there are no common ApiVersions between the source and target Kubernetes version
- It can be migrated but has some issues which need to be resolved
- It can be migrated with just an ApiVersion change
This activity is performed for both current and new ApiVersion.
Check out the Github repo and give it a star ⭐️: https://github.com/devtron-labs/silver-surfer
Use Cases
- Pre-Upgrade Planning: Silver Surfer helps you identify potential issues before the upgrade, giving you time to plan and resolve them.
- Streamlined Upgrade Process: The tool provides detailed guidance, minimizing downtime and errors during the upgrade.
- Kubernetes Object Management: Silver Surfer provides greater visibility into the compatibility of your objects with different Kubernetes versions, aiding in managing your cluster.
Key Benefits
- Reduced Upgrade Complexity: Simplifies the Kubernetes upgrade process, reducing stress and the potential for errors.
- Improved Uptime: Minimizes downtime during the upgrade process.
- Enhanced Cluster Management: Provides a better understanding of your Kubernetes objects and their compatibility with different versions.
7. Trivy
Trivy is a simple and comprehensive vulnerability scanner for containers and other artifacts. A software vulnerability is a glitch, flaw, or weakness present in the software or in an Operating System. Trivy detects vulnerabilities of OS packages (Alpine, RHEL, CentOS, etc.) and application dependencies (Bundler, Composer, npm, yarn, etc.). Trivy is easy to use. Just install the binary and you're ready to scan. All you need to do for scanning is to specify a target such as an image name of the container.
Installation
Installing from the the Aqua Chart Repository.
helm repo add aquasecurity https://aquasecurity.github.io/helm-charts/
helm repo update
helm search repo trivy
helm install my-trivy aquasecurity/trivy
Installing the Chart.
To install the chart with the release name my-release:
helm install my-release .
The command deploys Trivy on the Kubernetes cluster in the default configuration. The Parameters section lists the parameters that can be configured during installation.
Know more about Trivvy installation here.

Use Cases
- DevSecOps Integration: Trivvy seamlessly integrates into your CI/CD pipelines, identifying vulnerabilities early in the development process and enabling automated remediation.
- Secure Container Deployment: It ensures only secure container images are deployed to production by scanning them before deployment and integrating with container registries for continuous scanning.
- Ongoing Security Monitoring: Enables regular vulnerability scans and provides detailed reports, allowing for proactive security maintenance and tracking of remediation efforts.
- Beyond Containers: Extend security assessments to operating systems, server configurations, and other infrastructure components.
- Software Supply Chain Analysis: Analyze your entire software supply chain, from source to deployment, to identify and address vulnerabilities at every stage.
8. Cert-Manager
Cert Manager is an open-source tool designed to automate the management and provisioning of digital certificates in Kubernetes environments. It solves the challenge of handling TLS/SSL certificates for applications running on Kubernetes by simplifying the process of obtaining, renewing, and distributing certificates. Cert Manager enhances security and reduces operational complexity, ensuring that applications have valid and up-to-date certificates for secure communication.
It automates the lifecycle of your TLS certificates! No more manual renewal!
Installation
You don't require any tweaking of the cert-manager install parameters.
The default static configuration can be installed as follows:
kubectl apply -f https://github.com/cert-manager/cert-manager/releases/download/v1.15.1/cert-manager.yaml
📖 Read more about installing cert-manager using kubectl apply and static manifests and Installing with Helm
Checkout our blog to learn how to setup cert-manager using Devtron: https://devtron.ai/blog/kubernetes-ssl-certificate-automation-using-certmanager-part-1
Use Cases
- Automated Certificate Acquisition & Renewal: Effortlessly obtain and renew certificates from providers like Let's Encrypt, eliminating manual effort and ensuring continuous security.
- Secure Ingress Controllers: Automatically provision certificates for Ingress controllers, enabling secure HTTPS communication for services exposed through the Ingress.
- Centralized Certificate Management: Manage all your certificates from a single point of control, simplifying issuance, renewal, and revocation.
- Enhanced Application Security: Strengthen encryption and protect sensitive data by ensuring valid and up-to-date TLS/SSL certificates.
- Streamlined Operations: Reduce operational overhead, minimize downtime, and ensure continuous application availability by automating certificate management.
9. Istio
Istio extends Kubernetes to establish a programmable, application-aware network. Working with both Kubernetes and traditional workloads, Istio brings standard, universal traffic management, telemetry, and security to complex deployments.
Installation
Check out the Istio docs for Getting Started and a complete walkthrough of Canary Deployment with Flagger and Istio on Devtron.
Use Cases
Simplify Microservice Communication:
- Istio abstracts away complex networking concerns like service discovery, routing, and load balancing.
- Developers can focus on business logic while Istio handles communication between microservices.
Enhance Security:
- Implement consistent authentication, authorization, and encryption across all services using Istio.
- It mitigates security risks by enforcing security policies throughout the mesh.
Traffic Management:
- Istio enables A/B testing, canary deployments, and blue-green deployments.
- You can control traffic routing, timeouts, and fault injection seamlessly.
Observability and Monitoring:
- Monitor service behavior, track performance metrics, and troubleshoot issues with Istio.
- It integrates with observability tools for better insights into your microservices.
10. KRR
Robusta KRR (Kubernetes Resource Recommender) is a CLI tool for optimizing resource allocation in Kubernetes clusters. It gathers pod usage data from Prometheus and recommends requests and limits for CPU and memory. This reduces costs and improves performance.
Installation
The installation is pretty straight-forward. You can install the binary directly from their releases. To install the CLI, depending upon your operating system, you can install the KRR cli and use it for optimising the resources. You can use brew for installing on mac:
brew tap robusta-dev/homebrew-krr

brew install krr
Use Cases
- Cost Savings: Reduce cloud bills by recommending optimal resource requests, and eliminating over-provisioning.
- Performance Boost: Improve application responsiveness by preventing resource contention and ensuring sufficient resources.
- Data-Driven Insights: Gain insights into resource usage patterns for better planning and scaling decisions.
- Automated Optimization: Integrate with CI/CD pipelines to automatically adjust resource allocation for continuous optimization.
11. Kyverno
Kyverno is a Kubernetes-native policy engine designed for Kubernetes platform engineering teams. It enables security, automation, compliance, and governance using policy-as-code. Kyverno can validate, mutate, generate, and cleanup configurations using Kubernetes admission controls, background scans, and source code repository scans in real time. Kyverno policies can be managed as Kubernetes resources and do not require learning a new language. Kyverno is designed to work nicely with tools you already use like kubectl, kustomize, and Git.
Installation
To install Kyverno with Helm, first add the Kyverno Helm repository.
helm repo add kyverno https://kyverno.github.io/kyverno/
Scan the new repository for charts.
helm repo update
Optionally, show all available chart versions for Kyverno.
helm search repo kyverno -l
Check the whole guide here.
And be sure to check out our blog on securing Kubernetes clusters with Kyverno policies.
Use Cases
- Security: Enforce policies to prevent deployments with root privileges, restrict resource requests, control network access, and secure sensitive data.
- Compliance: Implement auditing, labeling, and access control policies to meet regulatory requirements.
- Best Practices: Automate resource validation, enforce naming conventions, and manage resource lifecycles.
- Extend Kubernetes: Customize admission control and validate custom resources.
12. Opencost
OpenCost is a vendor-neutral open-source project for measuring and allocating cloud infrastructure and container costs. It’s built for Kubernetes cost monitoring to power real-time cost monitoring, showback, and chargeback. It is a sandbox project with the Cloud Native Computing Foundation (CNCF).
Installation
Check out the Installation guide to start monitoring and managing your spend in minutes. Additional documentation is available for configuring Prometheus and managing your OpenCost with Helm.
Use Cases
- Identifying Costly Workloads: Identify specific pods or deployments consuming excessive resources and take steps to optimize their resource allocation.
- Allocating Costs to Teams: Use OpenCost to generate detailed reports showing the cost incurred by each team or project using your Kubernetes cluster.
- Right-sizing Resources: Optimize resource requests and limits for pods based on actual usage, reducing unnecessary resource allocation and saving costs.
- Predictive Cost Management: Forecast future costs based on historical data and identify potential spikes in resource consumption to proactively adjust resource allocation or budget.
Common questions
What is the best Kubernetes management tool for 2025?
Devtron is one of the top Kubernetes management tools in 2025, providing a centralized platform for CI/CD, application management, security controls, and multi-cluster visibility. Other highly rated tools include Karpenter for autoscaling, KEDA for event-driven workloads, Kyverno for policy enforcement, and Opencost for cost monitoring.
How do Kubernetes tools simplify DevOps workflows?
Kubernetes management tools reduce complexity by automating deployments, monitoring resource usage, managing configurations, and enforcing security policies. Platforms like Devtron streamline DevOps workflows through visual interfaces, RBAC integration, and end-to-end visibility, enabling faster, error-free operations.
Are there open-source tools for Kubernetes management?
Yes, several open-source tools help manage Kubernetes effectively. K9s offers a terminal UI for managing clusters, Kyverno automates policy enforcement, KEDA enables autoscaling based on external events, and Trivy scans containers for vulnerabilities. Many teams use these alongside platforms like Devtron for a complete management stack.
How do I choose the right Kubernetes management tool?
Choosing the right tool depends on your needs:
- For CI/CD, deployment automation, and visibility: Devtron,
- For cost optimization: Opencost,
- For autoscaling: KEDA,
- For policy enforcement: Kyverno,
- For terminal-based cluster ops: K9s Evaluate based on your environment (cloud/on-prem), team expertise, and integration requirements.
Conclusion
Kubernetes has revolutionized the way we build and deploy applications. However, its complexity can be daunting. The 12 tools we've explored provide a comprehensive toolkit for simplifying and optimizing your Kubernetes management.
The Coud-native landscape is overflowing with tools, each serving a specific purpose. Remember, there's no one-size-fits-all solution. Carefully evaluate your use case and choose the tools that best address your specific needs for a more efficient, secure, and cost-optimized Kubernetes experience.
By leveraging these powerful tools, you can unlock greater efficiency, reduce costs, enhance security, and ultimately, focus on delivering innovative applications faster. So, embrace these powerful tools and build a better infrastructure with confidence!
If you have any questions, or want to discuss any specific usecase, feel free to connect with us or ask them in our actively growing Discord Community.
Happy Deploying!


