Introduction
.NET is a powerhouse for building modern applications, from high-performance APIs to full-scale enterprise solutions. With its cross-platform capabilities and rich ecosystem, it’s an ideal choice for scalable development. However deploying .NET applications on Kubernetes isn’t always straightforward—misconfigurations, oversized containers, and inefficient resource allocation can lead to unnecessary complexity.
Devtron takes the hassle out of Kubernetes deployment by automating and optimizing the process, so you can focus on building, not troubleshooting. Prefer a manual approach? That’s always an option too.
In this guide, we’ll walk you through both methods and best practices to ensure a seamless, efficient deployment.
Deploy .NET Applications on Kubernetes:
- Using Devtron for Automated Deployment
- Using Kubernetes Manually
Did you know? Over 70% of cloud-native failures stem from misconfigured deployments. From bloated images to inefficient resource allocation, small mistakes can cause big inefficiencies. But don’t worry—this guide will help you avoid them!
Deploying .NET Applications on Kubernetes
Deploying a .NET application to Kubernetes involves several steps. Let’s first review the overall process and then discuss the various steps in depth.
Steps for Deployment
- Write and build the .NET Application
- Containerize the .NET Application
- Push the container to a Container Registry such as DockerHub
- Create the required YAML Manifest for Kubernetes Resources
- Apply the YAML manifest to the Kubernetes clusters
Prerequisites
Before proceeding with the deployment process, please make sure that you have the following prerequisites
- A .NET application
- Docker
- Kubectl
- A Kubernetes Cluster such as kind
Method 1: Deploying .NET Applications Using Devtron
Devtron is a Kubernetes management platform that simplifies the entire DevOps lifecycle. It automates the creation of Dockerfiles, and Kubernetes manifests, builds the application, and manages deployment through an intuitive UI.
Step 1: Create a Devtron Application and Add Git Repository
- From Devtron’s home page, create a new Devtron application.
- Add the Git Repository containing the .NET application code.
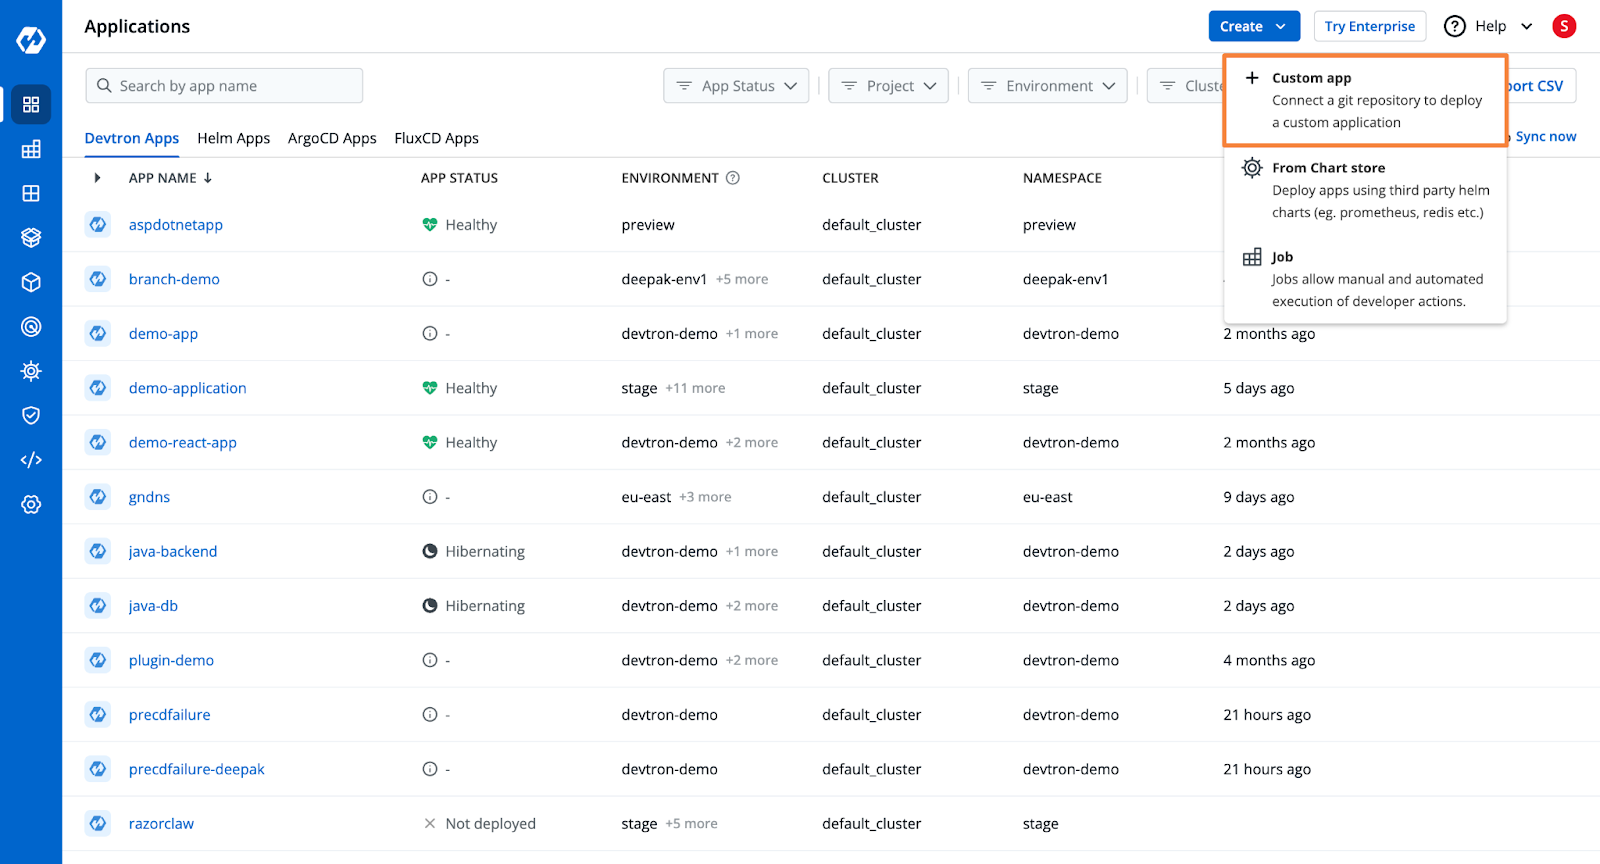
Check out the documentation to learn more about the application creation process.
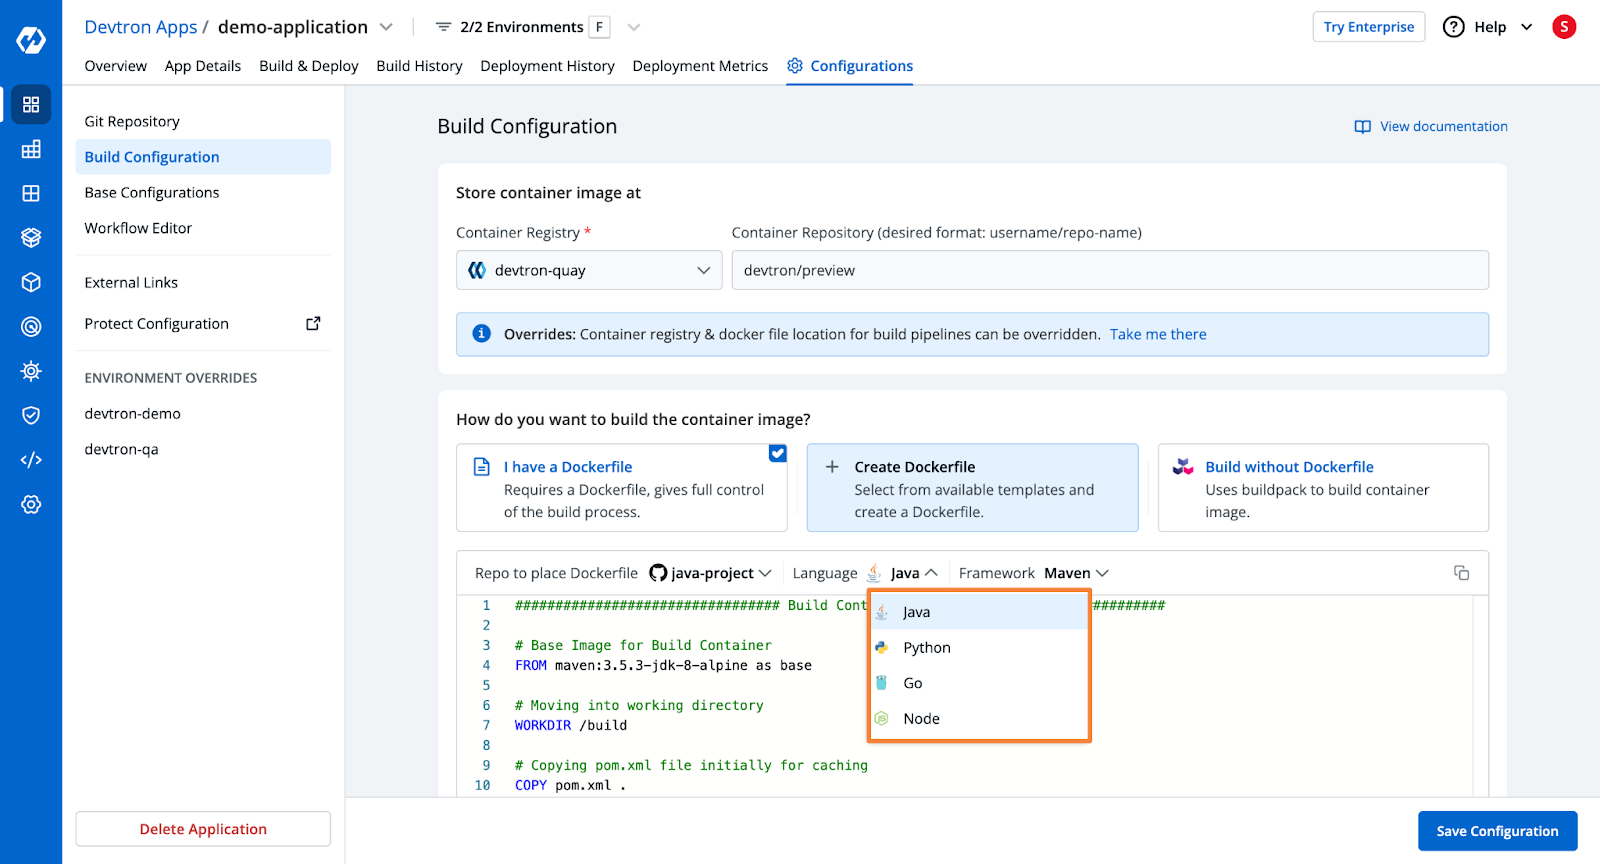
Step 2: Configure the Build
- Devtron will pull code from the repository and build the Docker container.
- You need to configure an OCI Container Registry.
- Choose from three build options:
- Use an existing Dockerfile
- Create a Dockerfile (using Devtron's template for .NET applications)
- Use Buildpacks
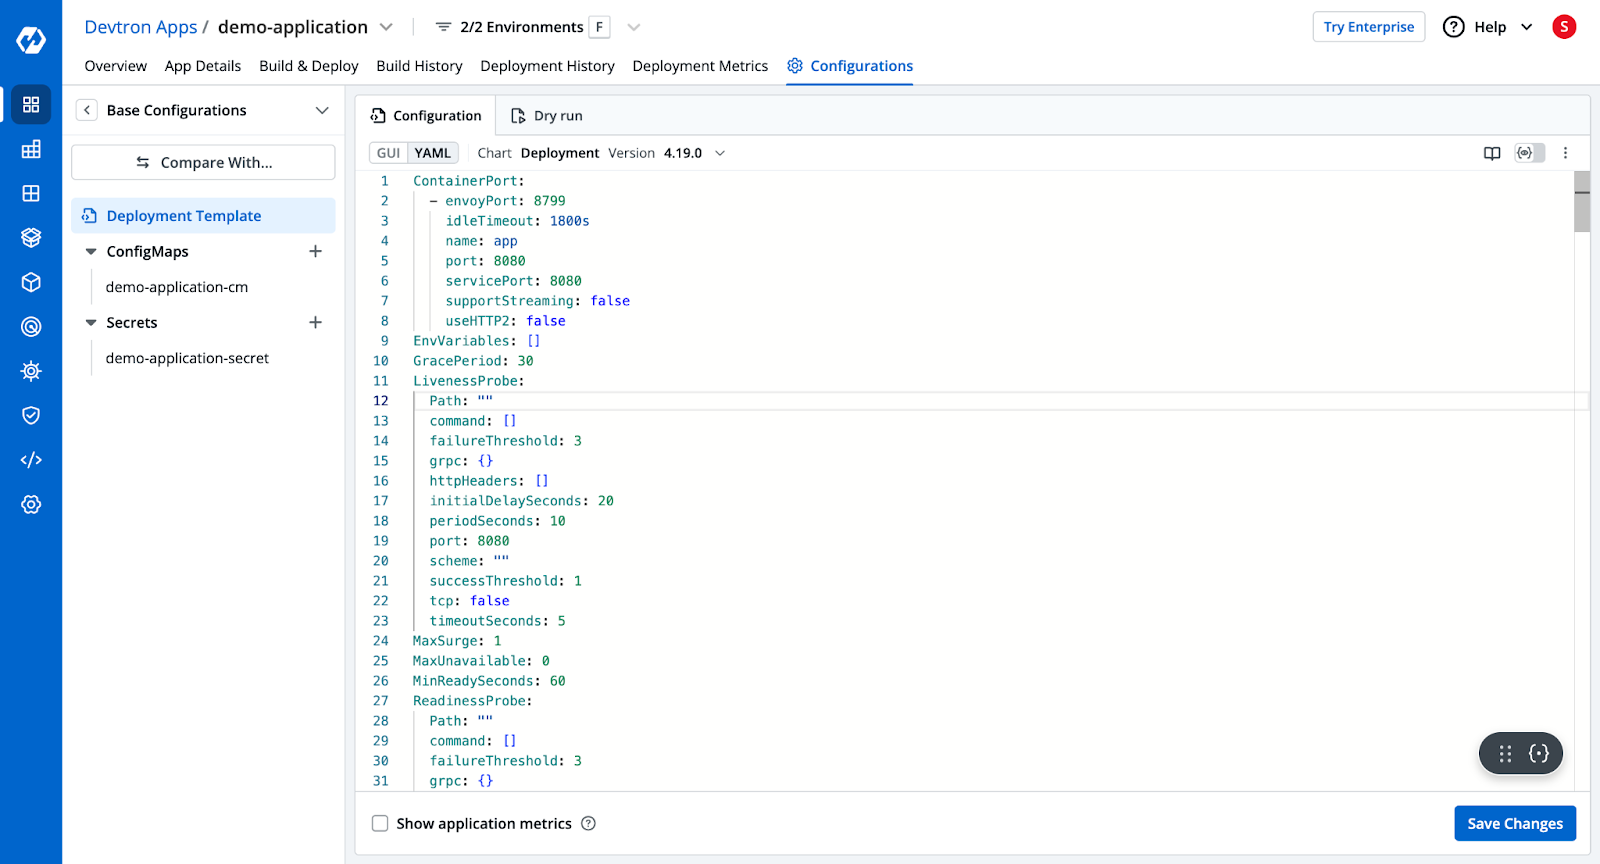
Step 3: Deployment Configurations
- Devtron provides a pre-configured YAML template for Kubernetes deployment.
- Configure ingress, autoscalers, and other deployment settings.
Step 4: Create the CI/CD Pipelines
- The CI pipeline will build the application and push the image to a registry.
- The CD pipeline will trigger deployments in the Kubernetes cluster.
- Configure Pre and Post Stages (e.g., security scanning, unit testing).
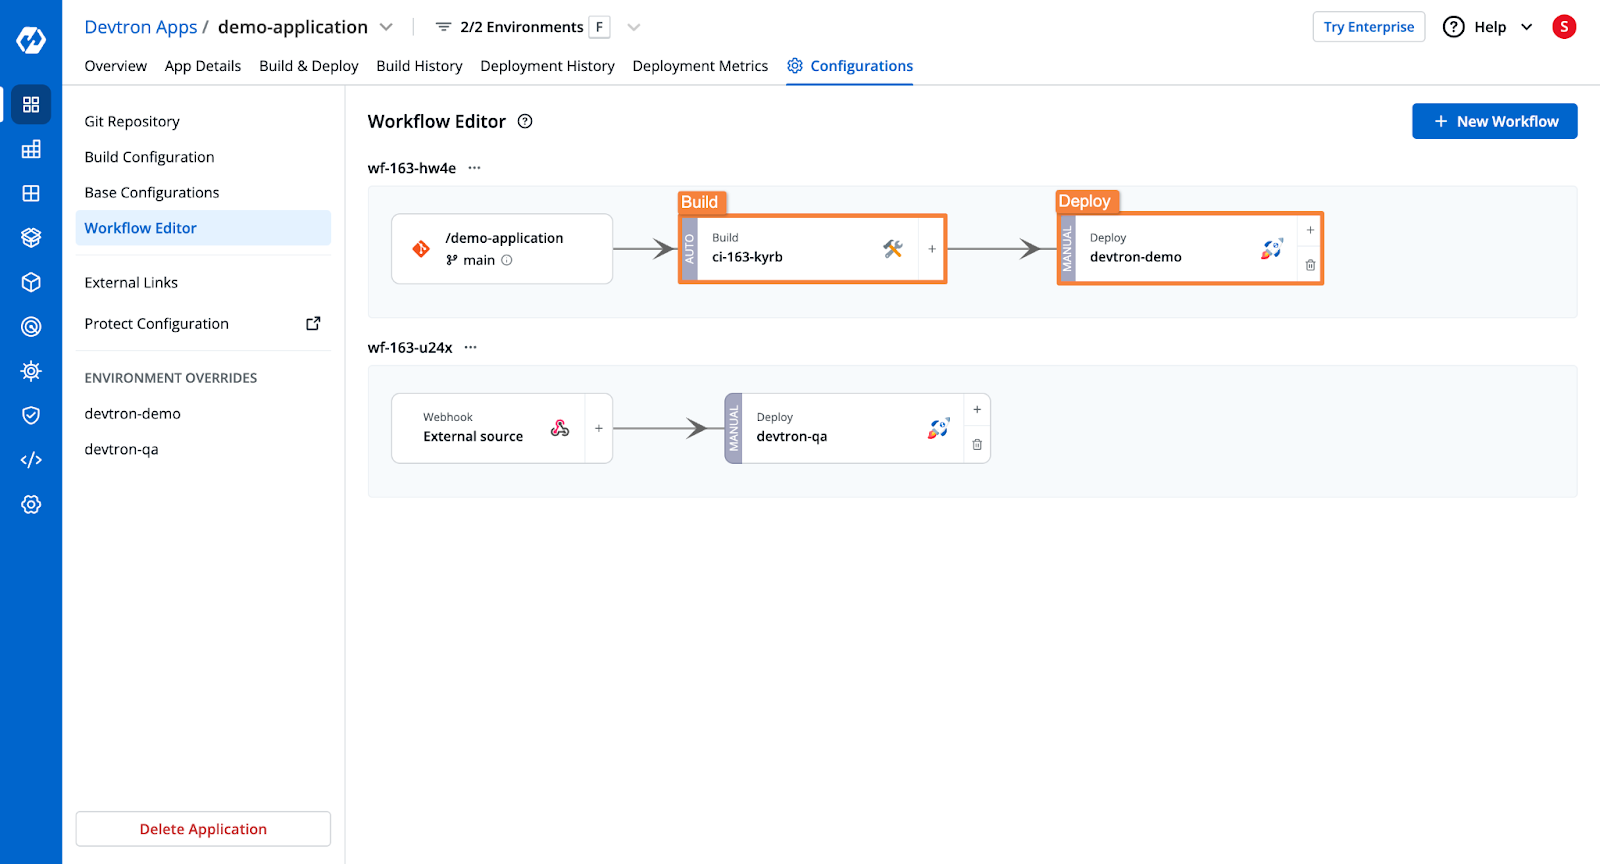
Please check the documentation to learn more about the pipeline configurations.
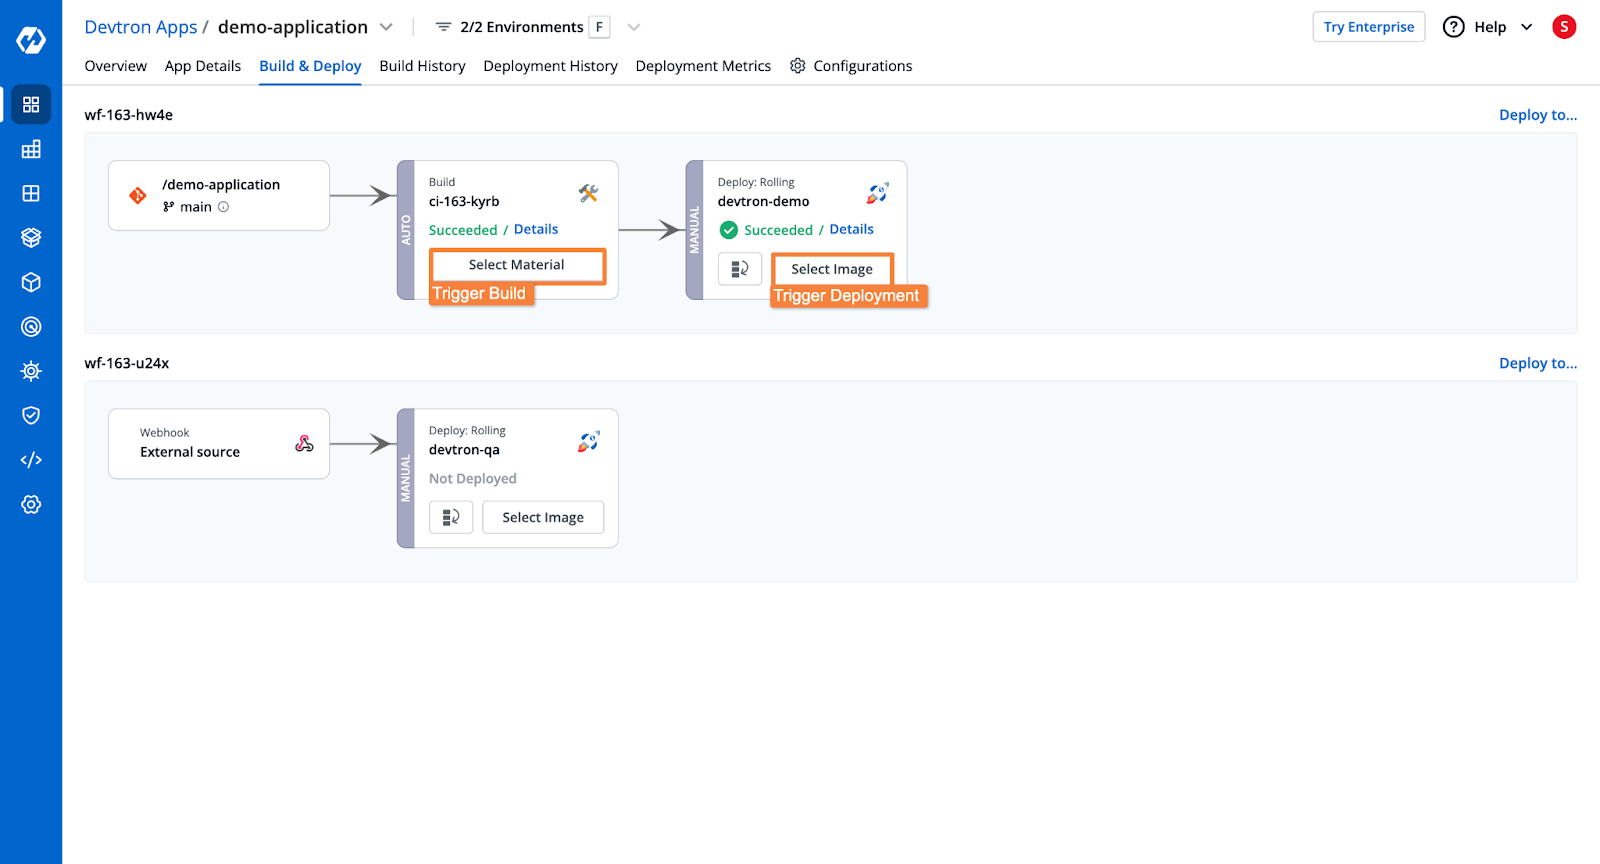
Step 5: Trigger the Build and Deploy Pipelines
- Select the Git branch and trigger the build stage.
- Once the build is complete, trigger the deployment stage.
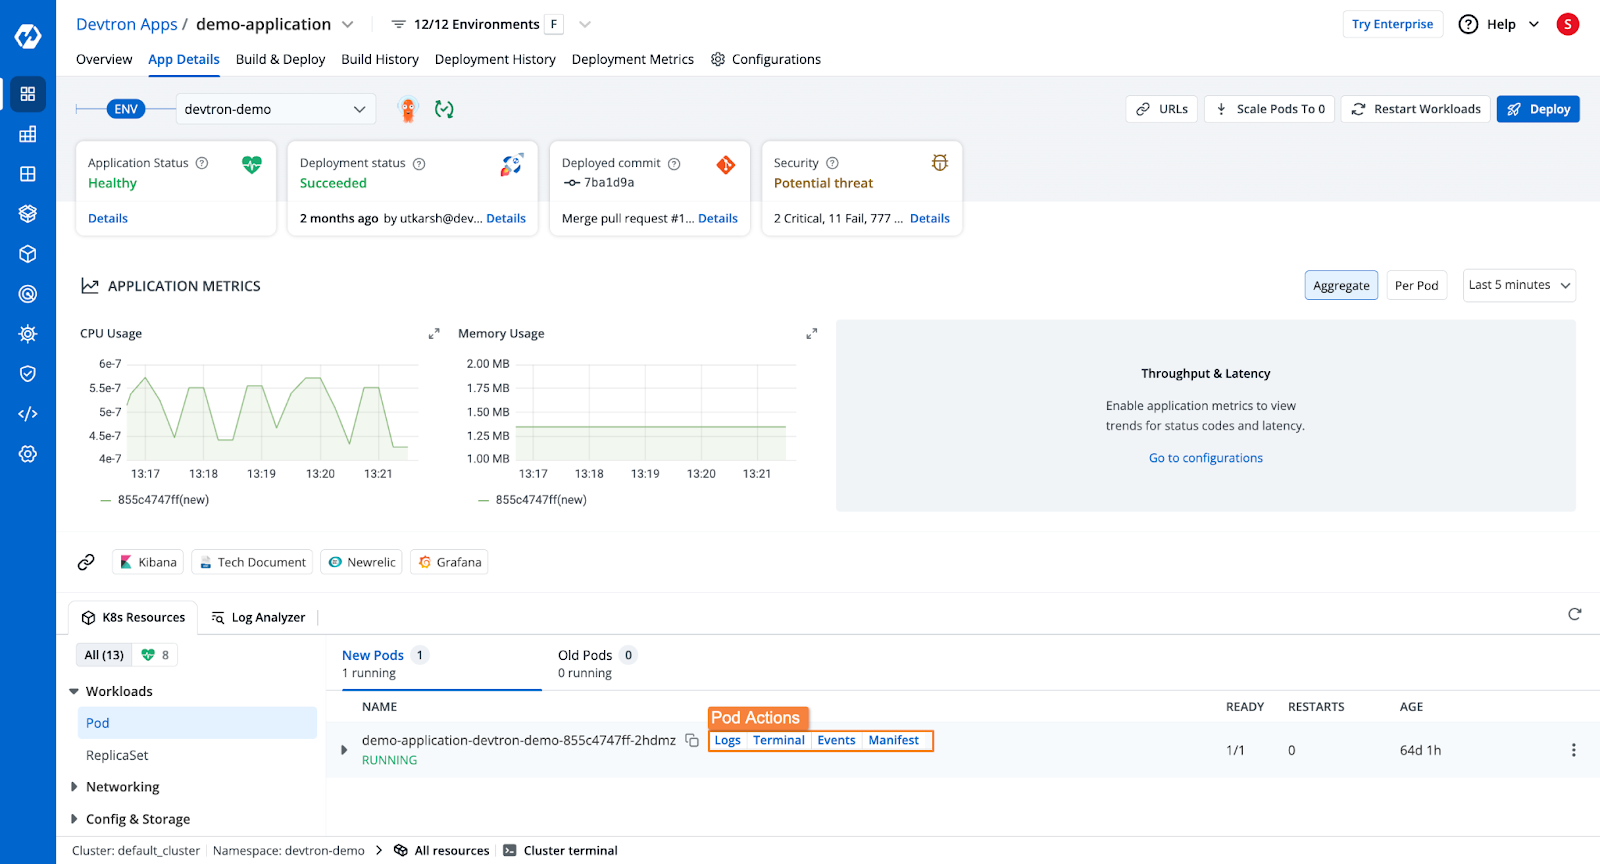
- Devtron will deploy the application and show:
- Deployment status
- Application health
- Kubernetes resource details
- Security vulnerabilities
- Rollback options in case of errors
Once the application is deployed, you will be able to see the application's health, deployment status, security vulnerabilities, the Kubernetes resources of the application, and more.
Method 2: Deploying .NET Applications Manually Using Kubernetes
Step 1: Create the Dockerfile
A Dockerfile is a set of instructions to build a container image. Below is the Dockerfile to containerize your .NET application:
FROM mcr.microsoft.com/dotnet/sdk:7.0 AS build


# Set the working directory in the container
WORKDIR /app


# Copy the .csproj file and restore any dependencies (via dotnet restore)
COPY *.csproj ./
RUN dotnet restore


# Copy the rest of the application files
COPY . ./


# Build the application and publish it for production
RUN dotnet publish -c Release -o /app/publish

FROM mcr.microsoft.com/dotnet/aspnet:7.0 AS runtime


# Set the working directory in the container
WORKDIR /app


# Copy the published files from the build stage
COPY --from=build /app/publish .


# Set the entry point for the application
ENTRYPOINT ["dotnet", "YourAppName.dll"]
Step 2: Build and Push the Docker Image
Run the following command to build the Docker image:
- Run the following command to build the Docker image:
docker build -t devtron/.NET-app:v1 .
- Push the image to DockerHub:
docker push devtron/.NET-app
Step 3: Creating the Kubernetes Deployment and Service Manifests
- Create a deployment.yaml file:
apiVersion: apps/v1
kind: Deployment
metadata:
 name: .NET-deployment
spec:
 replicas: 3
 selector:
   matchLabels:
     app: .NET
 template:
   metadata:
     labels:
       app: .NET
   spec:
     containers:
     - name: .NET-container
       image: devtron/.NET-app
       ports:
       - containerPort: 8080
- Create a service.yaml file:
apiVersion: v1
kind: Service
metadata:
 name: .NET-service
spec:
 selector:
   app: .NET
 ports:
   - protocol: TCP
     port: 80
     targetPort: 8080
 type: NodePort
Step 4: Deploy to Kubernetes
Run the following command to apply the manifests:
kubectl apply -f deployment.yaml service.yaml
Your .NET application is now deployed to Kubernetes!
Common Challenges and Solutions
1. Container Image Size Management
- Use Multi-Stage Builds to separate build and runtime environments.
- Use Lightweight Base Images like Alpine or Distroless to reduce size.
2. State Management
- Use StatefulSets for applications requiring stable network identities and storage.
- Configure Persistent Volume Claims (PVCs) for reliable data persistence.
3. Security Hardening
- Minimize attack surface by reducing container size.
- Scan images with tools like Trivy or Clair before deployment
4. Monitoring & Logging
- Set up Prometheus & Grafana for real-time performance tracking.
- Use Centralized Logging (Fluentd, ELK, CloudWatch, or Stackdriver) for better log analysis.
FAQ
What is the first step in deploying a .NET application to Kubernetes?
The first step is to create and build the .NET application, followed by containerizing it using Docker.
Why is a multi-stage build important for .NET applications?
It helps reduce the container image size by separating the build environment from the runtime environment.
How to push the container image to DockerHub?
After building the Docker image, use the command docker push <your-repo>/<image-name> to upload it to DockerHub.
What is the purpose of the Kubernetes service in the deployment process?
It exposes the application’s pods to the outside world, enabling users to access the application via a specified port.
How does Devtron simplify deploying .NET applications on Kubernetes?
Devtron automates the creation of Dockerfiles, and Kubernetes manifests, builds the application, and manages deployments, all through an intuitive UI.
Conclusion
In this blog, we explored two approaches for deploying .NET applications on Kubernetes:
- Automated Devtron Deployment with built-in CI/CD pipelines and advanced configurations.
- Manual Kubernetes Deployment using Docker and YAML manifests.
Using Devtron simplifies Kubernetes deployments, reducing manual efforts and improving efficiency. Start deploying applications today using Devtron’s platform!