1. Learn how to deploy a full MERN stack (MongoDB, Express, React, Node.js) on Kubernetes without writing complex YAMLs.
2. Use Devtron’s dashboard and chart store to easily set up MongoDB and manage configurations.
3. Deploy backend and frontend apps with custom app creation, ingress setup, and CI/CD pipelines in just a few clicks.
4. Leverage Devtron’s clone feature to speed up frontend deployment with minimal configuration changes.
5. Get a production-ready MERN stack running on Kubernetes with simplified workflows, scalability, and high availability.
Hello Everyone, welcome to another blog! In this blog post, we will talk about how easily you can deploy your MERN stack over Kubernetes with just a few clicks using Devtron. Yes, you read it right! You don’t have to write several YAMLs or pipeline configurations to deploy your entire stack over Kubernetes.
Let’s go ahead and see how we can achieve this.
MERN Stack
MERN Stack is a combination of different technologies summing up the entire stack. It consists of the following technologies:
- MongoDB - Use for database
- Express(.js) - Used node.js web framework
- React(.js) - Used for developing client-side JavaScript framework
- Node(.js) - Used for developing the premier JavaScript web server
Why Kubernetes?
Before we start with the hands-on journey, Why do we need to deploy MERN Stack over Kubernetes? To answer this question, let’s take a step back.
Traditionally, for deploying containerized applications/stacks, docker was heavily used. We can containerize each of the technologies say - MongoDB in a container, react in another container, and node-express in a different container and link them all with certain port numbers to work together. Or we can use docker-compose to deploy the entire stack.
But when you talk about auto-scaling, and high availability, these tools aren’t enough to meet the requirements. This is where Kubernetes comes into the picture.
It is an open-source container orchestration platform for automating deployments, scaling, and management of containers. To know more about why you need to migrate to Kubernetes, please click here
Getting Started
Now that we know the need for migration, let’s get our hands dirty. In this blog, we will show how to deploy a simple CRUD application that is divided into three parts -
- Database (MongoDB)
- Backend (Node & Express)
- Frontend (React Code)
For the database, we will use a community helm chart. All the deployments will be carried out by using Devtron.
[Note: If you haven’t installed Devtron, feel free to check out the well-managed documentation of Devtron and join the devtron discord community for any help]
Deploying MongoDB
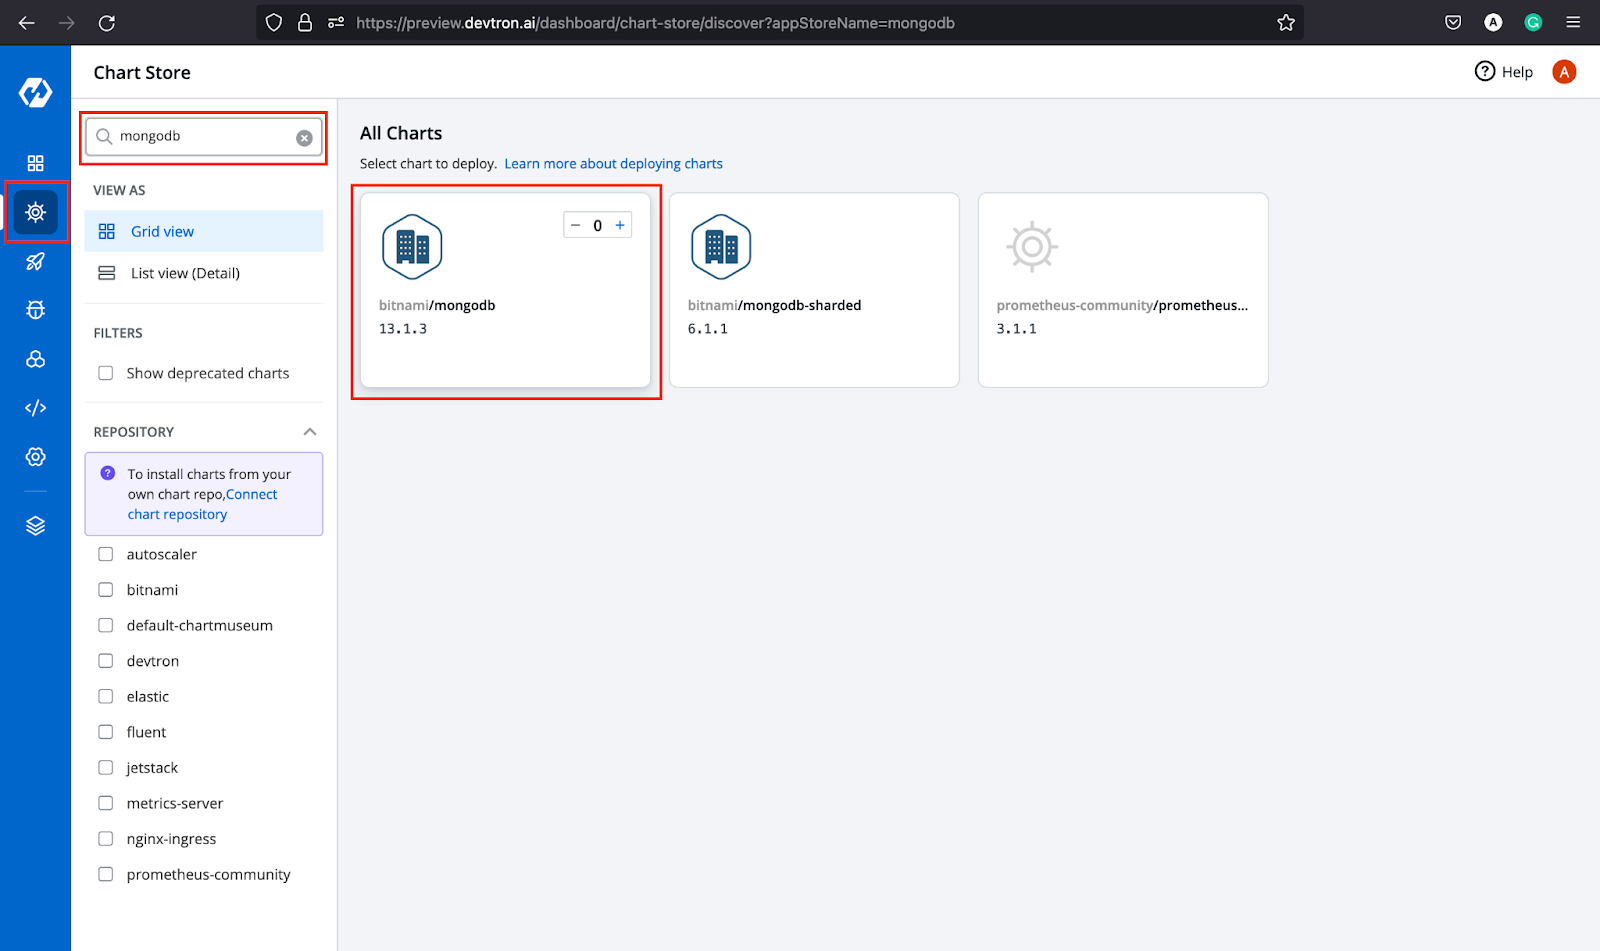
To deploy MongoDB, we will use bitnami/mongodb(13.1.2) chart that is easily accessible in Devtron’s Chart Store as you can see in the image below.
Once you get the chart, click on it. It will open the configuration window where you have to provide details for App Name, Project, and Environment in which you want to deploy. Additionally, it also shows all the chart configurations where you can make any changes if required. For this, please make the following changes:
auth:
rootUser: root
rootPassword: "abhinav123"
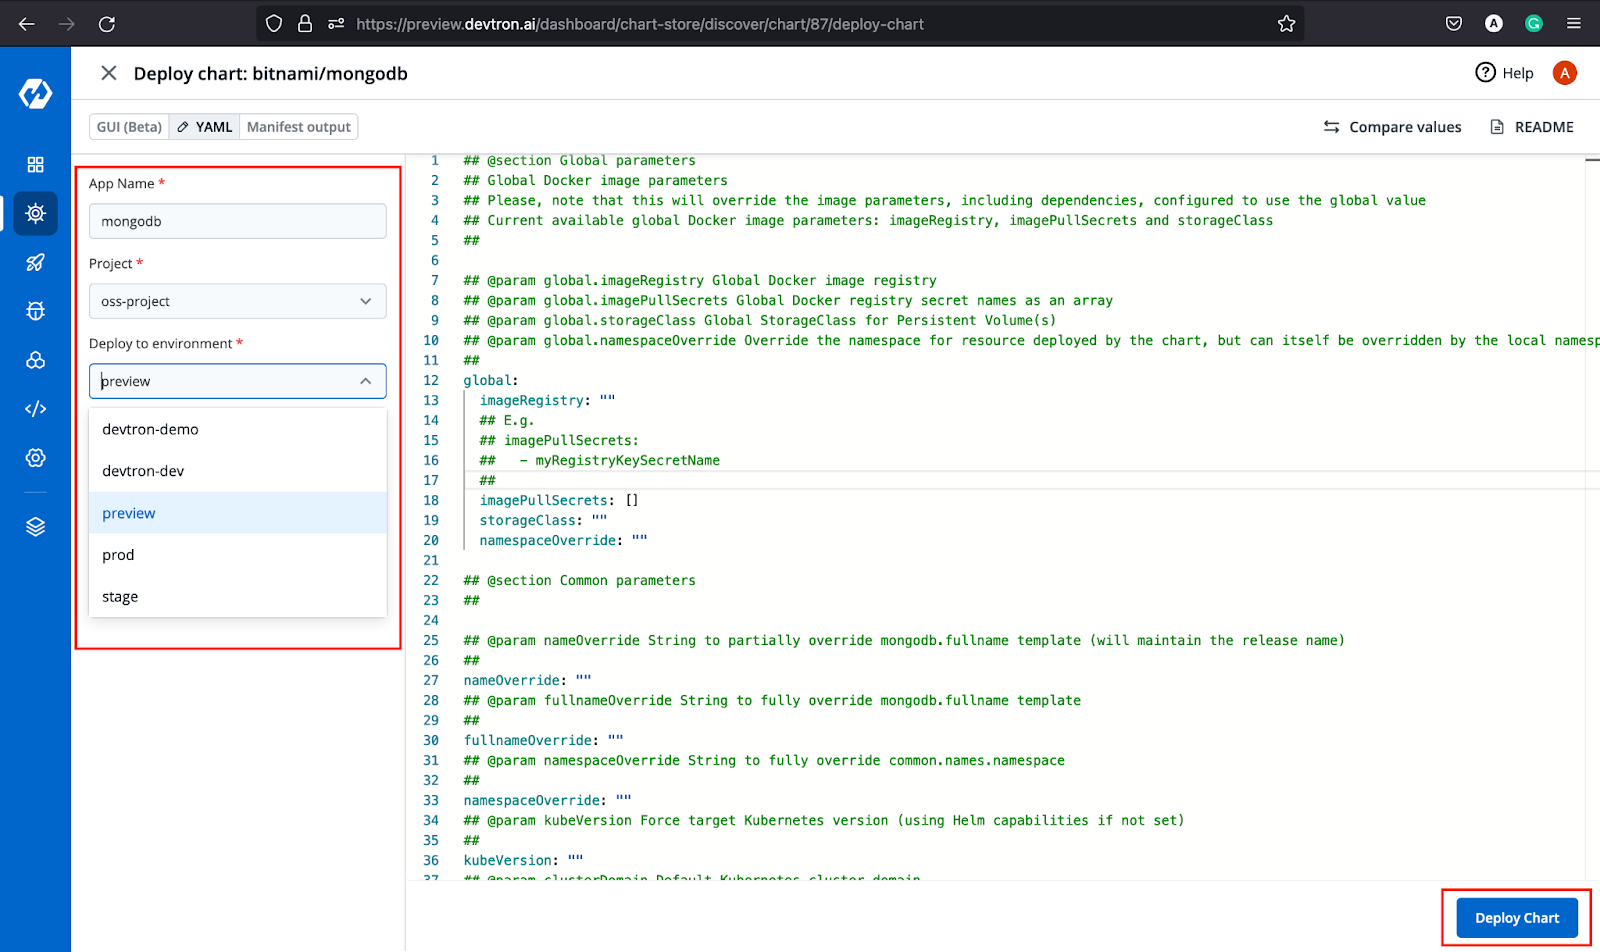
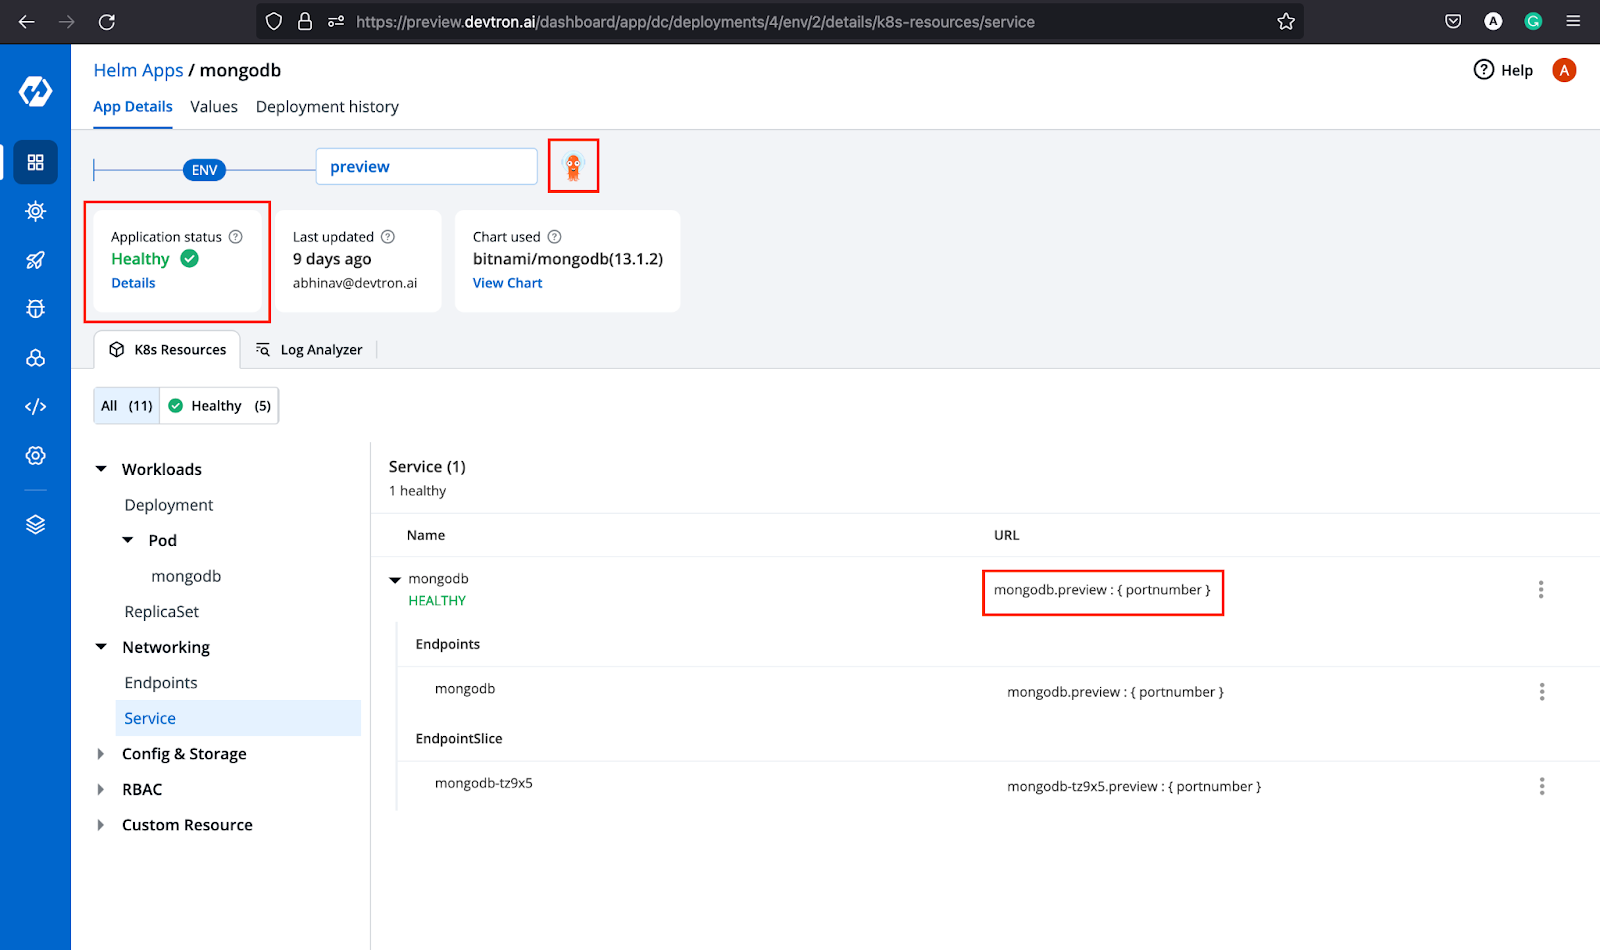
Once you click the Deploy Chart button, your database is up and running. You will be able to check out all the resources it has deployed, including the status of the application, the chart version, and many more as shown below.
Now that our chart is deployed, let’s move ahead and deploy the backend of our application.
[Check out this blog to learn how to Deploy Helm Charts with Devtron].
Deploy Backend
To deploy the backend (Express & Node), we have to create a custom app from the Devtron dashboard. Devtron is capable enough to deploy any kind of application irrespective of the language or stack chosen for the project. Let’s move ahead and onboard the backend app.
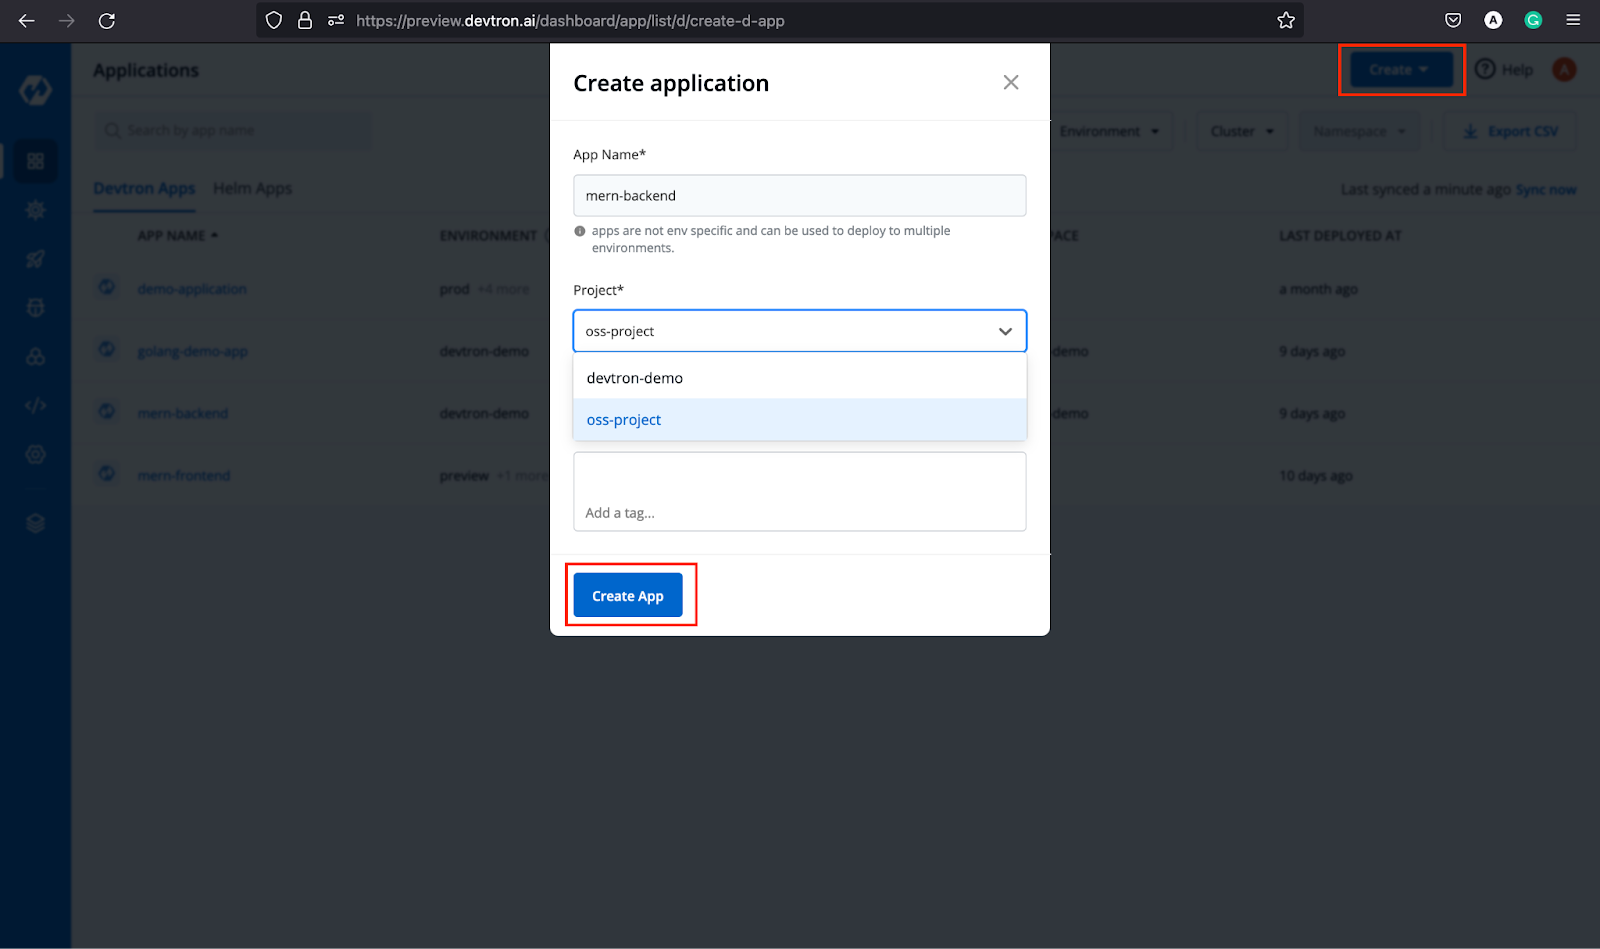
Step-1: Click on the Create dropdown, and select Custom App, it will open a window and ask for details as shown below. Provide the necessary details and click Create App
Step-2: After creating an app, you will be redirected to the App Configuration tab where you need to provide the Git Repository (source code URL), Docker Build Config (container repository name), configure Base Deployment Template (k8s configs), ConfigMaps & Secrets if any. For a detailed understanding on App Configuration, feel free to check out our documentation on App Configuration.
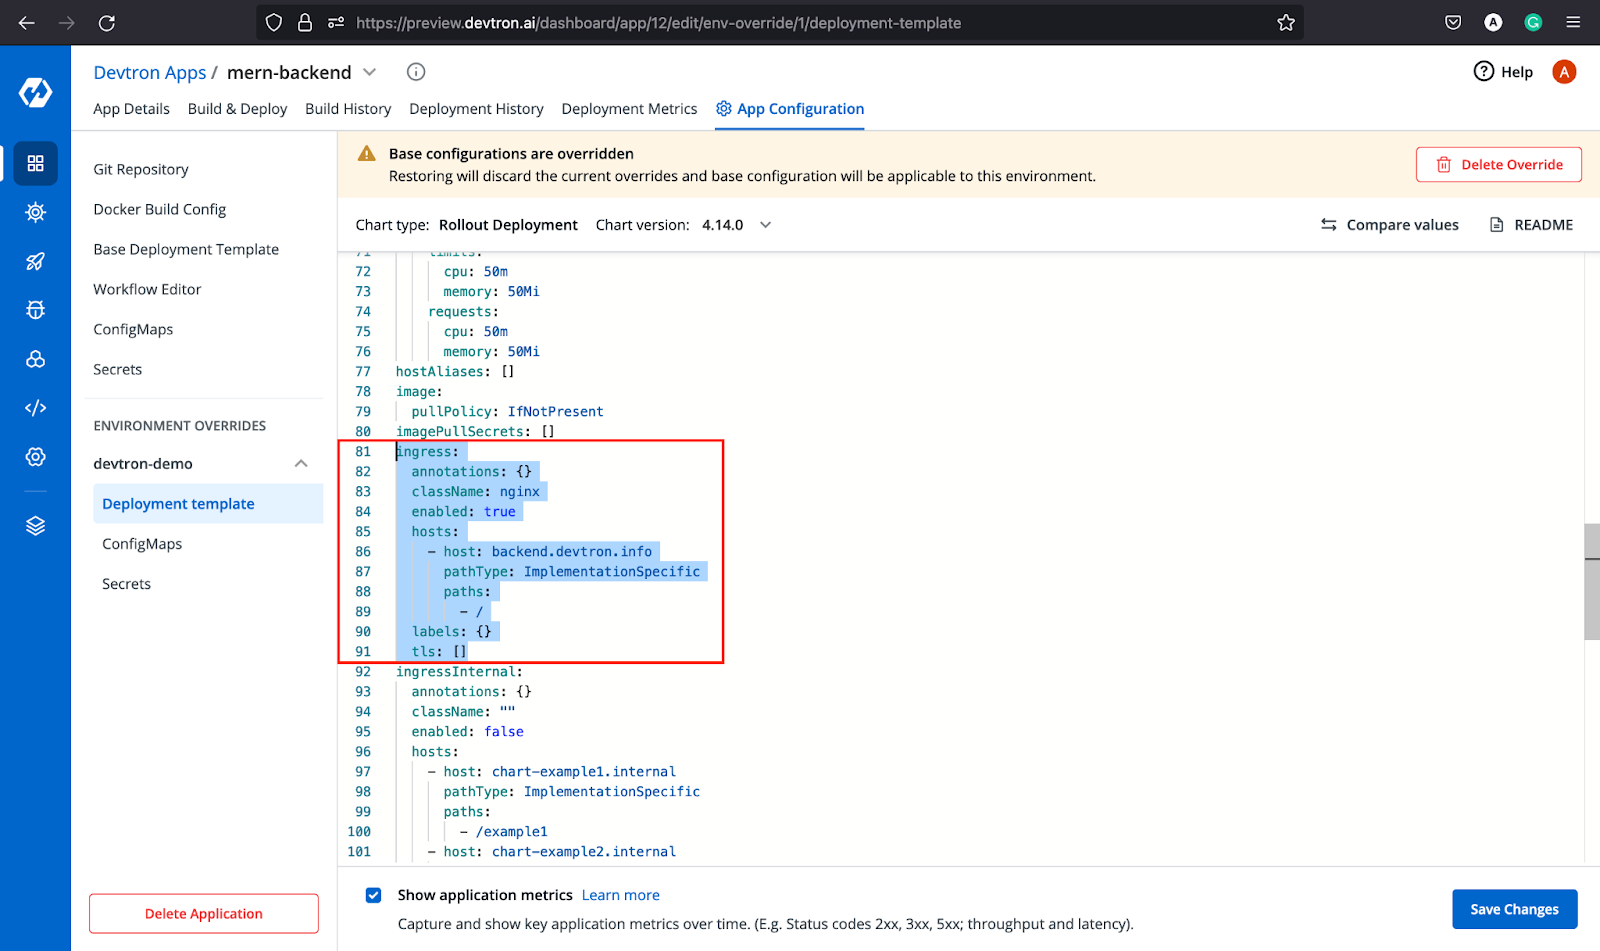
For this tutorial, we will configure the ingress and port number in the Deployment Template. For ingress, make sure that the ingress controller has been deployed. Feel free to check out this blog to configure the ingress controller using Devtron.
ContainerPort:
- envoyPort: 8799
port: 8082

ingress:
annotations: {}
className: nginx
enabled: true
hosts:
- host: backend.devtron.info
pathType: ImplementationSpecific
paths:
- /
After making these necessary changes, leave all the configurations as default. That’s the beauty of the deployment template provided by Devtron. You don’t have to write big YAMLs for k8s configuration. Everything, right from the pod specs, hpa, keda-autoscaling, service, ingress, etc. is pre-configured. You just have to tweak some values as per the requirements and deploy it.
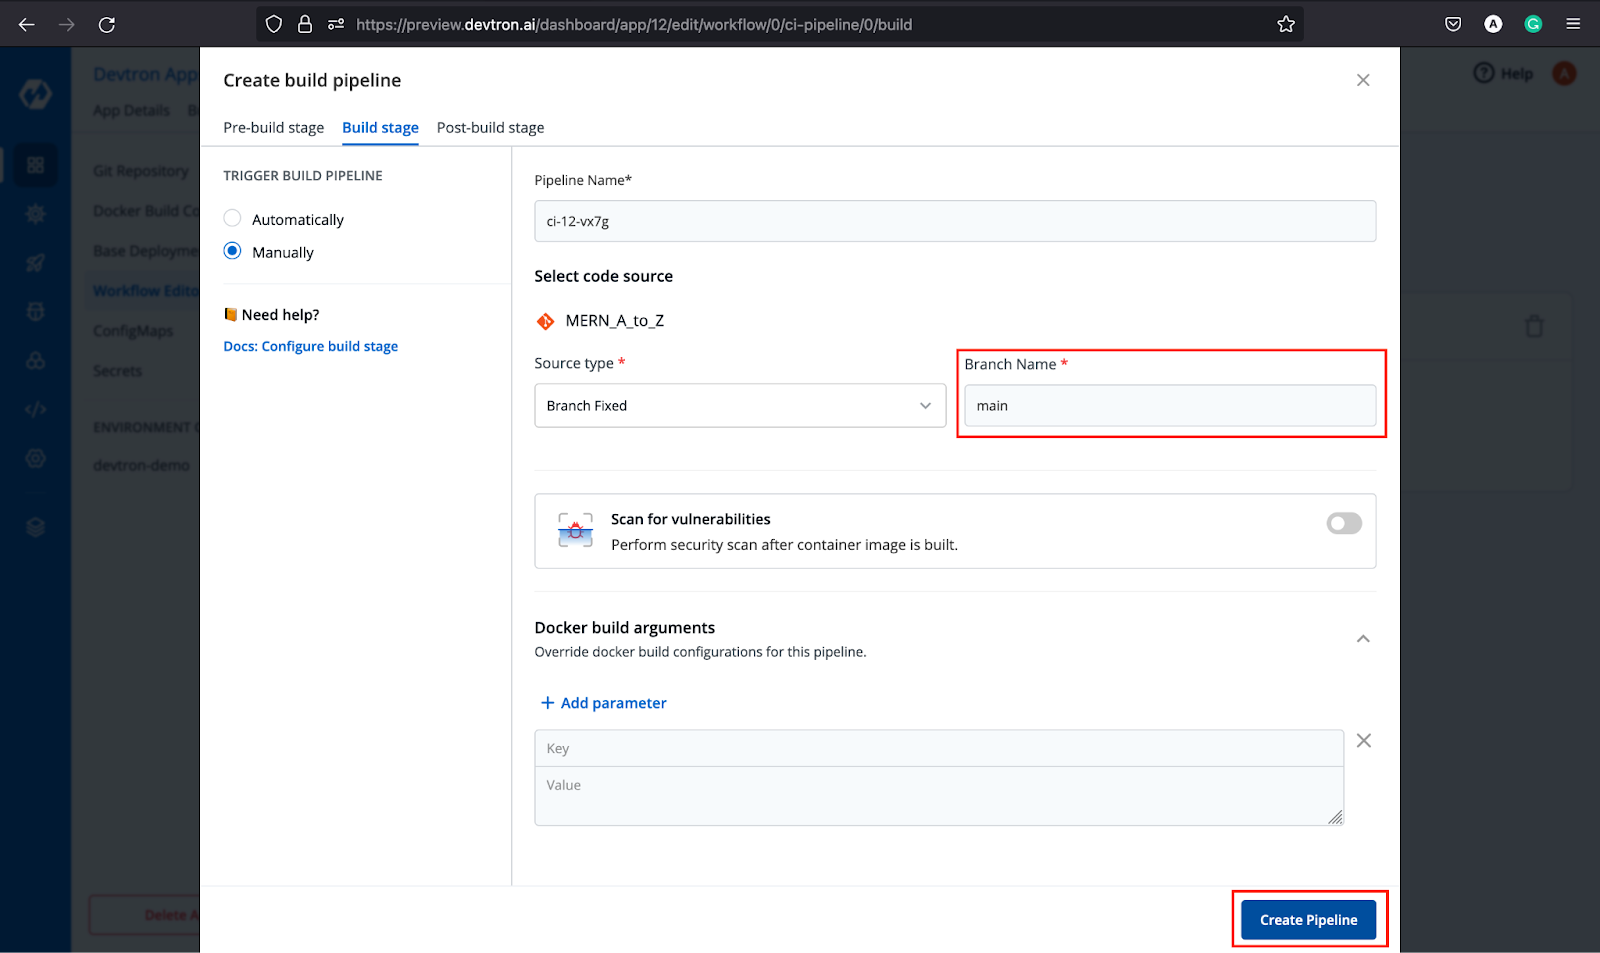
Step-3: Now let’s move ahead and create CI/CD pipeline using Workflow Editor. Just click Build Pipeline → Continuous Integration and provide the necessary details to create your CI Pipeline.
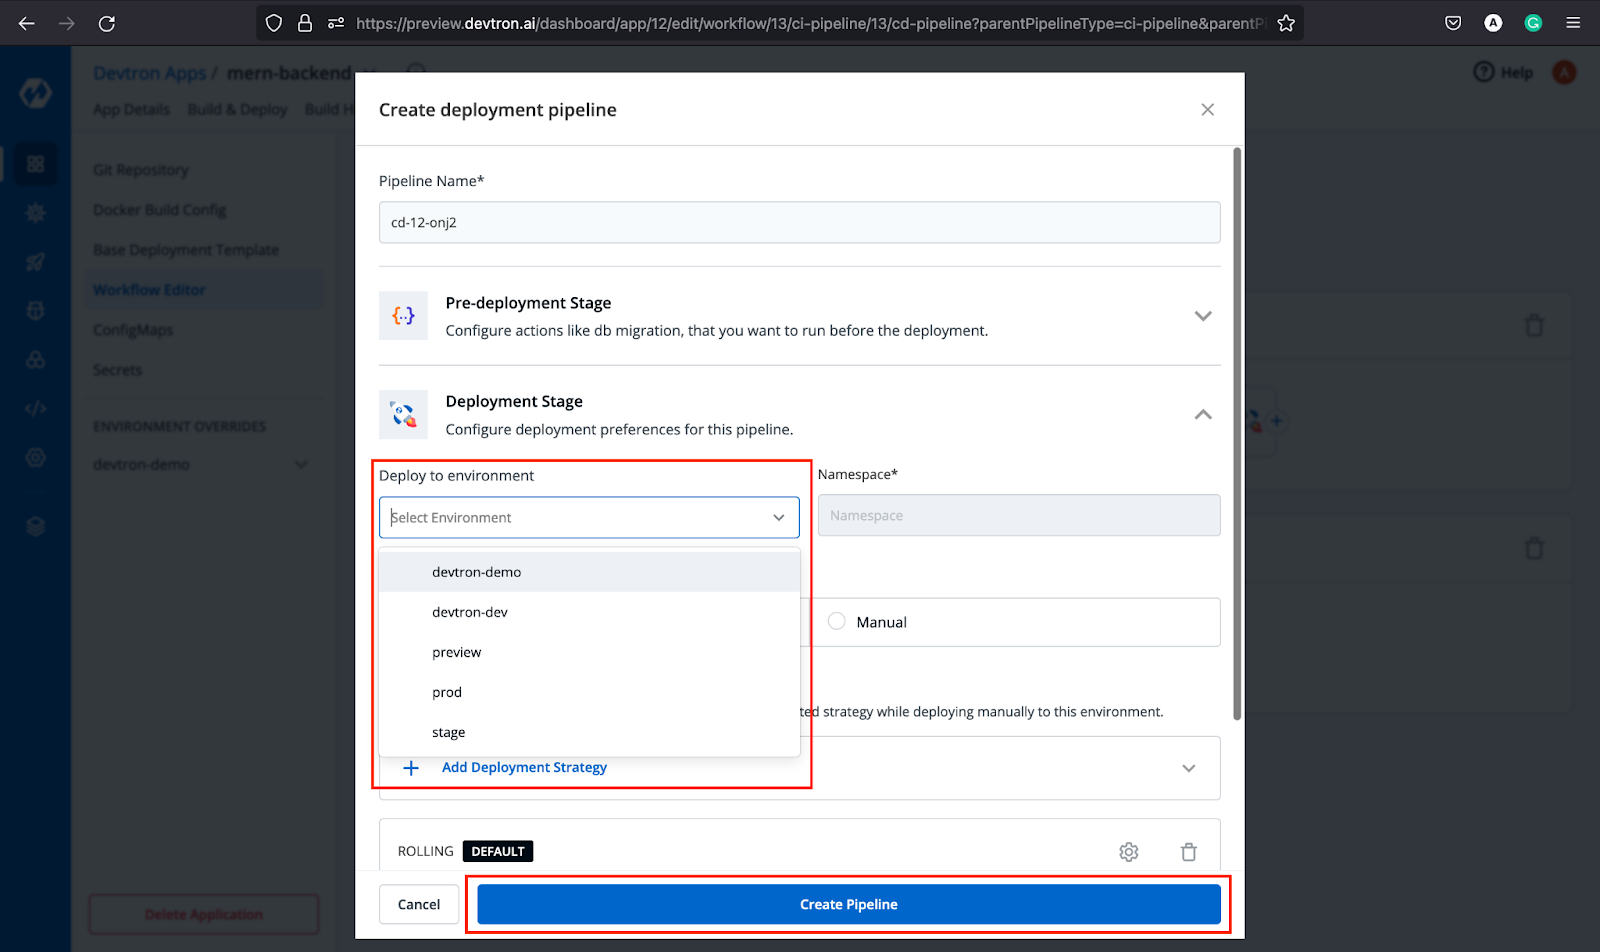
After the CI Pipeline is created, Click + icon to create a CD Pipeline corresponding to that CI. Configure the details, and click Create Pipeline.
Woohoo! We are done with creating the pipeline for our backend application. Now that we don’t have any ConfigMaps or Secrets for this application, let’s move to the Build & Deploy tab and trigger the CI Build.
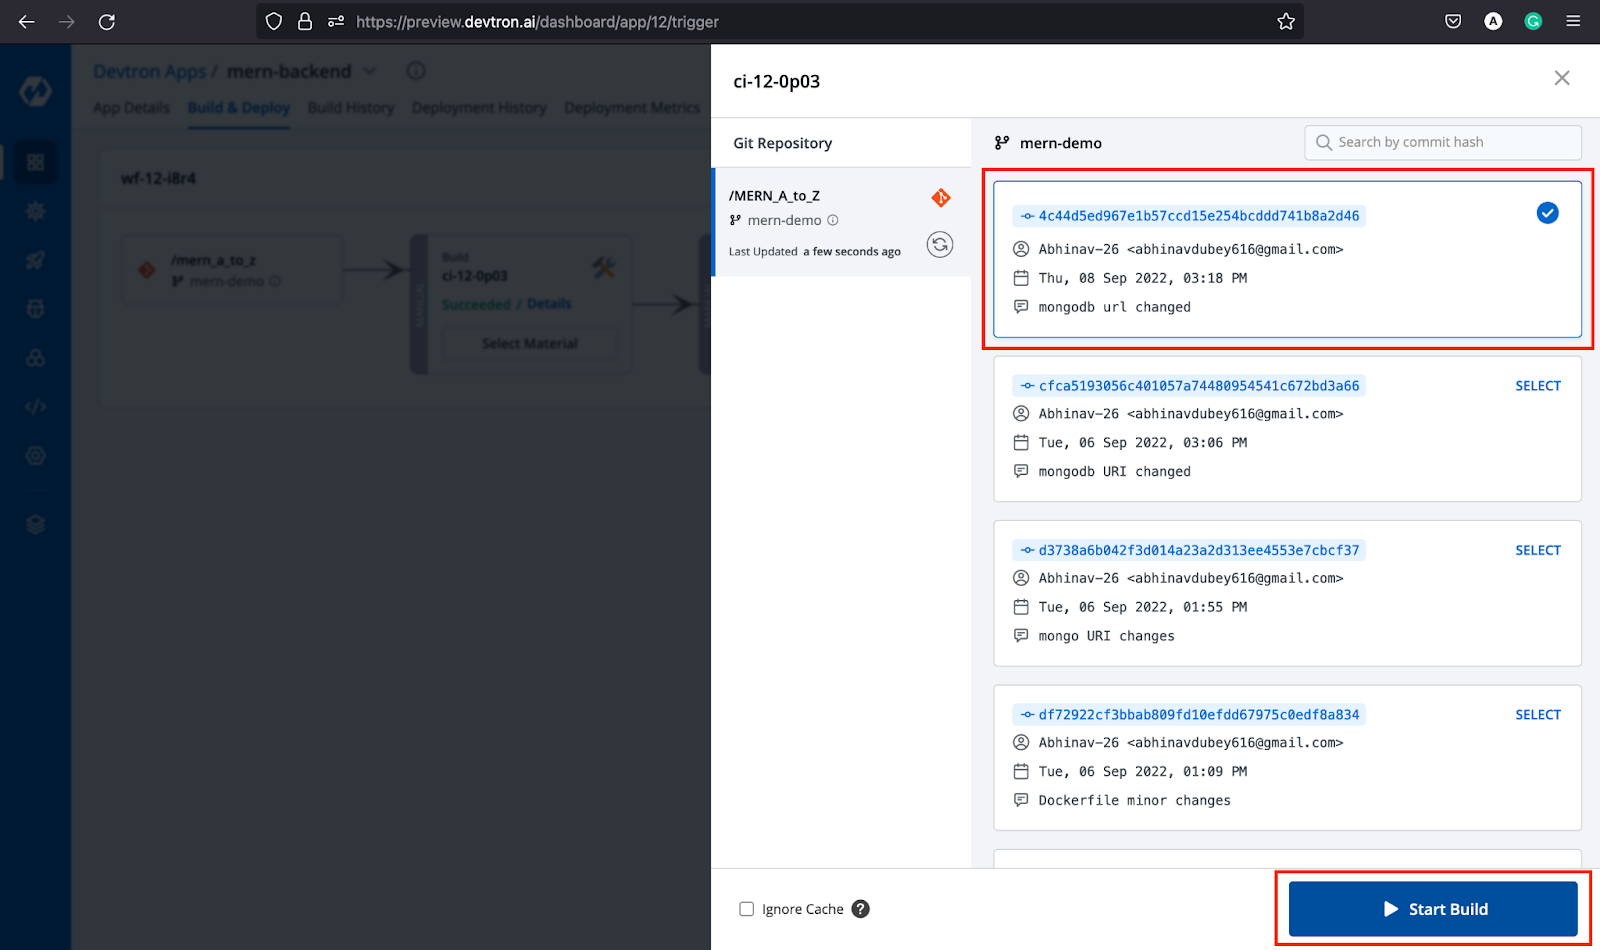
Step-4: Click Select Material, select the commit against which you want to build an image, then click Start Build. It will start building your image. You can see runtime logs, commit details for the particular build, security results (if enabled), and artifacts.
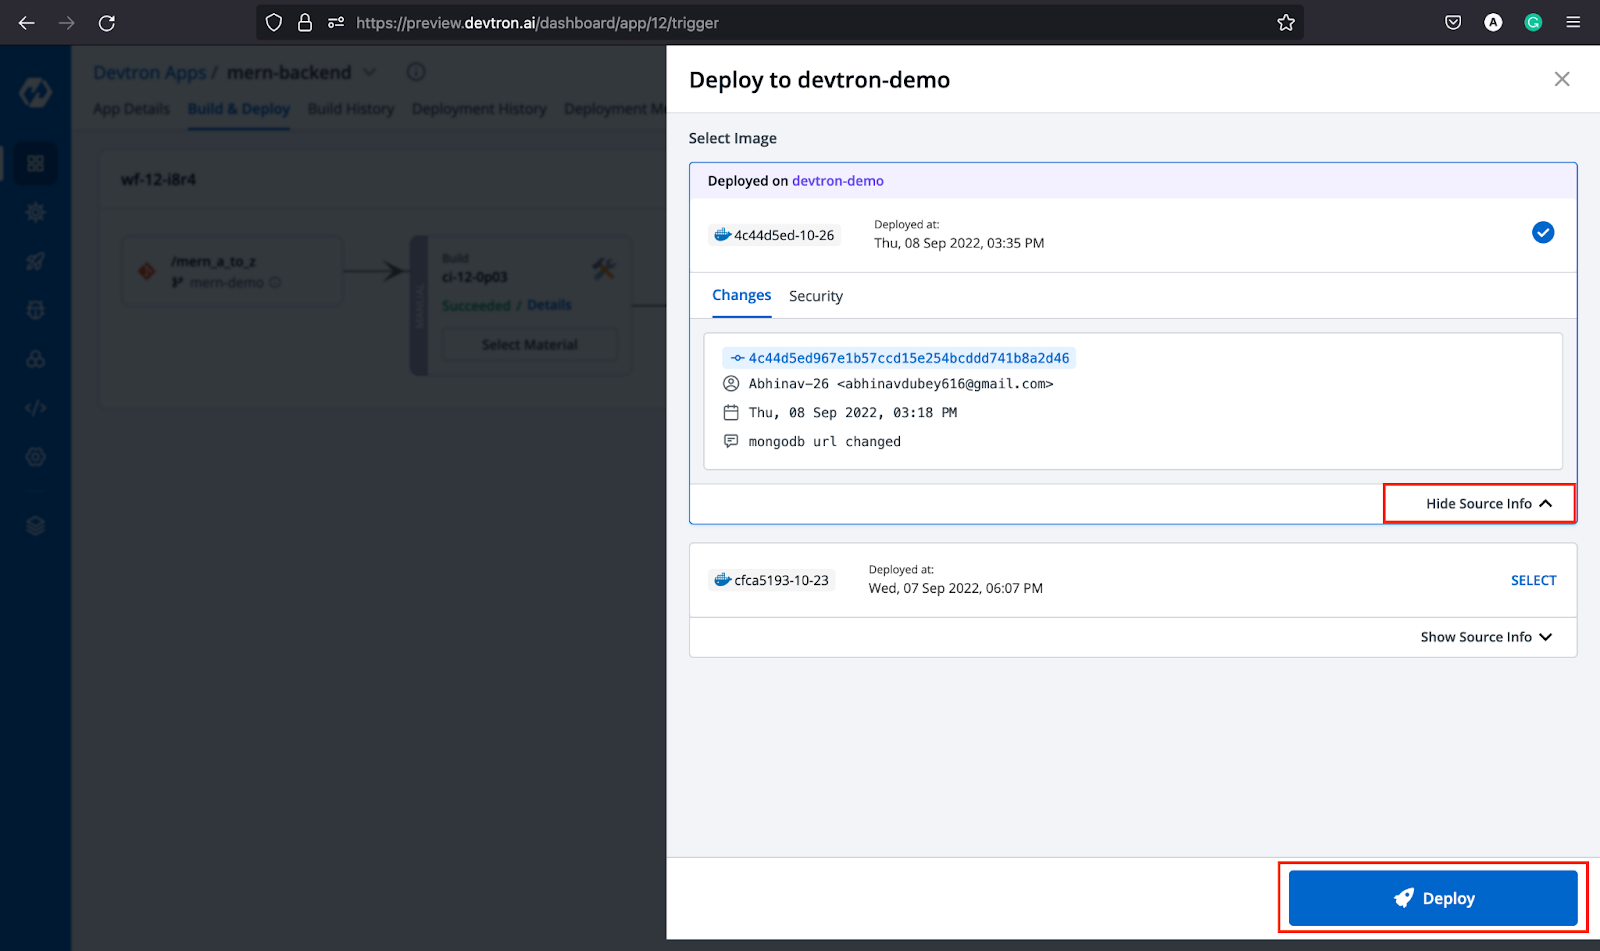
Step-5: After building the image, click on Select Image in your deployment pipeline, and deploy the image that you have built. You can also check the commit for which image was built on the deployment dashboard itself.
Now for more details of the deployment, navigate to App Details tab and you can see all the information about your application. The environment in which it is deployed, k8s resources it has like pods, services, etc, manifests, logs and much more can be found on the Devtron dashboard itself just like we had in the MongoDB chart when it was deployed.
Deploy Frontend
Now that our backend is deployed, let’s deploy the frontend application (React). To deploy it, we need to follow the same steps that we followed in the case of the backend. But instead of configuring all the configs again, we can use the clone feature of Devtron that would do all the configs for us. We would just have to replace the git repo of the source code, minor changes in the deployment template, and then we are good to build & deploy the application.
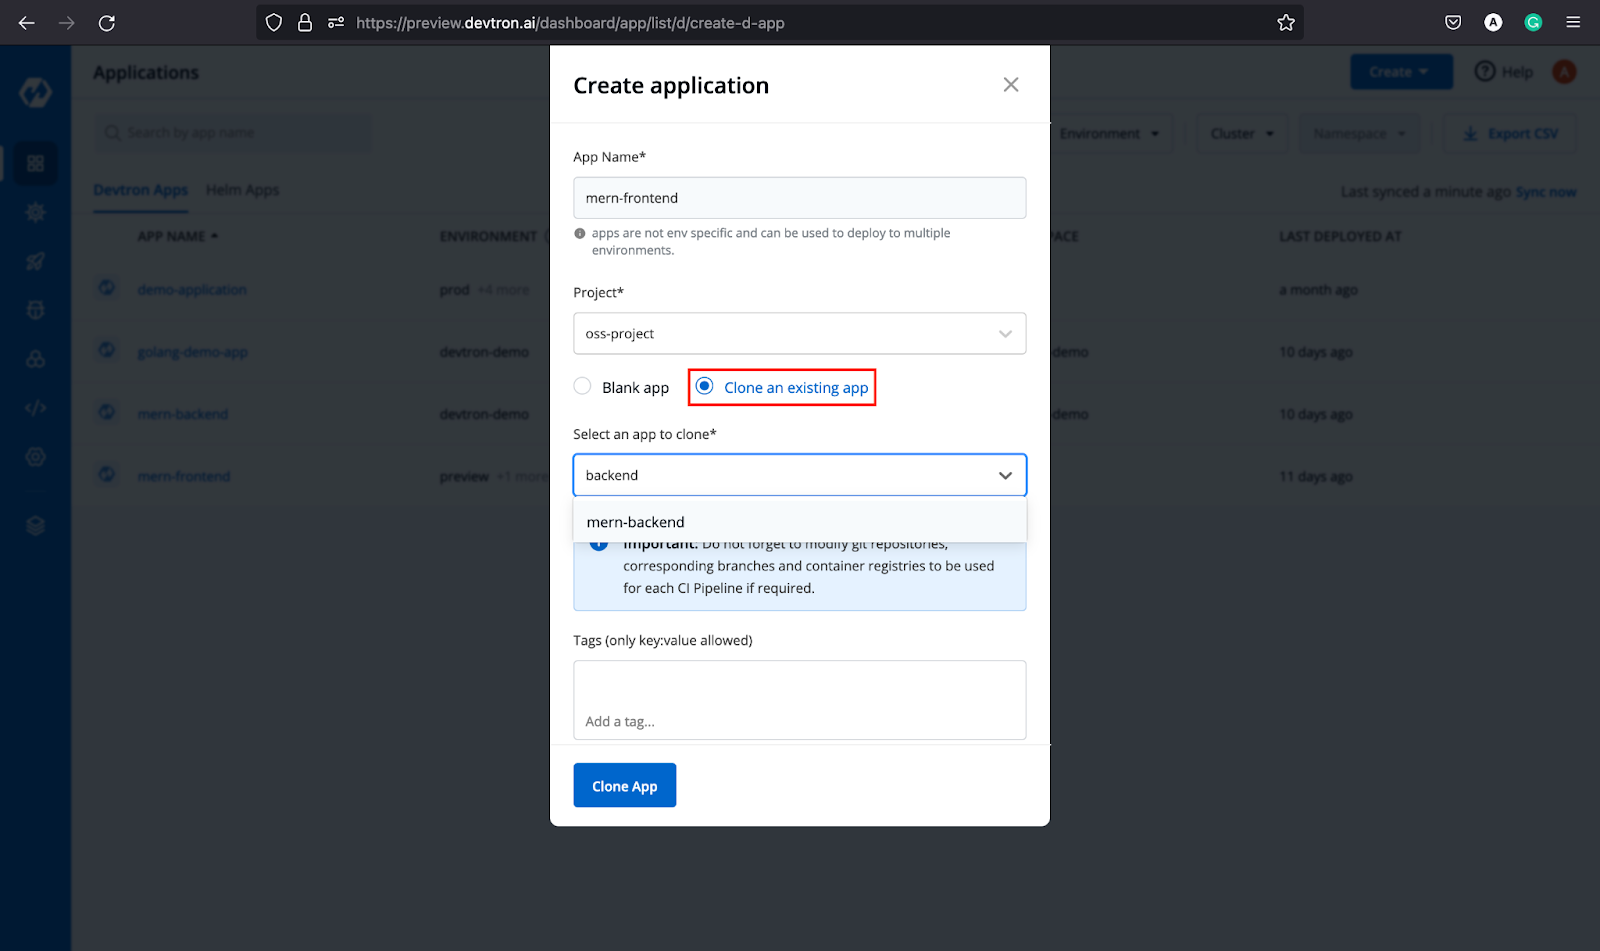
Step-1: Create a custom app, check the `clone` button, and select the mern-backend (backend application name)
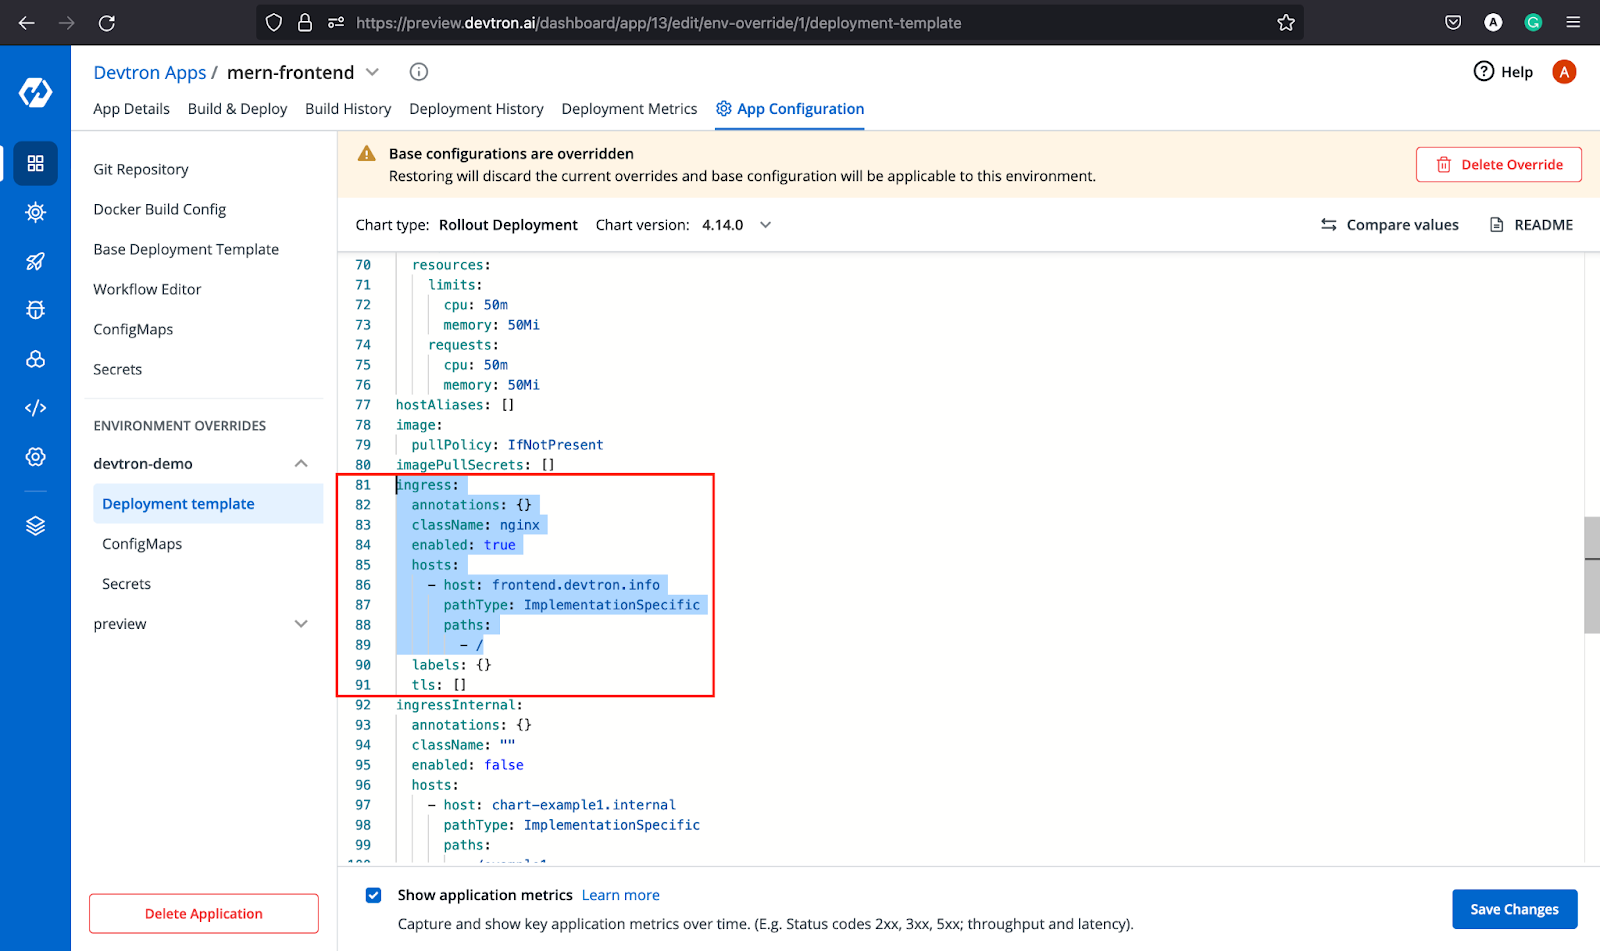
Step-2: After the app is created, it will take you to App Configuration tab wherein you have to replace the git URL with the frontend URL. Then move to the Deployment template, change the port number, and ingress hostname. In our case, we have made the following changes.
ContainerPort:
- envoyPort: 8799
port: 80
servicePort: 80
ingress:
annotations: {}
className: "nginx"
enabled: true
hosts:
- host: frontend.devtron.info
pathType: ImplementationSpecific
paths:
- /
After making these changes, build the image as we did for the backend application and deploy it. Once the application is up and running, we would be able to access the application at the host we have provided in ingress configurations.
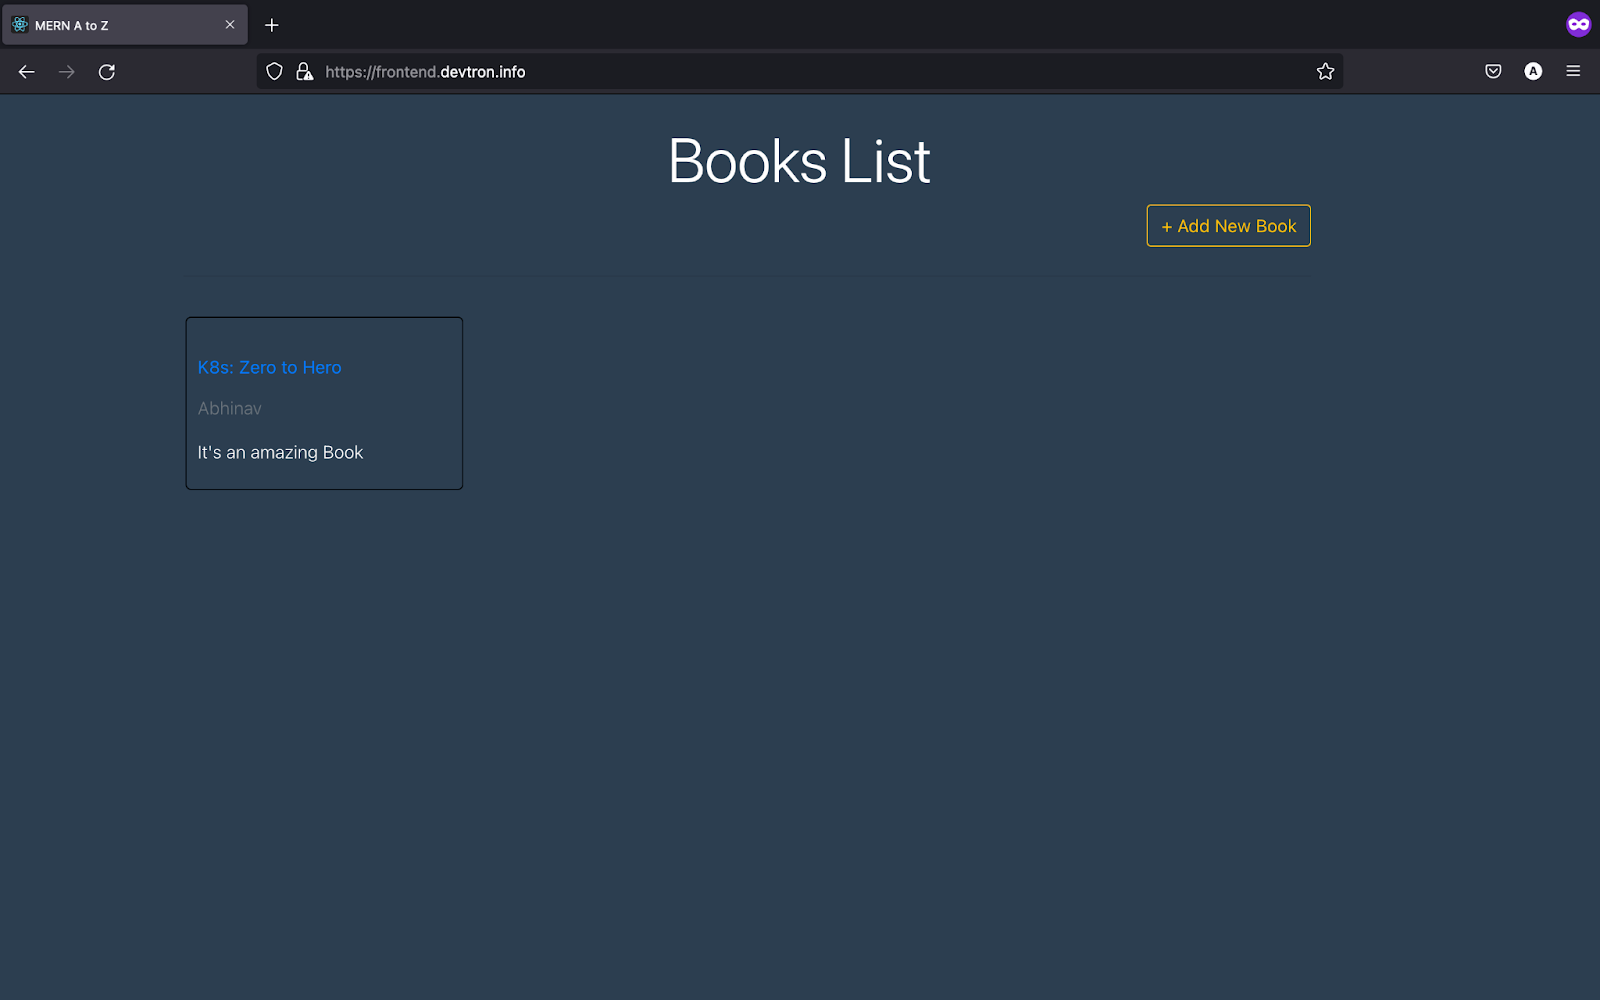
Hurray! The application is up and running. It is also connected with the backend and the backend is connected with the database as you can see in the above image we have added a New Book and it is successfully added.
Deploy MERN Stack on Kubernetes with Devtron
If you like Devtron, do give us a star on GitHub and join the Discord community for all the latest updates.
FAQ
How do I deploy a MERN stack application on Kubernetes using Devtron?
Devtron simplifies MERN stack deployment on Kubernetes by offering a no-code UI to configure, build, and deploy MongoDB, backend (Node.js/Express), and frontend (React) services—without writing complex YAMLs or pipelines.
Why should I use Kubernetes instead of Docker Compose for MERN stack deployment?
Kubernetes provides built-in auto-scaling, high availability, zero-downtime updates, and better resource management—features not available in Docker Compose, making it ideal for production-grade MERN applications.
Can I deploy MongoDB on Kubernetes using Helm in Devtron?
Yes, Devtron’s integrated Helm Chart Store allows you to deploy MongoDB easily using charts like bitnami/mongodb. You just need to configure auth details and hit “Deploy Chart.”
How does Devtron simplify CI/CD for MERN stack on Kubernetes?
Devtron offers built-in CI/CD pipelines, customizable deployment templates, Git integration, and live logs—making it easy to build, deploy, and manage React, Node.js, and MongoDB apps across environments.


