Welcome to another blog from the Devtron ecosystem! In this tutorial, you’ll learn to deploy a Django Full-stack Application over Kubernetes using Devtron. The best part is you don’t need to worry about working with K8s configuration files or setting up a CI/CD pipeline manually. Everything would be seamlessly done by the Devtron platform with a few button clicks.
Pre-requisites
Before moving forward, let’s look at all the things you’ll require to follow along:
- A full-stack Django Application on GitHub
For this tutorial, we’ll be using a simple To-Do List application with PostgreSQL as the database. The application can be accessed from the repo. - Devtron installed and configured on your machine
If you haven’t installed Devtron, feel free to check out the well-managed documentation on installing Devtron and join the discord community for help!
Setting up the database - PostgreSQL
Our application uses PostgreSQL as the database, so the very first step would be to deploy that. Here, we’ll be using a community Helm Chart and deploying it with the help of the helm dashboard by Devtron.
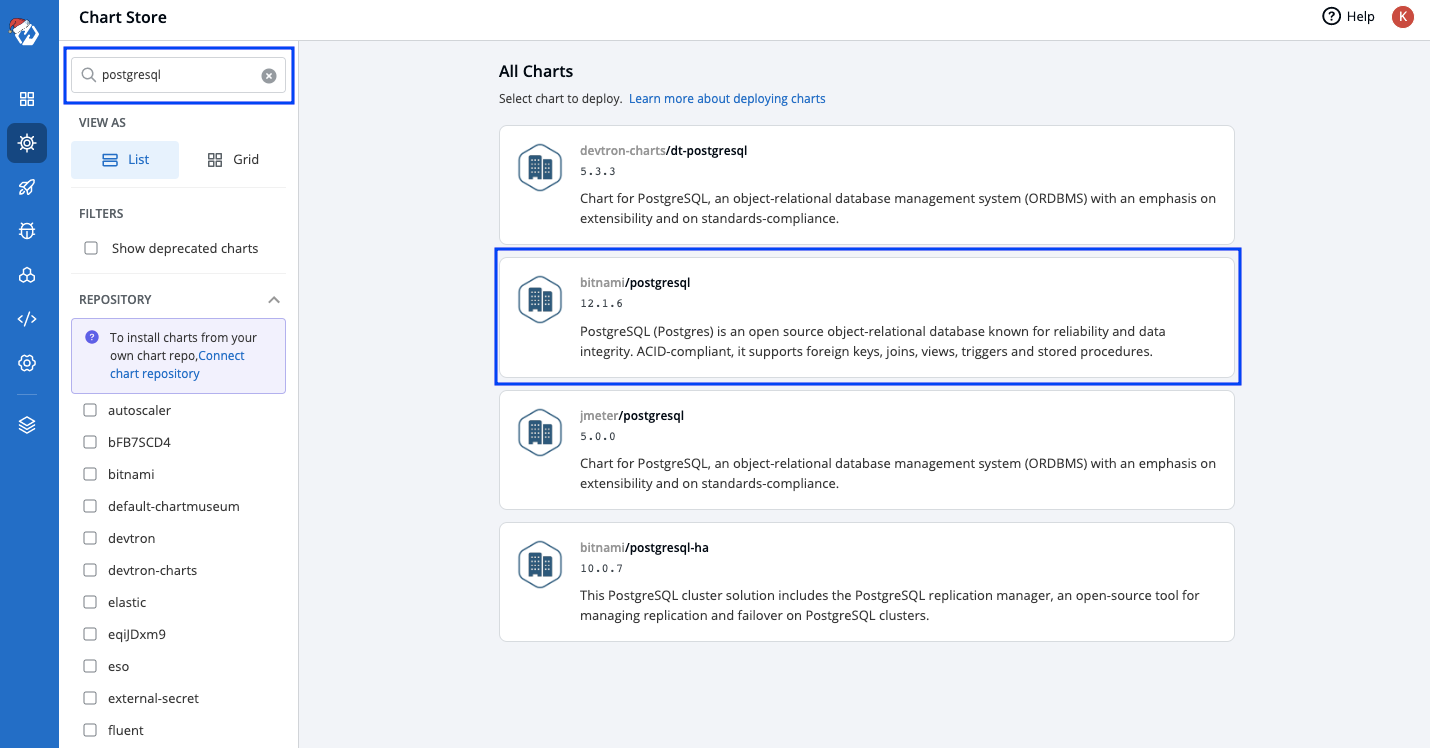
Step 1: Visit Chart Store
Navigate to the Chart Store on the Devtron Dashboard and search for postgresql. For this tutorial, we’ll be using the bitnami/postgresql(12.1.6) chart, as shown below:
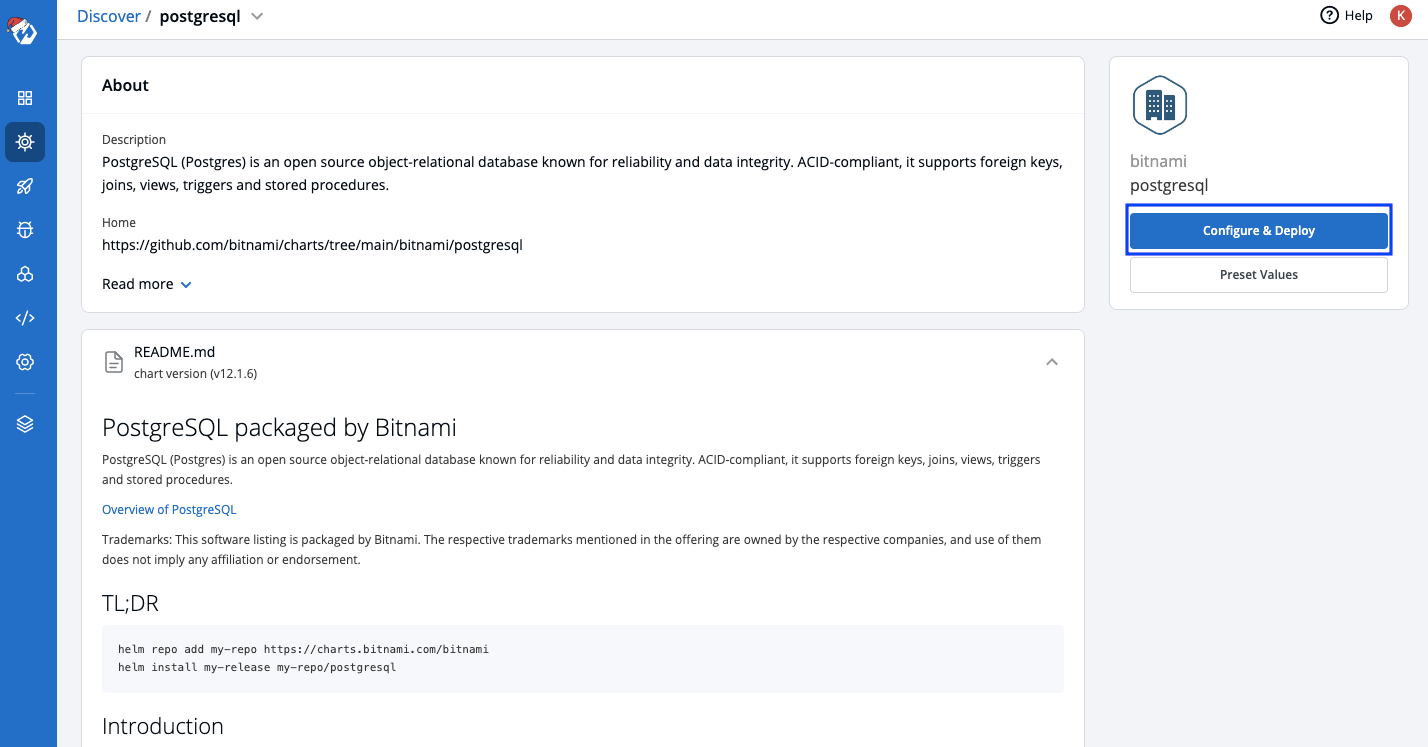
Step 2: Chart Selection
Click on the preferred chart where you may refer to the README to learn more about the helm chart.
Head over to Configure & Deploy, where you’ll be further setting up your chart configurations.
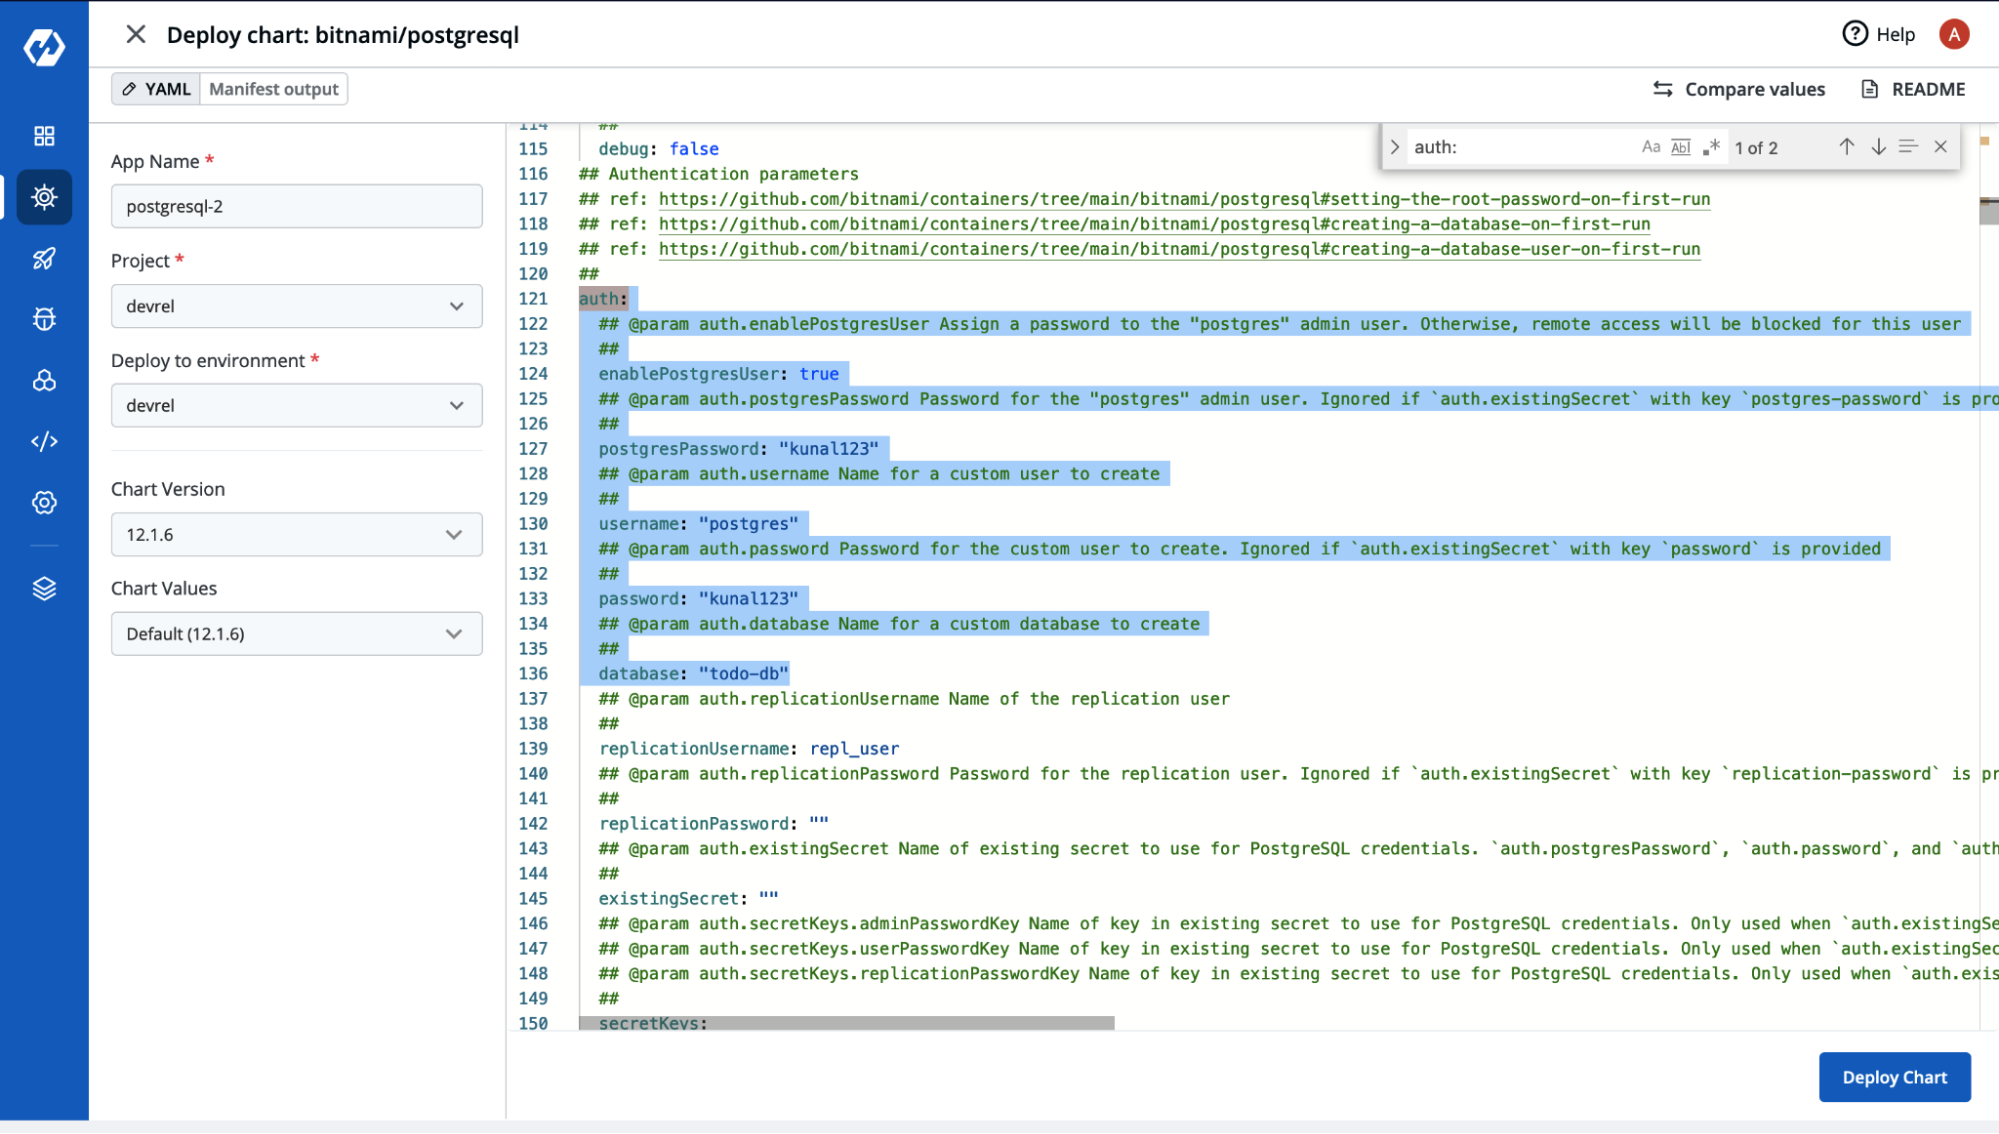
Step 3: Chart Configuration
In the configuration window, the following details must be provided:
- App Name
- Project
- Environment
You can directly make changes in the chart’s configuration file (values.yaml) here as per your requirements. For this tutorial, please add the following details:
    auth:
      postgresPassword: "<root_password>"
      username: "<new_user>"
      password: "<user_password>"
      database: "<database_name>"
Once these parameters are properly set, you are ready to deploy your chart.
Click Deploy Chart
Congratulations! Your PostgreSQL database is up and running! You can now view the chart details by heading to Helm Apps/postgresql on the dashboard.
You will be able to check out all the resources it has deployed, including
- status of the application,
- chart version, and many more, as shown below.
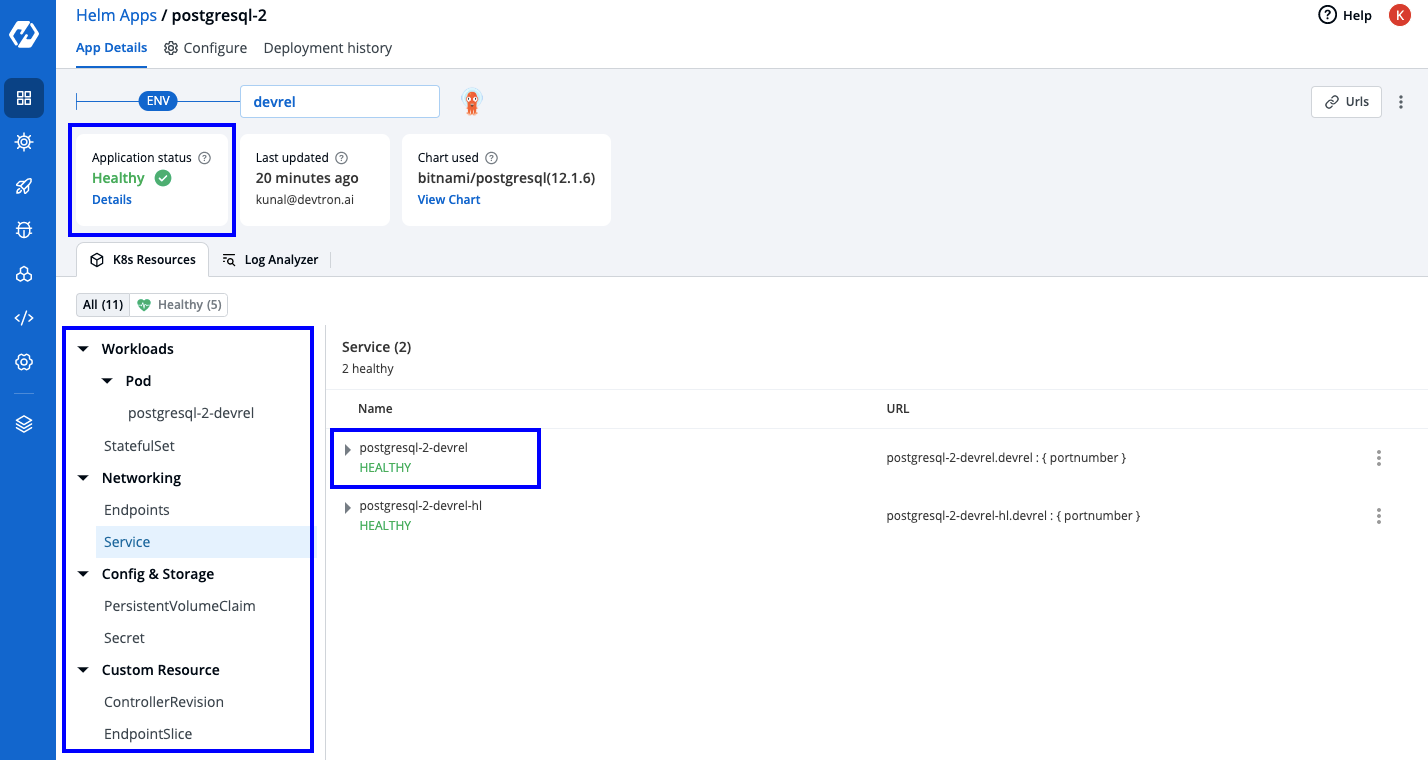
NOTE: Please note the service name from here, as that will be used while configuring the Django application.
In this case, it’s postgresql-2-devrelConfiguring the Application - Database Settings
Before we dive into deploying our app using Devtron, we have to make some changes to the database settings. Head over to settings.py of our Django application, which contains the configuration for your SQL database.
Make sure the configurations in settings.py match the ones of the PostgreSQL Helm Chart we deployed in the steps above.
In this case, we are providing all the root user’s details.
DATABASES = {
    'default': {
        'ENGINE': 'django.db.backends.postgresql',
        'NAME': '<database_name>',
        'USER': '<root_username>',
        'PASSWORD': '<root_password>',
        'HOST': '<service_name>',
    }
}
Once we have configured these settings, we are ready to deploy the application using Devtron
Deploying the Application
It’s interesting to know that Devtron is capable of deploying any kind of application irrespective of the language or tech-stack chosen for the project.
Before we create an application, ensure your Global Configurations are set and properly validated.
Please refer to the documentation for more information on the different sections of Global Configurations available in Devtron.
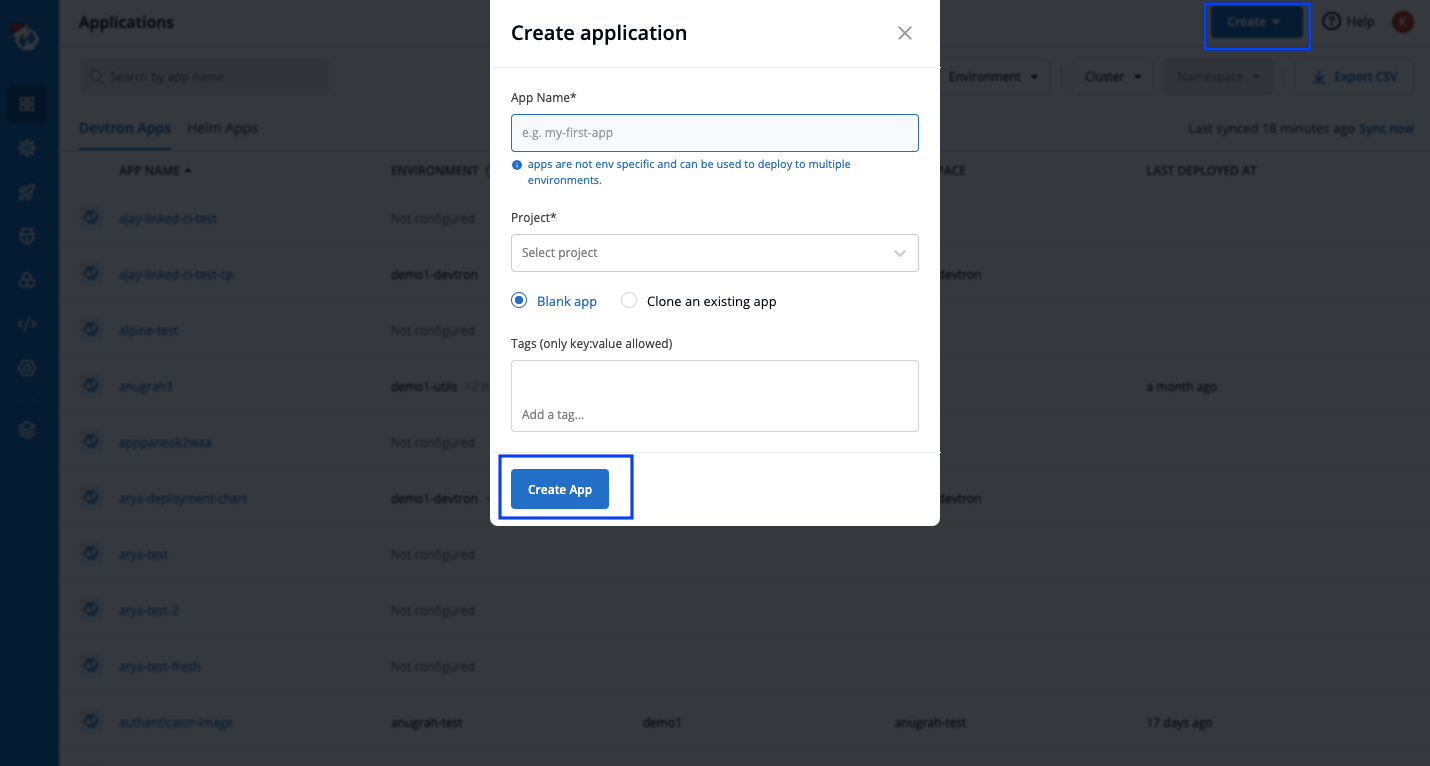
Step 1: Create a Custom Application
Head over to the Create drop down on the Devtron dashboard and select Custom app. Provide the necessary details asked in the prompt window and click Create App
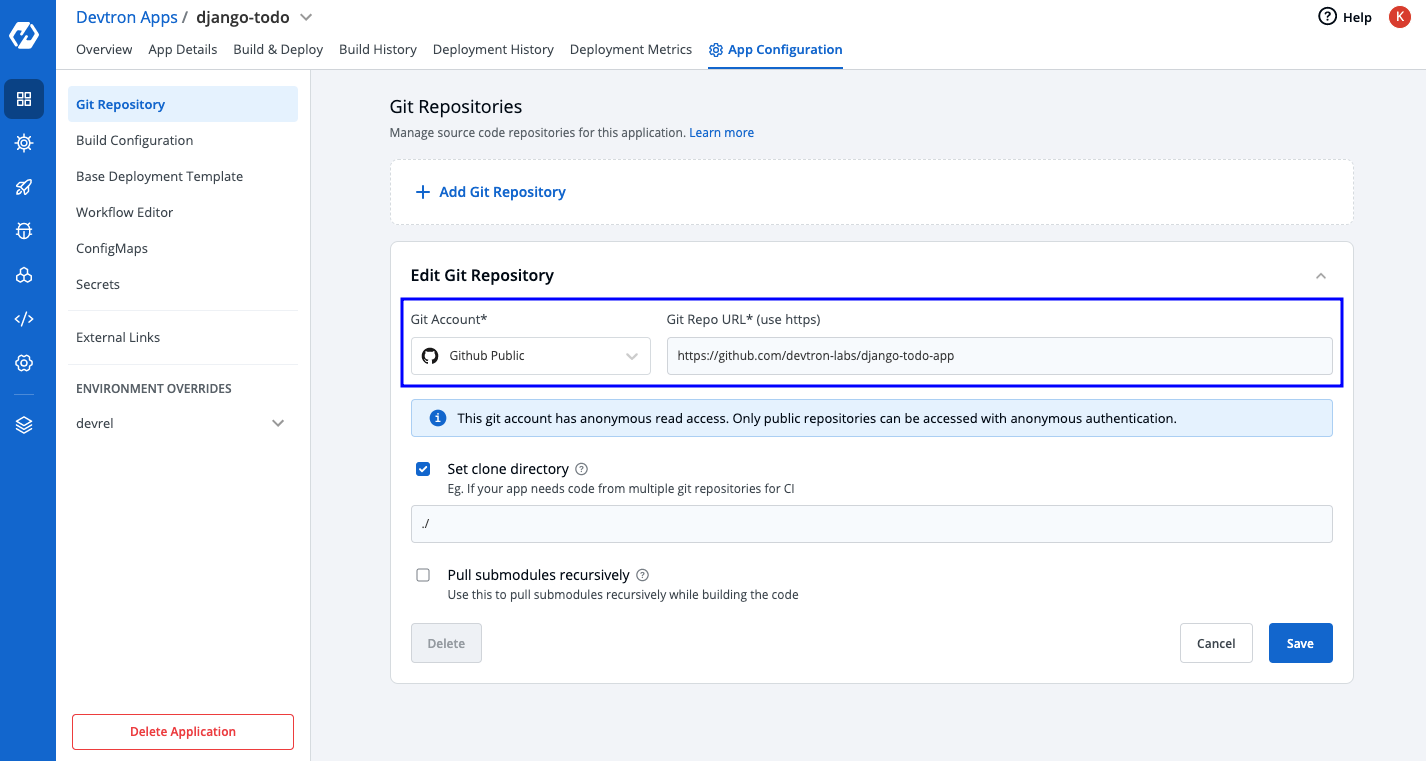
Step 2: App Configurations
After creating an app, you will be redirected to the App Configuration tab, where you need to provide the following details:
- Git Repository: The link to your project on GitHub
- In this case, we are using a simple To-Do app
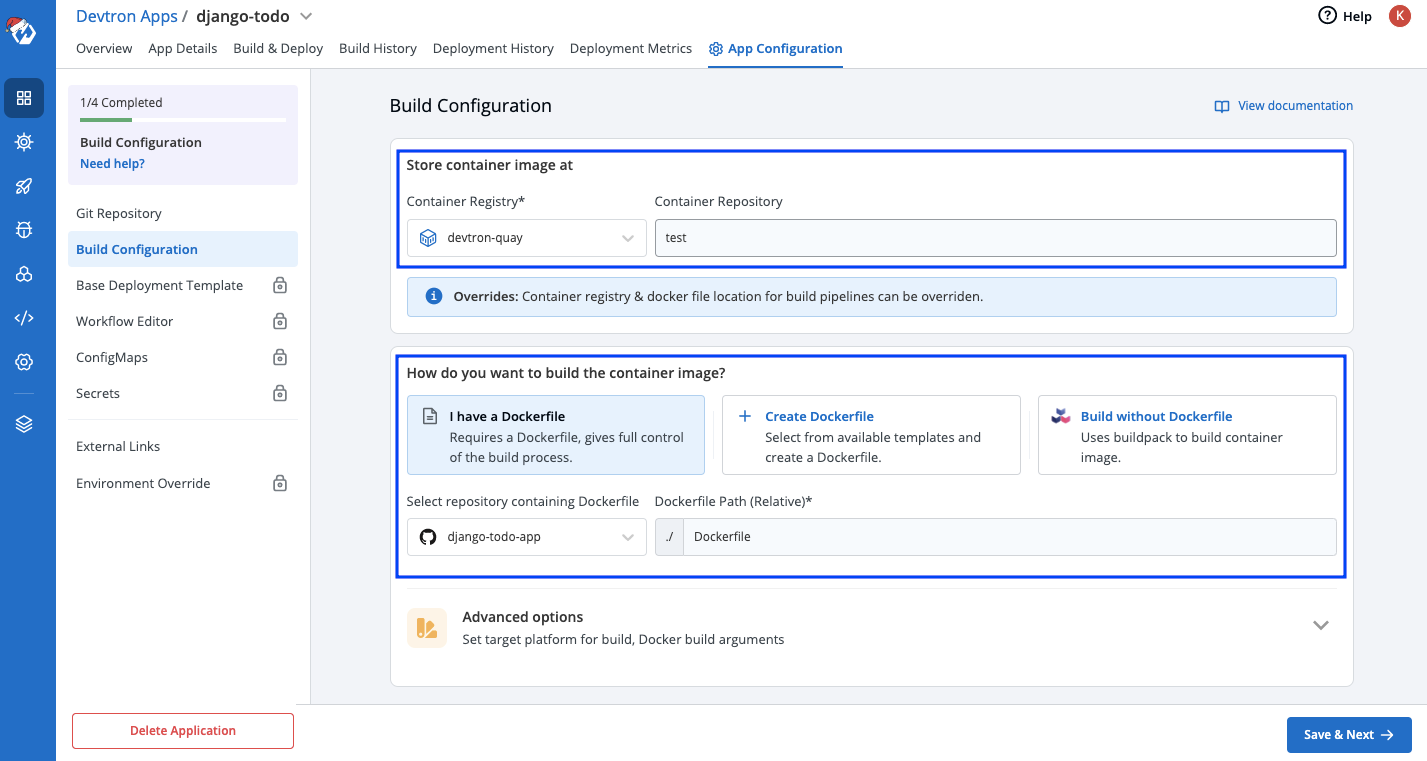
2. Build Configuration: Provide all the docker-related information to build and push docker images of your app
- Provide the details for the container repository to store your image
- We are using a Dockerfile for our application, so we will give the path to the same
- You can also choose buildpacks as an option to deploy your application if you don’t have a Dockerfile. For more information, please refer to our Build Configuration Documentation.
3. Base Deployment Template: The main deployment configuration goes here. The beauty of using the Deployment template is that you don’t need to manually configure things like pod specs, hpa, service, ingress, etc. All these come pre-configured with the template, and you just have to tweak some values as per the requirements.
Following are the steps to configure the deployment of our app:
Step 1: Select a chart type from the following options:
- Deployment (Recommended)
- Rollout Deployment
- Job & CronJob
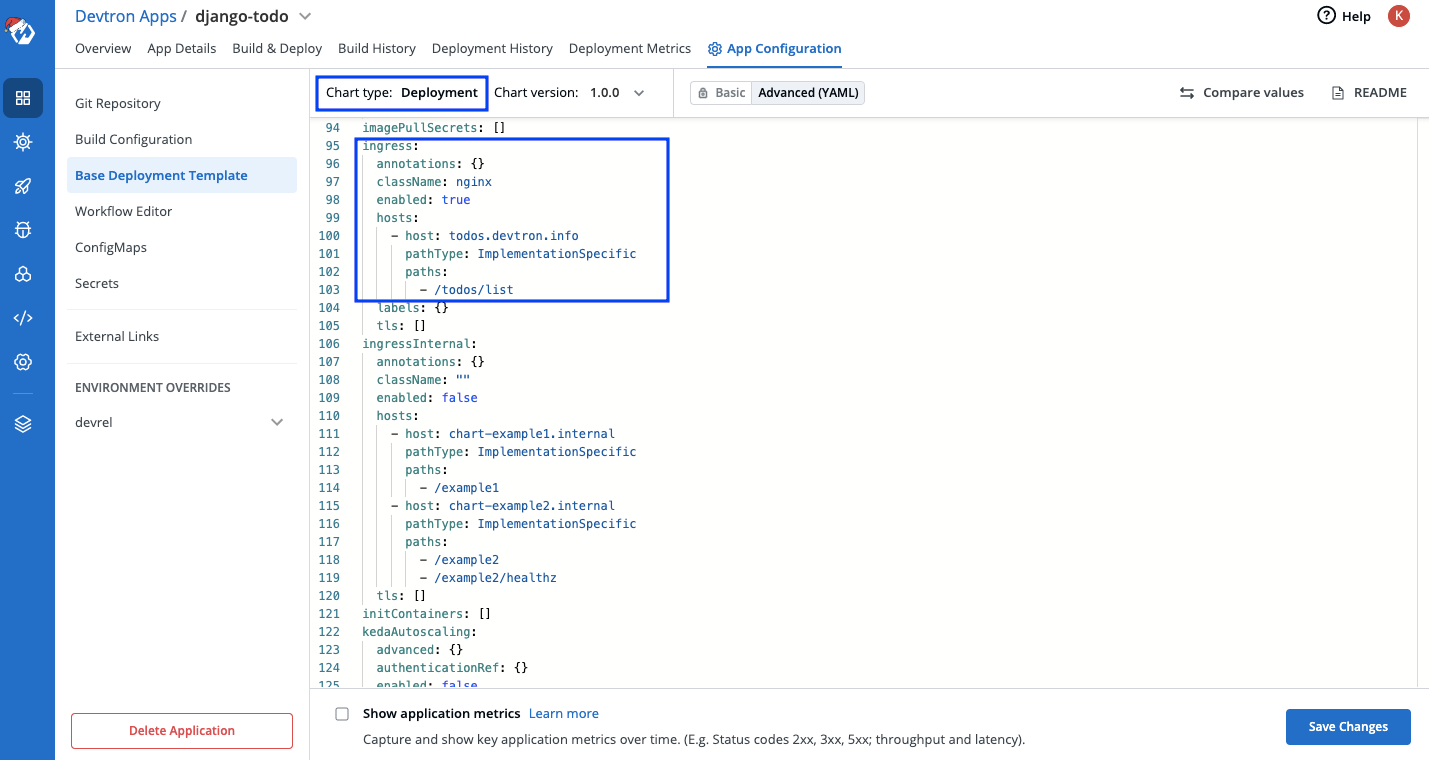
Step 3: Configure Ingress
Configuring the ingress controller parameters as follows:
        ingress:
              annotations: {}
              className: "nginx"
              enabled: true
              hosts:
                - host: <YOUR_DOMAIN>
                  pathType: ImplementationSpecific
                  paths:
                    - /<END_POINTS>
- You can also refer to the README for the specific Deployment Chart, provided on the platform itself to configure more parameters as per your requirements.
- Feel free to check out this blog to configure the ingress controller using Devtron.
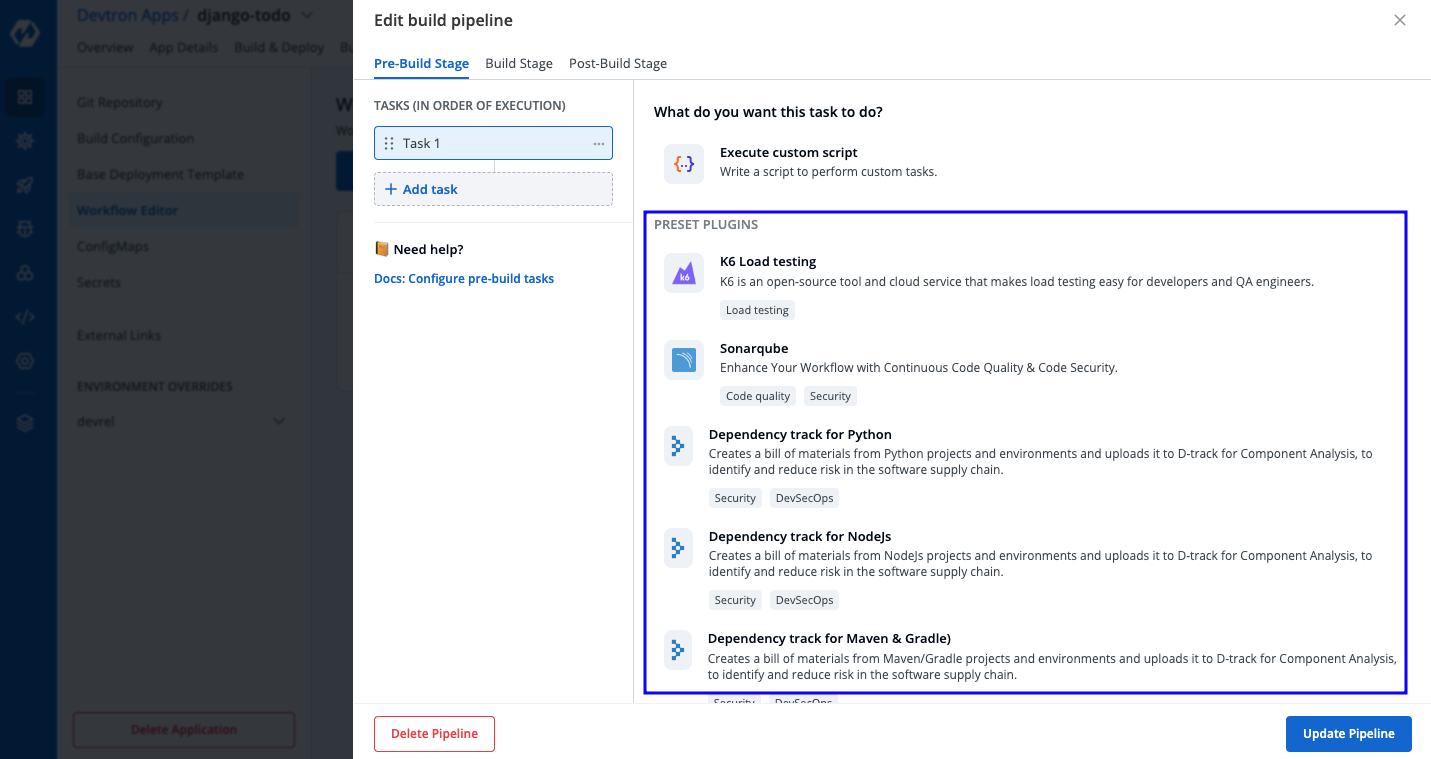
- Workflow Editor: Here, you can set up a simple CI/CD pipeline for the application in no time using the platform itself. There are mainly 3 types of pipelines that can be created here: (More information in the workflow editor documentation)
- Continuous Integration
- Linked CI Pipeline
- Incoming Webhook
Furthermore, the CI pipeline may also include Pre and Post-build stages to validate and introduce checkpoints in the build process. These can either be configured using some preset plugins like k6, Sonarqube etc. (as shown below) or using custom scripts as well.
For more information on Pre-build/Post-build tasks, please refer to the documentation on pre-build and post-build tasks.
Creating a CI/CD pipeline for our Django Application
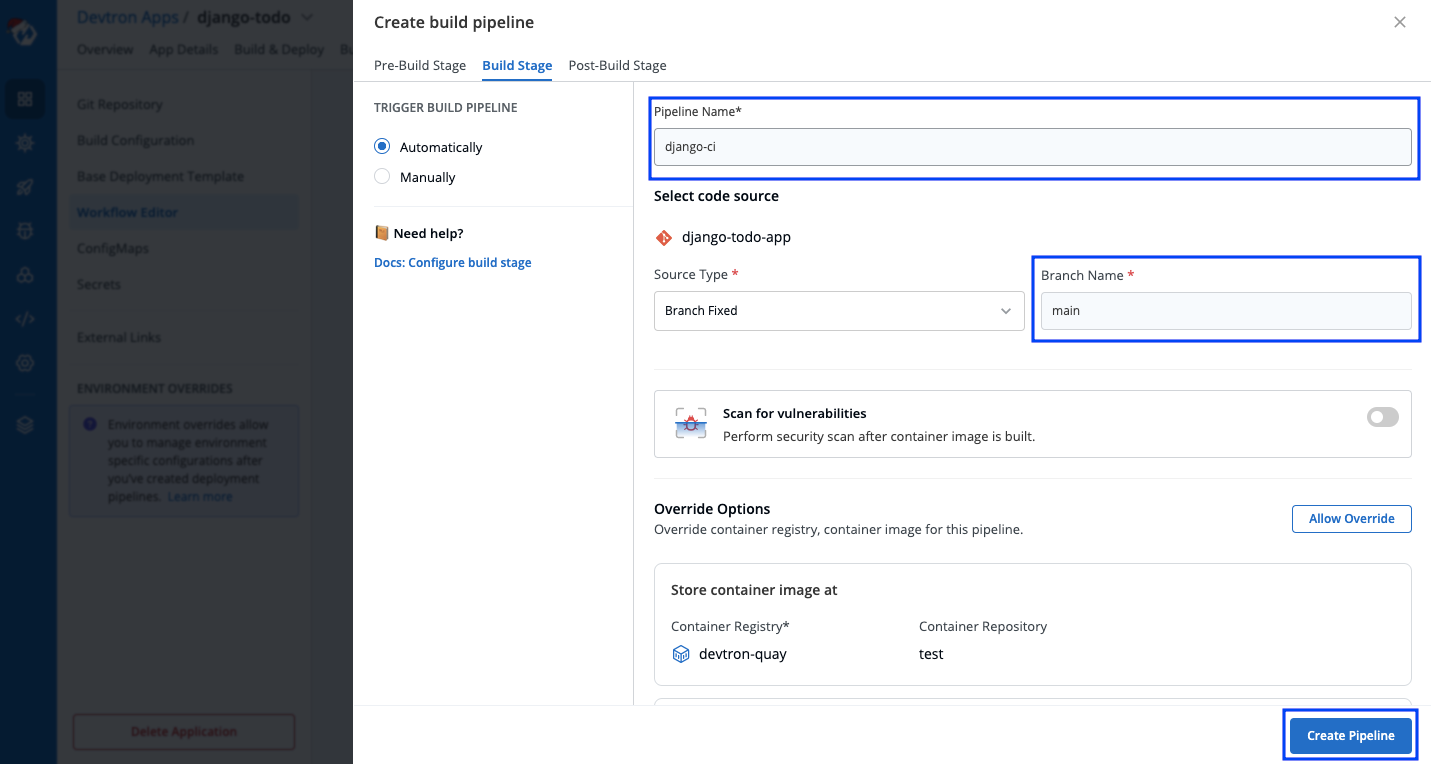
Step 1: Create CI Pipeline
For creating a CI pipeline, click on + New Workflow -> Build & deploy from source code. In the Create Pipeline window, provide the necessary details as shown below and click on Create Pipeline:
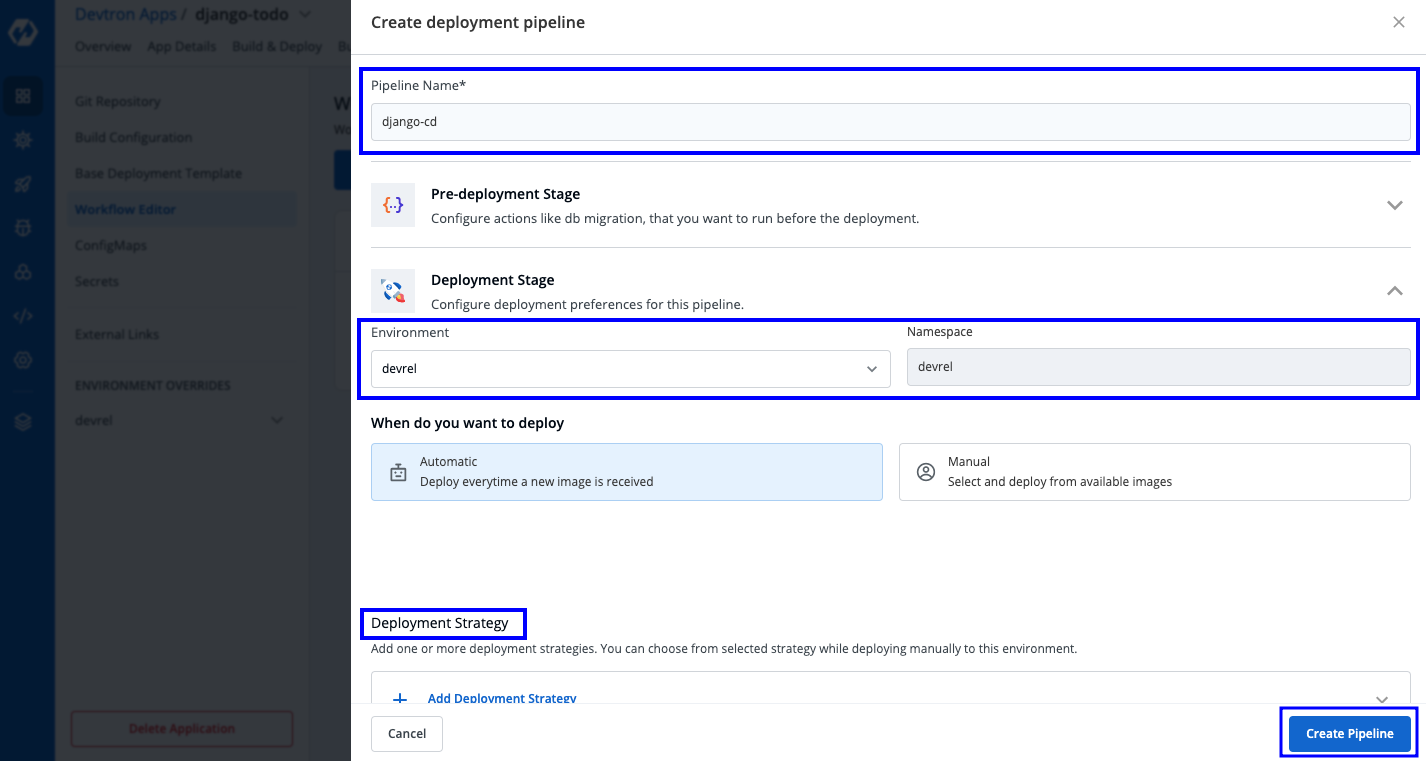
Step 2: Create CD Pipeline
For creating the deployment pipeline, click the + icon corresponding to the CI. Configure the details as required, and click on Create Pipeline.
Awesome! You now have a fully configured CI/CD pipeline for your application.

To know more about using the Workflow Editor, refer to the documentation on workflow editor.
As we don’t have any ConfigMaps or Secrets for this application, let’s move to the Build & Deploy tab and trigger the CI Build.
Step 3: Build and Deploy
In the Build & Deploy tab, click Select Material then select the commit against which you want to build an image, then click Start Build.
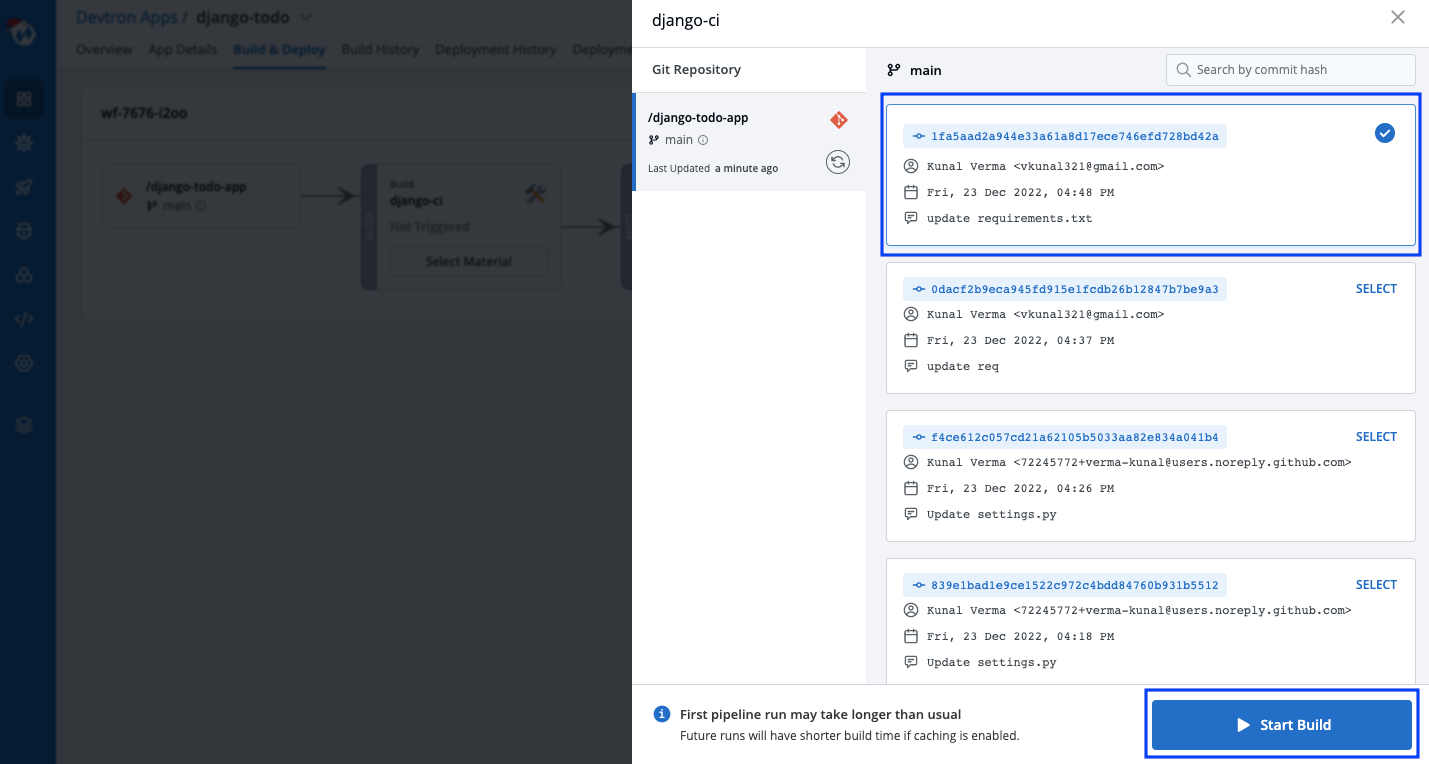
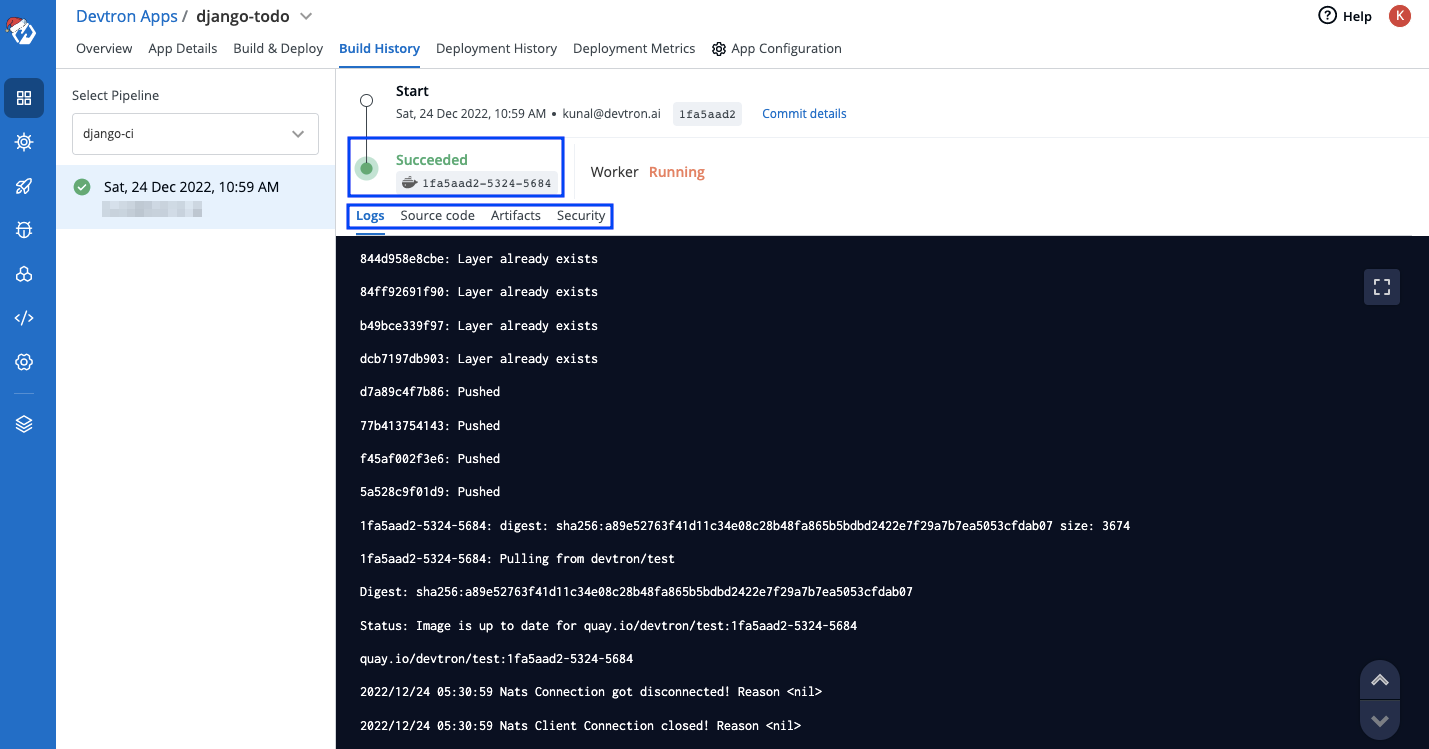
This will start building your image. You can also view runtime logs, commit details for the particular build, security results (if enabled), and artifacts.
Once the build is successful, the status will be updated accordingly!
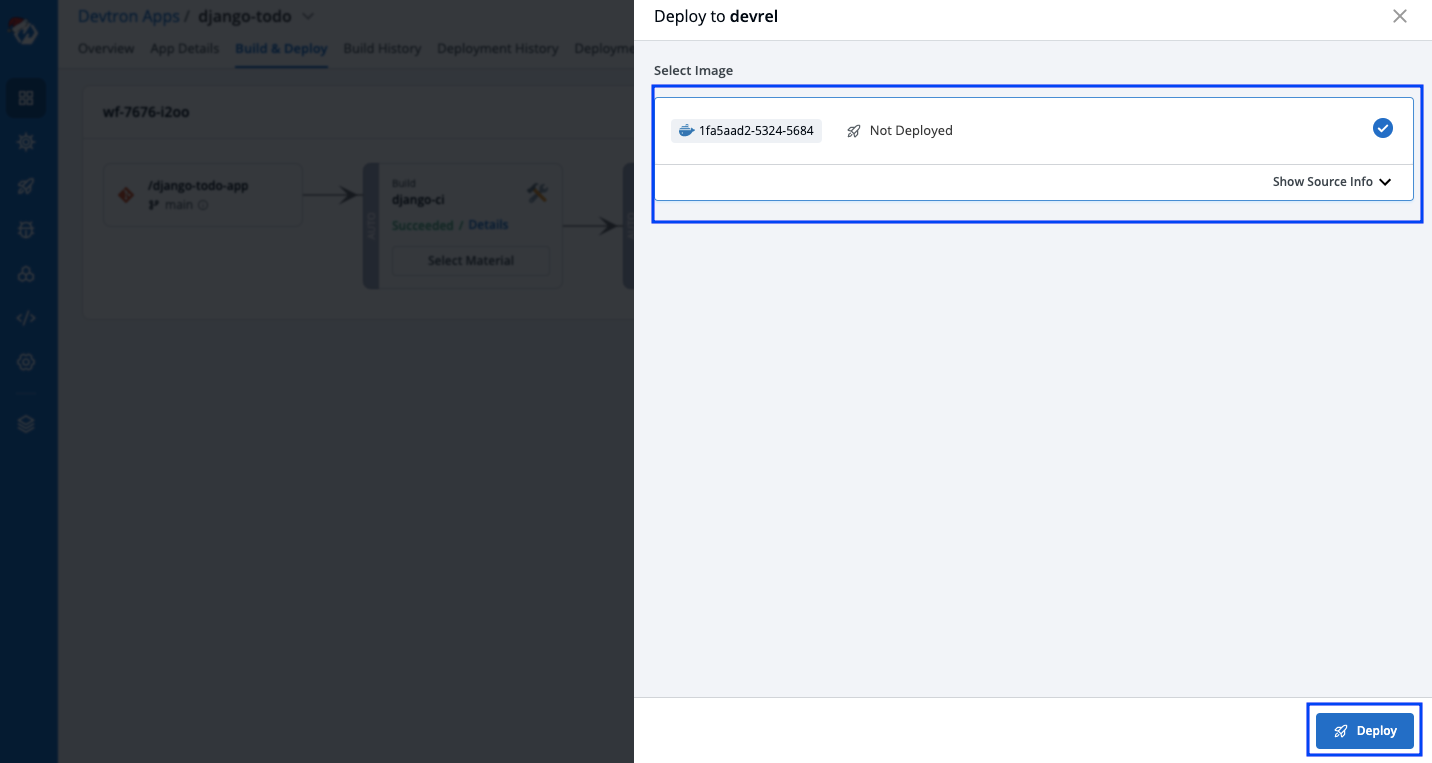
Step 4: Deploy using Image
Now is the time to deploy the application using the image we built in the previous step.
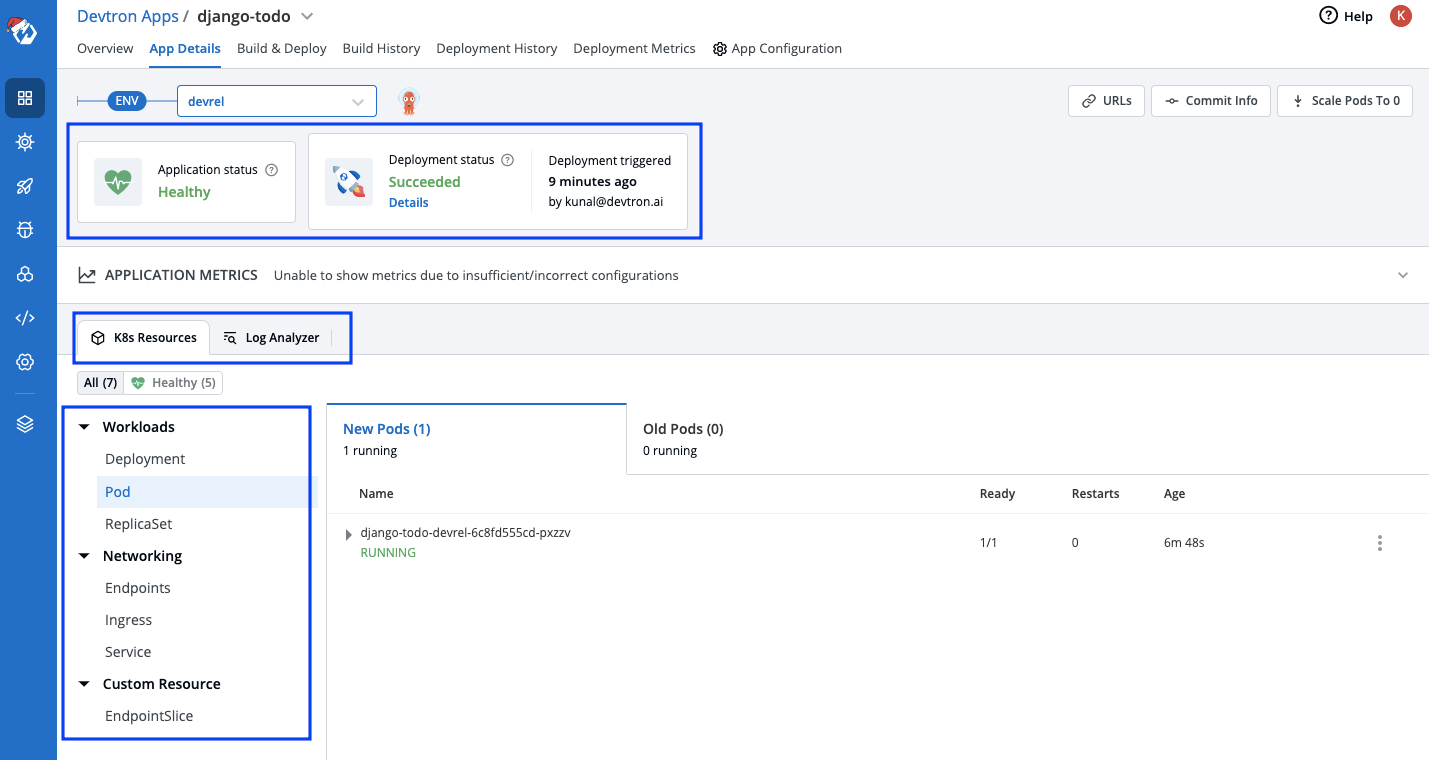
Now, we can check the status of our deployment on the App Details tab. Once the deployment is successful, it would reflect the Application Status: Healthy.
Furthermore, you can view all additional information about your deployed application such as:
- The deployment environment
- K8s resources like pods, services, etc
- Manifests of individual resources
- logs, and much more
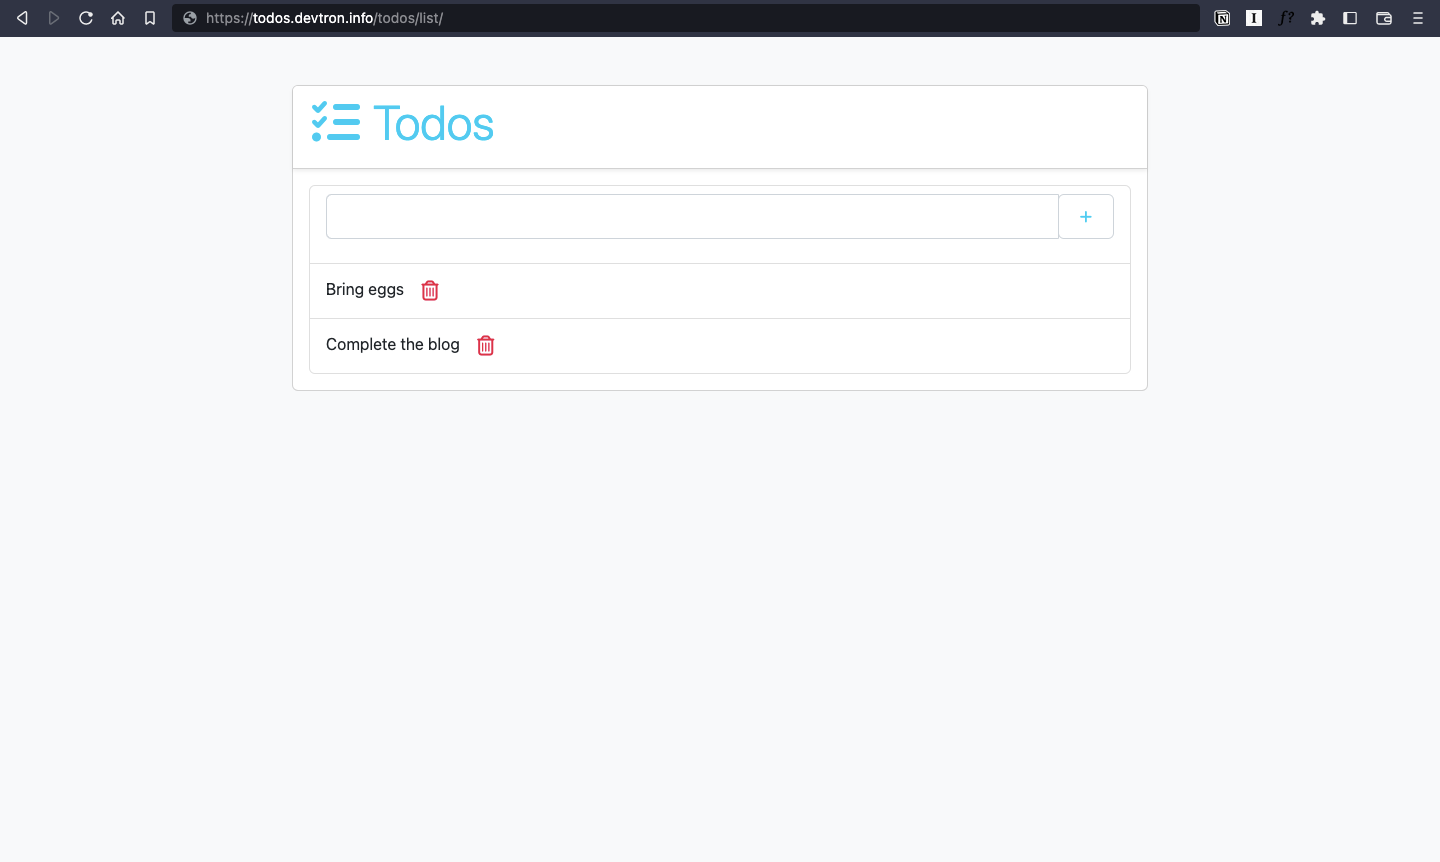
Step 5: View your Deployment
We have successfully deployed our Django app over Kubernetes 🎉
To check whether our application and database are running successfully, we can view this in our browser.
The syntax is: http://<hostname>/<path>
hostname & path would be the ones given in ingress while configuring the Deployment Template (refer to the steps above)
NOTE: An additional step here could be mapping your domain_name with the load balancer IP address, which can be found in the manifest of ingress (as shown below)
status:
  loadBalancer:
    ingress:
      - ip: <IP_ADDRESS>
Conclusion
We have successfully deployed our Django Application over Kubernetes using Devtron. If you like Devtron, do give us a ⭐️ on GitHub, and feel free to join the discord community for all the latest updates.