In recent times, applications are become increasingly complex and difficult to manage. Most of these complexities arise when you try to scale the applications to huge numbers. Traditional deployment methods i.e. deploying the application on VMs prove to be a bottleneck beyond a certain scale.
To alleviate the issue, many industries have migrated their applications from VMs to Kubernetes. Kubernetes is a tool, originally developed by Google, which is used today to deploy and scale applications. It was designed to run applications through multiple miro-services, which makes it easier to scale individual applications.
To understand it better, imagine you had an e-commerce website as a monolithic application i.e every component is packaged into a single application. Due to the festive season, the number of orders on the platform drastically increases. If you wished to scale the billing service of this application, every component would need to be scaled which becomes challenging as well as cost-ineffective. On the other hand, when you break the same application down into individual micro-services i.e, every component is its own self-contained application, it is much easier to scale only the billing service without touching the other applications.
In the previous blog, we covered the entire architecture of Kubernetes and all of its different components. If you wish to learn about the inner workings of Kubernetes, you can check out this blog. This blog covers the different parts of Kubernetes that are used to deploy and manage your applications. We will also explore how these components assist in the scaling of applications.
Workloads in Kubernetes
Kubernetes has several building blocks that are useful for deploying, updating, and managing your applications. These different building blocks are called Kubernetes Workloads. In total, there are 75 resources are shipped with Kubernetes. However, since Kubernetes is extensible, a lot of different custom resources can be added to the cluster using Custom Resource Definitions (CRDs)
The custom resources are useful for developing custom plugins for Kuebenrets which add to its functionality. For example, you can have custom resources for integrating a CD pipeline or for adding certain auto-scaling capabilities.
Kubernetes Resources vs Kubernetes Objects
Many times, the terms “Kubernetes Resources” and “Kubernetes Objects” are used interchangeably. While they are similar, there is a big difference between them. When we say “Kubernetes Object”, we are referring to the type of Kubernetes resource that can be created. We refer to it as a object, when it has not yet been created in the cluster. When the Kubernetes object is used to create a live instance of the object, it is referred to as a Kubernetes resource.
A good analogy to understand this is that of a restaurant. When you get the menu in a restaurant, you have several different options to select from. These different options to select from are similar to the Kubernetes objects. Once you place your order, and the food has been prepared, it then becomes a Kubernetes resource.
Different Workloads in Kubernetes
Within Kubernetes, there are many different types of Workloads available. As we discussed earlier, Kubernetes has a total of 75 different resources. You can see all these resources by running the below command
kubectl api-resourcesEvery Kubernetes resource has a certain function. Some workloads might work in combination with several different workloads. Let us look at some of these Kubernetes resources that you will have to use in everyday activities.
Pods
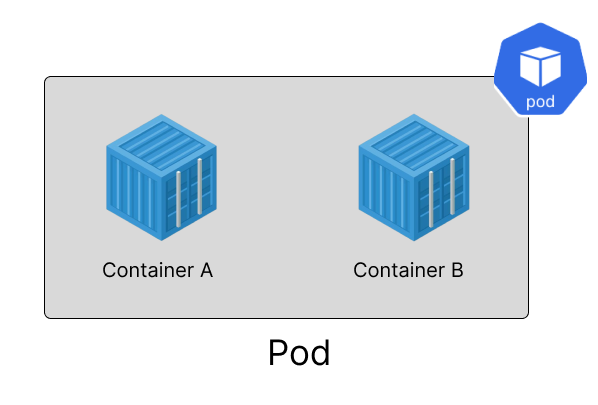
A pod is the smallest deployable Kubernetes unit. Inside a pod, all the applications run as containers. Pods are a wrapper unit around the containers. Inside a pod, there can exist multiple containers. Every container that is inside the pod will share the same network, storage, system resources, and specific configuration on how to run the pods.
Under the hood, a container uses the Linux kernel’s functionality of namespaces and cgroups for creating a layer of isolation. A pod creates its isolation similarly, with a key difference that the containers in the pod share the same network namespace.
A Kubernetes pod is used in two main ways
- Pods with single containers: When deploying applications in Kubernetes, the most common deployment method is to run a single container in a pod. It is recommended to run only a single container in a pod as the single container can utilize all the pod’s resources and it is not shared with other containers. In this case, you can think of the pod as a wrapper around a single container.
- Pods with multiple containers: As discussed previously, a pod can have multiple containers that share the same namespace. When a pod has multiple containers deployed, they are tightly coupled and are expected to work together. We will discuss some of the use cases of this later in this section.
To create a pod in Kubernetes, you need to write a YAML file to define the pod’s configuration. It will contain the information about a pod such as it’s name and labels, and also the information about the container such as the container name, container image, container port, etc.
The below YAML file can be used to create a pod that has a container named nginx and uses the nginx:1.14.2 image. Save the below YAML to a file called as pod.yaml.
apiVersion: v1
kind: Pod
metadata:
  name: nginx
spec:
  containers:
  - name: nginx
    image: nginx:1.14.2
    ports:
    - containerPort: 80
The pod can now be created by applying the above manifest file. You can run the below command to create the pod.
kubectl apply -f pod.yamlTo ensure that the pod has been created successfully, you can run the following command to see all the running pods
kubectl get pods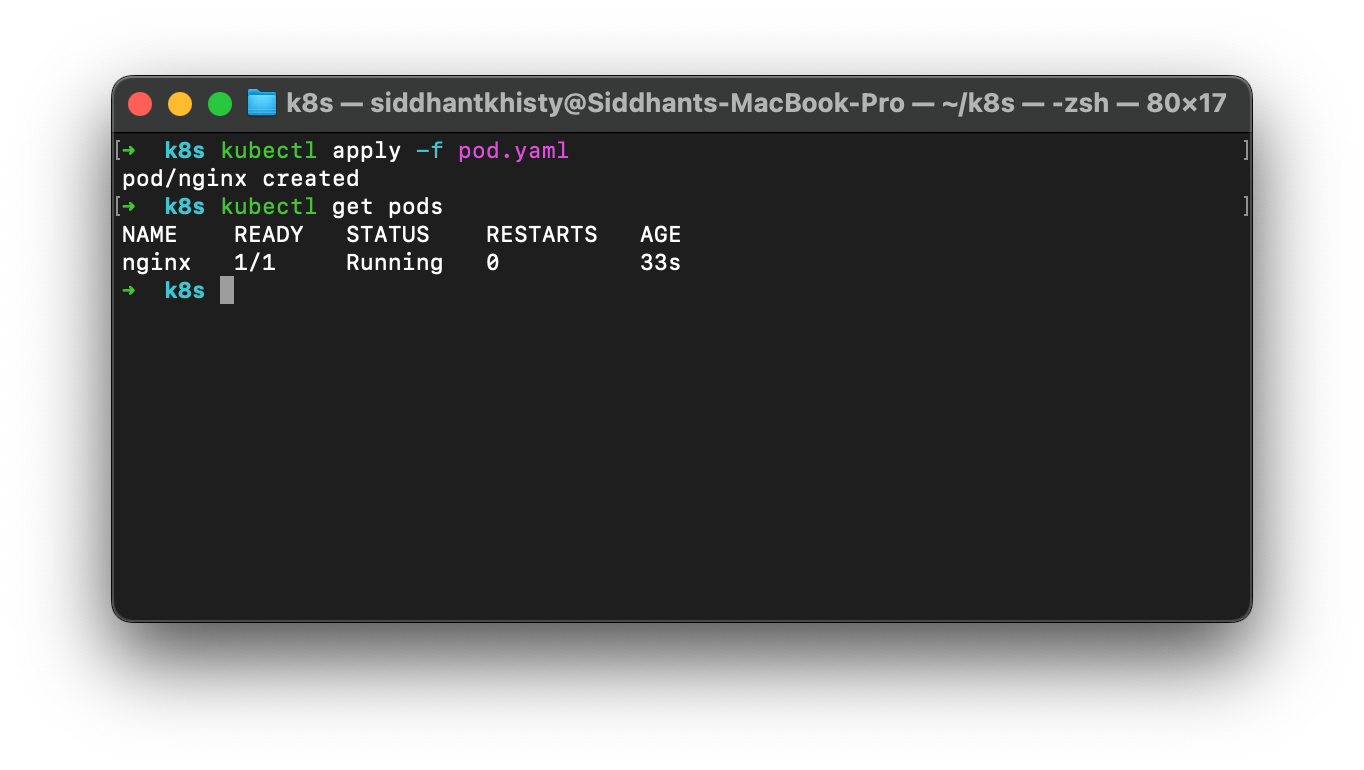
Creating a pod with multiple containers is often used for some advanced use cases in Kubernetes. Multiple containers are used in three different ways
- Init Container: You may deploy an application that requires some startup tasks to function properly. An example could be populating dummy data for an application deployed in a testing environment. In such case, you can create an Init container which performs some actions to prepare the main container to run. After the init container completes it’s task, it will stop running. Only after the init container has completed its task, the main container will start
- Sidecar Container: A sidecar container runs alongside the main container in the pod. Unlike an init container that stops running once its task is complete, a sidecar will constantly stay running until the pod is destroyed. A sidecar container is used to extend the functionality of the main container. In most cases, you will see a sidecar container for monitoring tasks such as gathering and exporting logs, metrics, and traces.
- Ephemeral Containers: Ephemeral containers are a special type of container that runs temporarily inside a pod. They are mainly used for troubleshooting the other containers in the pod. As Ephemeral containers are designed to be temporary, they are not recommended for running applications.
ReplicaSets
Kubernetes pods are ephemeral workloads which means that they can get deleted at any time due to insufficient system resources, some application error or any other reason. If a production application is running inside the pod, the application will be lost until the pod is recreated. If you try to manually observe the pod’s status and recreate it when it is destroyed, it can consume a lot of time, and there can be a significant delay between the pod’s deletion and recreation.
To ensure that a pod is running at any given point in time, Kubernetes has a resource called as the ReplicaSet. A ReplicaSet ensures that a pod with a given configuration is running at any given point in time. If the Pod is deleted either manually, or by any system process, the ReplicaSet ensures that the pod is recreated.
If an application pod gets deleted, the new pod that is created by the ReplicaSet will require some time to be created and start running. During this time delay, your application will also be unavailable. To avoid this, you can configure the ReplicaSet to run multiple instances of the same pod. In this case, even if one pod goes down, other pods keep the application active while the deleted pod is being recreated.
When creating a ReplicaSet, you must define the pod’s configuration along with the number of replicas you want for the pod. The below manifest will create a ReplicaSet that maintains 3 pods of nginx at all times.
apiVersion: apps/v1
kind: ReplicaSet
metadata:
  name: nginx-replica
  labels:
    tier: frontend
spec:
  replicas: 3
  selector:
    matchLabels:
      tier: server
  template:
    metadata:
      labels:
        tier: server
    spec:
      containers:
      - name: nginx-pod
        image: nginx
Deployments & StatefulSets
In Kubernetes, a Deployment is a way to create ReplicaSets and pods, and also manage rolling out updates in a seamless manner. When you wish to deploy an application in Kubernetes, you will want to use the Deployment object instead of using a ReplicaSet.
When you use a ReplicaSet to create a pod, it only ensures that the pod is running. If the configuration of the ReplicaSet is changed, it will not recreate the pod with the updated configuration. Only when the pod is deleted, the new pod will have the updated configuration.
A deployment, on the other hand, ensures that a pod matches the configuration defined in the deployment’s manifest file at all times. If the configuration of the pod and deployment do not match, the deployment ensures that the pod is deleted and recreated to match the desired state.
The manifest file for creating a deployment is very similar to the ReplicaSet manifest. The key difference is that a Deployment also has the option to define a deployment strategy. A rollout strategy defines how application updates should be rolled out over time. To learn more about the different deployment strategies that can be used, please refer to this blog
To create a Deployment object, you can use the below manifest file. This creates a deployment resource called nginx-deployment and enures that there are 3 pods at all times which run containers with the image nginx:1.14.2. If the configuration of this manifest is changed, the deployment object will create a new ReplicaSet and ensure that all the objects are up to date with the configuration.
apiVersion: apps/v1
kind: Deployment
metadata:
  name: nginx-deployment
  labels:
    app: nginx
spec:
  replicas: 3
  selector:
    matchLabels:
      app: nginx
  template:
    metadata:
      labels:
        app: nginx
    spec:
      containers:
      - name: nginx
        image: nginx:1.14.2
        ports:
        - containerPort: 80
A deployment is used for running stateless applications in the cluster i.e applications that do not have to store any data. If you wish to run applications that require storing data, such as a MongoDB or Redis application, you will want to use a StatefulSet. To learn about the differences between Deployments and StatefulSets, please check out this detailed guide.
Services
A Kubernetes service provides a way to expose the application in the pod to the network. By default, every pod has a unique IP, and the containers inside the pod are isolated. They can only communicate with other containers in the same pod. If a container wants to send or receive a request from the external world, it cannot do so.
To expose the pod to the outside world, a service has to be created and mapped to the pod. The service makes the pod accessible to other pods on the same network. Each service has a set of endpoints that are used to access the pods that are mapped to it.
When you deploy an application using a Deployment, there are going to be multiple pods created. As discussed earlier, each pod has its own unique IP address. When the pod is deleted and recreated, the same pod will get a new IP address. A service provides a single IP address that is able to send the traffic to the group of pods that are mapped to the service.
Kubernetes has three main types of services
- ClusterIP: ClusterIP exposes traffic within the cluster. This is used when the pod needs to talk with another pod inside the same cluster
- NodePort: A NodePort is a reliable way to expose traffic outside the cluster. If the pod is exposed via a NodePort, you require the Node’s IP address along with the NodePort value assigned to the service to access the application.
- LoadBalancer: A LoadBalancer is a cloud resource that can distribute the traffic between the different pods that are mapped to it. If there are 5 pods mapped to a service, the LoadBalancer uses a set of algorithms to determine which pod should the traffic be sent to.
Every pod has a label which is a way to identify the pod. You can map a service to the pod by using the appropriate selector.
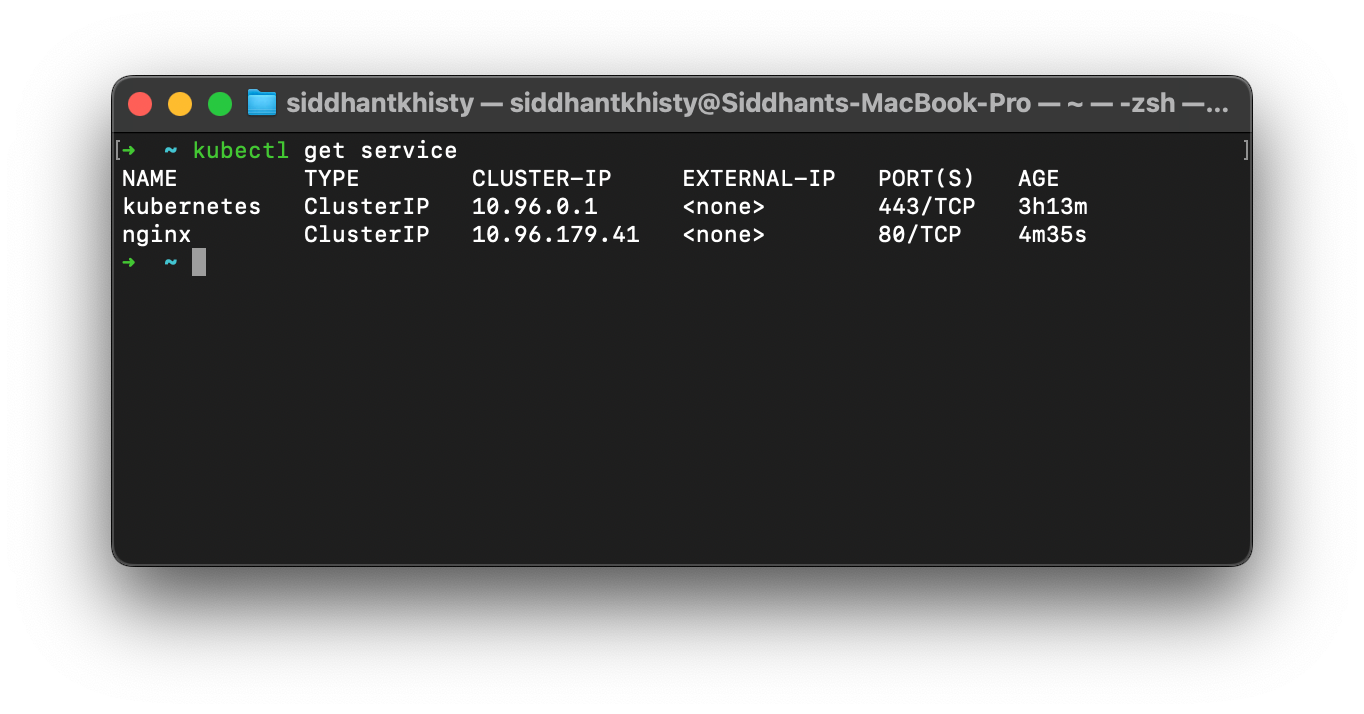
The below YAML file creates a service called nginx which exposes all the applications that have the label app=net on port 80. This service is of the ClusterIP type. If you wish to create one of the other types of services, you can update the type of the service.
apiVersion: v1
kind: Service
metadata:
  labels:
    app: net
  name: nginx
spec:
  ports:
  - port: 80
    protocol: TCP
    targetPort: 80
  selector:
    app: net
  type: ClusterIP
By default, Kubernetes has the kubernetes service which is used to forward requests to the Control Plane node.
Namespaces
In Kubernetes, it’s important to segregate groups of workloads into isolated spaces. This is done through a resource called Kubernetes Namespaces. Let’s say that you have deployed a monitoring stack and a network resource and you also have your core applications all running in your cluster.
If there was no isolation between all of these different workloads, it would become very difficult to see which resource does what. Namespaces are useful for creating this type of segregation so the monitoring stack will exist within the monitoring namespace, the applications will exist in the app-space namespace, and the network workloads within the network namespace.
You can create a namespace very easily using imperative commands. The below command creates a namespace called monitoring
kubectl create namespace monitoringJobs
A Kubernetes job is used for running certain tasks within the cluster. A job creates one or more pods within which the actual task that is defined runs. When a specified number of pods is complete, the task or the job is marked as completed. Kubernetes mainly has two types of Jobs
- Job: A job runs a single time and then terminates
- CronJob: A CronJob is a job that runs at specified time intervals
Jobs and CronJobs are used to automate repetitive tasks. Instead of having to write the commands in the correct order multiple times, you can define all the actions to be performed once within the jobs, and run the job every time you wish to perform the specified tasks.
Some of the common scenarios where jobs and CronJobs are used include
- Database migrations
- Cluster backups
- Data processing tasks
- Batch processing
- Automated Testing
Kubernetes Storage
Kubernetes was mainly designed to run stateless applications i.e applications that did not store any data. However, to properly run your workloads, you need to have a combination of stateful and stateless applications. Stateful applications are applications that need to store some kind of data such as databases.
Within Kubernetes, there are a few different workloads that are useful for storing and persisting the data of stateful applications. Let’s take a brief look at what these workloads are.
Persistent Volumes (PV)
A Persistence Volume(PV) in Kubernetes is a storage volume that ensures that the data is not lost upon the deletion of the pod. If a pod does not have any persistent volume attached to it, any data that is inside the pod will be lost when the pod is deleted.
Persistent Volume Claim (PVC)
A Persistent Volume Claim(PVC) is used for mapping the Persistent Volume to a particular pod. Within the pod’s configuration file, you will mount the PVC. The PVC will automatically bind to the correct Persistent Volume based on the configurations that are provided in them.
Storage Class (SC)
When you are running the cluster on a cloud provider such as AWS, you would want to dynamically provision storage resources such as an S3 bucket and attach it to the cluster. This is done with the help of the Storage Class resource. Kubernetes provides several different storage provisioners, which enable the dynamic creation of Persistent Volumes.
Volumes & Volume Mounts
When you want to add any storage to the Pod, you will need to define appropriate volumes and volume mounts in the pod’s configuration file. There are two different fields in the pod’s configuration called volumes and volumeMounts.
- Volumes: Volumes define the actual storage volume where the data will be stored. This can be either a path on the local node or a persistent volume
- VolumeMounts: Volume mounts are used for mounting the created volume to a specific path within the container. You can attach a single volume within multiple containers as well
Kubernetes Resource Management with Devtron
When you try to deploy your applications on Kubernetes, you end up creating multiple different workloads. Managing all these applications and their workloads can become difficult as each application will have its Deployments, ReplicaSets, Pods, Storage resources, etc. It can get even more challenging to determine which resource corresponds to which application.
Devtron is an all-in-one Kubernetes dashboard that helps you gain visibility and manage all your Kubernetes workloads. It visualizes the application workloads, as well as creates a logical grouping of all the workloads for a particular application.
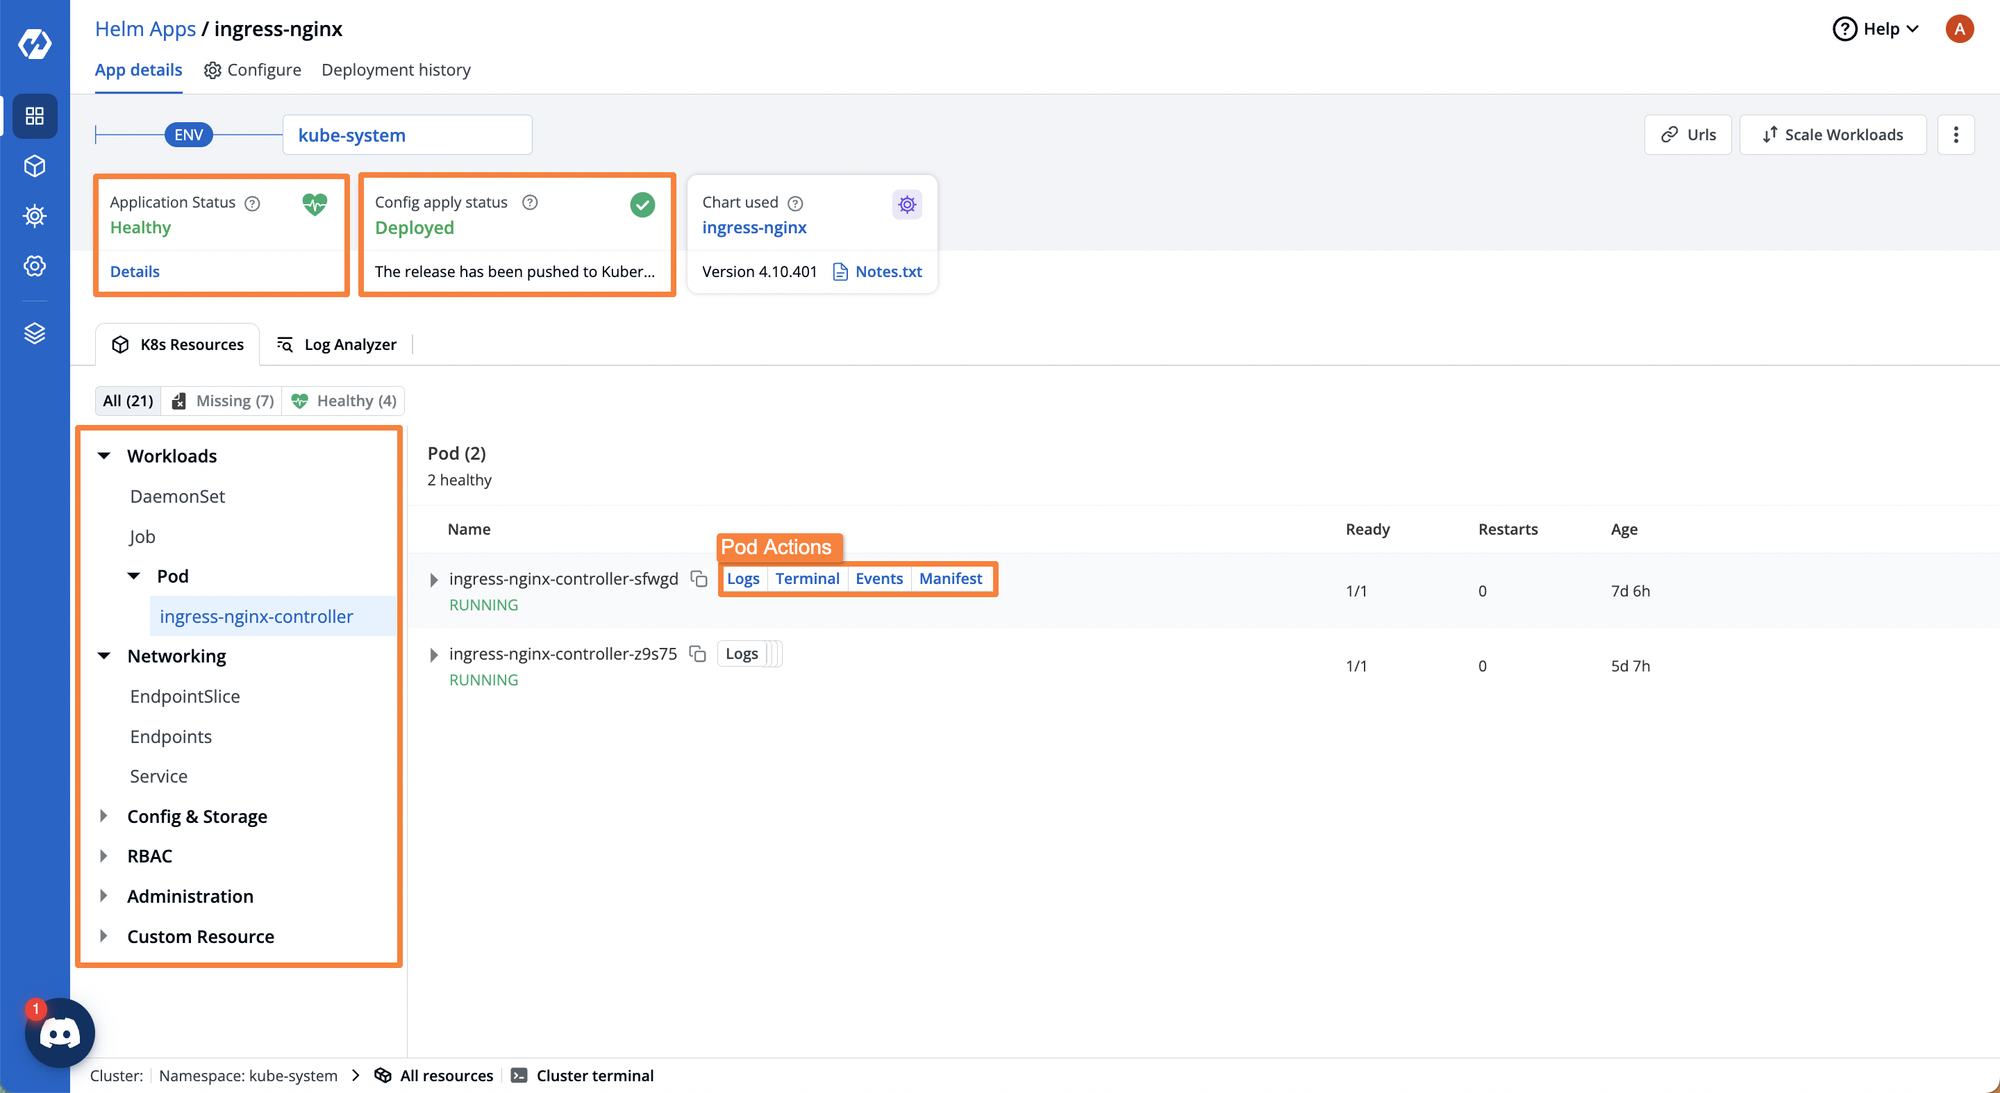
If you want to gain a streamlined Kubernetes experience for deploying and managing all of your applications, check out how Devtron can help.
Conclusion
Kubernetes has a lot of different components that work together to ensure that applications are running smoothly, and scaling them is easy. Breaking the application down into individual microservices makes it easier to scale individual services instead of scaling every single component of the application.
With the help of all the different Kubernetes workloads, you can ensure that your application can run smoothly without experiencing any significant downtime. The workloads such as deployments ensure that the pod running the application is always running and has the latest configurations. The services ensure that the pod can communicate with other pods, as well as the outside words.
If you wish to gain a deeper understanding of how the core Kubernetes components work, please check out this blog to understand the Kubernetes Architecture and how it works.
Feel free to join our Discord Community to ask questions and connect with other community members.